 FREE 1 to 3-Day Delivery on Orders $119+ Details
Best Sellers


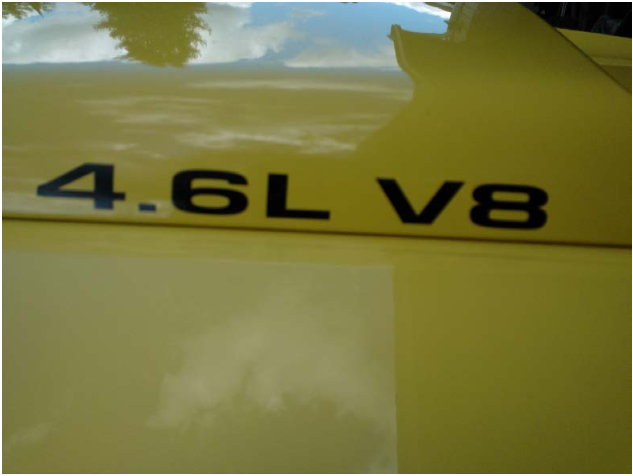
How to Install a 4.6L Hood Scoop Decal on your 1996-2010 Mustang GT
Installation Time
30 minutes
Tools Required
- Spray bottle with soap & water mixture (Windex works perfectly)
- Scissors to cut the strips out
- Plastic squeegee
- Optional - A hair drye
- Optional - A small needle or pin
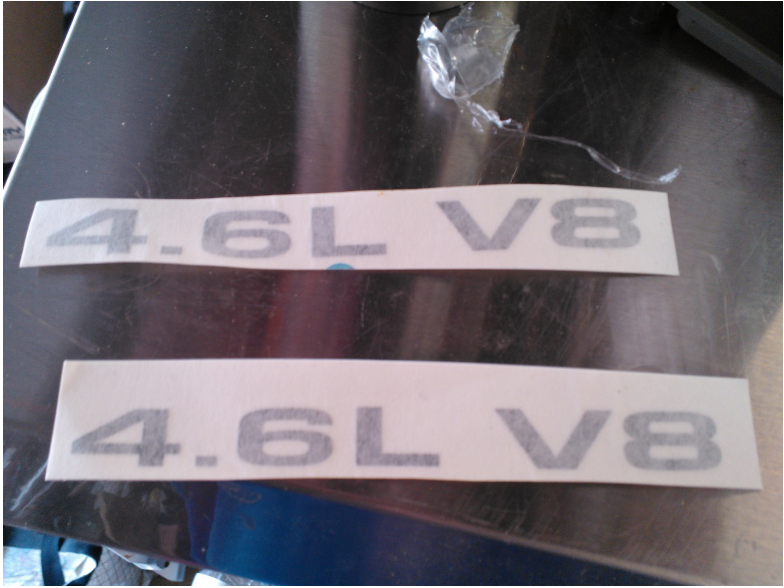
1.Remove the two hood decals from the packaging and cut carefully between the two individual strips. Separate the strips and try to make even shapes for easier fitting down the road.
2.Park your mustang in a relatively shady or cool spot for this installation.
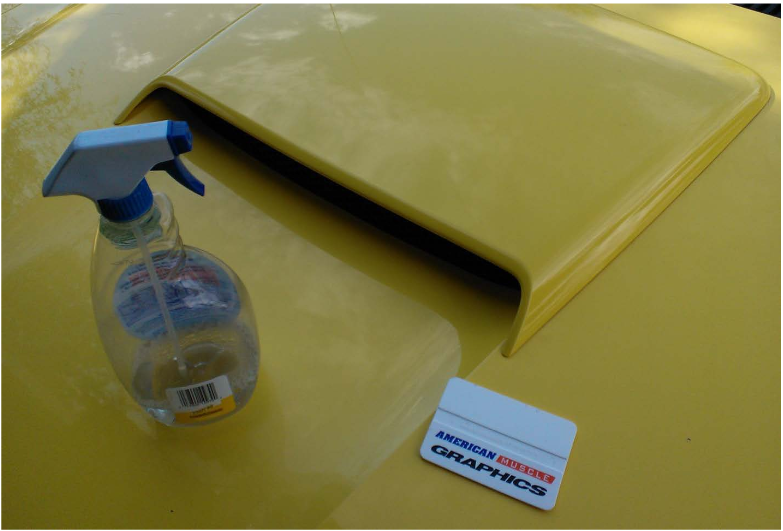
3.Wash the hood scoop (or the area you plan to install the vinyl) with soap and water. I find that cheap Windex or similar glass cleaner works just fine for installing vinyl. Use a paper towel to dry off the area, and remove any particles.
4. Place one of the cut strips up against the clean surface and try to get an idea of the location you’ll be installing the decal on. It’s a good idea to figure out how you want to apply it before you try it.
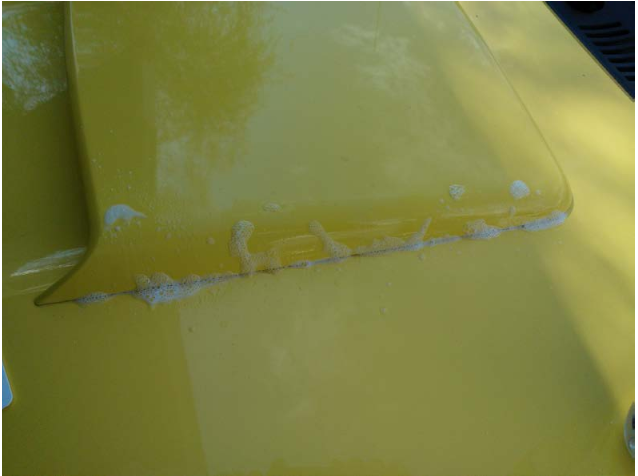
5.After you have cleaned the surface, spray it again with Windex, however this time you need to leave the surface wet so you can maneuver the decals. Leave it drenched with the soapy water.
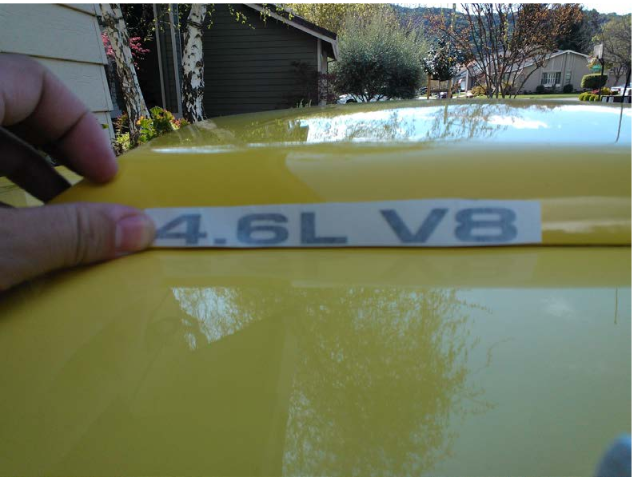
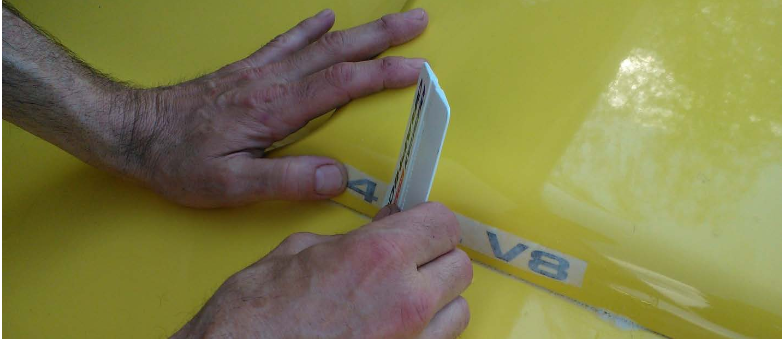
6.Peel the backing tape off the first vinyl strip. Taking care to avoid touching the vinyl against a dry surface; begin maneuvering the decal against the soapy water. It should slide easily back and forth without getting stuck or falling down if you prepared the surface properly.
7.Once you are pleased with the position you should try and push the vinyl flat against the surface so that it doesn’t move. Do NOT try and use the squeegee on it at this point, you need to give it a few minutes to dry under the sticker.
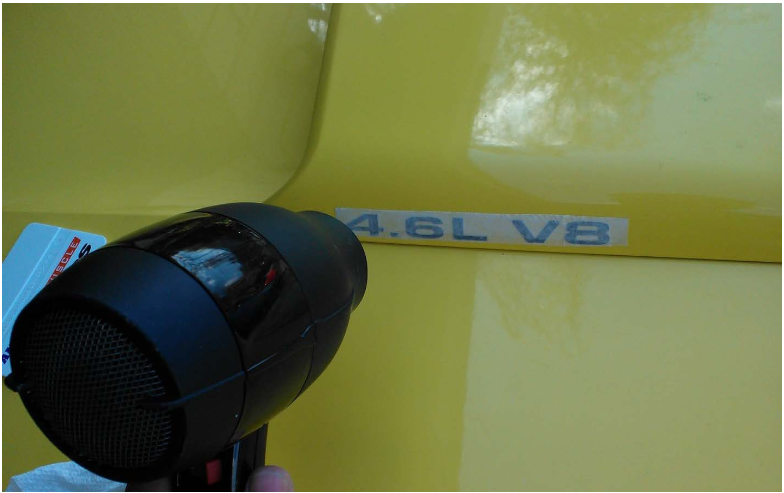
8.Now is a proper time to use the hair dryer. You should use medium/high heat, but don’t hold the dryer too close to the sticker, you don’t want the air flow to push the sticker around. Run evenly over the sticker for a few minutes at minimum to help dry out the excess water.
9. To avoid accidently moving letters around, it would be a good idea to repeat steps 3-8 on the second sticker. While you get the second sticker prepared, the first sticker will continue to dry out and gradually become less likely to fall off when you attempt to force out the air bubbles. Remember that the second sticker will face the other direction; you’ll have to decide how you want to align them.
10. At this point both stickers should be on the hood. Now is the time to return to the first sticker and finish the job. Use one hand to apply pressure to the decal, and use the other to squeegee out the water from under the vinyl strip. Carefully move in one continuous direction to push all the water from one side out the other. Left to right was the easy way for me to do it.
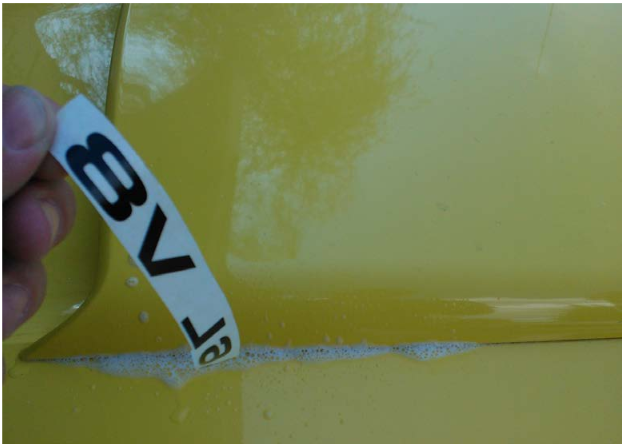
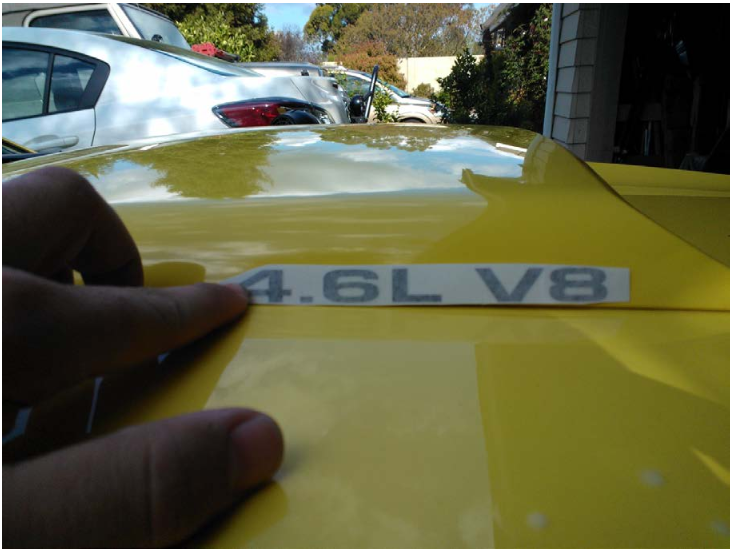
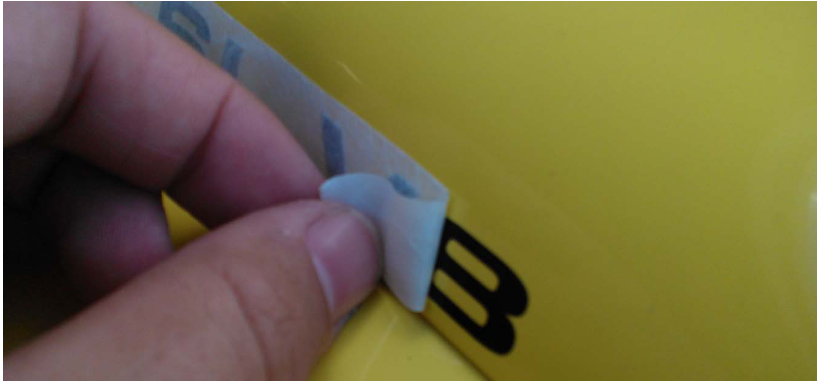
11. After you have squeegeed out as much water as possible, it is time to slowly peel off the transfer tape. Remove the transfer tape at a sharp angle to avoid pulling the letters out of position. Patience is the key to victory here;if the letters won’t stick they need more drying time.
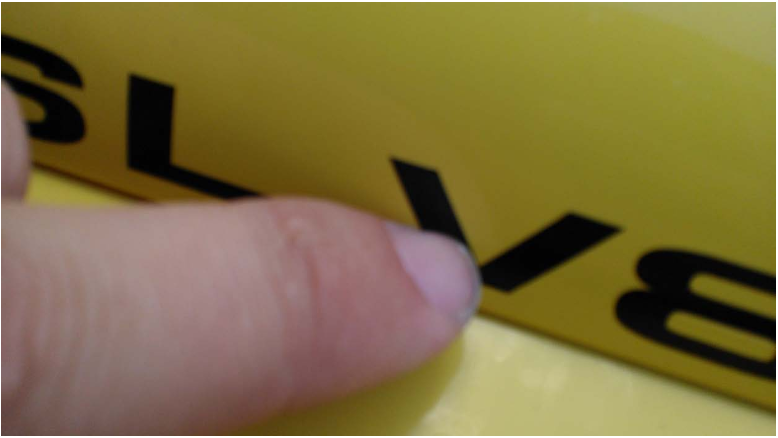
12. Now that the transfer tape is removed, you need to check for air bubbles under the letters. When you see a bubble you have two options for removing them. You can either push the bubble to the edge of the vinyl and out, or you can use a small needle to pop the air bubble. I use my finger nails to gently push the bubbles out; the squeegee doesn’t have the dexterity to carefully remove the bubbles after the transfer tape is gone.
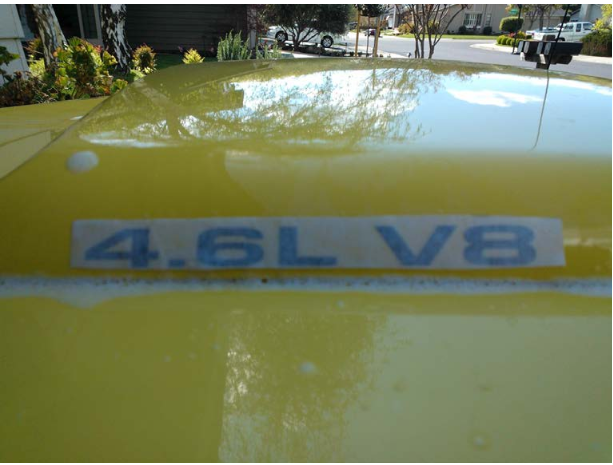
13. If you are successful the vinyl letters will firmly stick to the car, and they will look great.
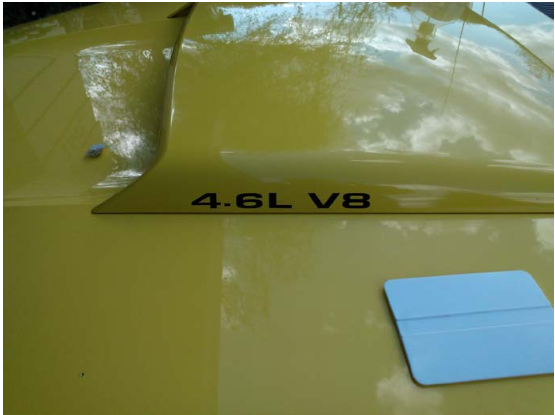
14.Repeat the steps to remove the transfer tape and seal the deal on the second vinyl. If you’ve worked carefully and patiently, the decals should look superb.
15. When you wash the car in the future, carefully avoid power-washing the vinyls or rubbing at them with a towel. If you are gentle with the vinyls, they should last a long time.
Installation Instructions Written By AmericanMuscle Customer Ethan Begley 4/18/2013
