 FREE 1 to 3-Day Delivery on Orders $119+ Details
Best Sellers


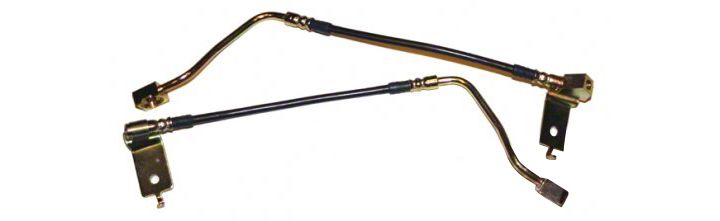
How to Install J&M Stainless Steel Rear Teflon Brake Lines on Your 1996-1998 GT and Cobra Mustang
Installation Time
3 hours
Tools Required
- Floor Jack
- (2) Jack Stands
- Lug Nut wrench
- Wheel Chocks
- Ratchet with a 10mm Socket
- 13mm Wrench (tube nut preferred but open end is ok)
- Rust Penetrate
- DOT3 Brake Fluid
- (4) Brake line to Banjo Bolt/Caliper Copper Washers
- A helping hand to assist bleeding the brakes
Shop Parts in this Guide
Installation
1. Park you vehicle on a level ground. Place the wheel chocks under the front tires. Use the floor jack and place it under your rear differential. Carefully jack up the rear end of the car enough to place the jack stands on either side of the differential under the axle housings.
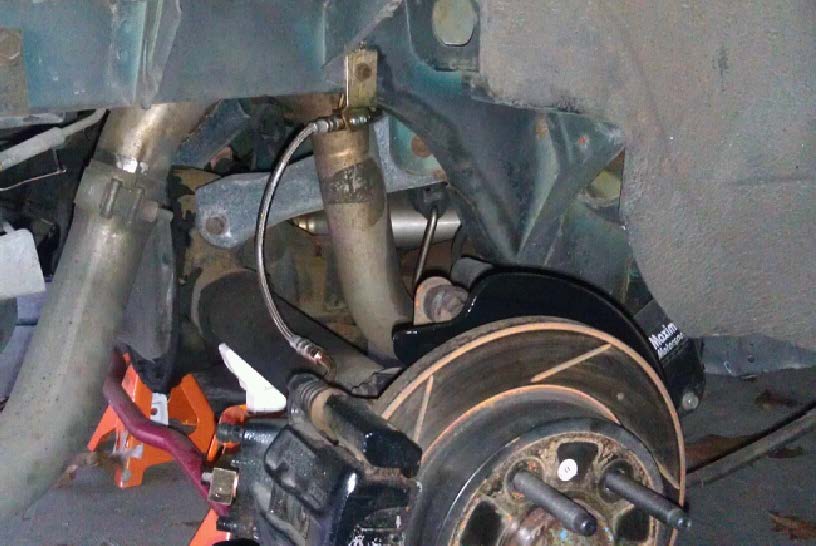
2. Take your rear wheels off. You will now be looking at your rear brakes, which should look like the following picture. I always spray down everything I will be removing with rust penetrating oil to make it easier to remove. NOTE: For better illustration purposes, I have removed my shocks to give you a nice view. On your car, your brake lines will be behind your shocks. The mounting points are shown in the following picture as well.
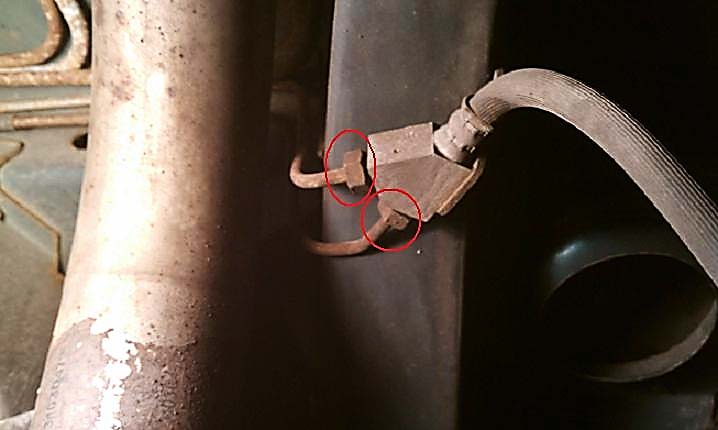
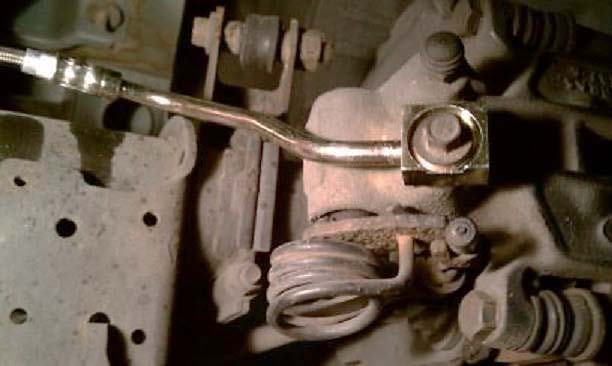
3. Start removing the old rubber brake line. You are going to remove the steel brake lines from the rubber hose. For this installation, I am showing you the passenger side which has (2) steel lines meeting the rubber hose. Take your 13mm wrench and loosen the (2) steel lines all the way until they come off the junction. They are labeled in the following picture with red circles. NOTE: brake fluid will slowly drip out but not enough to clear the system.
4. Take your ratchet and 10mm socket and remove the (1) mounting screw holding the bracket to the frame circled in the following picture. Be sure to keep the screw to reuse when you install the new brake lines.

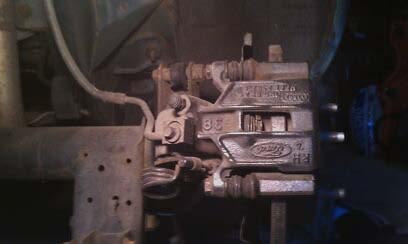
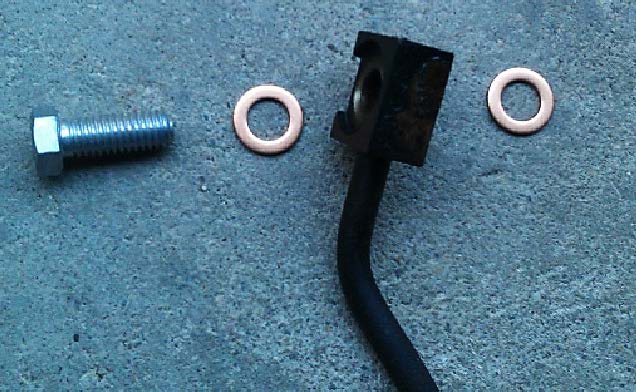
5. Now remove the line from the caliper. The banjo bolt is 10mm so use your ratchet to remove it. Once removed, you will then find (2) copper washers. One between the head of the bolt and the line and the other between the line and the caliper. You will need to keep this order when you install the new line; however, you will need to replace the washers with new ones available at any local auto parts store. The photos below show the location of the banjo bolt as well as the order of the parts.
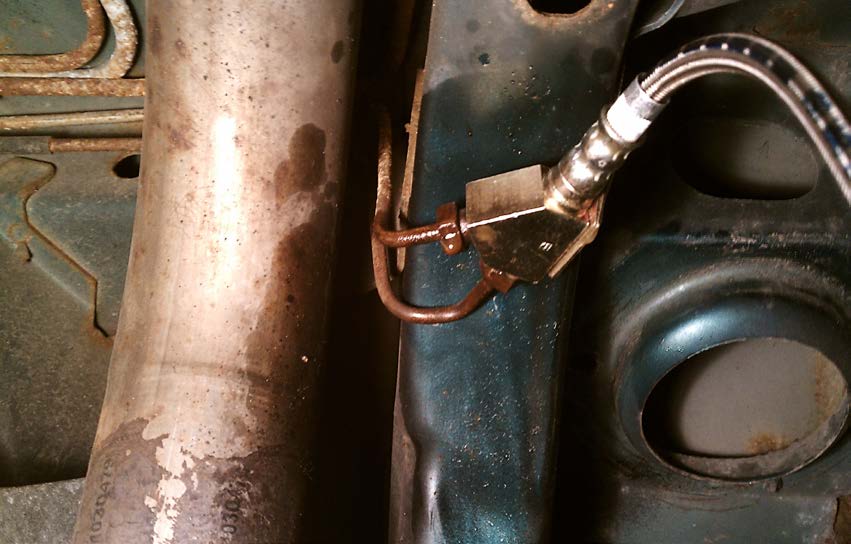
6. Now it’s time to install your new lines. You are going to work in the same order as removal. Start by installing your existing steel lines into the junction block of the new stainless steel hose. Make sure you start the fittings by hand because they strip out very easy. Once they are started by hand, finish tightening them with the 13mm wrench. It should then look like the following image.
7. Take the self-tapping bolt and bolt the hose bracket to the same place on the body as the old one. Use your 10mm socket and tighten it down.
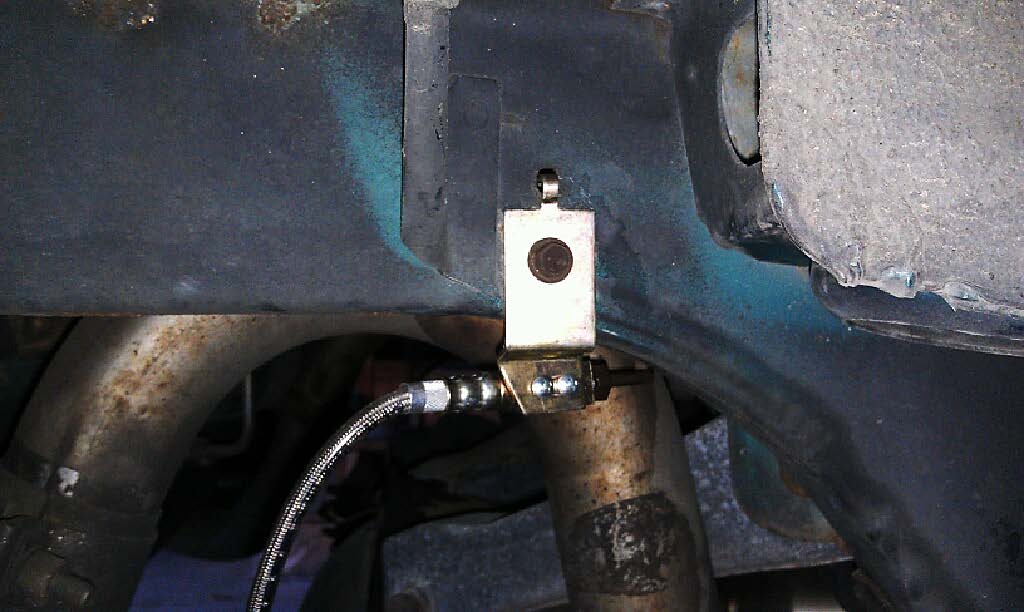
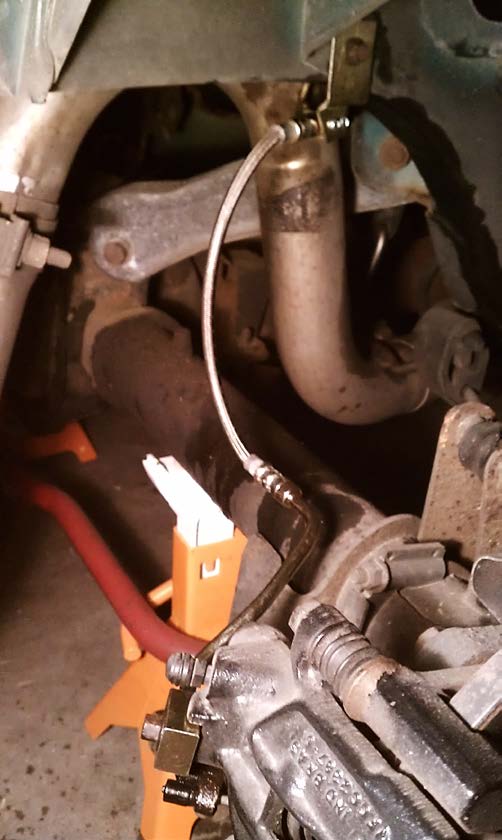
8. Next, install the end of the new lines onto the caliper. Remember you must keep the same order of parts as before but using new washers. Start the banjo bolt by hand so you don’t strip it inside the caliper. Once you tighten the banjo bolt, it should look like the following picture.
9. Congratulations. You have completed one side of your brake lines. Do the same thing on the other side of the car. Here is one more picture to show you a bigger view of the new line.
10. To finish your job, you must bleed your brakes. The best method is to have a friend hop in the car and slowly pump the brakes. Make sure the reservoir is topped off.
11. Have your friend step and hold down the brake pedal while you crack open the bleeder screw on one of your calipers. You should see some fluid and some air come out. Then retighten the bleeder screw. Have your friend pump the brakes again and repeat the previous procedure until you get a solid stream of fluid coming out of the bleeder. Remember to continuously check the fluid level in the brake master cylinder reservoir.
12. Once all the air is out, put the wheels back on and pump the brakes one final time to make sure you have a stiff pedal.
13. Test drive and enjoy.
Installation Instructions written by AmericanMuscle customer Thomas Bernier 4.20.12
