 FREE 1 to 3-Day Delivery on Orders $119+ Details
Best Sellers


Dual Exhaust Adapter Kit Installation Guide ('99-'04 V6)
Installation Time
3 hours
Tools Required
- Jack (x2) (I put them next to the jack stands for added safety)
- Jack Stands (x2)
- Drill with metal pipe cutting tool (x1)
- Socket wrenches (x1)
- Rubber Mallet (x1)
- Instructions that come with kit (always a good idea)
Installation
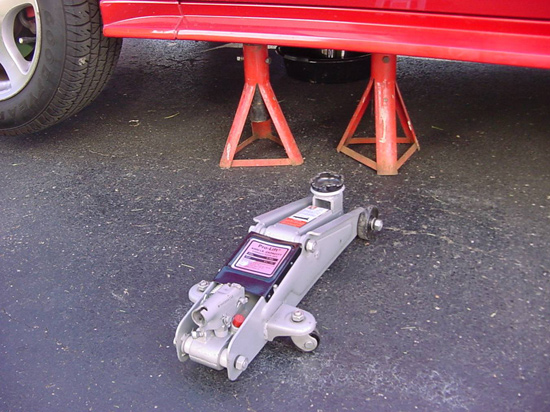
1. First start by jacking up the front of the car with a car jack. Place the jack stands underneath the front frame of the car. The higher you can get the car, the better. Also, make sure to lay some cardboard down underneath the car to ease your back. It is best to work on this with two people in case there is an emergency but it is also just easier with a second set of hands.
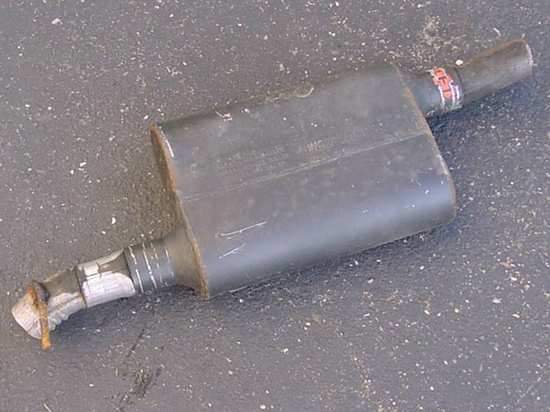
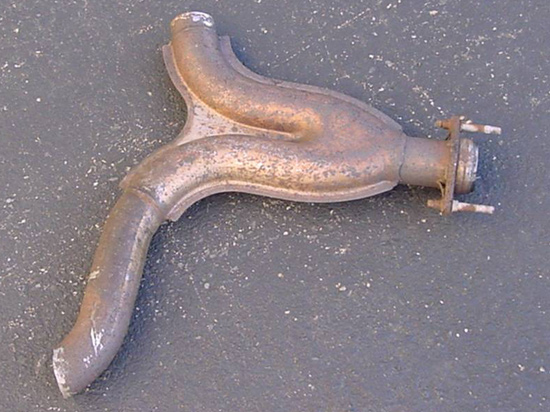
2. The first part of installing the exhaust adapter is to remove the old exhaust. In my case, the stock muffler was cut out and a Flowmaster Super 44 was bolted in its place. I had to cut the old tailpipe in half as it goes over the axle. Start by unbolting the rest of the exhaust tailpipe from the Y pipe. There are two bolts holding the flanges together. Using a 9/16 socket, loosen them and pull the tailpipe away from the “Y” Next, cut the tailpipe in half as it goes over the axle. This is the easiest way to remove the stock pipe. Remove the piping from the rubber hangers. Keep the rubber hangers on the car as they will most likely be used with the new exhaust kit. Below is a picture of the muffler and the “Y” pipe that was removed from the stock exhaust. Removal of the “Y” pipe is discussed below.
3. Once the entire original exhaust is removed, it is time to start cutting the Y pipe so that the adapter will fit over the two pipes that are produced from the newly cut pipes. After reading the directions that come with the adapter, they will tell you to cut the inside of the pipe by measuring 2 inches from the weld between the “Y” pipe and the catalytic converters. On the same weld, measure 3 ¼” on each outside of the “Y” pipe. I find that working on a job like this, it is best to measure the place to cut, and then cut a little less than the required amount. If it does not fit, you can always cut more but if you cut too much, you will need to get an exhaust pipe connector. Use a piece of wire as shown so that an exact measurement can be made. Using two pieces of wire cut to the two distances is easier than using a ruler or other tape measure.

4. Use a magic marker to draw exactly where the cuts should be made. Once the marks are in place, check them again because after cutting the “Y” pipe there is no going back. I know this sounds absurd but it is important. Be patient with this project and take all the time necessary. It could be potentially very costly to fix a mistake at a local shop. Have confidence and have a friend present to help if necessary.
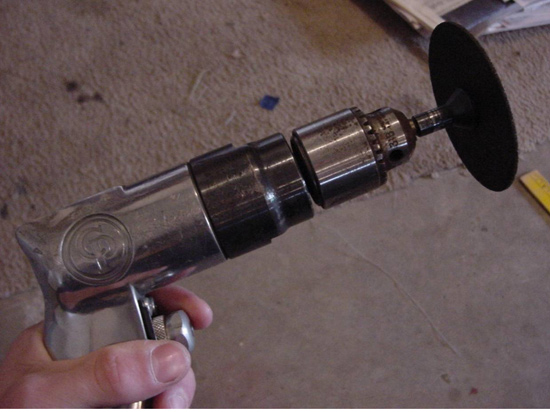
5. Start cutting the exhaust pipe with the cutting tool as pictured above and if you work slowly but surely the pipe will cut. I used a pneumatic air drill but a regular drill works just as well. Metal cutting wheels can be purchased at any hardware store. I believe a pack of five cutting wheels costs about $6.00. It just takes a little time and patience.
ALWAYS WEAR SAFETY GLASSES WHEN WORKING AROUND A CAR. ESPECIALLY UNDERNEATH THE CAR WHEN CUTTING THE PIPES! METAL FLAKES CAN FLY WITH EXTREME SPEED!
Please take the above warning very seriously. I wore safety glasses and even with those, I got a metal flake in my eye that needed an eye wash kit and an almost necessary trip to the hospital. It is best to use the goggle type of safety glasses.
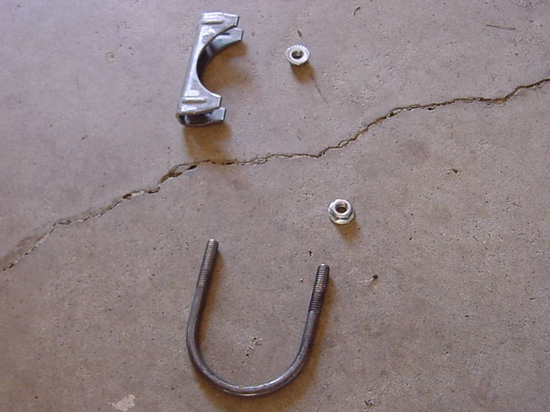
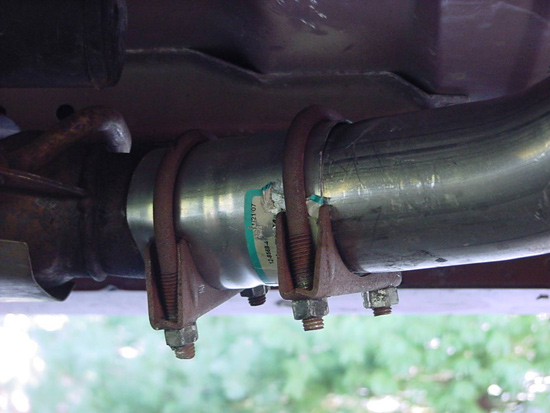
6. Once the pipes are cut to exactly the right dimensions, the adapter pipe should just slide on. I find it easier to put the two adapter pieces together and then slide them both on simultaneously. At this point, you will notice that after the two pieces of the adapter are connected together, one pipe leading to the flange is longer than the other.THE LONGER SIDE GOES ONTO THE DRIVER’S SIDE. After the H pipe is fixed onto the two pipes on the car, slide the U bolts, one on each side and then the smaller U bolt onto the center crossover that connects the two halves of the adapter. A U bolt needed for installation is shown below.Note: Do not tighten them until the rest of the exhaust is bolted onto the vehicle. The reason for this is so that adjustments can be made.
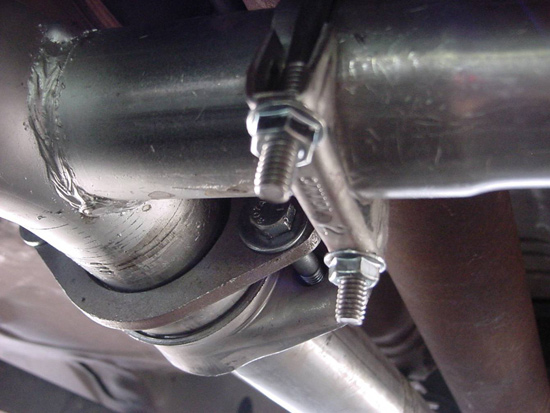
7. The image below shows the adapter from the crossover piece in the center, to the passenger side of the vehicle as it is bolted to the exhaust. Notice the U bolt that is securing the two pieces of the adapter together.
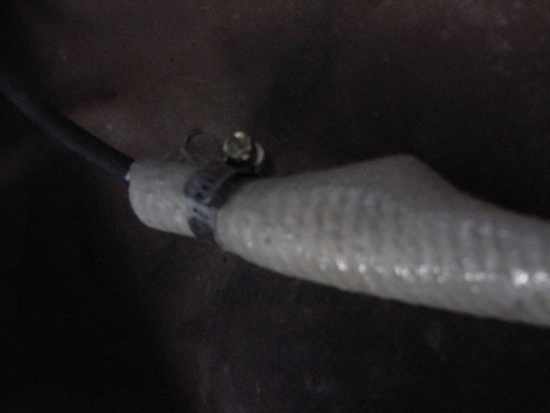
8. After the adapter is in place, find the rubber hose that came with the kit with the three small clamps. It is pictured below already installed on brake line.
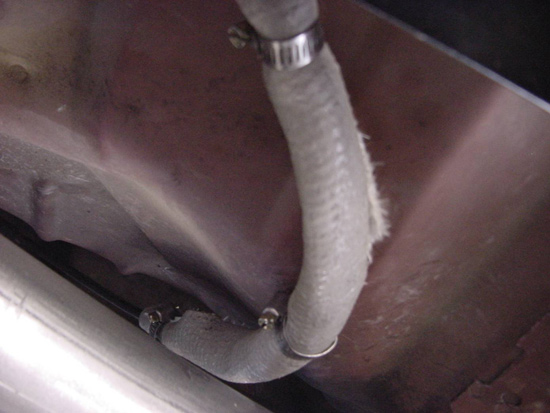
9. After looking under the car, you can see that there is a brake line on the driver’s side of the car that is very close to the adapter. The brake shield is designed to go over this brake line so that it shields the line from the heat. Start by taking the heat shield tubing and make a cut in one side of the shield from one end to the other. After this is completed, it will just slide over the line and use the three clamps to hold it in place so that it will not slide down the brake line.
10. From here, the next step would be to continue bolting on the rest of the exhaust, whether it is a GT cat-back system or a GT take-off kit.
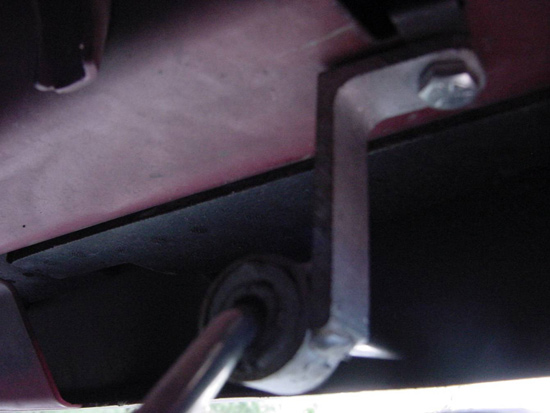
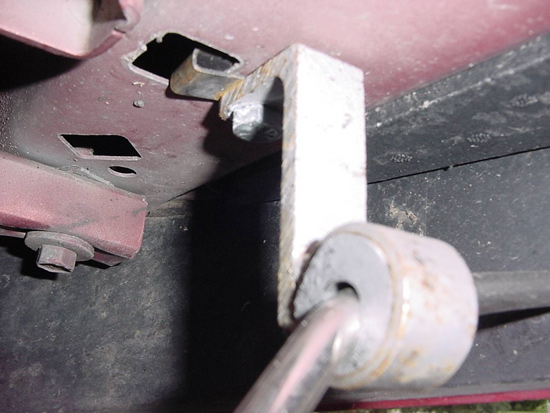
11. Also included with this kit are two tailpipe exhaust hangers and a passenger side exhaust hanger. Along with purchasing the adapter kit fromAmericanMuscle.com, I also purchased a Pypes Stainless Steel Hanger Kit, Part No. 20020. This kit is essential when completing a duel exhaust set-up because even though the adapter kit comes with a hanger, it is better to purchase the stainless steel hanger kit anyway. Something as important as exhaust hangers must be strong and bolted on tightly. The V6 rear bumper does not allow the exhaust hangers from the Pypes kit to work short of cutting the rear bumper or purchasing a GT bumper, the V6 adapter kit comes complete with two tailpipe hanger extenders. The picture below shows the exhaust installed with the tailpipe extenders.

12. They bolt into the holes in the rear of the frame closest to the center of the car. If you simply crawl underneath the rear fender and look up, you will see them. Simply bolt the tailpipe extenders to the frame and then slide the tailpipe hangers. Shown below are a few pictures of the tailpipe extenders.
13. Below is an image of what not to do when completing this installation. Make sure that the U bolts holding the old pipes onto the adapter are very tight. I did not tighten them down enough and the adapter slipped off of the passenger’s side of the car. Unfortunately, the adapter kit would not fit back over the pipe so I needed to go to a local auto shop and purchase a coupling that would hold the adapter to the original pipe on the car.
DON’T LET THIS HAPPEN TO YOU! MAKE SURE YOU TIGHTEN ALL OF THE BOLTS VERY TIGHTLY WHEN YOU FINISH THE INSTALLATION!
14. Congratulations, you have successfully completed the first step of installing a new duel exhaust on a V6 Mustang!
Installation instructions provided by AmericanMuscle customer Will Rimmler (5/13/08)
