 FREE 1 to 3-Day Delivery on Orders $119+ Details
Best Sellers


How To Install an AeroForce Wideband on your 1996-2010 Mustang
Installation Time
2 hours
Tools Required
- Jack
- Jack Stands (2)
- 12 mm Socket Wrench
- 10 mm Socket Wrench
- 8 mm Socket Wrench
- Adjustable Wrench
- Knife
- Zip Ties
- Helper (optional)
- Soldering Iron
- Electrical Tape
Instructions:
1. Raise the front of the vehicle with the jack, and safely support vehicle by placing jack stands in appropriate locations.
2. Open the hood and locate the battery on the passenger side of the vehicle.
3. Loosen the 10 mm screws holding on the positive and negative terminals on the battery as pictured below.

4. Remove the positive and negative cables from the battery and wrap them in paper towels to keep them from scratching anything.
5. Use the 8mm socket to loosen the battery tie down bolt and set the strap to the side.
6. Remove the battery from the car, and set it on the ground.
7. Remove the three bolts holding down the battery tray as shown below.

8. Remove the battery tray and set it aside.
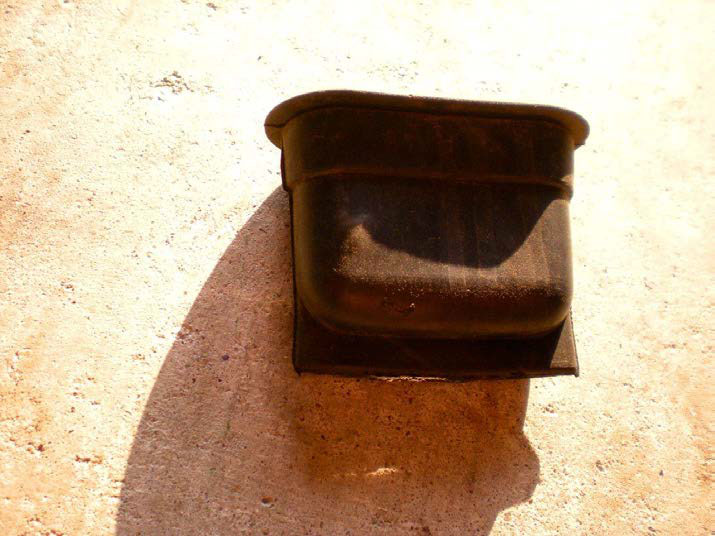
9. Along the firewall, you should see a cylindrical piece of rubber hanging down. Pull downward on this piece of rubber to remove it. This piece is pictured below.
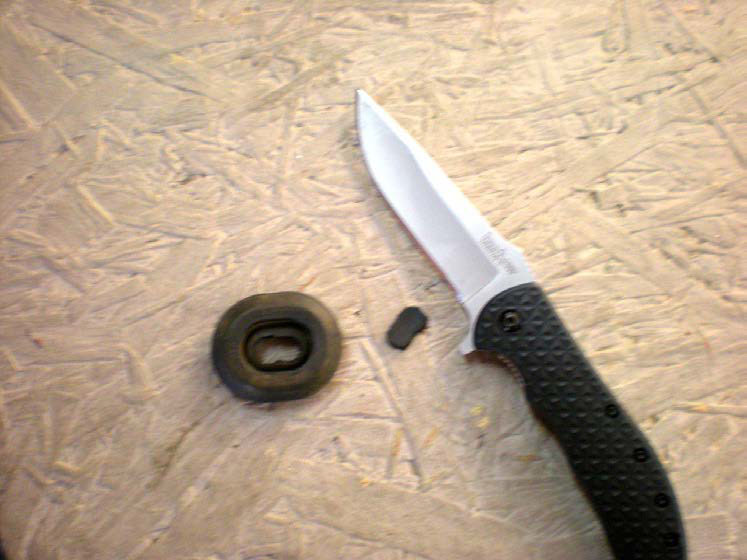
10. You will now see a round rubber grommet in the firewall that was hidden by the cylindrical rubber piece that you just removed. Pull on the round rubber grommet to remove it from the car. This grommet is pictured in the next step next to the knife.
11. Use a knife to cut out the middle portion of the rubber grommet as pictured below.
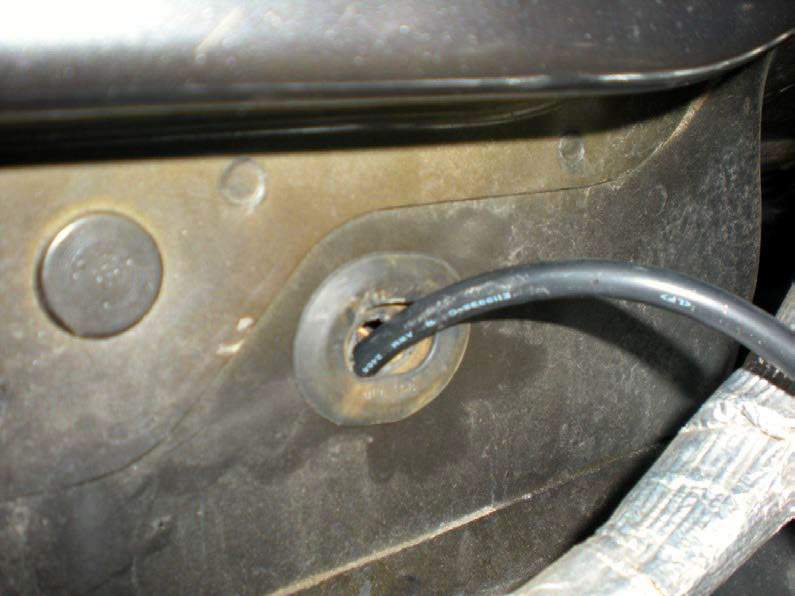
12. Reinstall the rubber grommet into the firewall and feed the sensor wire (5 pin flat connector side) through the rubber grommet and into the vehicle as pictured below.
13. Reinstall the rubber cylinder in front of the rubber grommet.
14. Feed the other end of the wire (big black connector) down along the exhaust so that it is underneath the car.
15. Now move to underneath the vehicle. If you have an off-road exhaust (no catalytic converters), then you will be removing your passenger side rear O2 sensor. If you still have catalytic converters on your car, you will need to have the provided bung welded in to your exhaust system upstream of the catalytic converters.
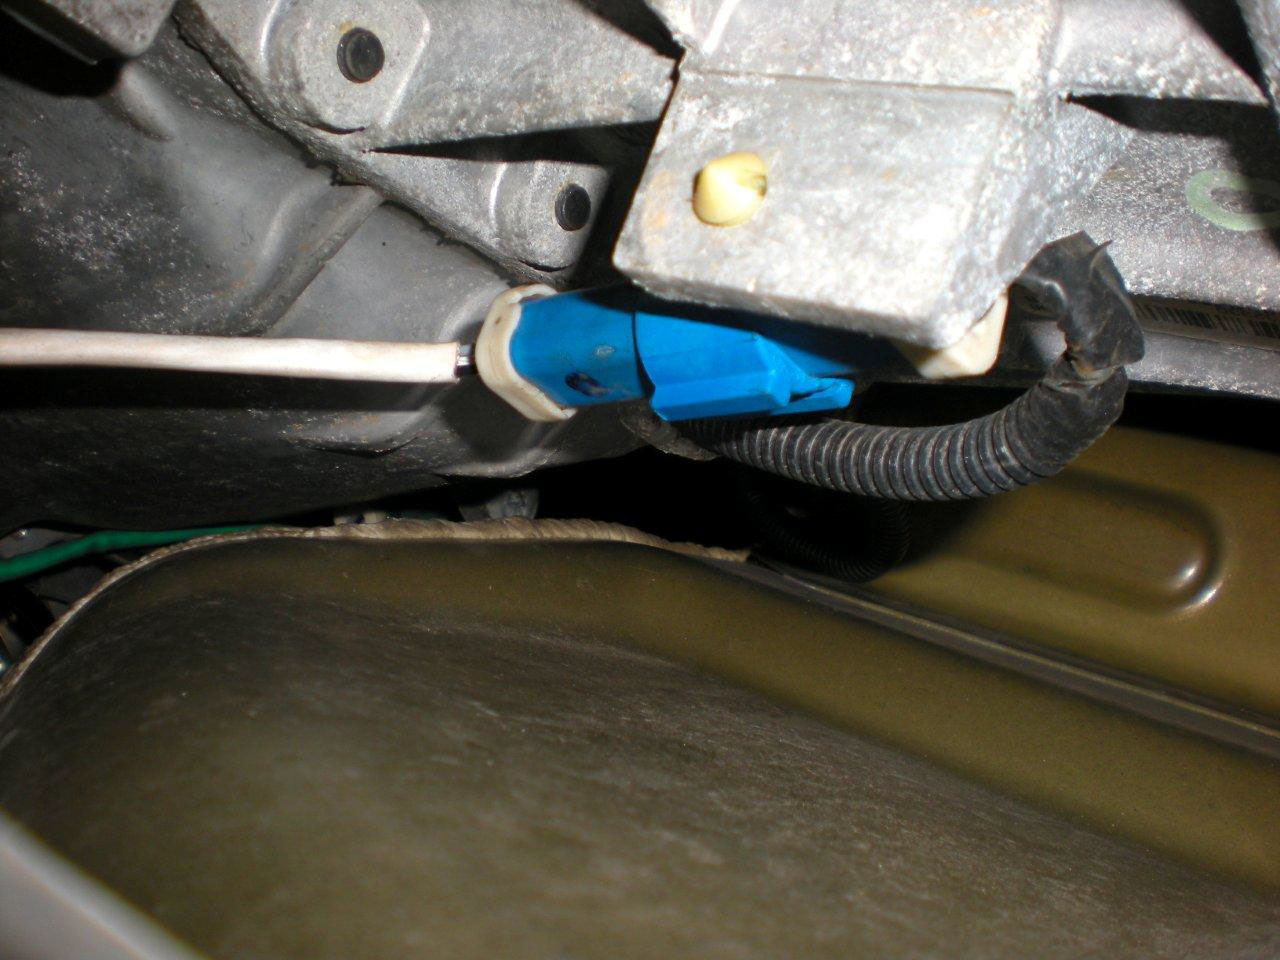
16. Underneath the car on the passenger side, you should see a blue connector for the downstream passenger side O2 sensor. Disconnect this sensor connector. The connection is pictured below.
17. Now use an adjustable wrench to remove the rear O2 sensor.
18. Remove the plastic cap from the new wideband sensor and screw it in to the downstream O2 sensor bung, or the newly welded in bung. After hand tightening, use the adjustable wrench to finish tightening the sensor.
19. Now connect the end of the sensor to the end of the wire that you fed down from step 14.
20. Now move back to under the hood of the vehicle. Pull on the cable going to the sensor until the slack has been taken out, and zip tie the big black connectors to the wire harness at the end of the fuel rail as shown below.

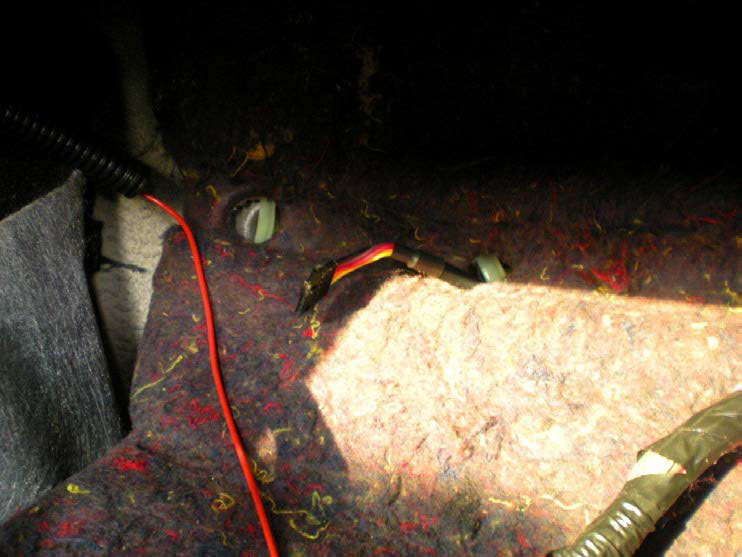
21. This step is where a helper is useful. One person should continue to feed the wire through the grommet from under the hood while the other person pulls back the carpet from the passenger side foot well and reaches for the connector. Once the person in the vehicle has the connector, pull on the cable until all slack is inside the vehicle. A picture of the connector coming through the firewall and through the insulation is shown below.
22. Now feed the gauge connector down from wherever you have your gauge mounted to the passenger foot-well where the sensor connector is located.
23. Now connect all three connectors to the supplied sensor calibration box in the passenger foot-well.
24. You will now need to remove the passenger side door sill plate. Pull upwards on this plate to remove it.
25. Then, remove the passenger side panel that surrounds the fuse panel. Pull on this panel towards the rear of the car to unclip it from the body, and remove it.
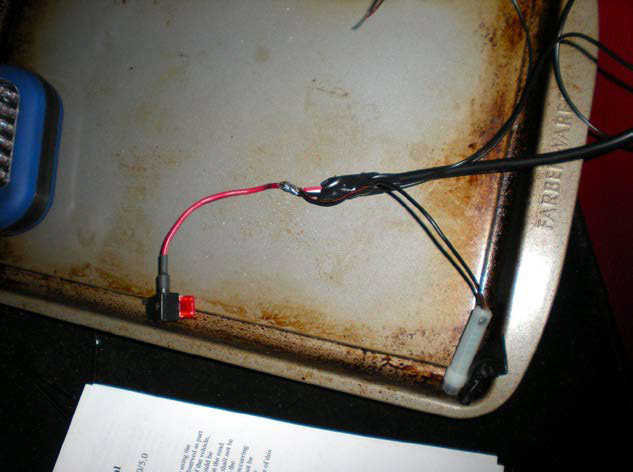
26. Take the red and white wires from the harness connector and solder them into the open end of the Add-A-Circuit as shown below. There is an extra black wire in the picture below for my hardwired radar detector, so please ignore the black wire.
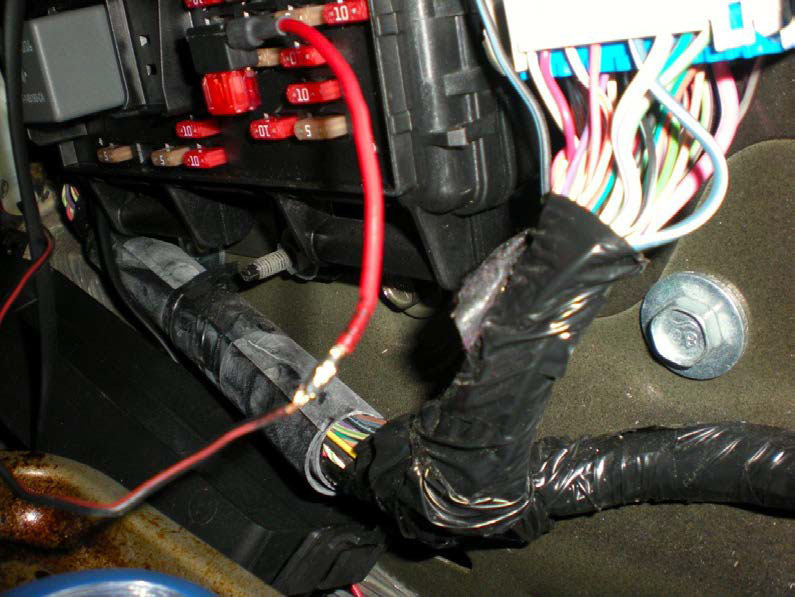
27. Use the electrical tape to tape up the soldered connection. Then plug the Add-A-Circuit into a switched fuse location such as the radio on the fuse panel as pictured below.
28. Now take the extra piece of wire and solder it to the black wire from the harness connector. Use electrical tape to cover up the solder.
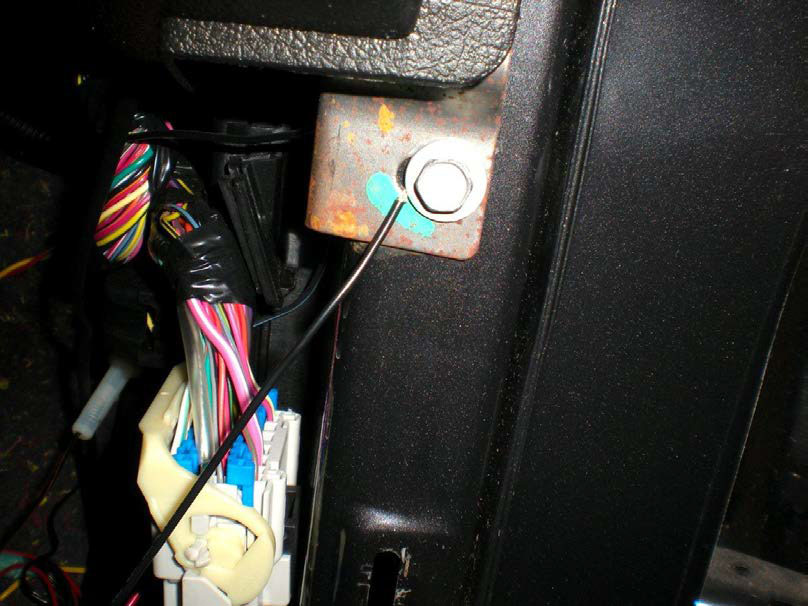
29. Loosen the 12mm bolt pictured below enough to slide the loose end of the extra piece of wire under it. This bolt will be your ground for your wideband.
30. Now take the gauge connector and connect it to your AeroForce gauge.
31. Reassemble the car in the reverse order to which you removed parts, hiding extra wire and the controller box in the passenger side foot-well.
32. After the battery has been reconnected, key on the vehicle. In the settings menu on your AeroForce gauge, set the slope to 2 and the intercept to 10 for the input assigned to your wideband.
33. After the key has been on for 30 seconds, press and hold the calibration button on the sensor box for 3 seconds to calibrate the sensor.
Installation Instructions provided by AmericanMuscle Customer Joseph Hudson 11.06.2012
