 FREE 1 to 3-Day Delivery on Orders $119+ Details
Best Sellers


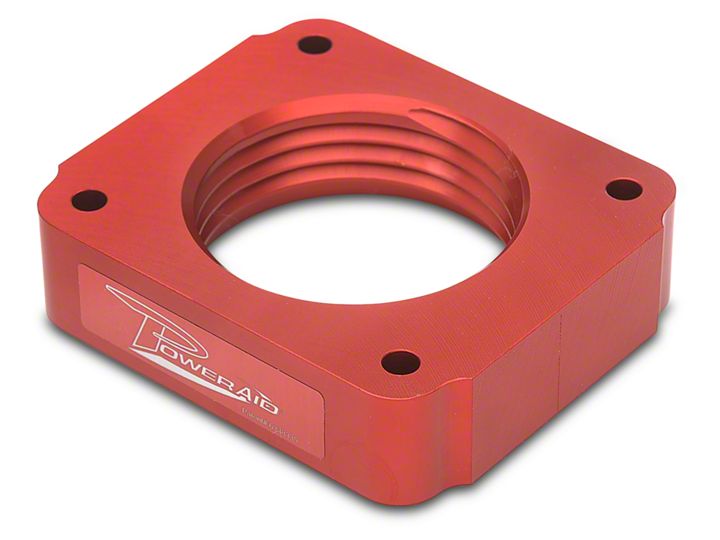
How to Install an Airaid Poweraid Throttle Body Spacer on your 1999-2004 Mustang GT
Installation Time
1 hours
Tools Required
- 10mm Socket
- 5/32" Allen Wrench
- Flat Head Screwdriver
Shop Parts in this Guide
(Will Only Fit Return-less Fuel System Cars)
Thank you for purchasing the PowerAid Throttle Body Spacer. Please read the
instruction manual carefully before proceeding with the installation. Contact AIRAID @
(800) 498-6951 8:00 AM - 5:00 PM MST Weekdays for questions regarding fit or instructions that are not clear to you. Your PowerAid Throttle Body Spacer was carefully inspected and packaged. Check that no parts are missing, or were damaged during shipping. If any parts are missing, please contact AIRAID.
Thank you for selecting AIRAID.
Included with your Poweraid Spacer is a sticker with a California Air Resources Board
(C.A.R.B.) Executive Order (EO) number. This sticker must be placed in plain view inside of the engine compartment. Failure to do so may prevent you from passing a smog inspection.
Parts List
(1) Power Plate
(2) Gaskets
(4) Hex Bolts 6mm x 50mm
(6) Lock Washers 6mm
(1) Extension Plate
(2) Hex Bolts 6mm x 12mm
(2) Flat Head Screws 6mm x 12mm
Tools List
10mm Socket
5/32” Allen Wrench
Flat Head Screwdriver
Installation Instructions. Read Me!
1. DISCONNECT NEGATIVE (-) BATTERY CABLE.
2. Remove air intake hose assembly.
3. Remove (2) bolts from throttle linkage bracket (Ref. “C”).
4. Remove (4) bolts from throttle body (Ref. “B”).
5. Install power plate and gaskets using (4) 6mm x 50mm bolts and lock washers (Ref. “A”).
* Note: Throttle Body side, engraved on power plate (Throttle body side). Tighten bolts evenly.
A. One gasket located between power plate and intake manifold.
B. One gasket located between power plate and throttle body.
6. Install throttle linkage extension plate using (2) 6mm x 12mm flat head screws. (Ref. “C”).
7. Install throttle linkage bracket using (2) 6mm x 12mm hex bolts and washers. (Ref. ”C”).
* Note: Do not use 1/8 inch fiber spacer.
8. Inspect & Test throttle linkage for full Open & Closed travel before driving. Some cruise or kickdown cables may require adjustment. Refer to service manual for proper adjustments.
9. Reinstall air intake hose assembly (Step 2).
10. Reconnect battery cable. Enjoy!
The sound of power...The “whistle” means its working!
