FREE 1 to 3-Day Delivery on Orders $119+ Details
Best Sellers


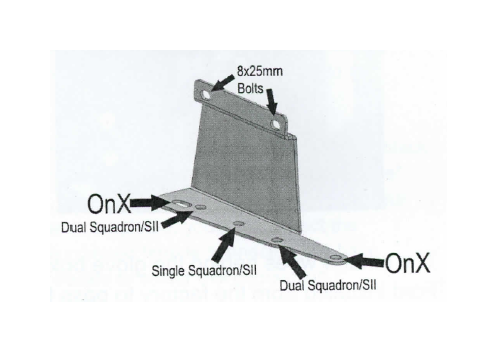
How to Install Baja Designs Fog Light Pocket Mounting Brackets on your Mustang

Step 1: Start by removing the (2) OEM socket head bolts just above the fog pocket location on the inside of the bumper.
Step 2: Once that has been done, you can begin installing the Baja Designs Fog Pocket Mounts with the provided 8x25mm Socket Head Allen Bolts.
Step 3: Now that the mounts have been installed, you can being installing your OnX, Squadron(s) or S2(s) LED auxiliary lights.
Wiring:
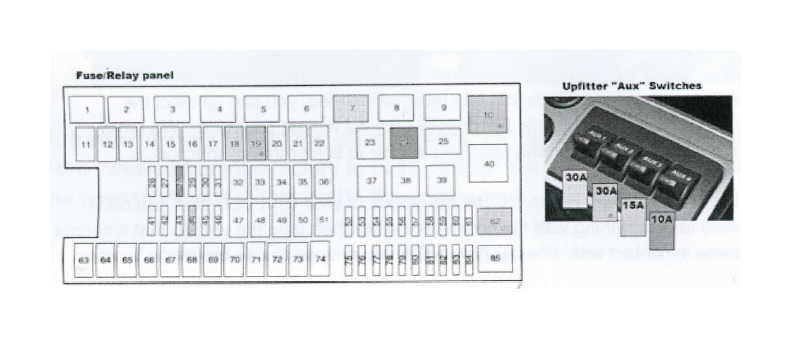
Our Ford Raptor wiring harnesses can be used in conjunction with your factory auxiliary switches. There are four switches, 2 that are rated at 30amps, 1 rated at 15 amps, and 1 rated at 10 amps. These are fused and relayed from the factory. Do not use the 10 amp switch for this installation. The circuits for each of the 4 factory switches, referred to as "upfitter" switches in your manual, are "open" as your Raptor is shipped from the factory. There are 4 wires that run from the switches to behind the glove box and end there.
1. Remove the end of the dash along with the glove box to access these wires. Note: The images below show the side panels removed.
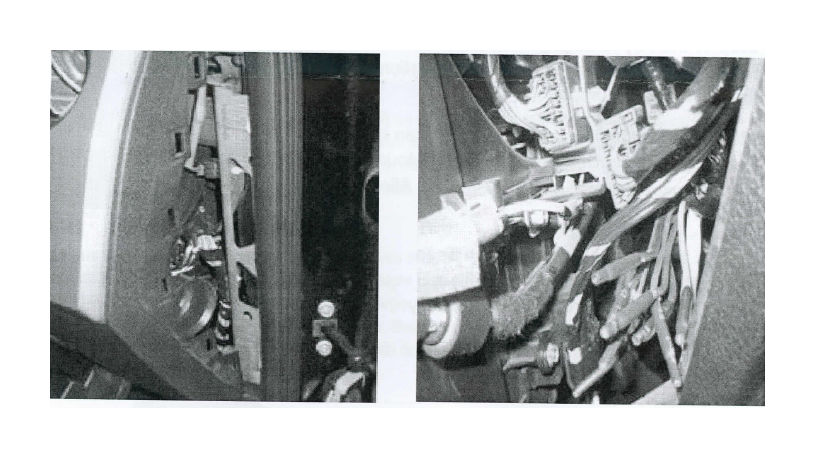
The other 4 wires behind the glove box are the "pass through" harness that Ford installed from the factory to pass through the firewall and end above the passenger side wheel well in the engine bay.
You can refer to the chart on the last page of these instructions to identify which switch corresponds with which wire. Do not use upfitter switch # 4, the brown wire, or the purple wire as they are only rated at 10 amps.
2. You'll need to connect the wires that run from the upfitter switches to the area behind the glove box to the pass through wires that run from this same location through the firewall terminating above the wheel well near the hood strut.
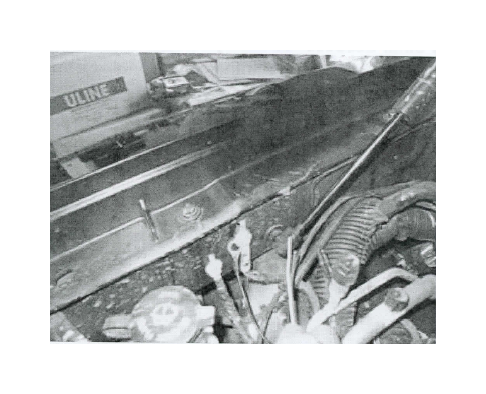
3. Plug the harnesses into the light and route each harness across the bottom of the air duct and up the side of the radiator to pass through where the factory horn harness does. Continue along the side of the battery up to where the factory pass through harness ends. You can use one of the body bolts next to this location for the ground.
4. The white wires in the Baja Designs harnesses are the positive leads. The black wires with the ring terminals are the grounds and the green wire is the "mode" wire. Using the provided connectors, crimp the double female bullet onto your upfitter power lead. Once that has been completed, you can connect the individual power leads into the double crimped female connector. We have provided heat shrink in the case you decide to solder this connection.
5. If you do not want to use the "mode" option of your OnX LED then you don't need to do anything with the green wire other than tape the end so that it cannot come in contact with chassis ground. If you choose to use the mode function then you will need to mount a momentary push button switch somewhere in the cab. You will need to run a wire from the green Baja Designs wire to one side of the momentary switch inside the cab. If you have not used the purple pass through wire for any other accessories then you could use this to connect the green to your momentary switch. Run another wire from the other side of the momentary switch to a chassis ground. You can choose a ground location under the dash for this.