 FREE 1 to 3-Day Delivery on Orders $119+ Details
Best Sellers


How to Install BBK CASTER/CAMBER PLATES on a 2005 to 2014 Mustang
Installation Time
4 hours
Tools Required
- Sockets: 10 mm, 13 mm deep, 15 mm , 17 mm, 18 mm and 21 mm deep
- Wrenches: 8 mm, 10 mm , 18 mm, 19 mm, and 21 mm (an adjustable wrench can also be used in some areas)
- Ratchets for above sockets
- Extension for 21 mm socket (6” length)
- Lug Wrench
- Floor Jack
- 2 Jack Stands
- Sand Paper
- Wheel Chock
- Torque Wrench (Ranging from 15 lb. ft. to 148 lb. ft.)
- Spring Compressor
- An air impact gun OR a pass through/extreme access socket set
Shop Parts in this Guide
Installation
1. Break all front lug nuts loose with a lug wrench. Chock the rear wheels and apply the parking brake. Jack up the front of the car using an appropriate jacking point (i.e. - frame rails) until the front wheels are off the ground. Support the car with jack stands and remove the lug nuts and rims. This is a good time to check the condition of the brake rotors and pads. The stock strut tower mounts that will be replaced look like the following: From under the hood:
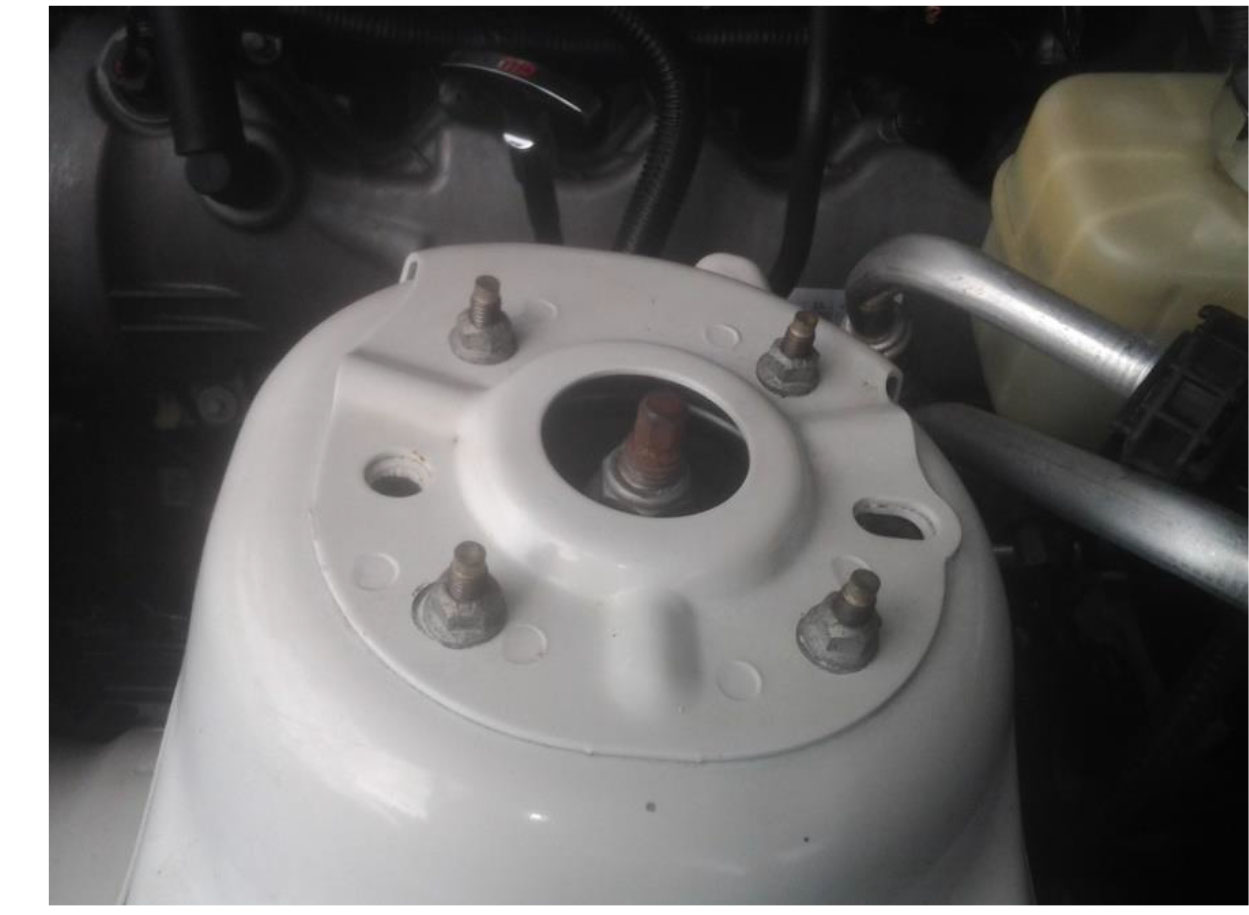
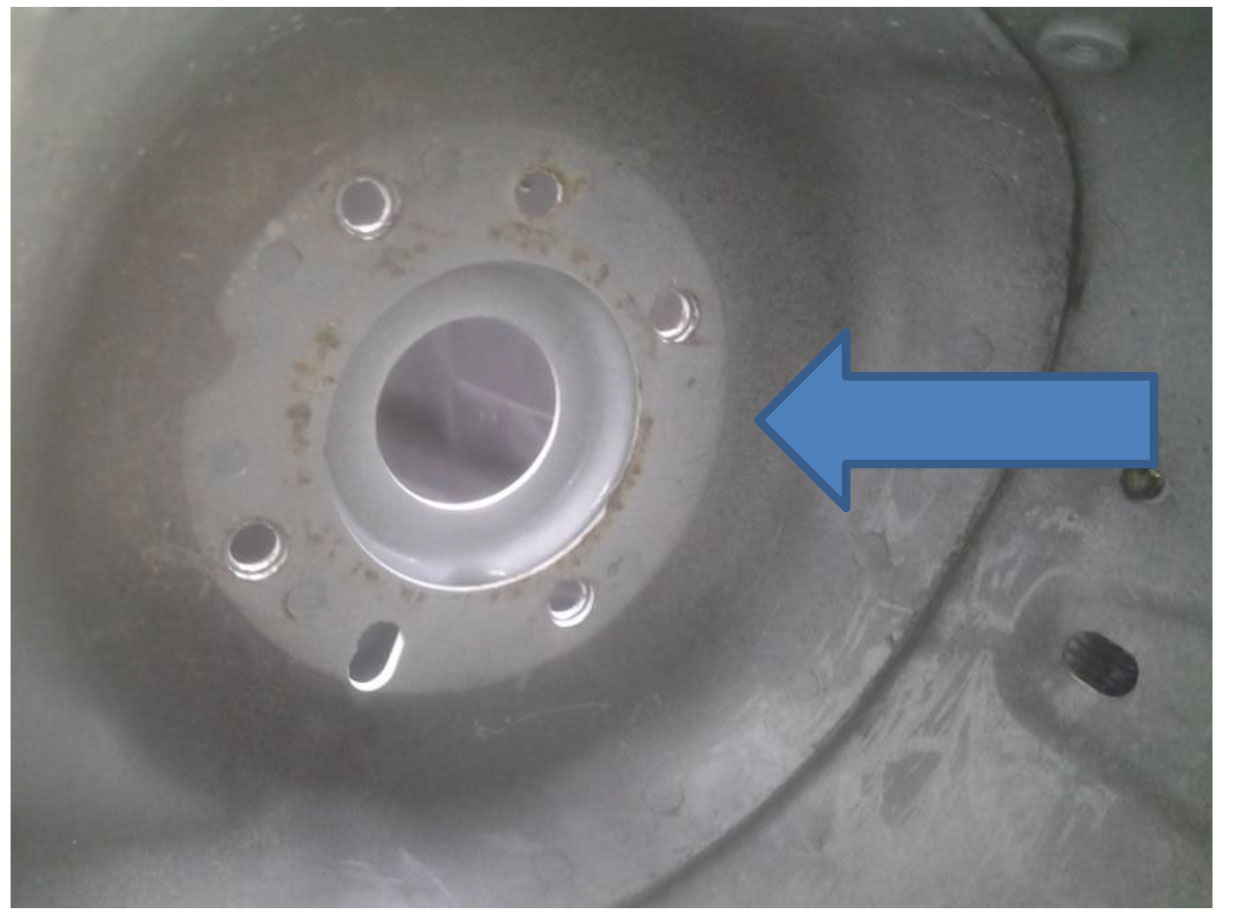
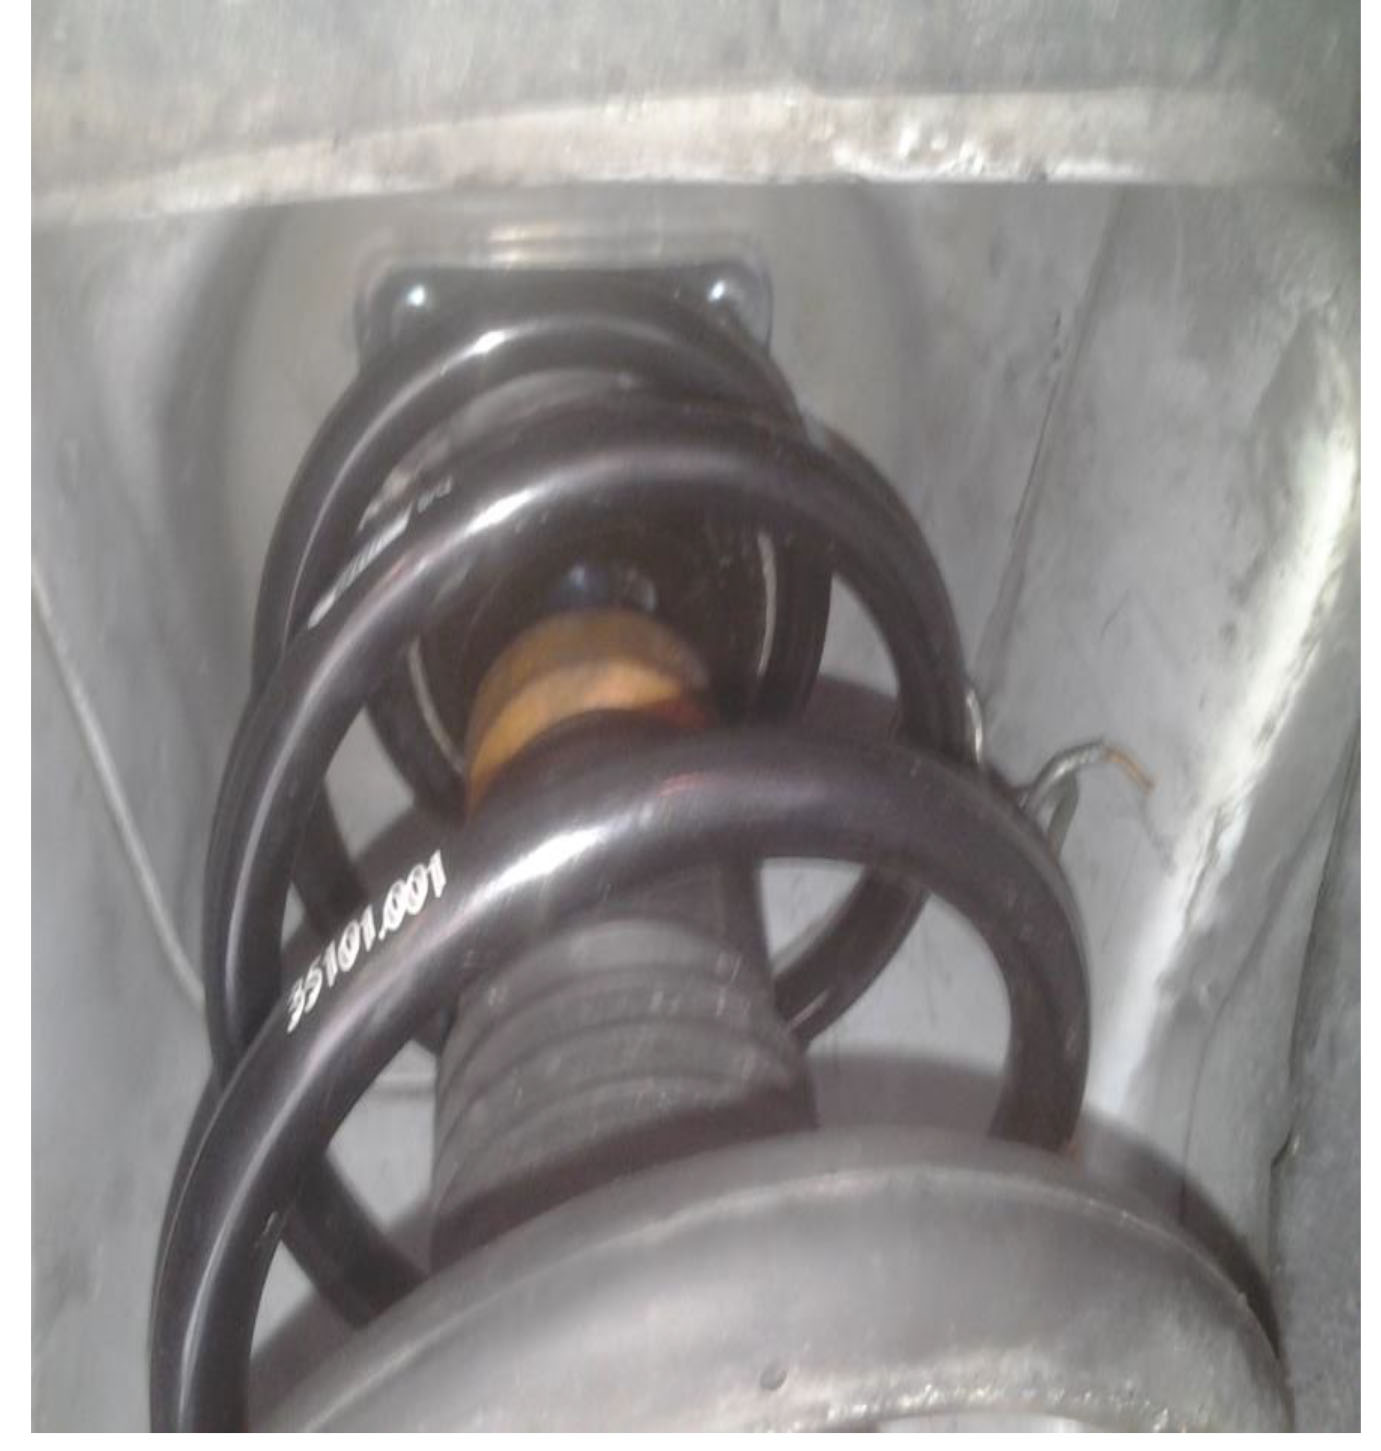
From underneath, in the wheel well:
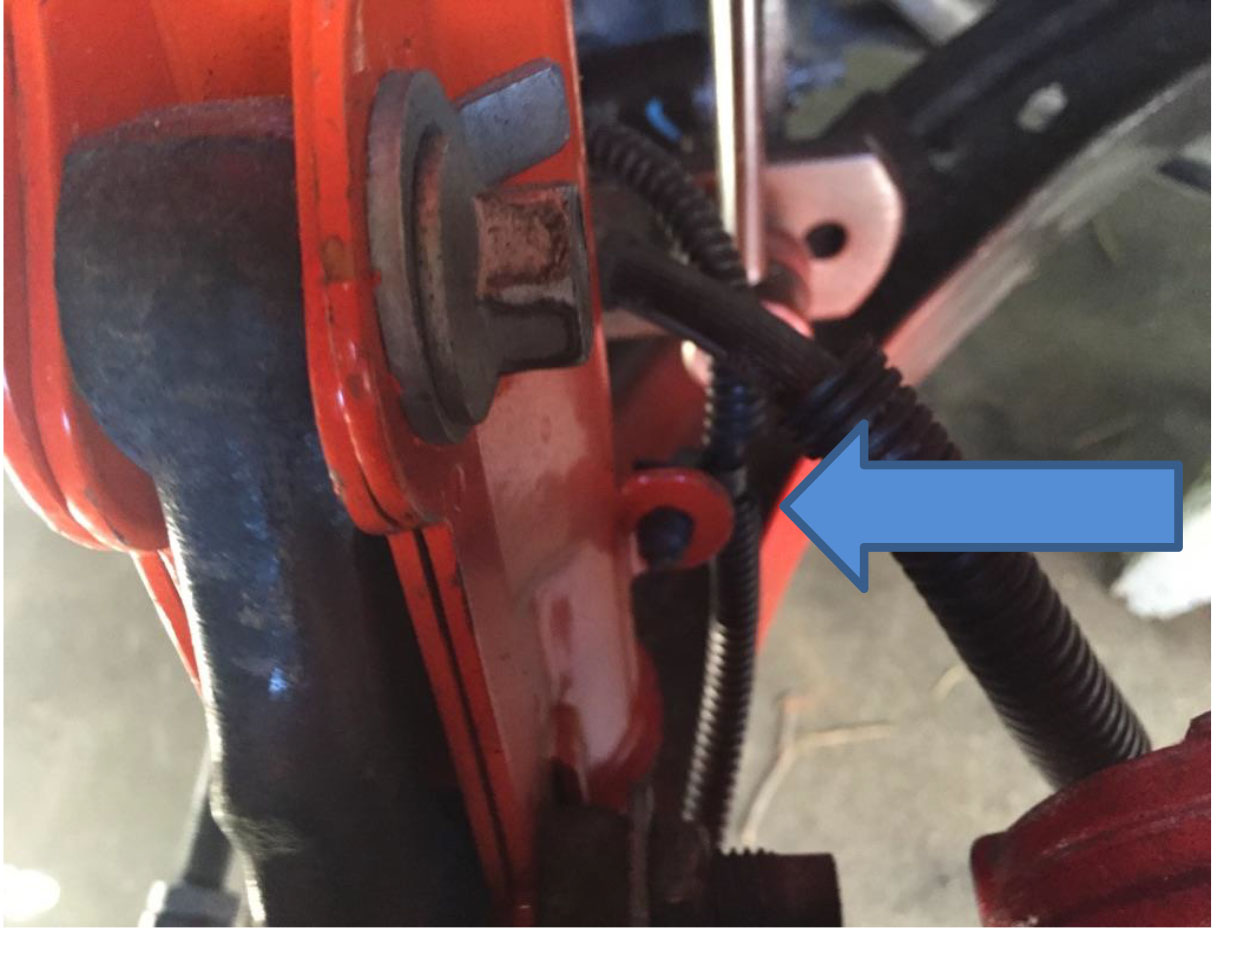
2. To remove the factory strut mounts, start by unbolting the brake line bracket bolt from the strut using a 10 mm socket. In the first picture, the brake line retainer is fastened with a flat-head screw. Because aftermarket struts do not have threaded holes for the factory 10 mm bolt. Also remove the wheel speed sensor wire retaining clip by pulling it out of the hole. This clip is shown in the second picture just below and to the right of the bolt head

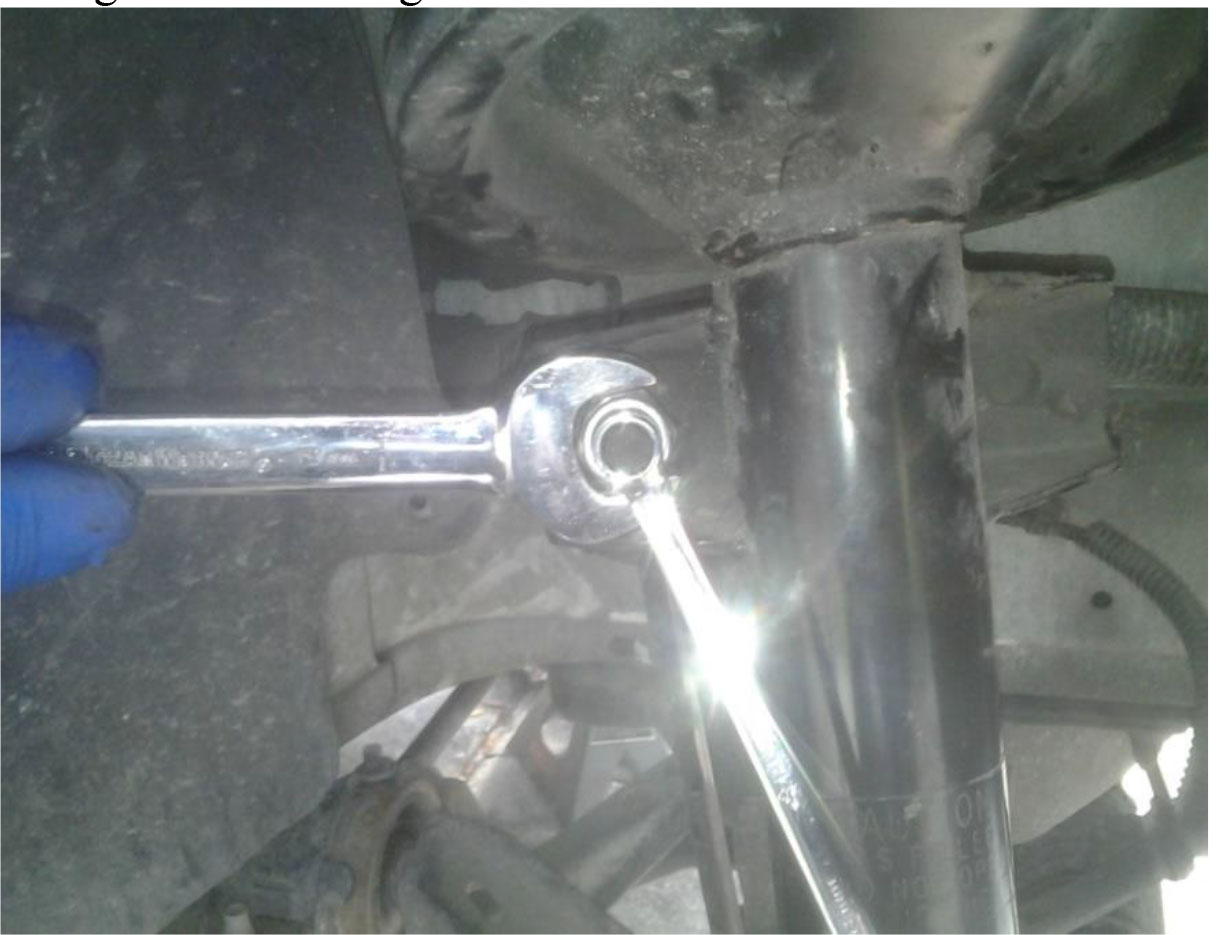
3. Unbolt the stabilizer bar link nut from the strut using a 19 mm wrench to loosen the nut while stopping the link stud from spinning with an 8 mm wrench. Once the nut is removed, push the stabilizer bar link through the mounting hole in the strut.
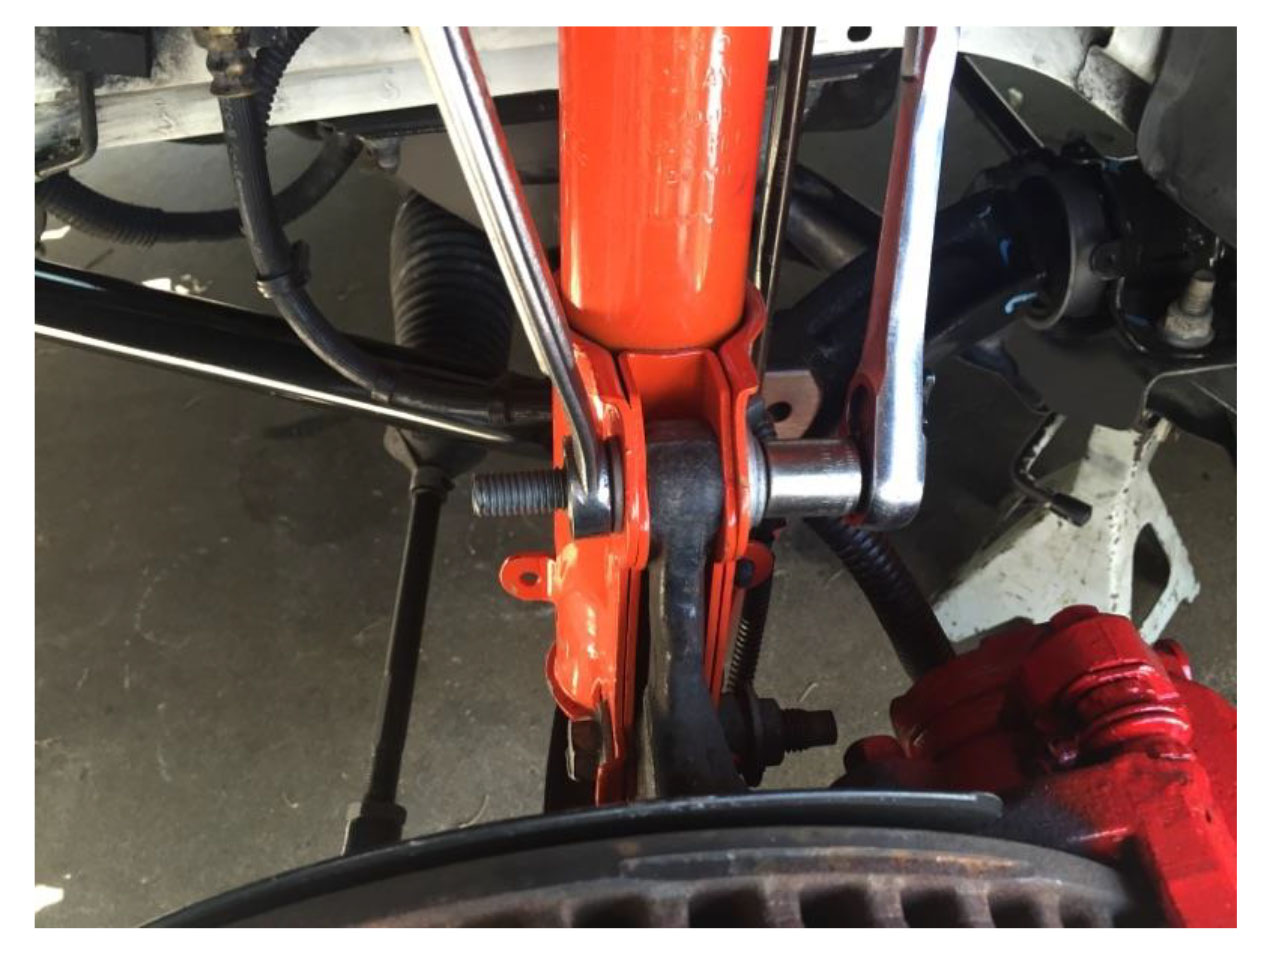
4. Remove the 2 strut to spindle nuts and bolts using a 15 mm socket and an 18 mm wrench on one bolt and an 18 mm socket and a 21 mm wrench on the other bolt. Once the hardware is removed pull the top of the spindle away from the strut so that the bottom of the strut swings freely.
5. Using a 13 mm deep socket, remove the 4 strut mount nuts that are located on the top of the strut towers under the hood. Once these nuts are removed, the strut and strut mount assembly can be removed from the car by sliding it down and out. When it is removed, the strut towers will look as follows:
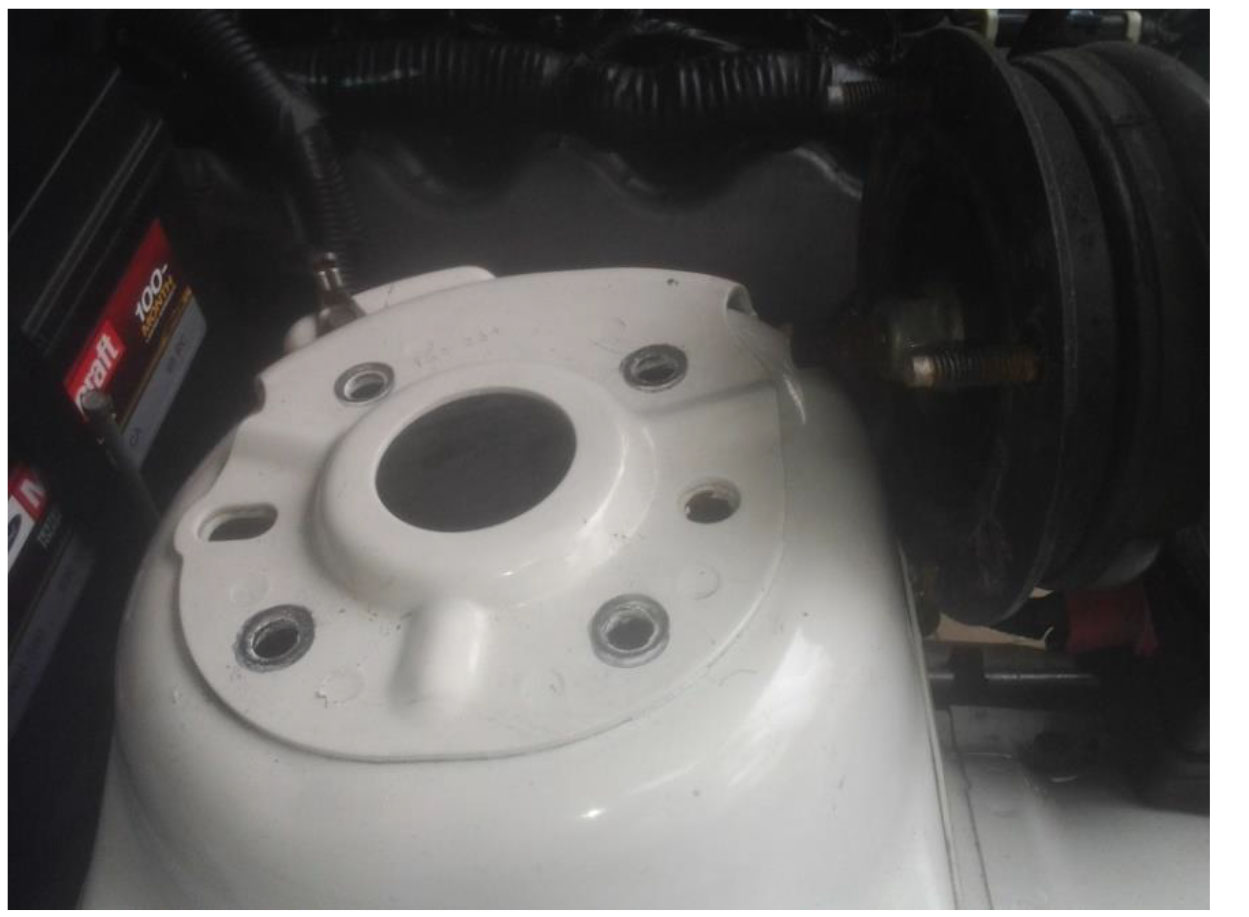
From Under the Hood:
From Under the Wheel Area:
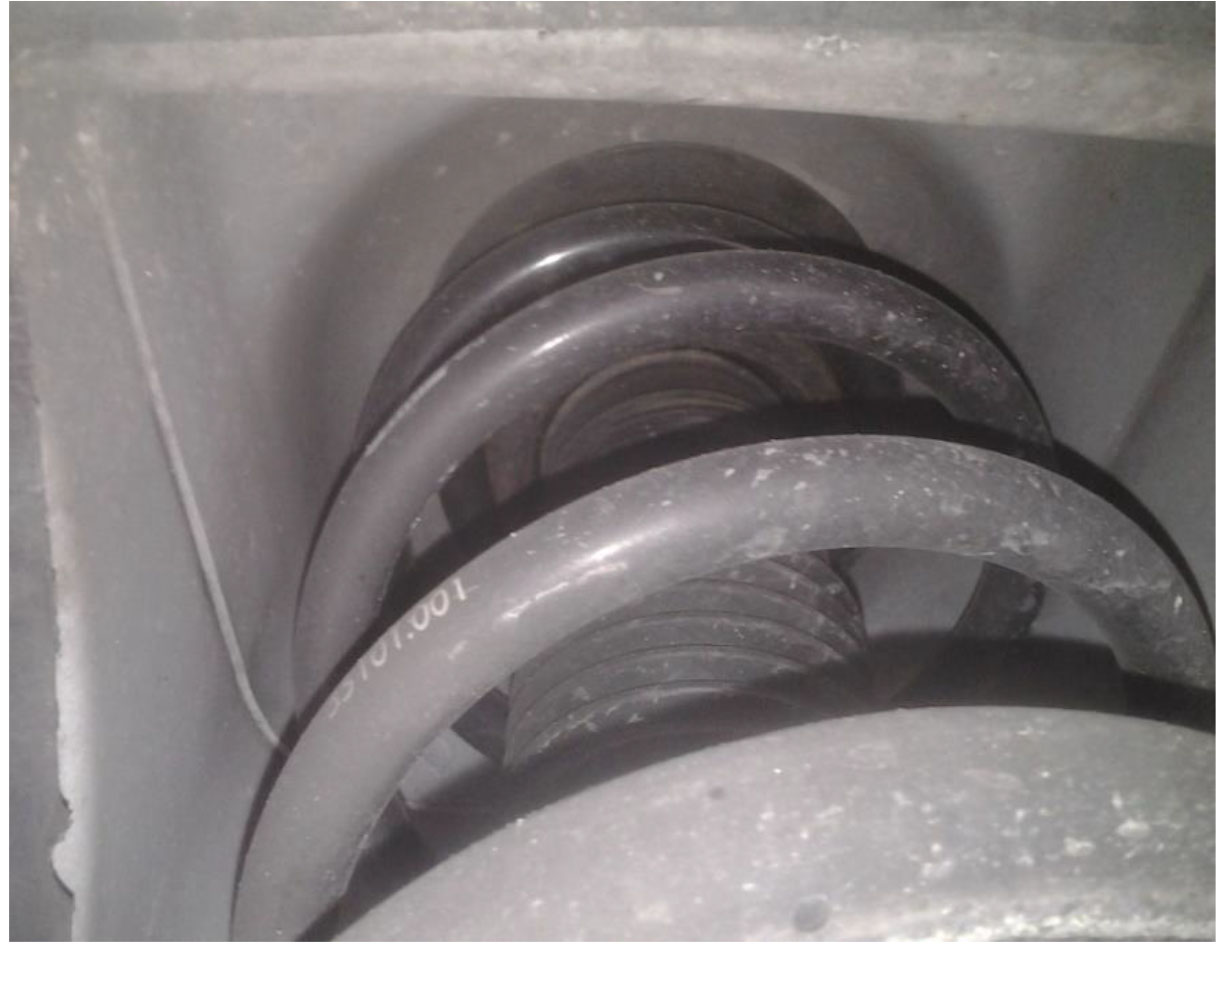
6. If necessary, using sand paper, remove any burrs or rough spots from the strut tower where the BBK plates will be located. 7. With the strut assembly removed from the car, it is time to remove the factory strut mounts. Compress the coil springs using a spring compressor, and remove the nut that attaches the strut to the mount.
CAUTION: THE COIL SPRING CAN FLY OFF AND CAUSE INJURY OR DAMAGE. BE SURE THE SPRING COMPRESSOR IS PROPERLY INSTALLED!
To remove the nut, use an adjustable or 21 mm wrench to loosen the nut while holding the strut stud with a 10 mm wrench. With the nut removed, the factory strut mount can be slid off the strut assembly. If you are replacing your coil springs and/or struts, now is the time to do it.
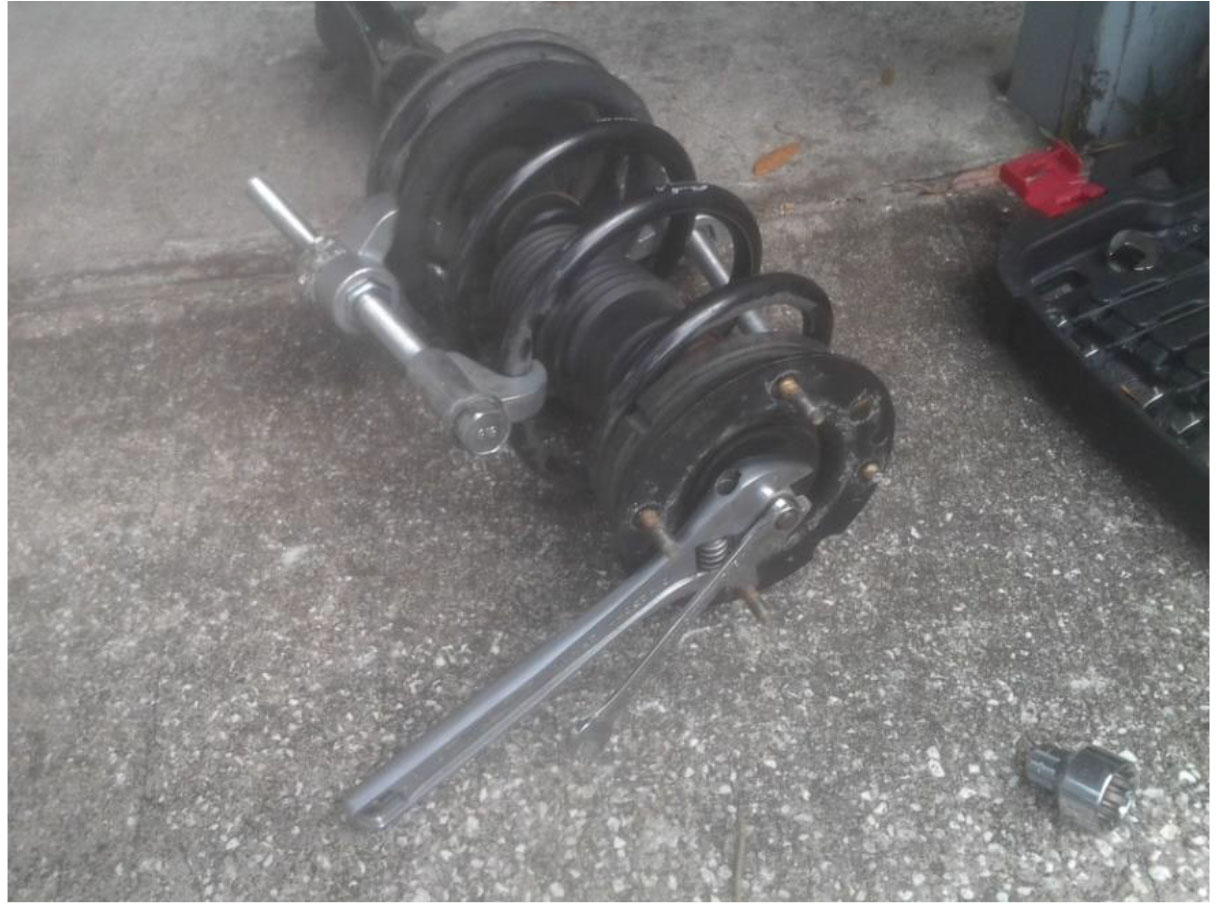
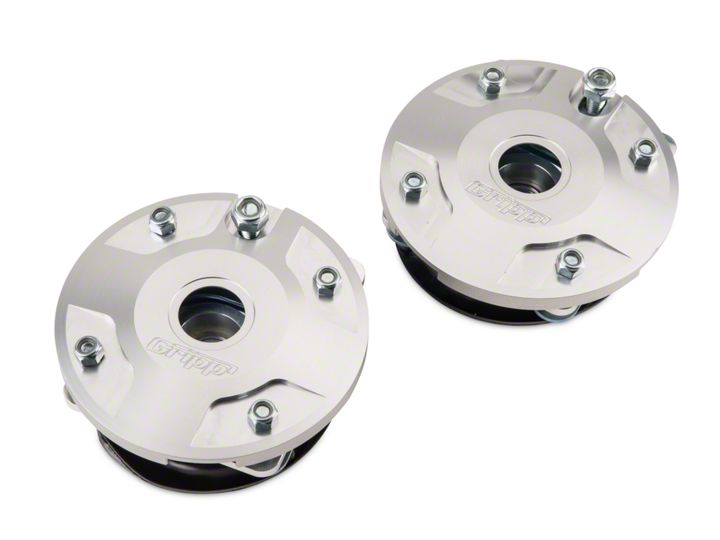
8. If you are installing these on a 2005-2010 Mustang GT, install the supplied spacer on the strut stud. For 2011 to 2015 cars, no spacer is needed. Each plate is engraved with a part number that indicates which side of the vehicle that particular plate is for. The part number SUB768D is for the driver side and SUB768P is for the passenger side.
Place the lower part of the BBK plate (being careful not to pull the black piece apart from the metal piece-ball bearings will fall out and the new BBK plates will be ruined) on the strut assembly, and secure it with the nut that was removed in the previous step. Before torqueing the nut down to the recommended 46 lb. ft., spin the coil spring to ensure that the coil spring is positioned properly between the strut stop for the bottom end of the spring and the BBK plate stop for the top end of the coil spring.
The design of the BBK plate recesses the nut so that it cannot be tightened with a wrench. To tighten the nut, an impact gun can be used, or a pass-through socket set can tighten the nut while the stud is held with a wrench or socket and ratchet. Once the nut is snug and the strut assembly is installed in the car, the nut can then be properly torqued to specification (46 lb. ft.) with a deep 21 mm socket.
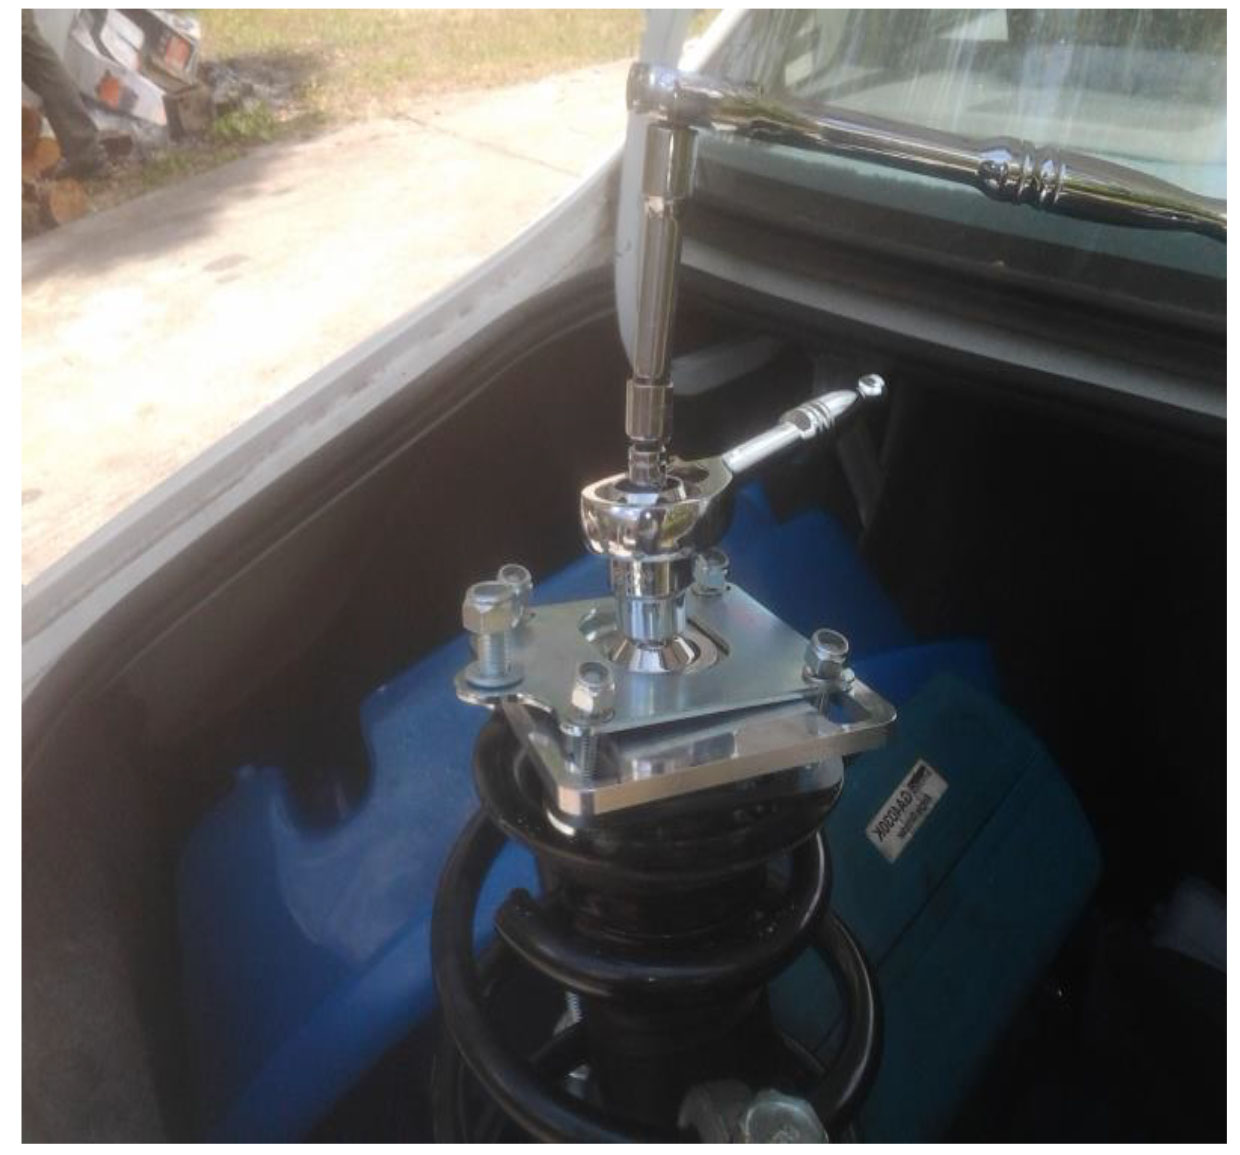
9. Once the strut mount is installed on the strut assembly, remove the coil spring compressors and insert the strut assembly up through the strut tower. The pre-installed rubber bands on the BBK plates will hold the studs in place. Be sure to orient the bolts in such a way that the larger caster adjustment stud is toward the back of the car (the stud that uses the 17 mm nut as opposed to the 4 that use 13 mm nuts).
Place the cap plates on top of the strut tower, and have the nuts ready. It is helpful to have someone start the nuts from above while the strut assembly is held from below. Once all of the nuts are started, cut the rubber band and pull it out. Tighten the nuts so they are snug.
10. Reassembly is the reverse of disassembly. Reinstall the bolts that hold the bottom of the strut to the spindle. These should be tightened to 148 lb. ft. Reattach the sway bar end link to the strut and torque the nut to 85 lb. ft. Reattach the brake line bracket bolt and torque to 15 lb. ft. Attach the wheel speed sensor wire retaining clip by pushing it into the correct hole in the strut. The wheel can be reinstalled at this point. Tighten the lugs in a crisscross pattern.
11. Do the opposite side of the car using the same steps. It is helpful to do one side at a time so the other side can be used as a reference.
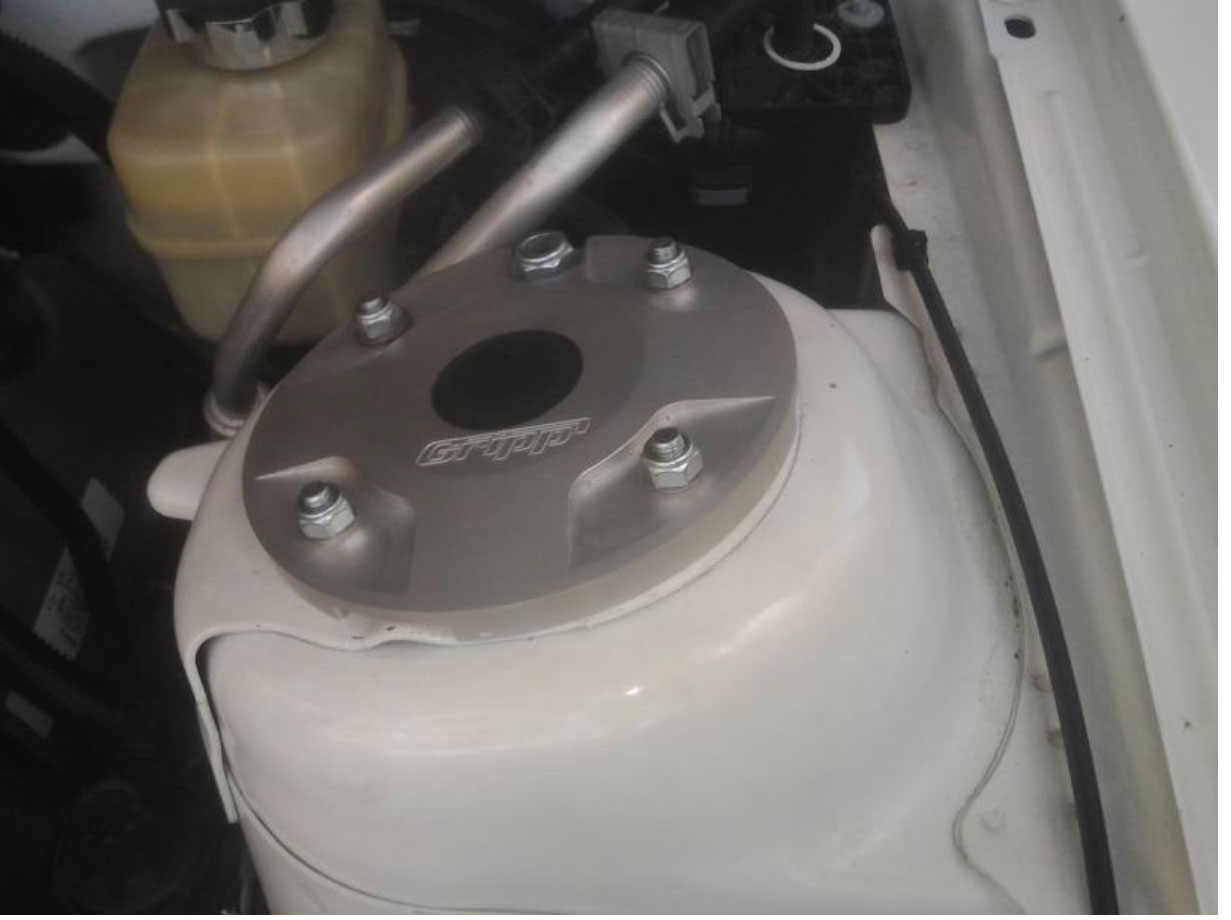
12. Once both struts are installed, loosen the 5 nuts on top of the BBK plates under the hood. Center the strut rod by using a 21 mm deep socket and extension to pull it to the center of the opening. Torque all 5 nuts to 26 lb. ft. on the top of the BBK plates with 13 mm and 17 mm deep sockets. Torque the center strut rod nut to 46 lb. ft. with a deep 21 mm socket. Snap the black caps into the holes in the BBK plates.
13. Jack the car up, remove the jack stands, and lower the car. Torque the lug nuts to 100lb. ft. using a 21 mm socket.
14. An alignment is needed as soon as possible. To adjust the caster, loosen the nuts on the top of the BBK plate. The top of the strut assembly can be slid toward the front or back of the car. The larger 17 mm nut is than tightened to lock in the caster setting. The strut assembly can be moved from side to side to adjust the camber. Once the camber is set the remaining four nuts can be tightened. This must be done with the front suspension unloaded (both front wheels off the ground).
Installation Guide Created and Provided by AmericanMuscle Customer Melvin Norris on May 17, 2016
