 FREE 1 to 3-Day Delivery on Orders $149+ Details
How to Install BBK Rear Lower Control Arms on your 2005-2014 Mustang
Installation Time
2 hours
Tools Required
- 18mm Socket
- 21mm Deep Socket
- 50mm Torx Bit
- Ratchet
- Long Extension
- Pliers or Vise Grip

Shop Parts in this Guide
Tools required- 18mm socket, 21mm deep socket, 50mm Torx bit, ratchet, long extension. Pliers or vice grips.
------------------------------------------------------------------------------------------------
UPPER ARM
STEP 1
Lift rear of vehicle and support axle on jack stands.
STEP 2
From inside the car, remove rear seat by pushing in on tabs under seat front, one on each side. Lift seat bottom up and remove from car.
STEP 3
Remove the single 18mm bolt on center of trans tunnel.
STEP 4
Place a jack under one side of the fuel tank to support the weight of the tank only. DO NOT LIFT THE VEHICLE BY THE FUEL TANK!
STEP 5
From under the car, remove the (2) #50 Torx bolts that retain the gas tank straps. Let fuel tank hang down onto driveshaft.
STEP 6
Remove two 18mm bolts that retain upper control arm bracket to floor. Lower the tank slowly. Tank will rest on the driveshaft when lowered.
NOTE
The bolt that attaches the upper control arm to the rear end housing has an arm/flag on one side to keep it from spinning. Be sure to put your wrench or socket on the 21mm nut that is on the other side to remove the bolt.
STEP 7
Remove the bolt that holds the upper arm to top of rear end housing.
STEP 8
Remove the bracket and arm from the vehicle.
STEP 9
Remove the 18mm bolt that holds the control arm to the bracket.
STEP 10
Install the BBK upper arm into the bracket using the original bolt and tighten to 129 ft-lbs.
STEP 11
Install the bracket and arm back into the car and tighten the 2 bolts that hold the bracket to the floor pan to 89 ft-lbs.
STEP 12
Tighten the BBK arm to the rear end housing using the original nut and bolt to 129 ft-lbs.
STEP 13
Torque the front bracket bolt (inside the car) to129 ft-lbs. Reinstall rear seat.
STEP 14
Lift fuel tank back into position and re-secure tank straps with the original bolts.
LOWER ARMS
STEP 1
Jack up car and support axle on stands. Remove & install arms one side at a time
NOTE
Release the parking brake before moving to STEP 2.
STEP 2
Remove clip for e-brake cable at caliper. Remove cable from actuating arm. Slide cable out and thru lower control arm. Let the cable hang.
STEP 3
Remove front and rear 18mm control arm mounting bolts and remove control arm from the car.
STEP 4
Install new lower arm with stock bolts. Tighten bolts to 129ft-lbs.
STEP 5
Loop e-brake cable under arm and reconnect it to the caliper actuating arm.
STEP 6
Reinstall cable retaining clip.
STEP 7
Repeat for opposite side.
NOTE
Apply the parking brake firmly before lowering the car from the jack stands!
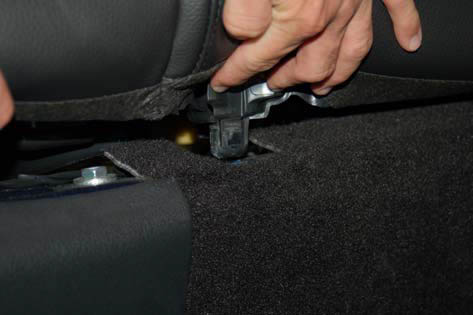
Release seat bottom
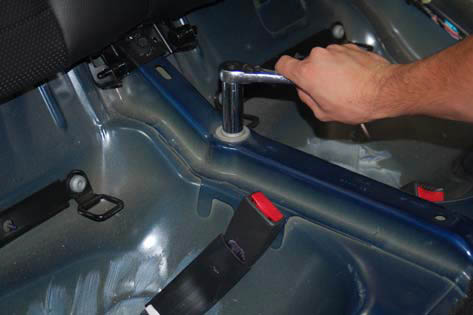
Remove front bolt
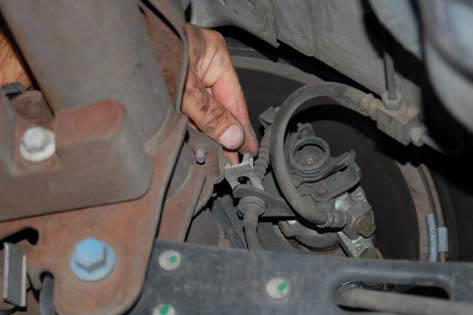
Remove brake cable clip
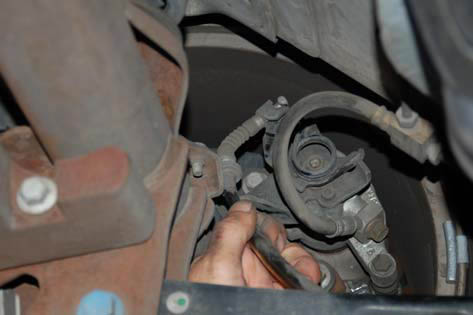
Disconnect cable from caliper
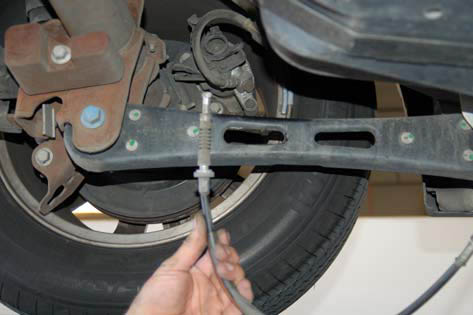
Pull cable through control arm

