FREE 1 to 3-Day Delivery on Orders $119+ Details
Best Sellers


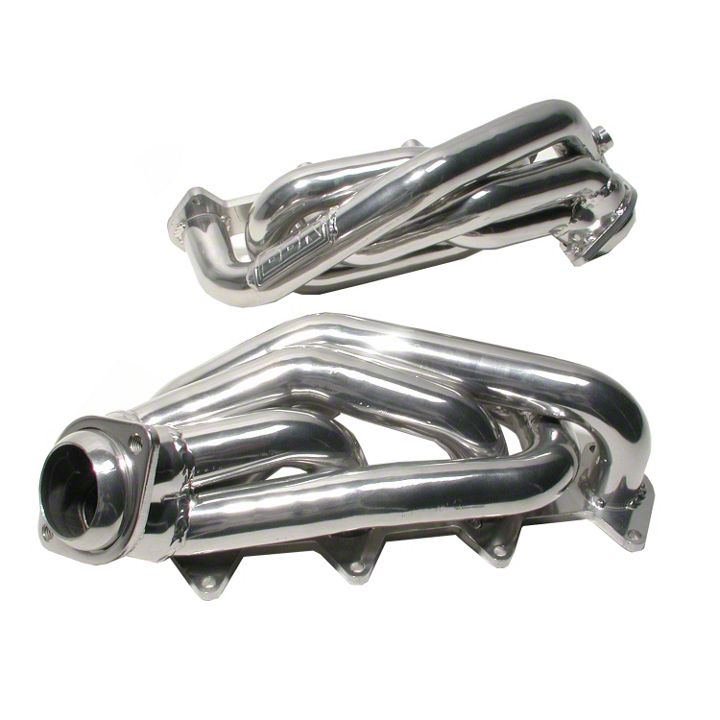
How to install BBK Ceramic Tuned Length Shorty Headers on your 2005-2010 GT Mustang
Installation Time
1 days
Tools Required
- Jack
- stands
- 8mm, 13mm, & 22 mm open end wrenches
- ratchet
- swivel
- extensions
- 13 mm, & 15mm deep sockets
- small flat screwdriver 7/8" open end.
Shop Parts in this Guide
Installation
ALWAYS USE EXTREME CAUTION WHEN WORKING UNDERNEATH A VEHICLE. USE STURDY JACK STANDS PLACED ON A HARD LEVEL SURFACE. ALWAYS WEAR PROTECTIVE EYE WEAR
Included in this kit: Headers, gaskets, header bolts, collector studs, washers, lock washers, and nuts.
Step 1 Disconnect (–) negative battery terminal.
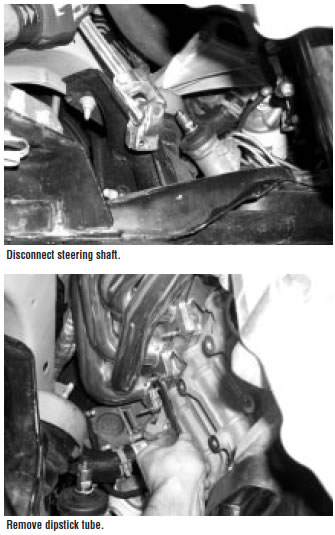
Step 2 Remove the bolt that secures the dipstick tube to the driver side cylinder head and pull the dipstick tube straight up to remove it from the engine.
Step 3 Lift the vehicle as high as possible with jack and support with stands.
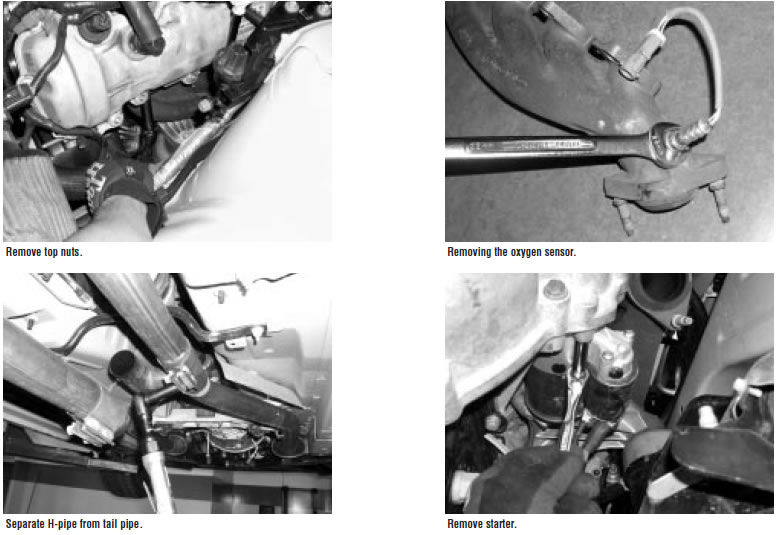
Step 4 Unplug all oxygen sensors.
Step 5 Separate the cat-back system by loosening the 2 nuts on each band clamp and prying the locking tabs up with a small screwdriver while sliding the clamp towards the rear of the car.
Step 6 Unbolt stock H-pipe from collectors and remove the H-pipe from the car.
Driver Side
Step 7 Remove the bolts from the top and bottom of the steering shaft and remove the shaft.
You may find more working space by removing the motor mounts from the engine by removing the nuts that secure the mounts to the K-member and carefully jacking the motor up and supporting it with a block of wood, then removing the fasteners that attach the mounts to the engine block. DO NOT ATTEMPT TO LIFT THE ENGINE BY JACKING UNDER THE OIL PAN!
Step 8 Remove the front driver side sensor from the manifold.
Step 9 Remove the stock exhaust manifold and gasket. (Some of the manifold bolts are easier to access while working under the hood).
Step 10 Install the oxygen sensor into the BBK header.
Step 11 Install BBK header and supplied gasket.
NOTE: On some applications it may be easier to re-use some of the original stud type hardware.
Step 12 Insert and finger tighten the supplied collector studs.
Step 13 Reinstall motor mount and the dipstick tube.
Passenger side
Step 14 Unbolt and remove starter from bell housing.
Step 15 Remove motor mount from block if needed.
Step 16 Remove stock exhaust manifold and gasket.
Step 17 Install BBK header and supplied gasket.
Step 18 Insert and finger tighten the supplied collector studs.
Step 19 Re-install motor mount and starter.
Step 20 Lower motor mounts onto their mounting studs and tighten nuts.
Step 21 Re-install the steering shaft.
Step 22 Re-install H-pipe using supplied washers, lock washers and nuts at collectors.
Step 23 Re-connect the oxygen sensors.
Step 24 Re-connect negative battery terminal.
After driving the car for a few hours it’s always a good idea to check and re-tighten the header bolts.