 FREE 1 to 3-Day Delivery on Orders $119+ Details
Best Sellers


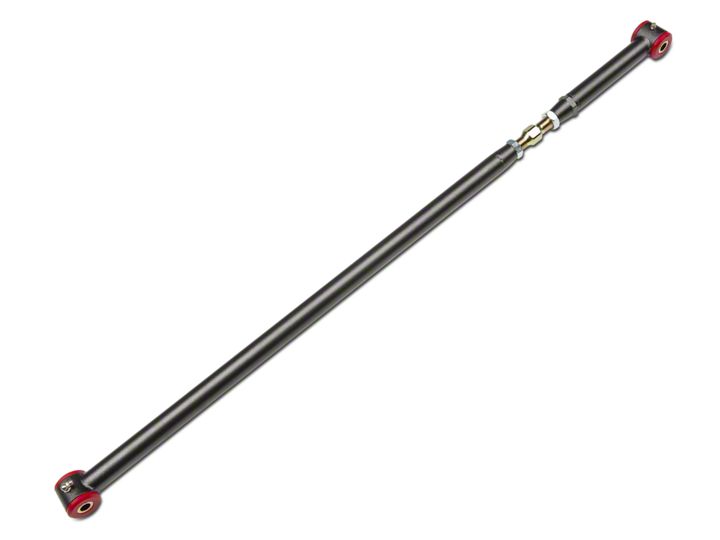
How to Install a BMR Adjustable Panhard Bar on your 2005-2013 Mustang
Installation Time
1 hours
Tools Required
- Floor Jack
- Jack Stands (2)
- 18mm socket and socket wrench (prefer ½” wrench)
- Torque Wrench
- Adjustable Wrench
- Grease Gun / Chassis Lube
- Plumb Bob
- Tape Measure
Shop Parts in this Guide
Required Tools and Materials:
• Floor jack
• Jack stands (2)
• 18mm socket and socket wrench (prefer ½” wrench)
• Torque wrench
• Adjustable wrench
• Grease gun / chassis lube
• Plumb bob
• Tape measure
Lifting Vehicle:
1. Ensure vehicle is on flat level surface.
2. Lift rear of vehicle carefully by placing jack under differential.
3. Support vehicle using jack stands in the factory recommended lift points in front of each rear wheel. Do not support by axels.
4. Remove jack allowing rear suspension to unload.
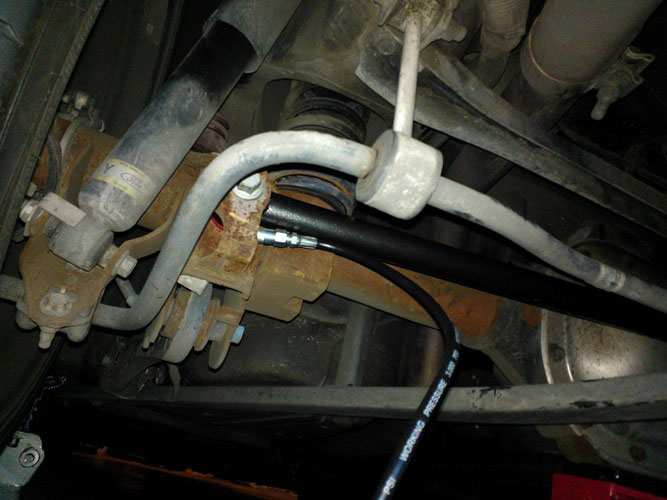
Removal:
1. Optional: Removal of the rear wheels will allow easier access to mounting bolts, but is not required.
2. Begin on the driver’s side by locating the mounting bolt near the base of the shock cylinder.
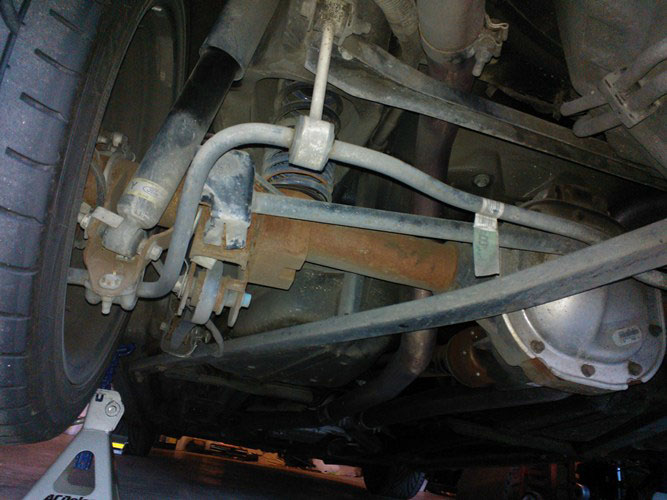
3. The mounting bolt may be concealed behind a plastic splash shield. Lift the shield first from the front, and then gently pry up from the rear to remove.
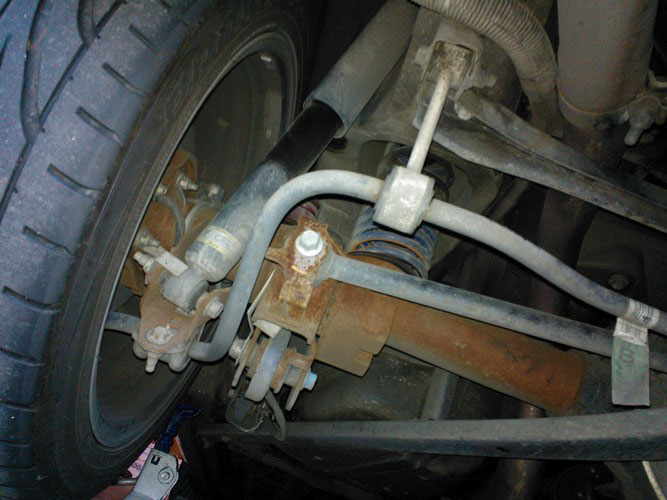
4. Using an 18mm socket loosen and remove the bolt. Save the bolt and nut (with metal flange) you will reuse these.
5. Next move to the passenger’s side.
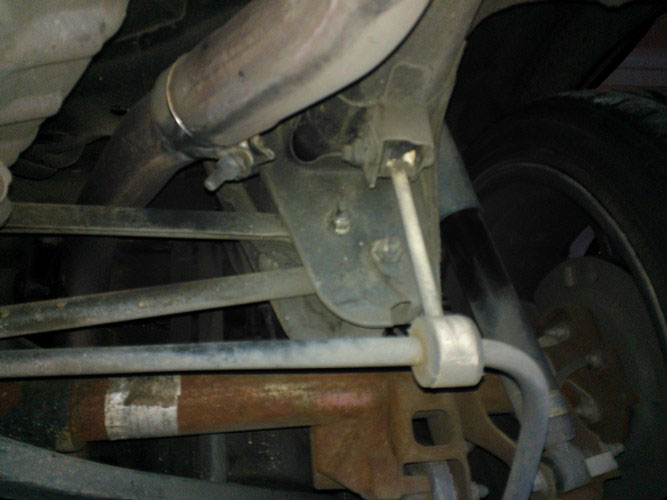
6. Using the 18mm socket loosen the mounting bolt from the rear side of the bracket.
Tip: You may need to loosen the panhard reinforcement bar mounting bolt to release the panhard bar for removal. Loosen the bolt from the front side of the mounting bracket, but do not remove.
7. The panhard bar is now ready for removal.
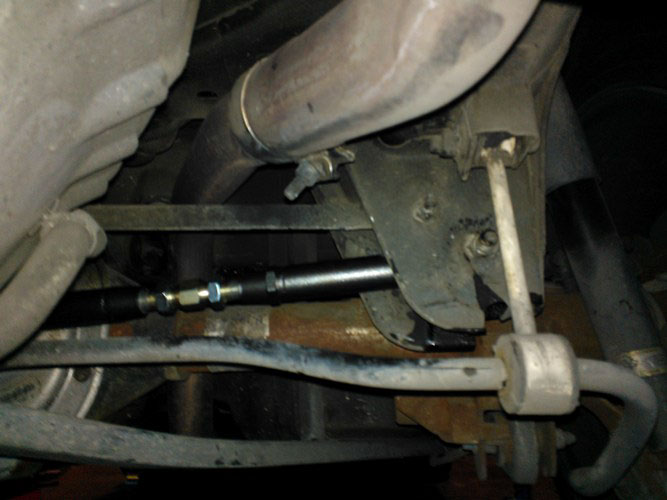
Installation:
1. Adjust the panhard bar length to approximately the same length as the factory bar

2. Hand tighten lock nuts ensuring that the grease fittings are on the same side.
3. Notice which side of the bar has the elbow grease fitting (opposite side as the adjustment set nuts). This side must go on the driver’s side to enable access to grease fitting without removing the bar.
4. Place the panhard bar into the factory brackets with grease fittings pointing downward.
5. Install bolts / nuts as they were before removal.
6. Tighten bolts to 129 ft/lb using a calibrated torque wrench.
7. Note: If you loosened the panhard reinforcement bar, be sure to retighten the bolt.
Final Adjustment:
1. Place jack under the rear differential and lift the vehicle off of the jack stands.
2. Remove the jack stands and lower to the ground.
3. Tip: For lowered vehicles place 2x10’s under the rear wheels to allow room to work under the vehicle.
4. Using a grease gun; apply 3 pumps to each grease fitting.
5. Using a plumb bob, hold the string against the fender allowing the bob to hang near the center of the tire. Measure the distance between the string and the tire.
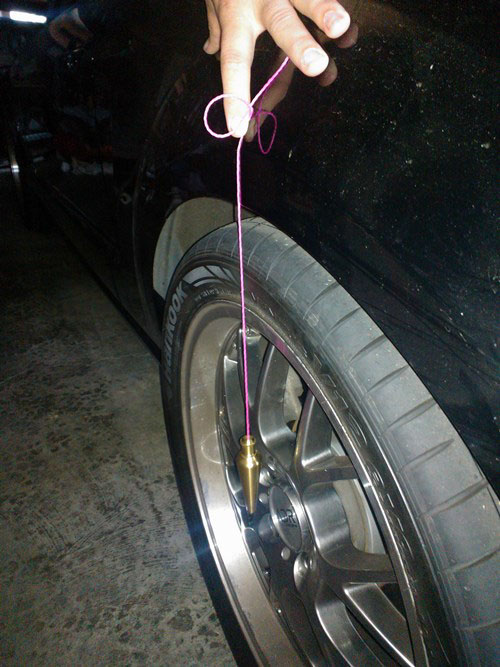
6. Repeat for the other tire.
7. If the difference between the two sides is greater than ¼” adjust the bar to compensate.
8. Using the adjustable wrench, turn the adjustment coupling towards the front of the vehicle to shorten the bar and shift the axel towards the passenger side. Reverse the direction to shift to the driver’s side.
9. Repeat 4-7 until wheels are within ¼”.
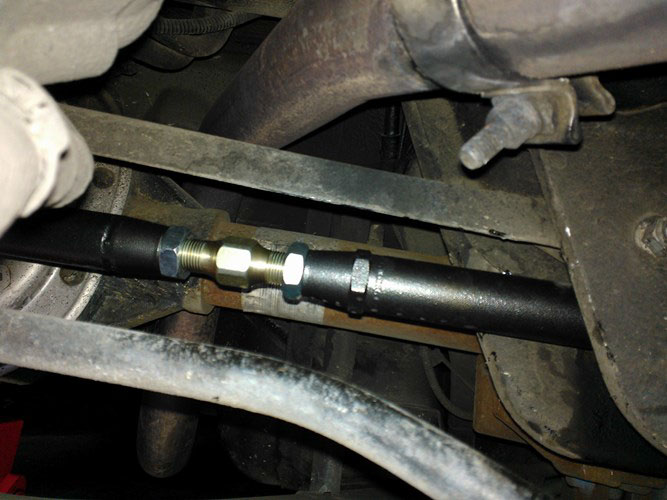
10. Tighten down the adjustment set nuts.
11. Use Loc-tight on the set nuts to prevent them from walking.
Installation Instructions written by AmericanMuscle customer Brent NiezGocki 9/10/2012
