 FREE 1 to 3-Day Delivery on Orders $119+ Details
Best Sellers


How to Install MGP Caliper Covers - Front and Rear on Your '05-'10 Mustang
Installation Time
1 hours
Tools Required
- Supplied (4) Front and (4) Rear Clips
- 3/8" Wrench or Socket
- Pliers or Wire Cutters
- Safety Goggles
- Torque wrench
- .013 Feeler Gauge or Business Card
Shop Parts in this Guide
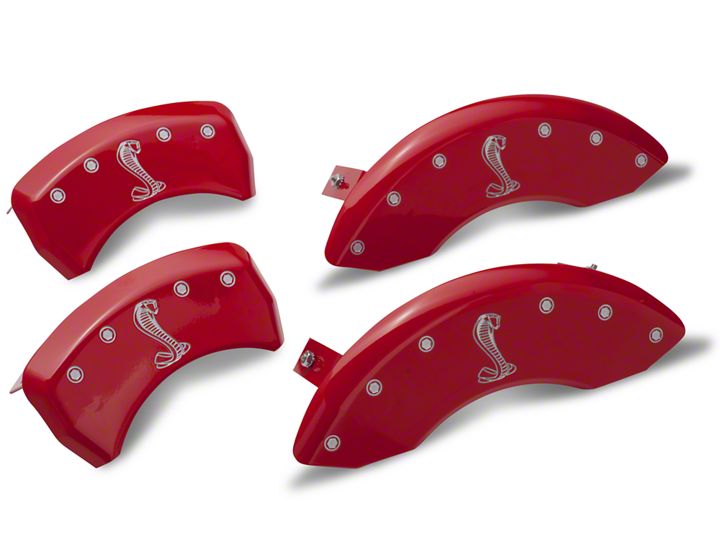
- MGP Brake Caliper Covers with Cobra Logo; Red; Front and Rear (05-09 Mustang GT, V6)
- MGP Brake Caliper Covers with Pony Tri-Bar Logo; Red; Front and Rear (05-09 Mustang GT, V6)
- MGP Brake Caliper Covers with GT Logo; Red; Front and Rear (05-09 Mustang GT, V6)
- MGP Brake Caliper Covers; Red; Front and Rear (05-09 Mustang GT, V6)
- MGP Brake Caliper Covers with Cobra Logo; Black; Front and Rear (05-09 Mustang GT, V6)
- MGP Brake Caliper Covers with Pony Tri-Bar Logo; Black; Front and Rear (05-09 Mustang GT, V6)
- MGP Brake Caliper Covers with GT Logo; Black; Front and Rear (05-09 Mustang GT, V6)
- MGP Brake Caliper Covers; Black; Front and Rear (05-09 Mustang GT, V6)
Installation
NOTE: When using these Caliper covers with some aftermarket wheels, wheel spacers may be required to ensure adequate clearance between the caliper cover and wheel. American Muscle has a great selection of wheel spacers.
Installation Instructions:
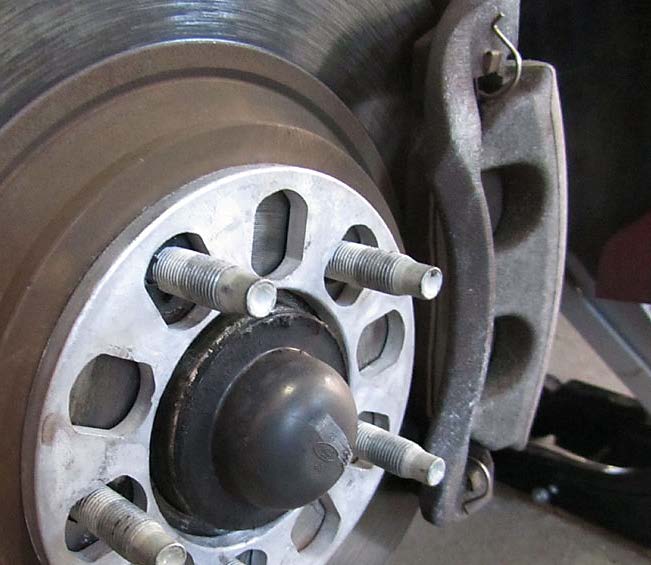
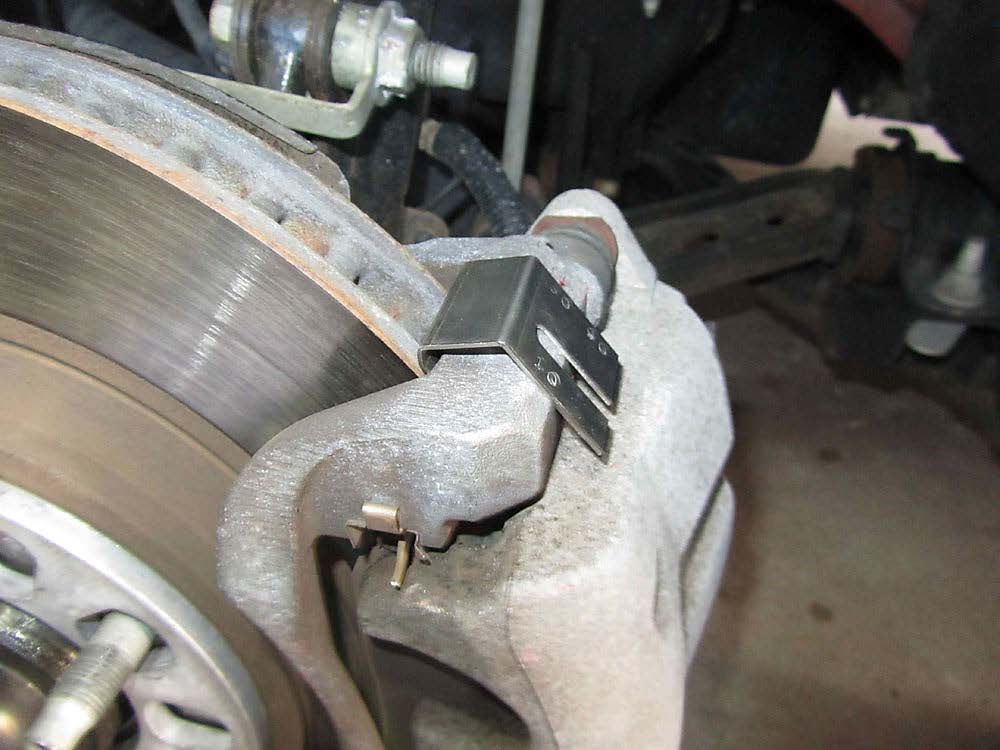
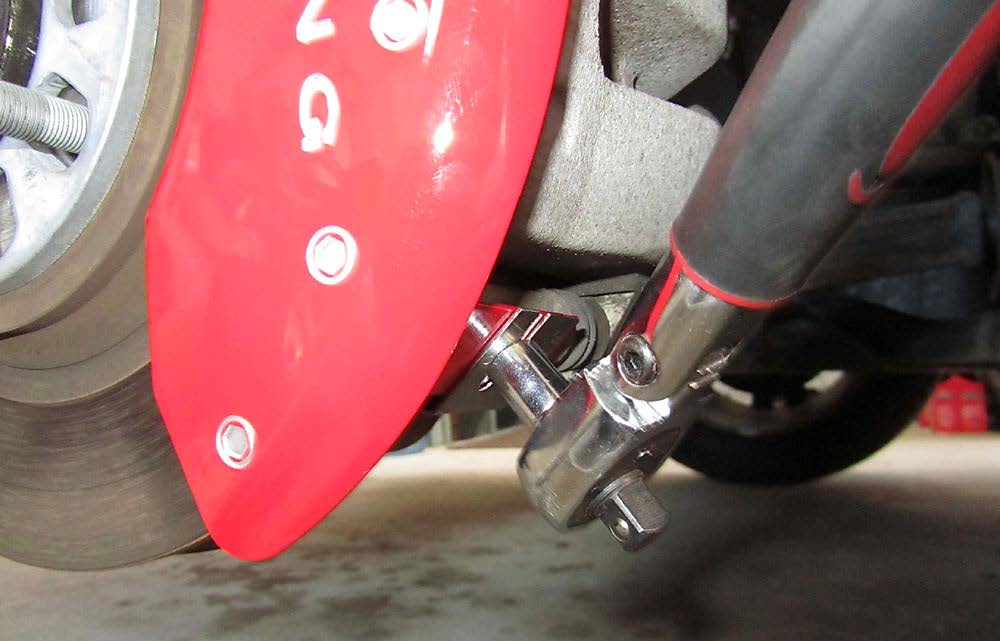
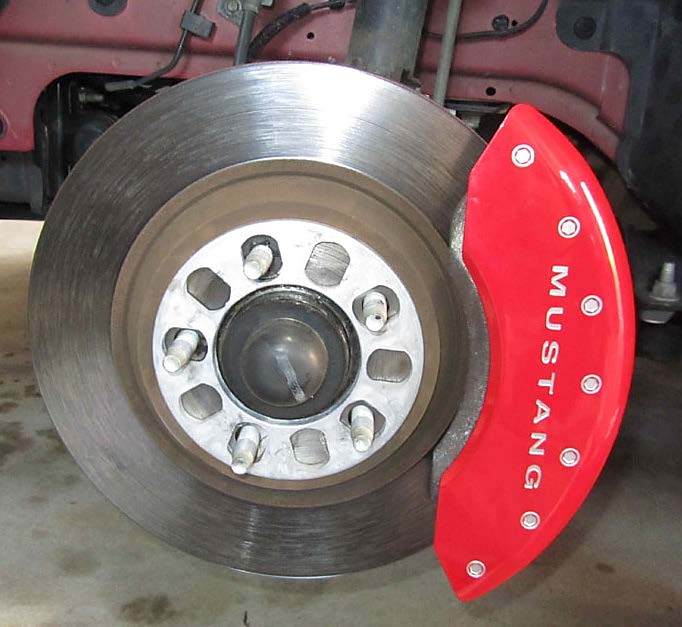
1. Loosen lug nuts, jack up car, and remove front tire. If necessary, install wheel spacers at this time, as show in the picture above. Also at this time, locate possible factory brake pad clips that are on some models. This clip can be seen in the top right portion of the above picture. The clips were factory on my front brake pads while my rear brake pads did not include these clips.
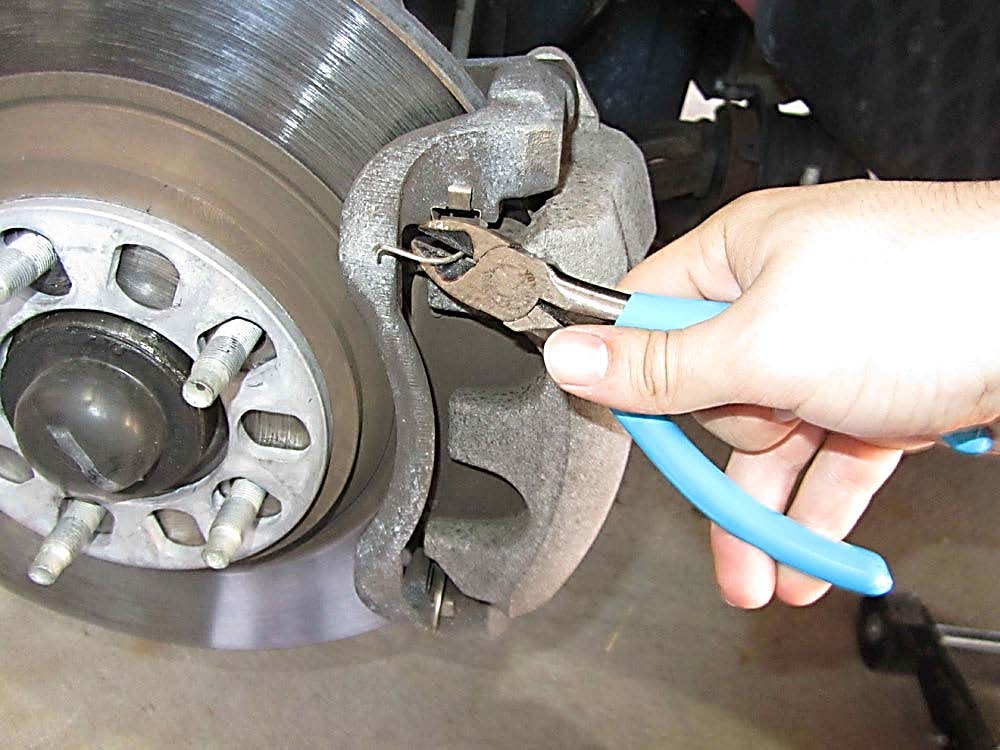
2. While wearing safety goggles and using wire cutters, clip off any brake pad clips. These clips interfere with the caliper covers and cause them to push closer to the wheels. You may also use pliers to bend and flatten the clips instead of clipping them off.
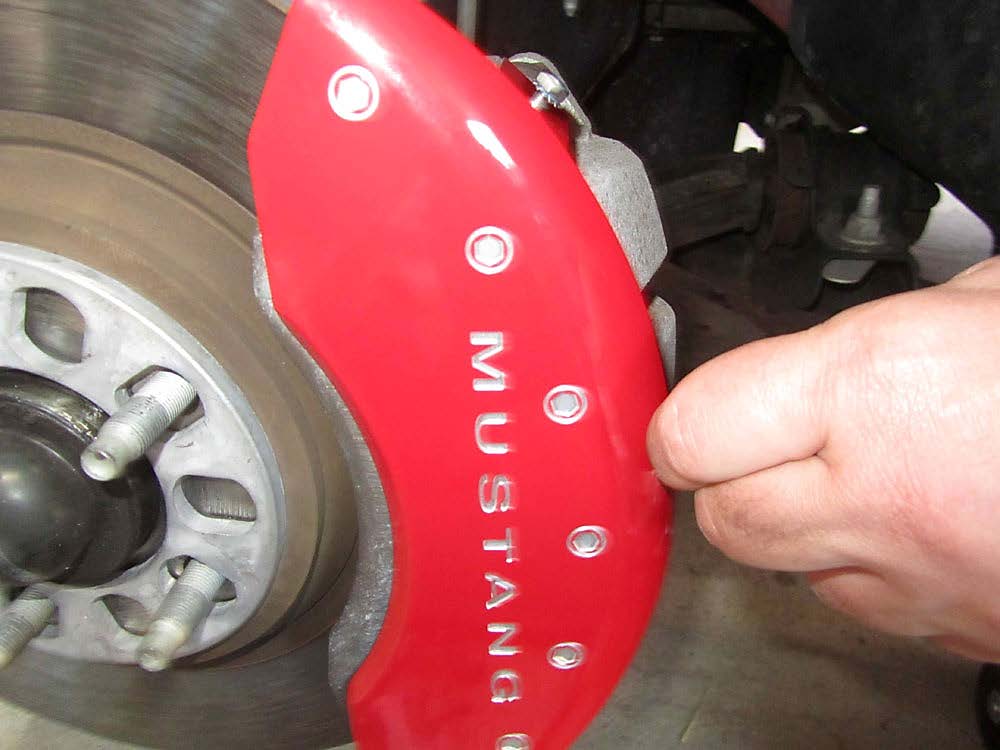
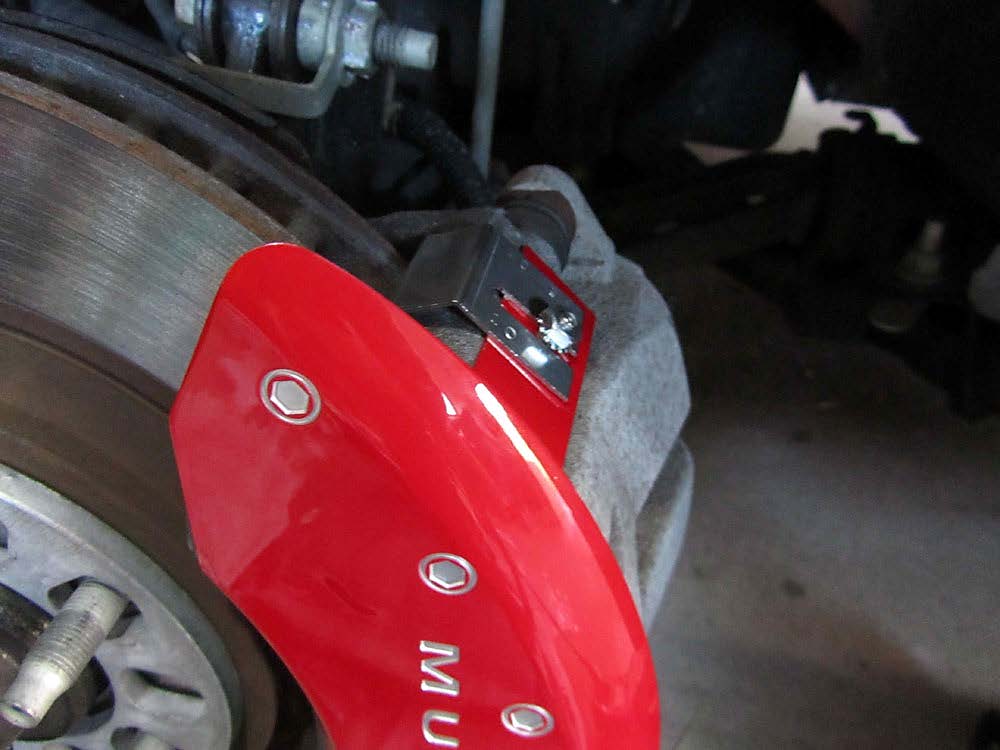
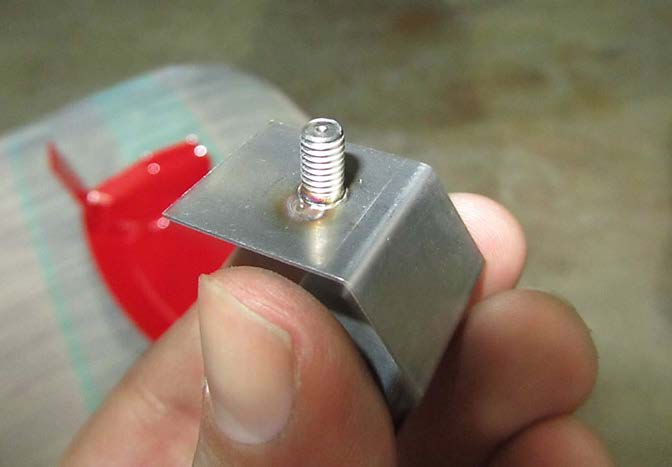
3. Working on the front caliper, test fit the caliper cover onto the caliper to make sure that everything lines up properly. Loosen the lock nuts on the upper and lower screws to assist in later steps. Remove cover from caliper and test fit the clips used to hold the cover in place onto the caliper.
4. The front clips are slot-type clips, so the top clip should have a slot that is toward the rest of the brake. Place top clip in between the brake rotor and caliper.
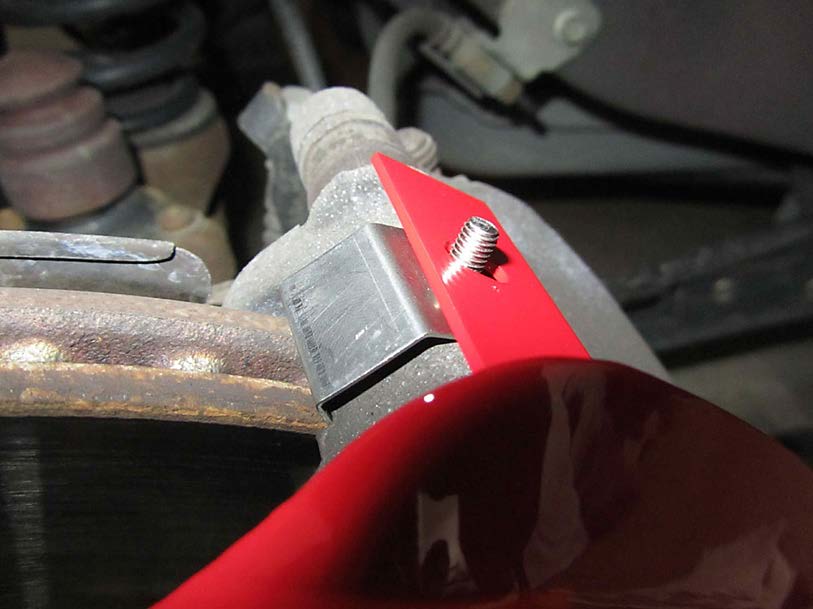
5. Next, keep top clip in place while putting caliper cover back on caliper. Bend the end of the clip upwards a tiny bit and slide the caliper cover underneath the clip. The slot of the clip and the screw on the caliper cover should align.
6. Tighten locknut with a 3/8” wrench or socket to about 1/4 turn past finger-tight, or torque at 25 in-lb. NOTE: Do not over tighten.
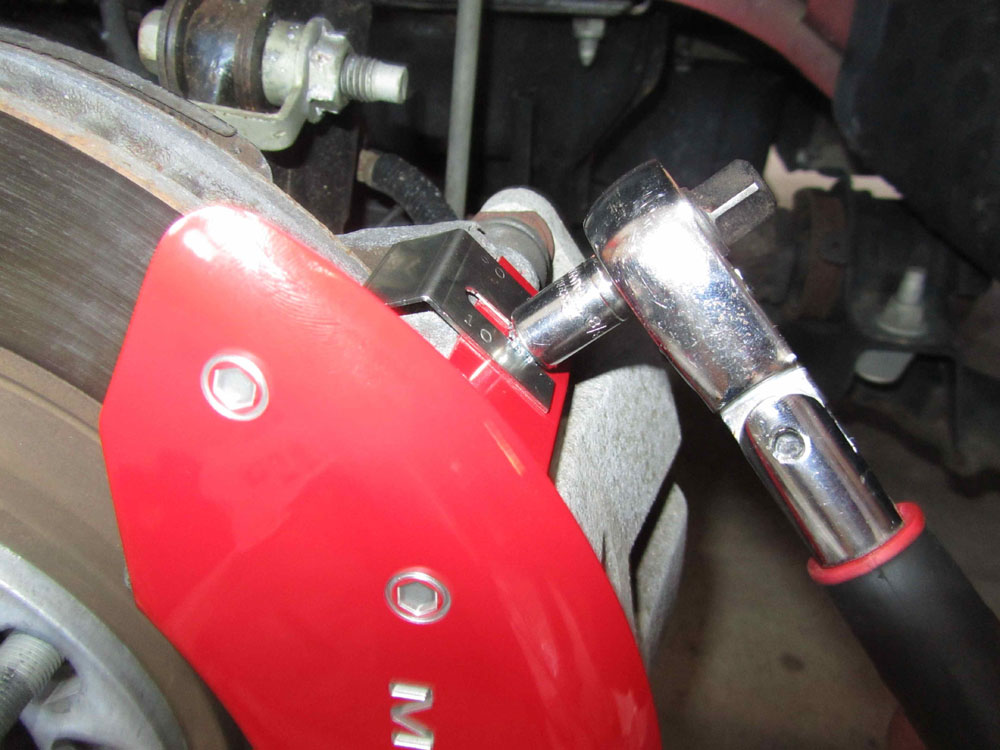
7. Insert bottom clip in between brake rotor and caliper (in the same manner as the top clip) while sliding the end of the clip over the caliper cover. Tighten the lock nut to 25 in-lbs.
8. Using a feeler gauge or business card, check that there is at least a .013 inch (.32 mm) gap in between the clip and brake rotor. There should be enough room to slide a strip of the business card paper in and out of the gap without the card sticking.
9. Re-install wheel and tighten lug nuts per manufacturer specifications. Before lowering the jack, rotate wheel and make sure that there is no rubbing against the caliper cover. Repeat steps 1-9 for the other front caliper cover at this time.
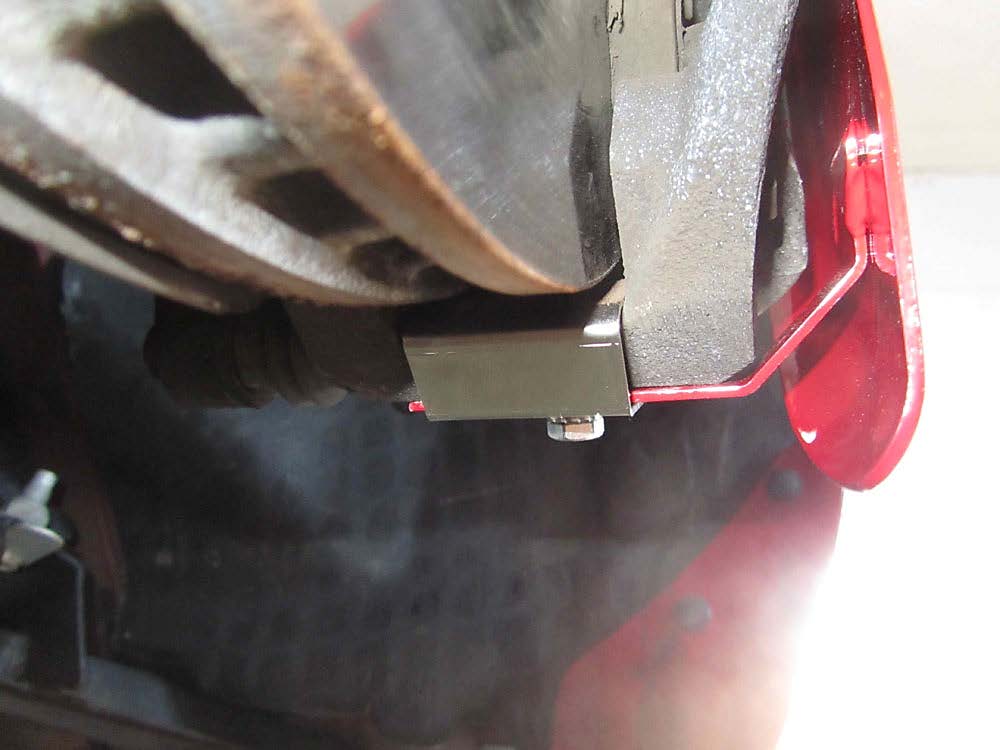
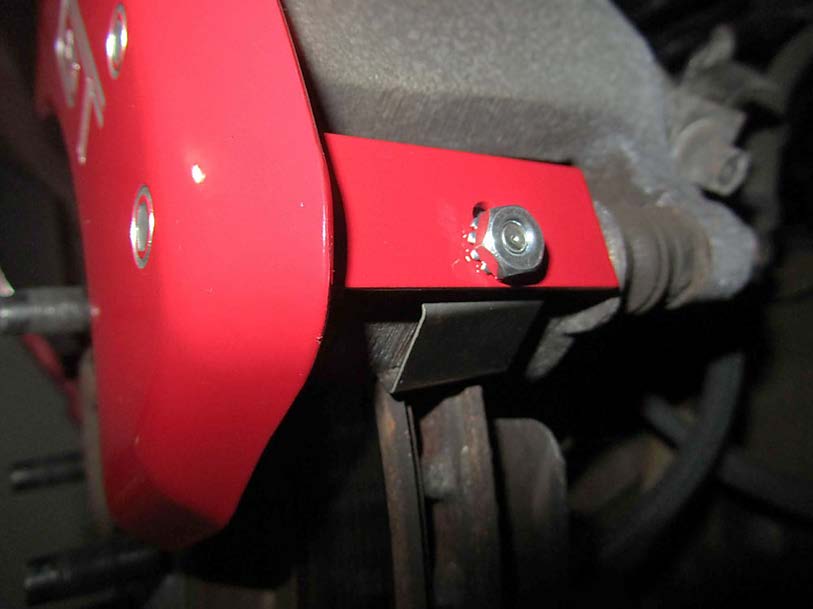
10. Next, install the rear caliper covers. When installing the rear caliper covers, follow steps 1-8 for both rear calipers in exactly the same manor, except for step 5. Step 5 is different due to the way the rear clips connect to the caliper covers. The rear clips are stud-type while the front clips are slot-type.
11. Instead of sliding the caliper cover under the clip as in the front caliper cover install, the caliper cover fits on top of the stud-type clip.
12. Tighten lock nuts to 25 in-lbs on the rear caliper covers. Check that there is at least a .013 inch (.32 mm) gap in between the clip and brake rotor.
13. Re-install wheel and tighten lug nuts per manufacturer specifications. Before lowering the jack, rotate wheel and make sure that there is no rubbing against the caliper cover. Repeat for the other rear caliper cover at this time.
14. Installation of all (4) caliper covers is now complete.
Installation Instructions written by AmericanMuscle customer Mark Pennio 4.20.12
