FREE 1 to 3-Day Delivery on Orders $119+ Details
Best Sellers


How to Install Canton Aluminum Expansion Tank on your Mustang
Installation Time
1 hours
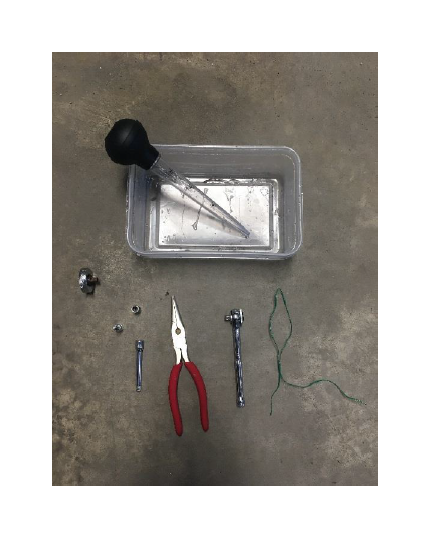
Tools Required
- Pliers (For spring hose clamp
- #7 socket and thumb ratchet (For worm hose clamp) (Can also use flat blade screwdriver)
- Ratchet, socket, and extension (For tank bolts)
- Piece of wire or string (To hold hose)
- Turkey baster (To remove fluid)
- Quart size container (To hold fluid)
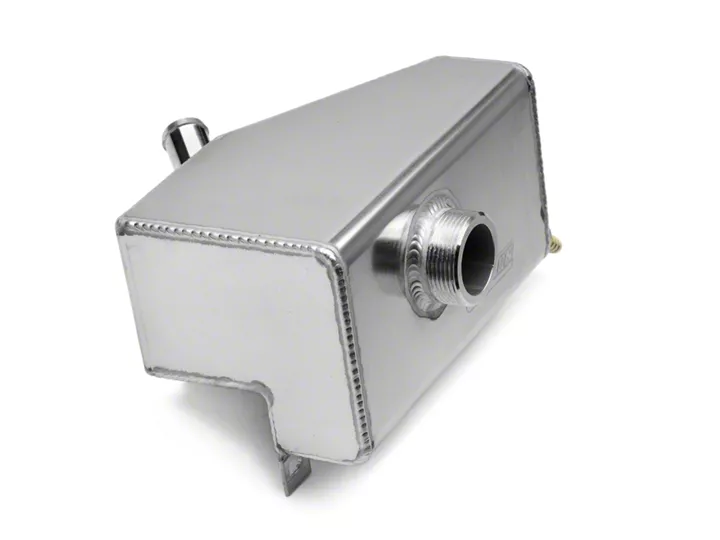
Shop Parts in this Guide
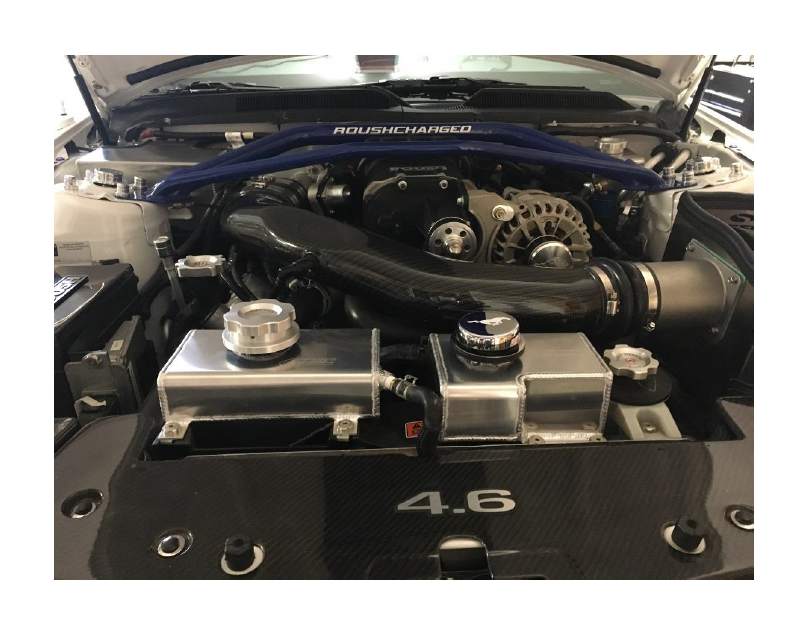
Before:
Tank Removal
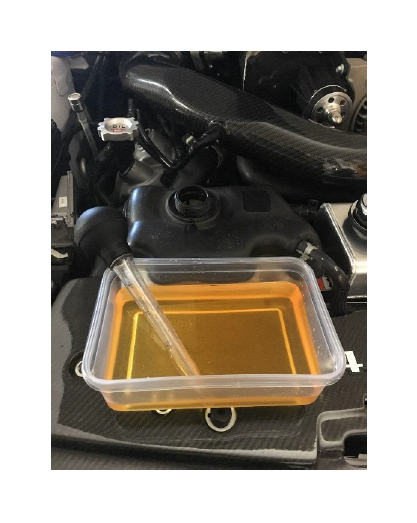
Use turkey baster to drain tank into quart container
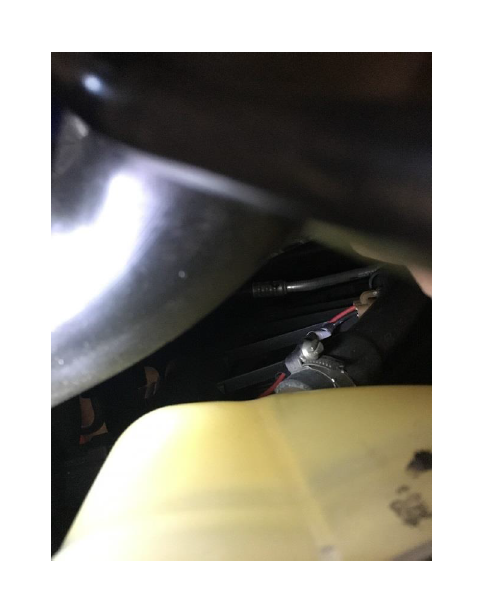
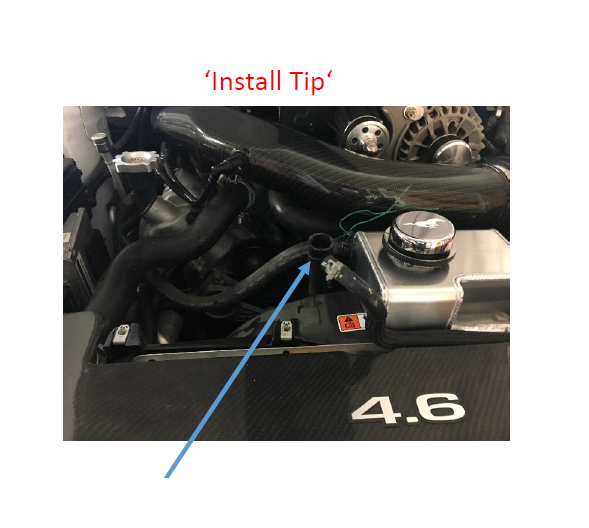
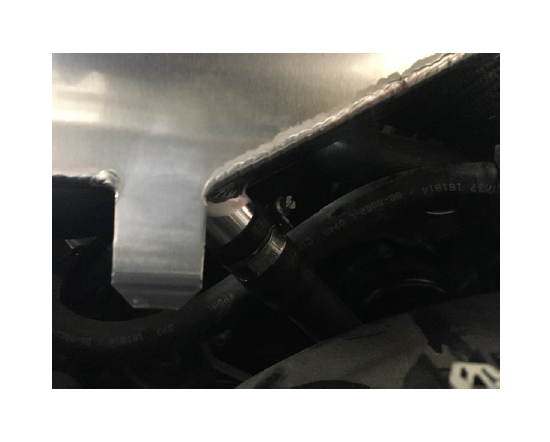
Locate hose connecting to the rear lower left of the tank.
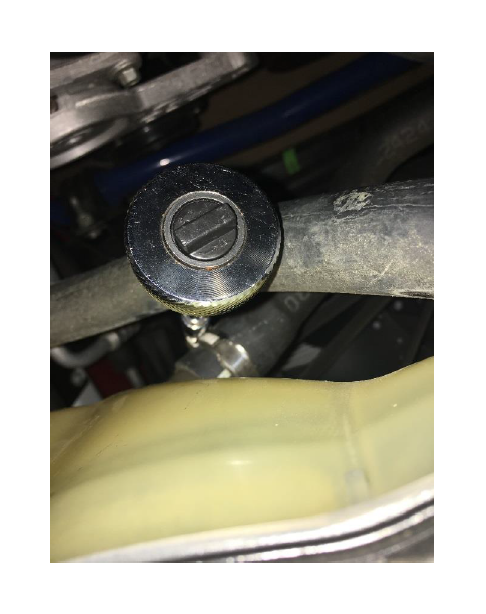
Use the 7mm socket, extension and ratchet To loosen the worm clamp. Slide clamp away from tank.

Use pliers to squeeze and slide clamp from hose at the top of the tank. Pull hose off of tank. It should slide easily.
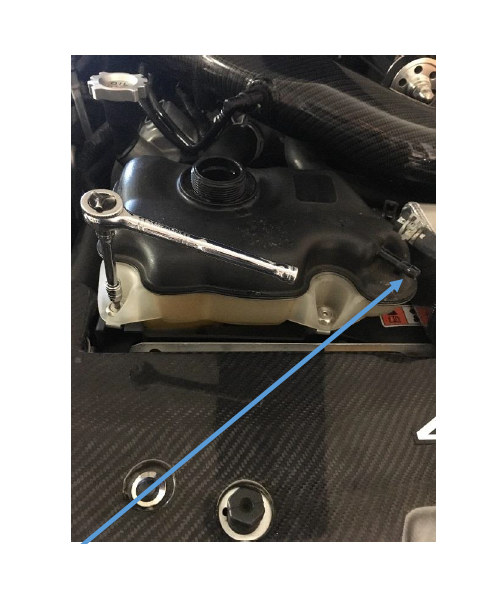
Use socket and extension to remove two bolts holding tank to car.

The tank will lift allowing more room to pull off the rear lower hose. The tank can now be removed from the car.
Use wire or string and tie hose to keep it from falling and spilling fluid onto floor and car
New Tank Installation
• Before securing new tank to the car, remove wire or string and connect hose to the lower rear of tank. Slide and tighten the worm clamp.
• Set the new tank in place and tighten the two bolts to the tank
• Connect the top hose and slide the clamp into place.
• Use the turkey baster and fill the tank with every drop.
• Use the old cap and tighten to one click.
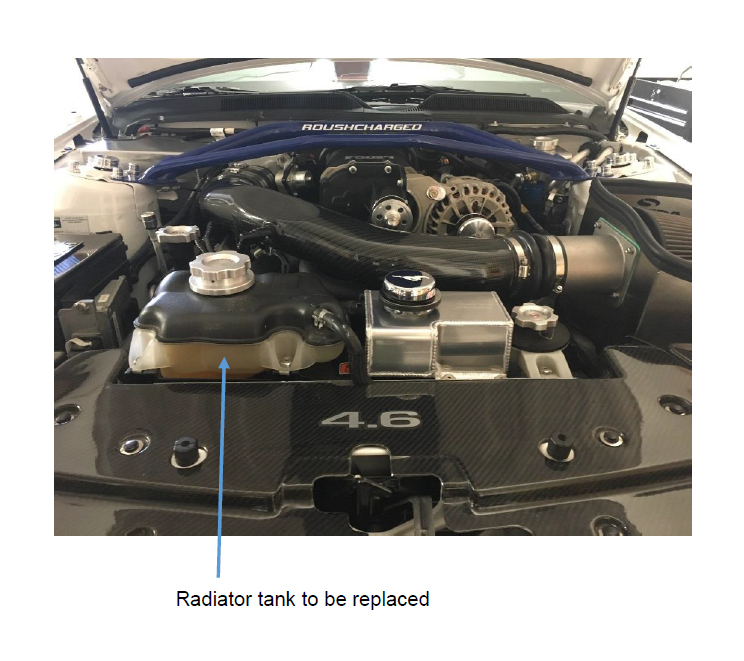
After: