 FREE 1 to 3-Day Delivery on Orders $119+ Details
Best Sellers


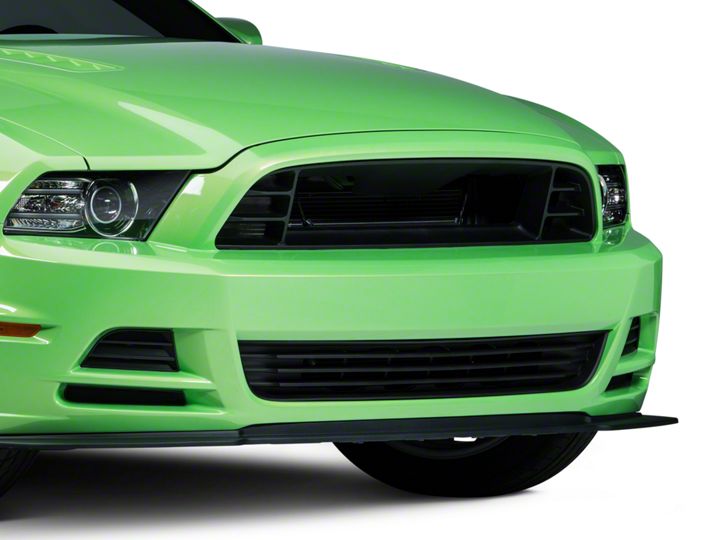
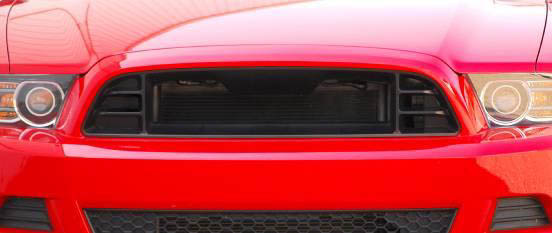
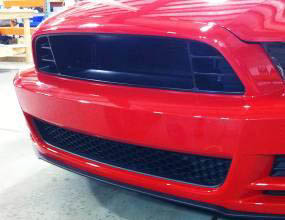
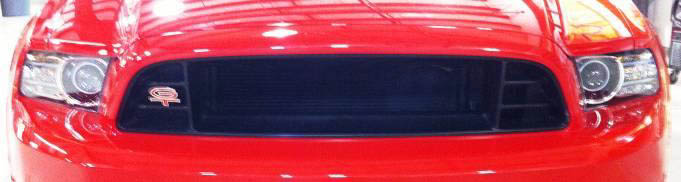
How to Install a CDC Performance Grille on your 2013-2014 Mustang
Installation Time
1 hours
Tools Required
- Close Quarters Hacksaw (or hacksaw blade)
- Side Cutters (or similar)
- Masking Tape
- Electrical Tape
- Black Spray Paint (flat or low-gloss)
- Detail Spray and Microfiber Cloth
Shop Parts in this Guide

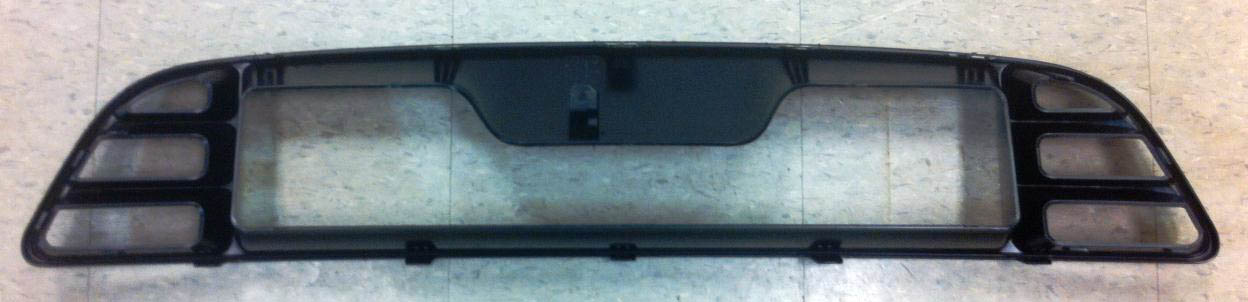
2013 CDC Performance Upper Grille Instructions
CDC# 1311-7000-01
Note: Read instructions before starting installation. Permanent modifications are required for this installation. Removal of factory Fog Lights is required for this installation.
Kit Components: CDC Part#
► 1 - Replacement Grille 1311-2000-01
► 1 – Push Pin 65003
► 2 - Zip Ties 116053
► 1 – Pack of Isopropyl Alcohol 950006
► 1 – Pack of 3M Adhesion Promoter 950007
► 1 – Installation Instructions CD4II3CZ
Tools Required:
► Close quarters hacksaw (or hacksaw blade)
► Side Cutters (or similar)
► Masking Tape
► Electrical Tape
► Black Spray Paint (flat or low gloss)
► Detail Spray and Micro Fiber Cloth
Attention: Failure to follow instructions may result in loss of this product. Classic Design Concepts is not responsible for improper installation.
Installation Procedure:
1. Mask off the top surface of front fascia below the Grille to protect paint.
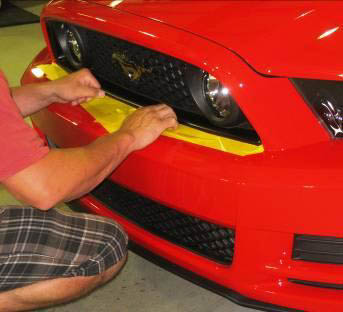
2. Remove factory Grille. Firmly grasp Grille just inboard of the Fog lights. In a swift motion, pull grille to dislodge the surrounding clips.

3. Remove Fog Lights. Using a Close quarter Hacksaw (or blade) cut the molded bracketry that hold the lights in place. After the bracketry has been cut, disconnect the wiring.
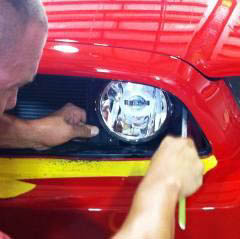
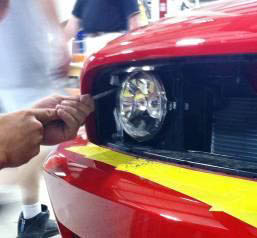
4. Secure wiring harness. Wrap the ends of the wiring connectors with electrical tape to keep out debris. Fold the harness and secure with the provided Zip Ties as shown in pics.

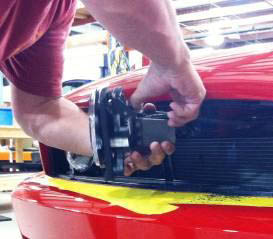
5. Remove center bar. Using same saw as step 3, remove the center bar.
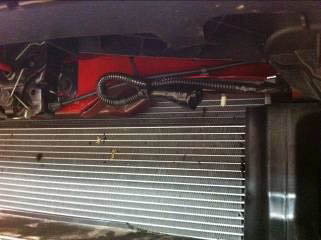
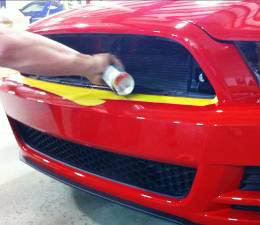
6. “Black Out” the radiator. We suggest using a black self etching primer to black out the radiator for best performance. A flat or low gloss spray paint will work too.
7. Clean the grille surround area.
8. Install your CDC Performance Grille. Simply press Grille into location. Make sure all molded fasteners properly engage.
9. Install Push Pin. Press Push Pin through the tab on the back side of the Grille into the hole on the Driver side of the Hood Latch. Refer to images below.
Note: Picture taken from back side of Performance Grille to show Push Pin location.
Note: Close up photo of hood latch to show Push Pin location.

10. OPTIONAL. Install the Badge Bracket. Clean between the Grille Bars with the provided Alcohol and allow to dry. Apply the provided Adhesion Promoter and allow to dry. Peal the backing from the 3M tape and install Badge Bracket in desired location. NOTE: CDC provides a universal style Badge Bracket that is intended to be placed between the Grille Bars on the Passenger side of the Grille. CDC does NOT provide the Badge, only the Badge Bracket. There are several Badges on the market that will fit in this location.
Thank you for choosing Classic Design Concepts for your restyling needs. If you have any questions or concerns regarding installation please contact [email protected]
or call 866-624-7997.
