 FREE 1 to 3-Day Delivery on Orders $119+ Details
Best Sellers


How To Install a Chrome Radiator Hose Kit on a 1996 – 2000 Mustang GT
Installation Time
2 hours
Tools Required
- Flat Blade Screwdriver
- Large Clean Oil Pan
- Engine Coolant
- Water Hose
- Pliers
- 10 mm socket and socket wrench
- A jack and jack stands or a set of automotive ramps
- Coolant System Flush (optional)
- Replacement Thermostat (optional)
- Coolant Additive (optional)

1. Jack up the car high enough to be able to get under it, or drive the car up on ramps and allow time for the engine to cool.
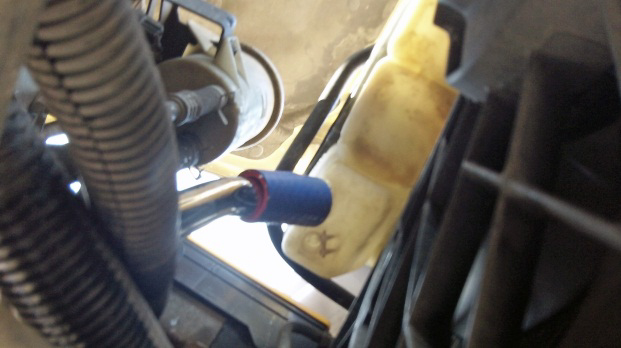
2. While the engine is cool and shut off, drain all coolant from the radiator. To drain the radiator, place your container under the drain valve of the radiator which is on the passenger side near the front bumper. Next, open the valve using the appropriate sized socket or screwdriver for your valve plug (this may vary from car to car).
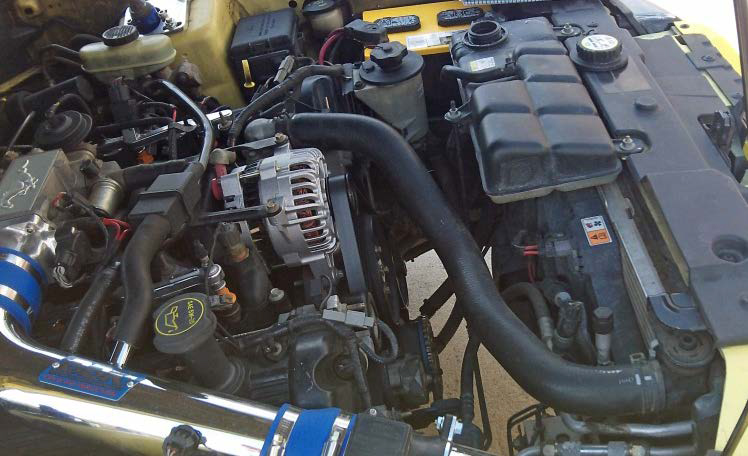
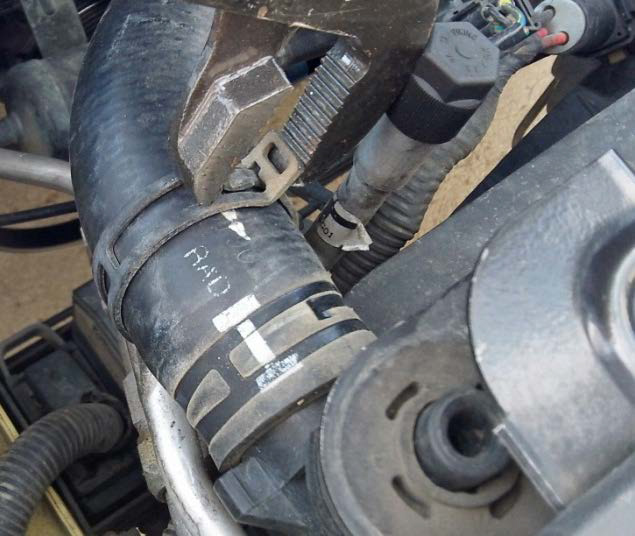
3. Remove the old radiator hoses by squeezing the factory clamps together with the pliers and sliding them back from the radiator or engine block. Then pull on the old hose to separate it from the radiator or engine block. There are two hoses being removed. An “S” shaped upper radiator hose that runs from the top of the radiator to the top of the engine compartment where the thermostat housing is located and a “T” shaped lower radiator hose that runs between the bottom of the radiator, the reservoir, and the driver’s side of the engine block.
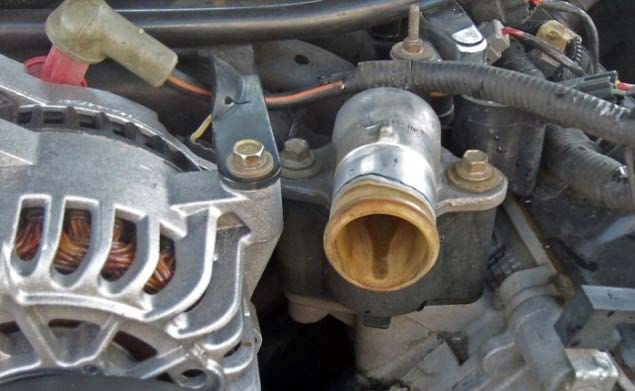
4. While the hoses are disconnected it’s a good idea to remove/replace the thermostat and wash out the engine block and radiator. You’ll need a 10 mm socket and driver to remove the two bolts that hold the thermostat housing in place. Once finished put the thermostat back and tighten the thermostat housing back into place. Also close the plug in the radiator.
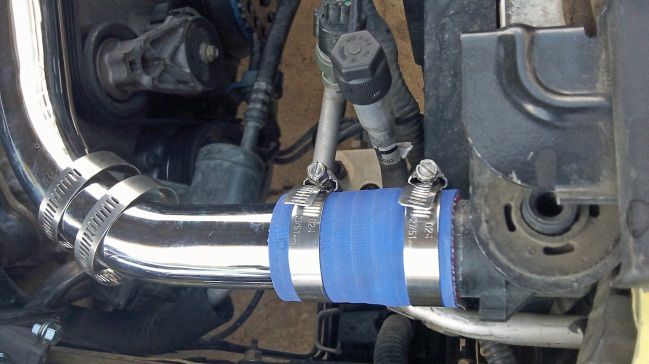
5. Slip the proper silicone hose connectors over the “S” pipe ends and slide them down until the end of the pipe is visible. Slide (4) of your new clamps into place on the pipe also. Position the pipe in place between the thermostat housing on the top of the engine block and the radiator inlet. The pipe should connect to the radiator at a 90 degree angle. If this isn’t the case, flip the pipe over. Once it is properly positioned, slide the silicone hose connector down over the radiator inlet so that it holds that end of the pipe in place. Then do the same with the other end of the pipe as shown. Once in place, slide the clamps in place and tighten them to finish mounting this pipe.
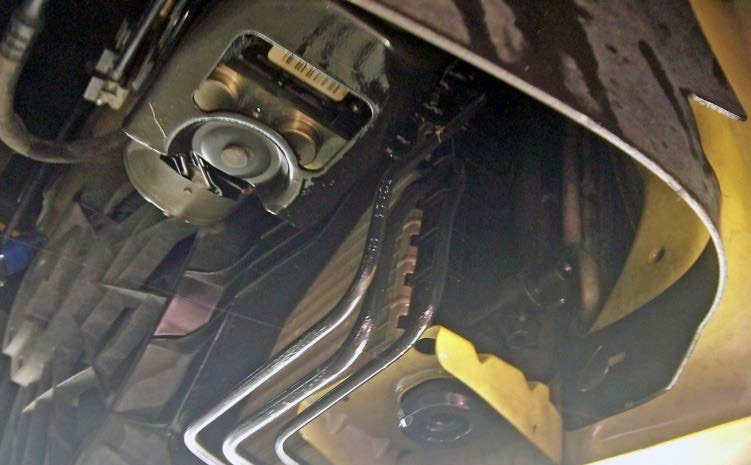
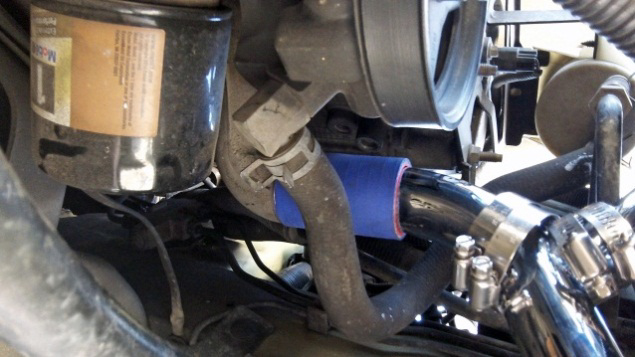
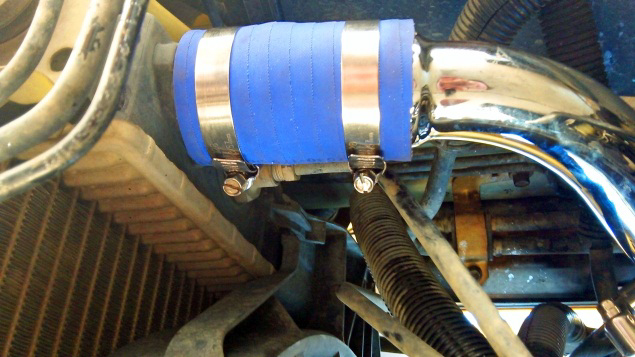
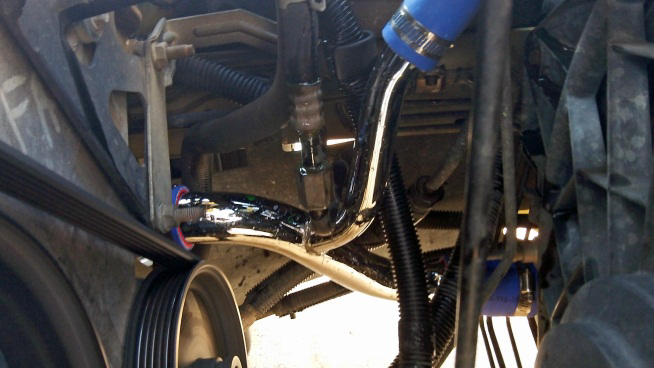
6. Next, put the corresponding silicon hose connectors and clamps on the “T” shaped lower radiator pipe. This one is a little trickier to position into place. It is easiest to install from under the car. Slide the hose connectors in place over the engine inlet and radiator outlet at the bottom of the engine compartment. Once those two are done, slide the hose connector over the coolant reservoir tube from the top side of the engine. Ensure that the pipe in fitted in place properly, and then tighten all 6 clamps on the connectors for the “T” pipe.
7. (Optional Step) Now is a great time to use the coolant system flush to dissolve and clean out any remaining rust, dirt, and other containments before filling the system with coolant again. Read and follow the instructions included on the flush solvent to properly do this.
8. Fill the reservoir with a 50/50 mixture of coolant and water. You may also want to include a coolant additive such as Lucas Super Coolant Additive or Mishimoto Liquid Chill Radiator Coolant Additive to further enhance and protect your engine cooling. Fill to the top of the reservoir with your coolant mixture and then start your engine. Let it run until the engine has reached normal running temperatures (can be seen on the temp gauge of the dashboard). Once the engine is hot, top off the reservoir to ensure that it’s full. Replace the radiator cap and ensure that’s it’s tightened until it clicks at least twice. Be careful while the engine is hot. The new chrome pipes do get hotter than your old rubber hoses. You can easily burn your arm or hands once the engine is at temperature.
9. Let your Mustang run for about 15 minutes or so and watch for any leaks from the hoses or the thermostat housing. Continue watching the areas around the blue silicone hose connectors over the next couple days when the car engine is cool for any seepage. If a clamp is loose, it may not leak when hot, but as I found, it can leak when it has sat cool for a while. They key is to watch. Once you’ve had them installed for a few days, if there’s no leakage, you should be ready to go, and looking good when you do!
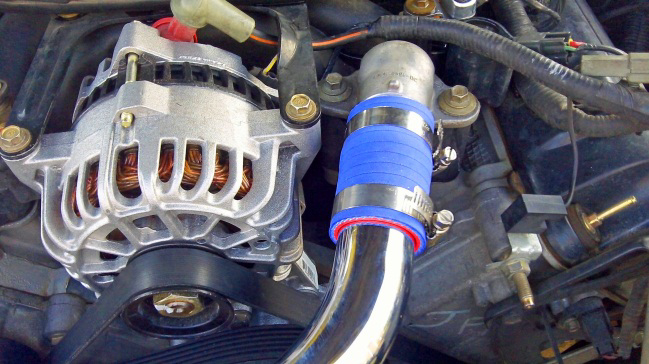
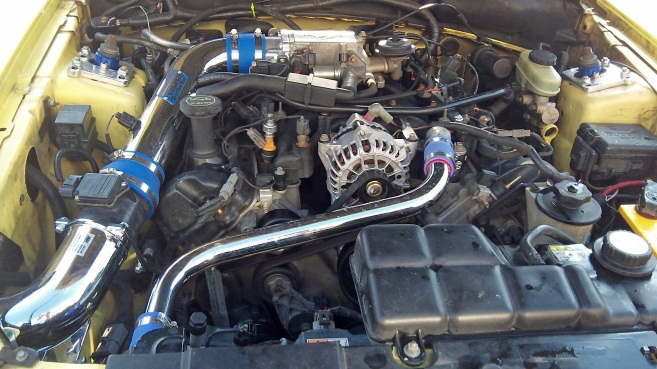
As you can see below, these pipes look great and do a great job of keeping your pony reliably cool. The BBK Cold Air Intake kit especially looks good with these chromed radiator hoses.
Installation instructions provided by AmericanMuscle customer Benjamin Olds 7.25.12
