FREE 1 to 3-Day Delivery on Orders $119+ Details
Best Sellers


How to Install C&L Supercharger Pulley - 3.00 Pulley on your Mustang
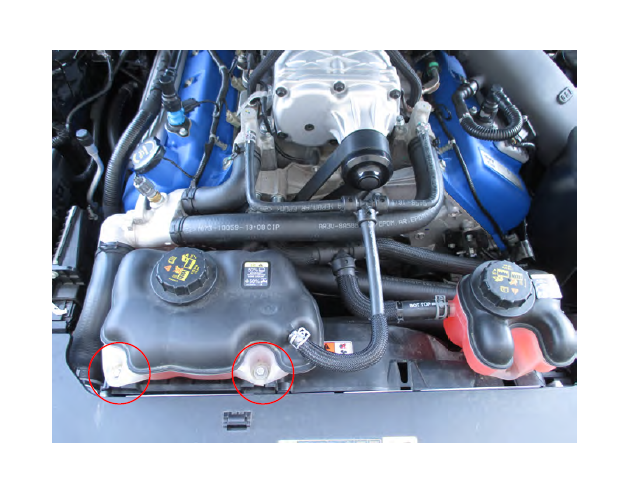
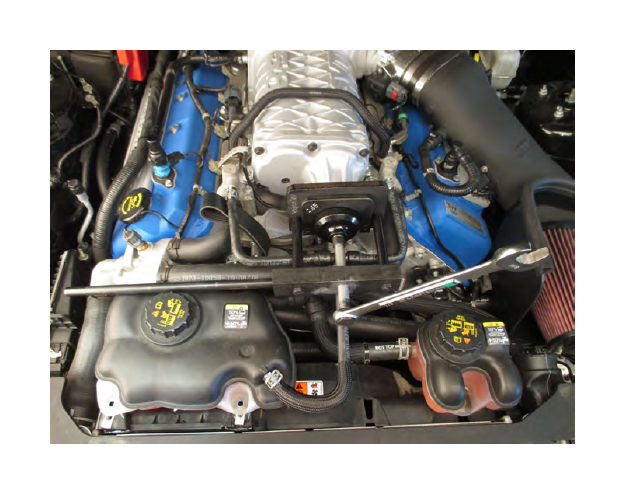
Step 1:
Remove the 10mm bolts holding the coolant overflow to the fan shroud. Move the overflow out of the way so that you can access the supercharger belt tensioner.
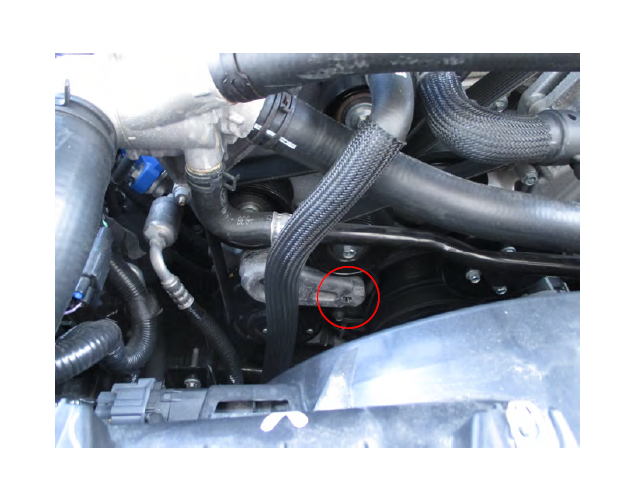
Step 2:
Using a 3/8” ratchet apply pressure on the belt tensioner so that you can remove the Super charger belt from the pulley. **Note: Just fold the belt out of the way, there is no need to remove it.
Removal
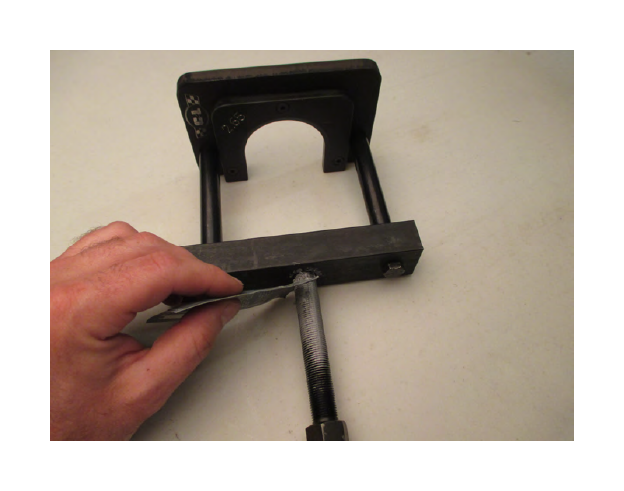
Step 3:
Using the supplied #10-24 screws (3) and hex key, attach proper sized adapter plate to the tool, with the beveled edge and engraving facing up.

Step 4:
Apply anti-seize lubricant (included) to the main bolt threads and the faces of the steel spacer used in the following step.
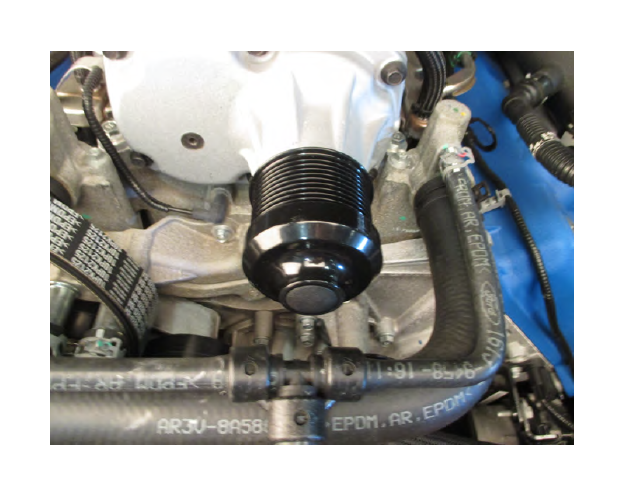
Step 5:
Remove plastic cap from end of supercharger shaft, and insert steel spacer.
Step 6:
Slide the tool over the pulley until it is seated over the grooves, under the lip, and hand tighten the center bolt until the spacer slides into the end.
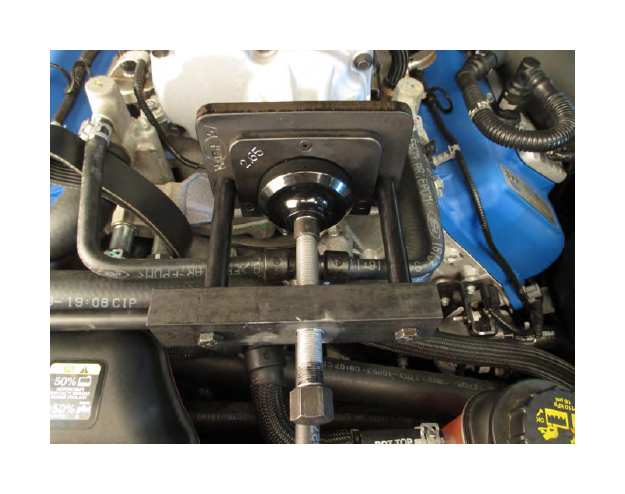
Step 7:
Insert the torque bar into the end of the top plate, and the box end of a 7/8” wrench on the center bolt.
Step 8:
Holding the torque bar still, tighten the center bolt with the wrench until the pulley is pressed off.
** Discard old pulley. Do NOT attempt to reinstall!
**
Installation
Step 1:
Make sure supercharger shaft is clean and free of any fluids or debris.
Step 2:
Remove center bolt from tool.
Step 3:
Screw the set screw into the end of the center bolt.
Step 4:
Install approximately half way onto the bolt in order:
a.Flange nut facing towards the pulley
b.Thrust bearing
c.Washer
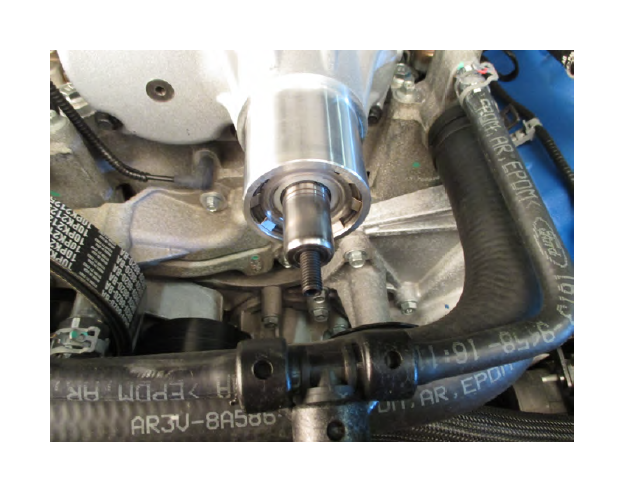
Step 5: Slide your new pulley onto the supercharger shaft. The pulley has a counter bore that will help to align it perfectly straight.
Step 6: Screw the center bolt assembly into the supercharger shaft until hand tight.
Step 7:
Hand tighten the flange nut until the washer contacts the pulley.
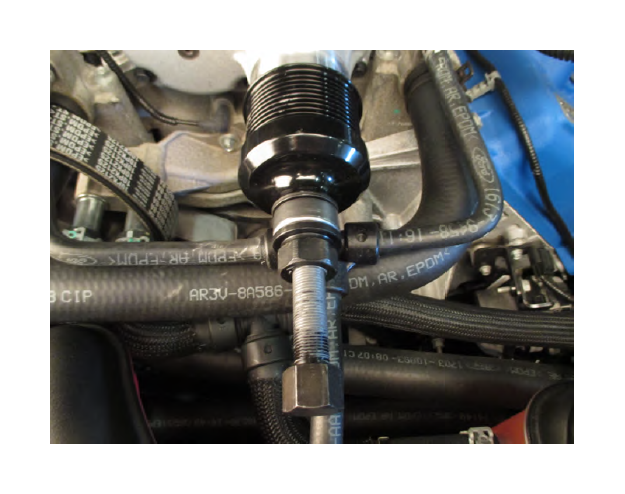
Step 8:
Place the box end of a 1 1/16” wrench on the flange nut, and a 7/8” wrench on the end of the center bolt.
Step 9:
Tighten the flange nut to press the pulley on, holding the center bolt still. ** Only use the 7/8” wrench to counteract the flange nut wrench. Tightening the center bolt can cause the set screw to snap **
Step 10:
Continue pressing the pulley on until the pulley snout is flush with the supercharger shaft. The flange nut will not tighten any further.
Step 11:
Unscrew center bolt assembly from the supercharger shaft, reinstall belt, and reinstall plastic center cap.