 FREE 1 to 3-Day Delivery on Orders $119+ Details
Best Sellers


C&L Cold Air Intake ('05-'09 V6) - Installation Instructions
Installation Time
1 hours
Tools Required
- A socket wrench with 8MM and 10MM sockets (you will need an extension to get into some hard-to-reach places).
- A flat head (standard) screw driver
- A Phillips screw driver
- A Torx 20 bit (comes with the C and L CAI)
- An old towel (to lay stuff on and clean out the engine bay) (Optional)
- A pair of Mechanix gloves (Optional)
Shop Parts in this Guide
Installation
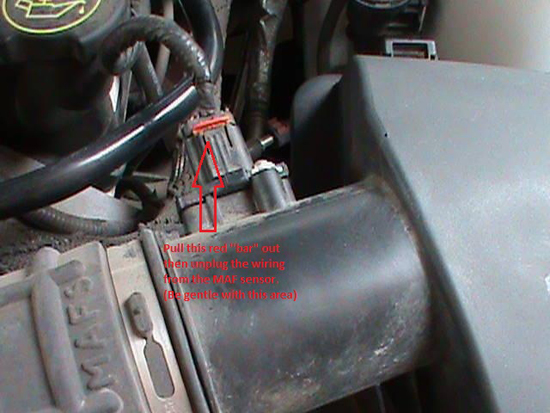
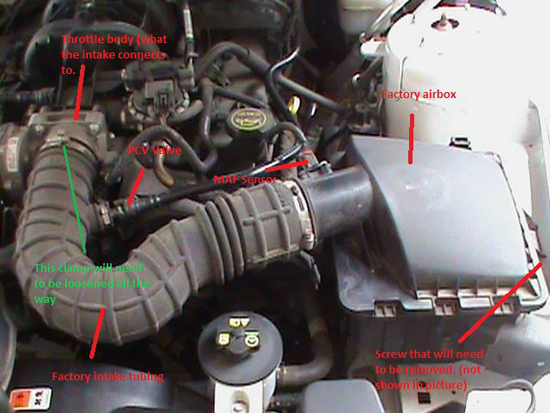
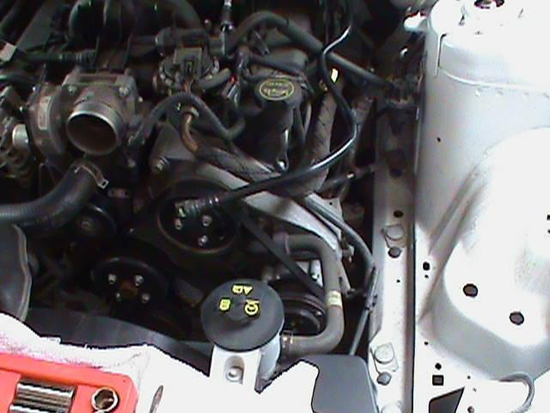
1. There are two sensors “plugged into” the factory tubing. They need to be removed. Start with the one closest to the air box (the MAF sensor ). You should see a little red lever on it, pull the lever out and proceed with disconnecting this.
2. Next disconnect the other one near the throttle body (the PCV valve). You should see a little green level on this one. The green lever pulls up and then it disconnects from the tubing by pulling it out.

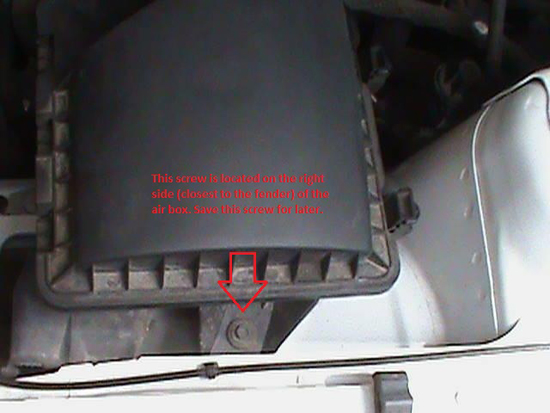
3. Remove the factory air box fastener with a 10MM socket wrench. This is located on the right side of the factory air box – closest to the fender (this is the part where the extension socket is needed). Remove this bolt and save it for later.
4. Next we need to loosen the intake tube clamp that connects the factory intake tube to the throttle body. This can be done with the 8MM socket wrench. Loosen it all the way and pull the intake tubing off of the throttle body. (Labled in green below)
5. The factory air intake system should now be completely disconnected and can be lifted out of the engine bay and set aside.
Note:Optional step: Now is a great time to clean out the area beneath and around the old intake. If you have some extra time cleaning this area will really help the C&L CAI “pop out” when you pop the hood open.
Removing Stock MAF Sensor and Installing it on the C&L CAI
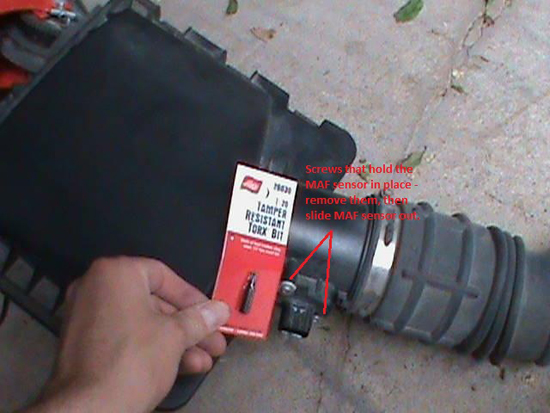
1. The MAF sensor is located right on the side of the stock intake tubing near the factory air intake box.
2. There are two screws located on the outside. Removing these screws require the use of a Torx 20 bit. Remove the two screws and gently slide the MAF sensor out (be sure not to break this part – it should slide out fairly easy).
3. Locate the MAF housing supplied with the C&L kit.
4. On the side of the C&L MAF there is a slot where the MAF sensor needs to be inserted. Line the MAF sensor up with the pre-cut holes in the MAF housing unit and slide it in.
5. If your Mustang was made after December 2005 you cannot use the screws from the stock air intake. You must use the two screws supplied with the C&L kit.
6. Using a Phillips screwdriver screw the two new screws into the MAF housing unit to hold the MAF sensor in place. (If your Mustang was made prior to December 2005 you can use the screws supplied from the factory, or the new ones. If you use the ones supplied from the factory then you will need the Torx 20 bit again.)
Pre-Assembly of C&L CAI
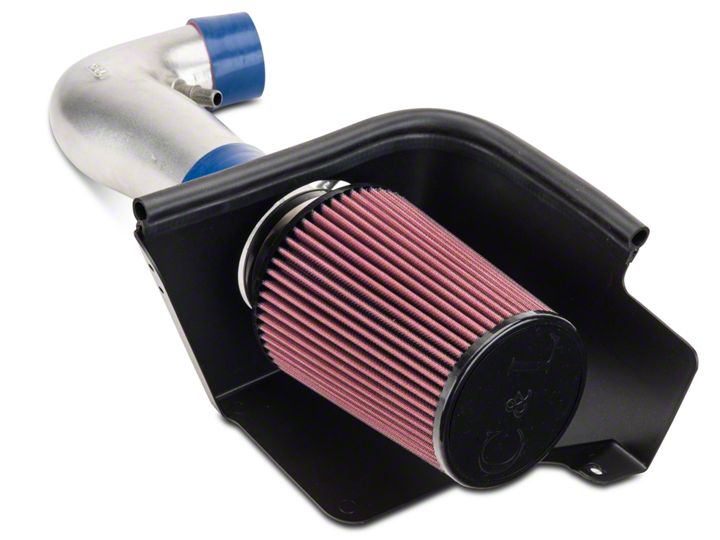
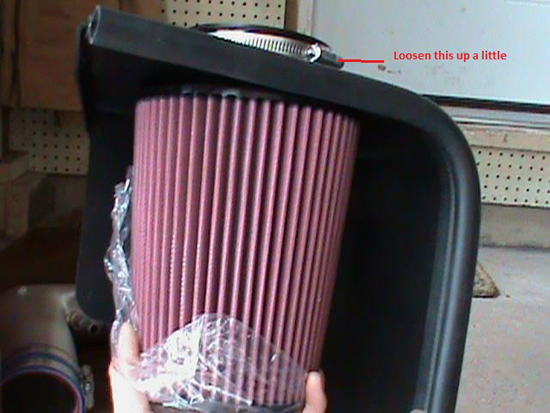
1. Gather the new air filter, the heat shield, and the MAF housing.
2. Take the new air filter and loosen the clamp on the air filter using a standard screw driver. You will need it loose so you have some wiggle room later on.
3. Take the air filter and place it through the big hole in the heat shield.
4. Install the MAF housing (be gentle since it has the MAF sensor in it now), by placing the larger end of the MAF housing onto the end of air filter that sticks out from the heat shield. Tighten the clamp that you previously loosened in Step 2
5. Set the MAF housing and air filter aside. Take the C&L intake tube and loosen up the four clamps. A standard screwdriver works best for this.
6. Now take the C&L intake tube and connect it to the smaller end of the pre-assembled MAF housing/air filter. You have to line up the MAF sensor correctly so that it can easily be plugged back in when installed in the engine bay. It should be lined evenly with the part of the intake tube that connects to the throttle body. See picture below.
Note:You may have to push the clamps backwards in order to connect the intake tube and the MAF housing.
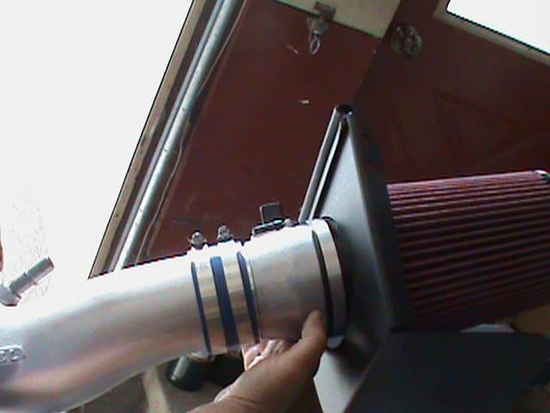
7. Move the two clamps back to where they originally were and tighten down the two clamps with the standards screw driver. You should now have what the picture above shows.
8. At this point the factory air intake should be removed from the engine bay and you should have a completely assembled C&L cold air intake setup with the MAF housing ready to be installed.
Installing the New C&L CAI:
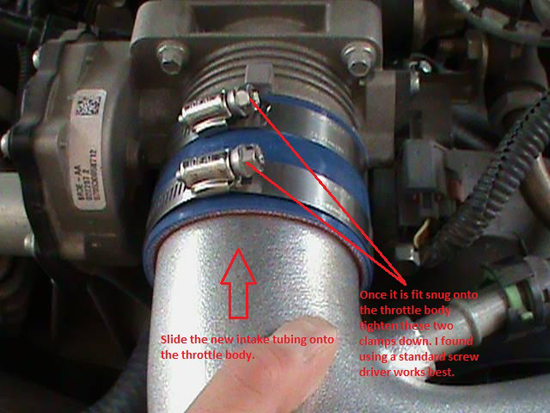
1. Take the open end of the C&L intake tube and connect it to the throttle body. You will need to loosen the clamps with a standard screw driver and then slide it onto the throttle body. It helps to move the clamps around so that it slides on easier. (Be sure that the air filter and intake tube assembly is not rubbing against the engine bay – if so readjust its position.)
2. Tighten the two clamps with a standard screw driver being sure the intake tube fits snuggly onto the throttle body.
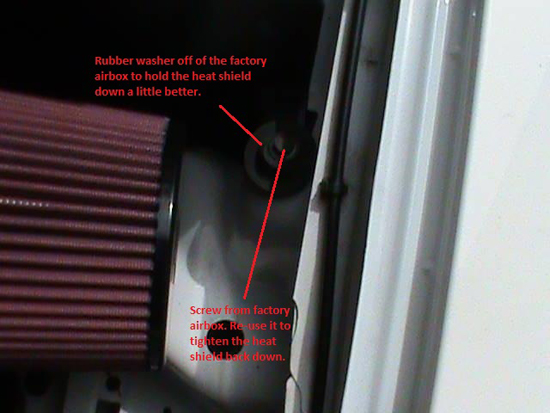
3. Bolt the heat shield into the same hole you as the stock air box. Use the factory bolt you saved from step one, section B. This requires the 10MM socket wrench with an extension again. (Note: I found it helpful to use a rubber washer from the stock air box to hold the new heat shield in place.)
4. Now your C&L intake installation is almost complete! You just need to re-connect the PCV valve wire and the MAF sensor wire.
5. Locate the MAF sensor wire and make sure the red bar is still pulled out. Plug it into the MAF sensor and push the red bar back in so that it stays in place.
6. Locate the PCV valve wire and pull the green lever up and plug that back into place.
7. Give every screw/bolt a final tightening and check to make sure that nothing is rubbing against other engine parts.
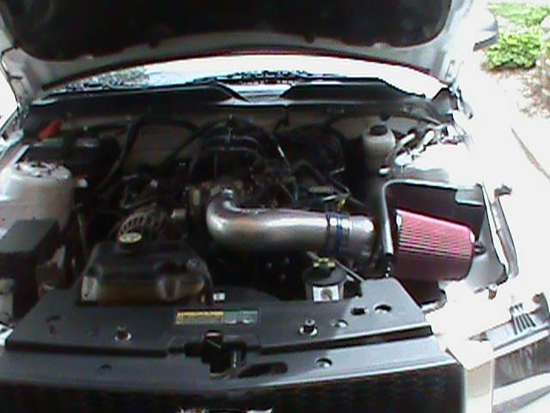
8. Setup of your C&L cold air intake is now complete.
9. Before starting your car you MUST, and I mean MUST re-tune your car with an SCT tuning device or a diablo sport tuning device. I cannot stress this enough, but your car will NOT run right without a new tune!! Once you upload a new tune into your car start her up and hear her roar! You have just successfully added one of the best mods for your car!
Installation instructions provided by AmericanMuscle customer Max Poshusta 5.20.10
Best Sellers
Related Guides
-
Installation
-
Installation
-
Installation
