 FREE 1 to 3-Day Delivery on Orders $119+ Details
Best Sellers


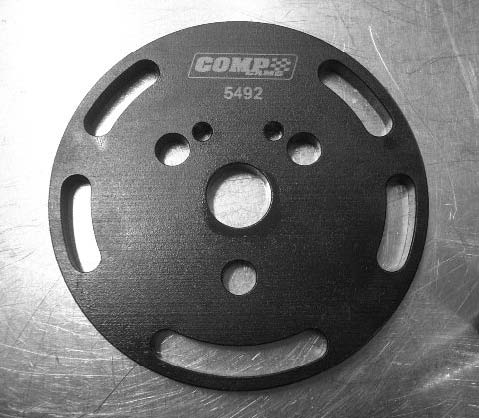
How to Install Comp Cams Adjustable Phaser Lock Kit on your 2011-2012 Mustang GT
Tools Required
- Metric Socket Set
- Ratchet
- Torx T-30 Socket
- 10mm Socket (12 point) Snap Ring Pliers
- 1" Open Ended Wrench
- Camshaft Degree Kit
Installation
Instructions
1.Disconnect the negative post of your battery.
2.Remove any beauty/coil covers from the engine.
3.Remove the coil and phaser actuator electrical connectors, from both banks of the engine.
4.Remove the coils and valve covers from both sides of the engine.
5.Remove spark plugs, this will ease rotation of the engine later on.
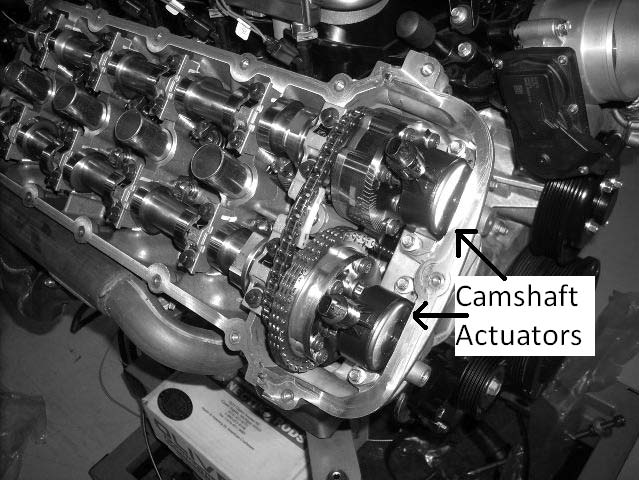
6.Remove camshaft actuators. These are the tall pieces that stick up through the valve covers and sit just in front of the cam phaser. They are mounted to the front cover with two 8mm bolts each.
7.Remove front drive accessories and front cover of the engine.
8.Remove front tensioners and guides.
9.Remove engine main timing chains.

10.Remove the three camshaft bolts using a 10mm (12 point) socket from all four camshafts.
11.Remove two phasers from one bank of the engine at a time. To remove intake and exhaust phasers press down on the tensioner, to release tension, so the small cam phaser chain can be slid over the tensioner.
12.Start camshaft removal; remove camshaft caps and camshafts following the OEM instructions sequence. All capsMUSTbe reinstalled in the same place, note their position. The OEM numbers them and also has an arrow pointing toward the front of the engine.
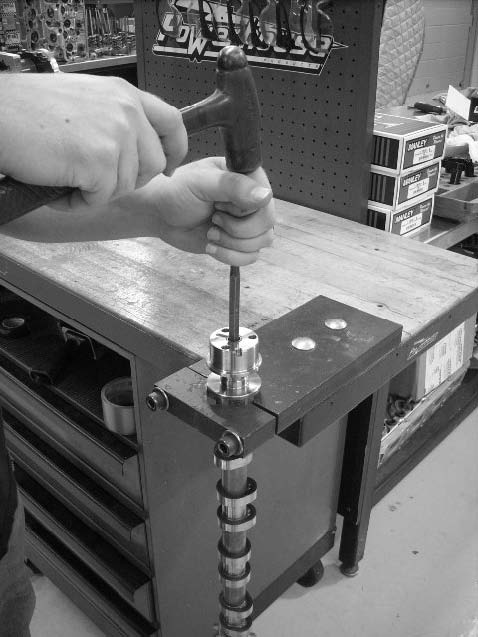
13.After the camshafts have been removed,gentlytap in supplied oil plug into the front of the camshaft with a properly sized blunt faced punch. The plug should be pressed in slightly past flush and end up sitting slightly recessed from the top of the camshaft.
14.Install new camshaft bearing cap bolts. Camshaft bearing cap bolts are torque to yield and cannot be reused.(Ford part #N806183-S437, 20 required per cylinder head).Step 1.Torque to 4.4 lb./ft. (53lb./in.).Step 2.Tighten an additional 45°. Following the Ford camshaft cap torque sequence. (See camshaft installation instructions)
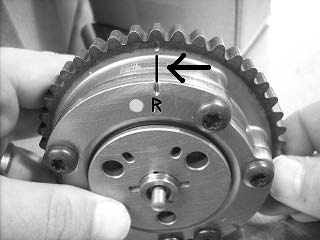
15.Mark a point of reference on your Phaser body. You will see an “R” marked on the front of your phaser. Scribe a permanent line directly above the “R”. This will be your permanent point of reference when later adjusting the camshaft.This same point will on allfour camshafts regardless of bank orintake/exhaust.
16.Using snap ring pliers remove the<2pan style="letter-spacing:.25pt"252 small snap ring from in front of phaser.
17.Using a Torx T-30 loosen the six perimeter phaser bolts.Note: Before the sixth and final perimeter bolt is removed sit the phaser on a flat work surface and do no handle it any more than is necessary after it is loosened. Without the perimeter bolts holding the phaser together it can potentially fall apart into many pieces if not handled with extreme caution.
18.Carefully remove the OEM front phaser plate. There are two pieces that will come off. A smaller center plate that has the three cam bolts and a larger outer plate that has the six perimeter bolts.
19.As soon as you remove the phaser front plate make sure the small round metal gasket is still in place on the phaser, and not still on the back of your OEM phaser plate. If it comes off, then reinstall.
20.Notice that when you remove the front cover there will be a small spring and small star shaped plastic spring seat that will be visible. Remove these two parts, they are not used with the COMP Cams® adjustable locking plates.
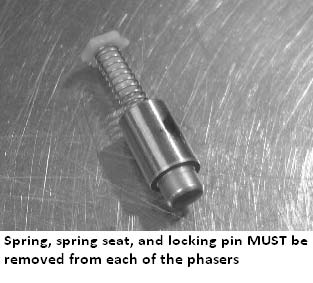
21.Beneath the spring, in the previous step, is a locking pin that must be removed.If you do not remove thispin, the phaser will remain locked and not be ableto be adjusted.
22.Install COMP Cams® phaser locking plate. To align the adjustable locking plate correctly, set the plate on the phaser so the COMP Cams ® logo is directly above where the locking pin was removed in step 21. Ensure that small alignment pin fits correctly in place and the phaser plate sits flush without interference. Also ensure the three camshaft bolt holes lined up correctly for reassembly.
23.Install supplied M6 washers on to the six phaser perimeter bolts removed earlier.
24.Reinstall the six perimeter phaser bolts through the adjustable locking plate and into the phaser body, only tighten until finger tight.
25.Reinstall each phaser without the rear chain. Ensure the phaser pin will engage the pocket on the camshaft fully. Tighten one perimeter phaser bolt to hole the phaser in alignment and remove.Note: The phaser is made of many pieces and can be reassembled slightly misaligned. Without this step the phaser may look complete, but it may not engage the camshaft.
26.Reinstall the intake and exhaust phasers on both banks of the engine, with the small rear camshaft chains. Use the OEM instructions for reinstallation along with procedure for lining up the OEM timing marks. Make sure all of the phaser dowel pin seats firmly in the camshafts.
27.Reinstall new camshaft bolts, these bolts are torque-to-yield and must be used only once. The Ford replacement part number is BR3Z-6279-A. You will need 12 new bolts to complete this process. Install and torque new cam bolts to 11lb./ft. and then add 90° of additional clockwise rotation.
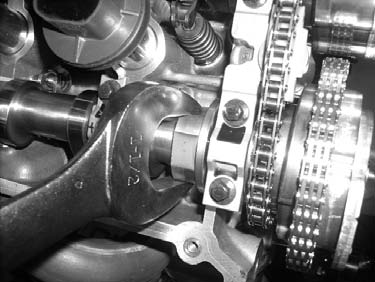
28.Using the 1½" open ended wrench, advance or retard the camshaft as desired using the mark added earlier to the phaser body, in step 16, and the marks on the COMP Cams® adjustable locking plate. Each mark represents four crank degrees of camshaft advance or retard. You may have to rotate the engine to allow use of 1½" wrench.Note: If the phaser will not adjust, slightly loosen the six perimeter phaser bolts.
29.Next, snug one of the loosely installed perimeter phaser plate bolts, on either side the COMP Cams® logo to keep the camshaft in place for degreeing, do not exceed 70-89 in./lbs.
30.Degree the camshaft to verify the centerline (see camshaft degree kit instructions). If it is where desired continue on, if not, loosen the perimeter phaser bolt again and repeat steps 27 through
28 until desired camshaft center line is achieved.You MUST degree in every camshaftindividually!!
31.Once the camshaft is verified to be in the desired position, remove and reinstall the six phaser bolts loosely using medium strength thread locker.DO NOT loosen all six perimeter bolts atone time, or the camshaft move and the degreeing process will have to be done over again.Ensure at least one bolt is always tightened!!!
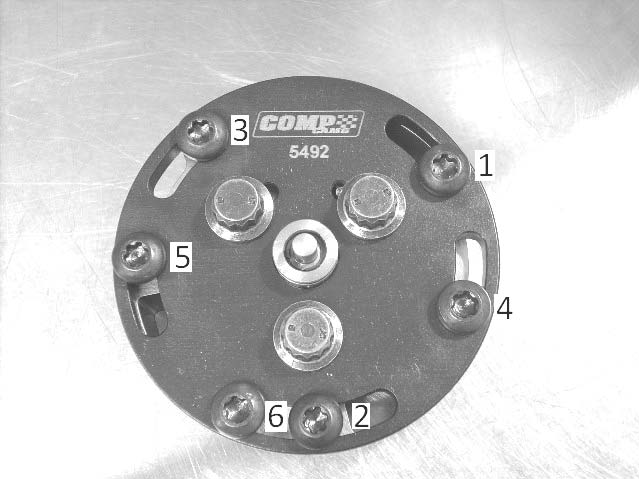
32.Torque the six perimeter bolts to 70-89 in./lbs., using a star pattern.
33.Reinstall the small center snap ring using snap ring pliers.
34.Repeat steps 27 through 33 on the three remaining phasers until all four camshafts phaser locking plates have been completely installed and degreed in individually.
35.Reinstall camshafts, phasers, guides, tensioners, front cover, actuators, and all other accessories per OEM instructions. It is critical to make sure all timing marks are properly aligned and installed correctly as instructed by the OEM!
36.Reinstall valve covers.
37.Reinstall spark plugs and coils.
38.Reconnect all electrical connectors.
39.Reinstall beauty/coil covers.
40.Reconnect negative battery post.
Limited Warranty
Competition Cams, Inc. warrants that all of its products are free from defects in material and workmanship, and against excessive wear for a period of (1) one year from the date of purchase. Thislimited warrantyshall cover the original purchaser.
Competition Cams, Inc.’s obligation under this warranty is limited to the repair or replacement of its product.To make a warranty claim, the part must be returned within (1) one year of purchase to the address listed below, freight prepaid. Items covered under warranty will be returned to you freight collect.
It is the responsibility of the installer to ensure that all of the components are correct before installation. We assume no liability for any errors made in tolerances, component selection, or installation.
There is absolutely no warranty on the following: A) Any parts used in racing applications;
B) Any product that has been physically altered, improperly installed or maintained;
C) Any product used in improper applications, abused, or not used in conjunction with the proper parts.
There are no implied warranties of merchantability or fitness for a particular purpose.There are no warranties, which extend beyond the description of the face hereof. Competition Cams, Inc. will not be responsible for incidental and consequential damages, property damage or personal injury damages to the extent permitted by law. Where required by law, implied warranties or merchantability and fitness are limited for a term of (1) one year from the date of original purchase.
This warranty gives you specific legal rights and you may also have other legal rights, which vary from state to state.
Best Sellers
Related Guides
-
Installation
-
Installation
-
Installation
