FREE 1 to 3-Day Delivery on Orders $119+ Details
Best Sellers


How to Install a Corsa Cut and Clamp X-Pipe in your 2013-2014 Mustang GT500
Installation Time
2 hours
Tools Required
- Safety Glasses
- Saw or Chain Style Pipe Cutter
- 15mm Socket
- 3/8” Ratchet
- Torque Wrench
- Flat Screwdriver
- File or sanding device for deburring
Shop Parts in this Guide
Please confirm that all parts are present before beginning the factory exhaust system removal and CORSA exhaust system installation.
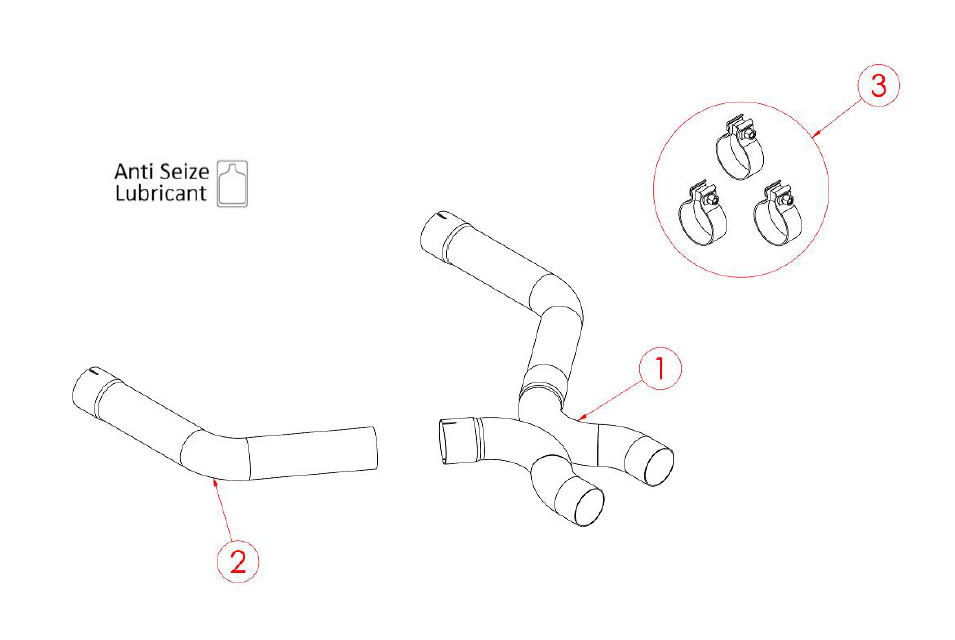
Bill of Materials:
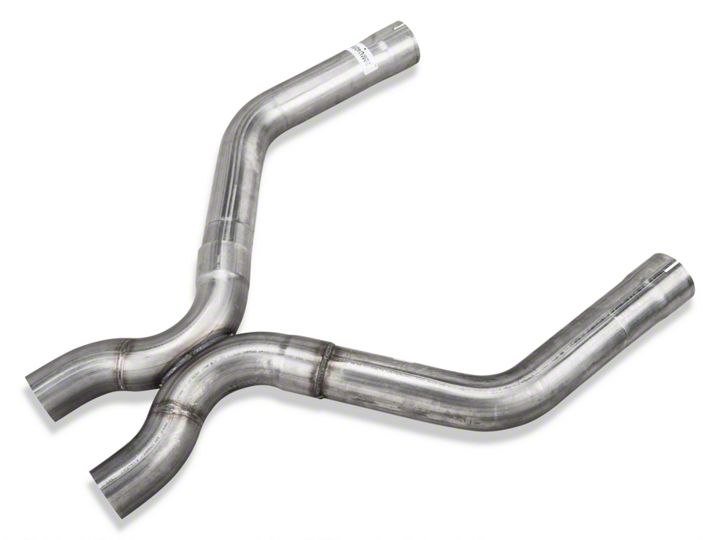
1 - XO-Pipe Assembly (20MU4054)
2 - Inlet Elbow Pipe (20MU4055)
3 - Hardware Kit: (20MU7020)
• (3) 2.75” Clamps
Factory Exhaust System Removal:
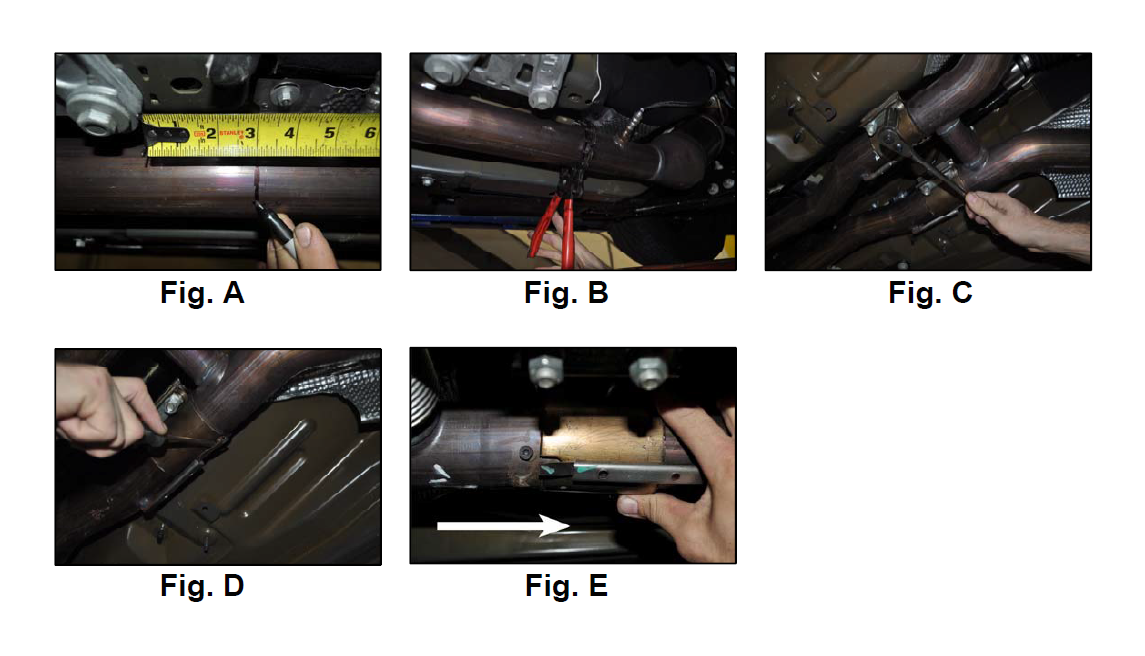
1. Mark both of the stock after-cat pipes at 3.125 inches upstream from the front edge of the transmission cradle. This point is just downstream of the after cat oxygen sensor locations. (See Fig. A) This mark will be your cut line.
2. Using a saw or chain style pipe cutter, cut both after-cat pipes at the marks. (See Fig B)
3. Using a 15mm socket and a 3/8” ratchet, loosen the four nuts on the factory sleeve clamps located just after the factory H-pipe assembly. (See Fig. C)
4. On the driver side, use a flat screwdriver to pry the clamp spring clip up from the retainer pin on the factory H-pipe assembly. (See Fig. D) Repeat for the passenger side.
5. Slide both factory sleeve clamps toward the rear of the vehicle to free the outlet end of the factory H-pipe. (See Fig. E) Remove the factory H-pipe section from the vehicle.
6. Deburr the cut edge of the retained factory after-cat pipes using a file or sanding device. This will aid in the installation process.
Installation of CORSA Exhaust System:
NOTE: Apply the anti-seize lubricant (supplied) to the threads ONLY of all the clamps and flange bolts. Failure to follow this procedure can cause nuts to seize on clamps and potentially destroy threads. After applying anti-seize lubricant, be sure to thoroughly clean your hands, as lubricant will tarnish stainless steel. All clamps should be tightened using a properly calibrated Torque Wrench. Using an air impact gun will damage the clamp and reduce its ability to effectively seal the joint. It may also cause the joint to separate, thereby causing damage to your exhaust system and to your vehicle.
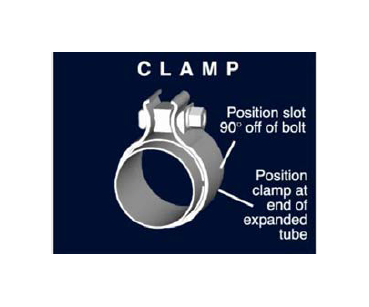
NOTE: Align all clamps so that the center of the clamp bolt is 90 degrees from the notch in the pipe. (See Fig. CLAMP)
1. Remove all exhaust system components from shipping carton, including the three supplied clamps.
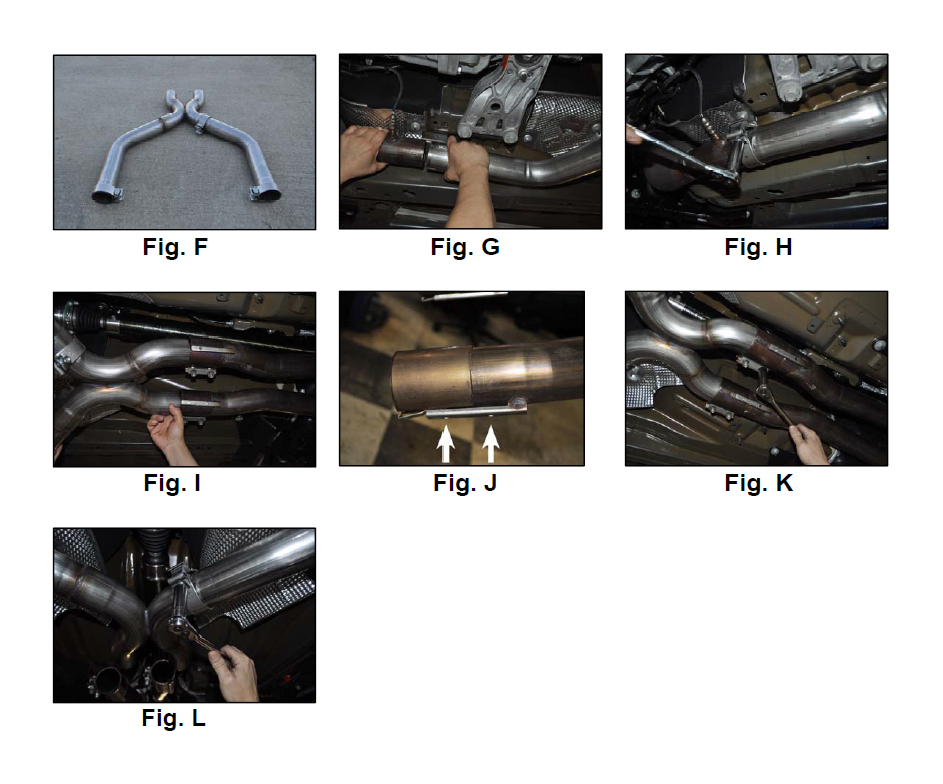
2. Pre-assemble the CORSA XO-pipe assembly, with the three 2.75” clamps installed and positioned onto each expansion as shown. The separate inlet elbow pipe goes to the driver side, and all three clamp bolts will be facing downwards when installed. (See Fig. F)
3. Slide the inlet of the XO-pipe assembly onto the passenger side after-cat pipe first, and then repeat for the inlet elbow pipe on the driver side after-cat pipe. (See Fig. G) Next, position the XO-pipe inlet so that it has around 1.75” of overlap onto the factory passenger side after-cat pipe, and then snug this clamp using a 15mm socket and ratchet, leaving it loose enough for later adjustment. (See Fig. H)
4. Install both axle pipe inlets onto the XO-pipe outlets as shown. (See Fig. I) Slide the factory sleeve clamps forward so that their rear edge is approximately centered between the two holes in the axle pipe bracket. (See Fig. J) Next, tighten the four nuts on the factory sleeve clamps using a 15mm socket and ratchet. (See Fig. K)
5. Position the inlet elbow pipe to also have 1.75” of overlap onto the factory driver side after-cat pipe, and then snug both remaining 2.75” clamps on each end of this pipe. (See Fig. L)
6. Visually inspect the exhaust system position, clamp orientation, and exhaust pipe clearance. Make any necessary adjustments at the slip joints.
7. Start at the front of the vehicle and tighten the nuts on the clamps. Torque nuts to 45 ft-lbs. Verify clearances to underbody components after tightening.
8. It is STRONGLY SUGGESTED that all clamps be checked and re-tightened, if necessary, to the recommended torque after initial road testing of the vehicle, as thermal cycling has occurred on the system. Please wait until system has fully cooled to perform this step.
NOTE: During cold weather start-ups, you may experience an exhaust sound that is deeper and louder in tone than usual. This is temporary and will diminish to normal levels once your engine has reached its normal operating temperature.
NOTE: Immediately following the installation of your exhaust system, you may experience a trace of smoke after initial start-up. DO NOT be alarmed. The smoke is caused by the burning of a small amount of forming oil residue used in the manufacturing process.
CORSA Installation Pictures