 FREE 1 to 3-Day Delivery on Orders $119+ Details
Best Sellers


How to Install cp-e Exhale Cold-Side 2.75in Intercooler Pipe w/ HKS SSQV BOV - Race Red
Installation Time
30 minutes
Tools Required
- Ratcheting Socket Wrench (1/4" and 3/8" Drive)
- 5.5mm Socket
- 7mm Socket
- 8mm Socket
- 10mm Socket
- 11mm Socket
- T-30 Torx Socket
- O-ring Pliers
- Flat head screw Driver
- Jack stands (Optional)
- Hydraulic Jack (optional)
- WD-40
Steps to Installation
1. Before you begin taking apart anything disconnect the negative side of the battery under the hood on your left side by the windshield.!!!!
2. If you have a jack to prop your car on this will make it easier to access the bolts and push pins on the under tray underneath the front of the car. This part is optional if you just want to lay down and get under the car without the jack.
3. To remove the under tray there are (14) 7mm Bolts, (6) Push Pins, and (2) 5.5mm Bolts.
4. Next You will need to take the engine cover off underneath the hood. There are (2) 8mm Bolts and (2) 10mm Nuts holding the cover on.
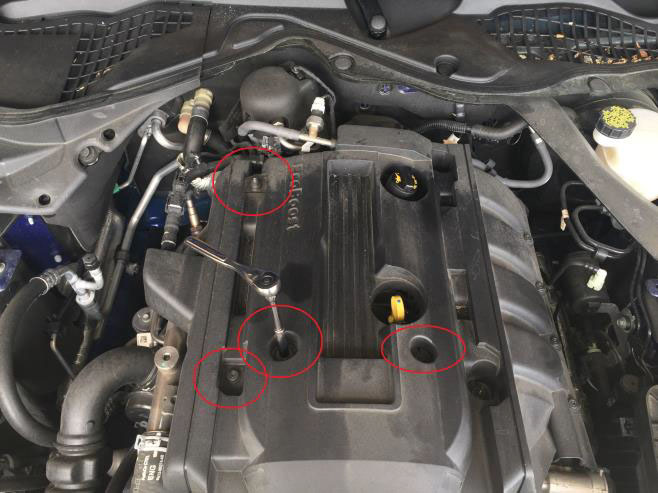

5. Next with the engine cover off we need to disconnect the MAP Harness and Sensor from the intake manifold using a T-30 Torx Socket
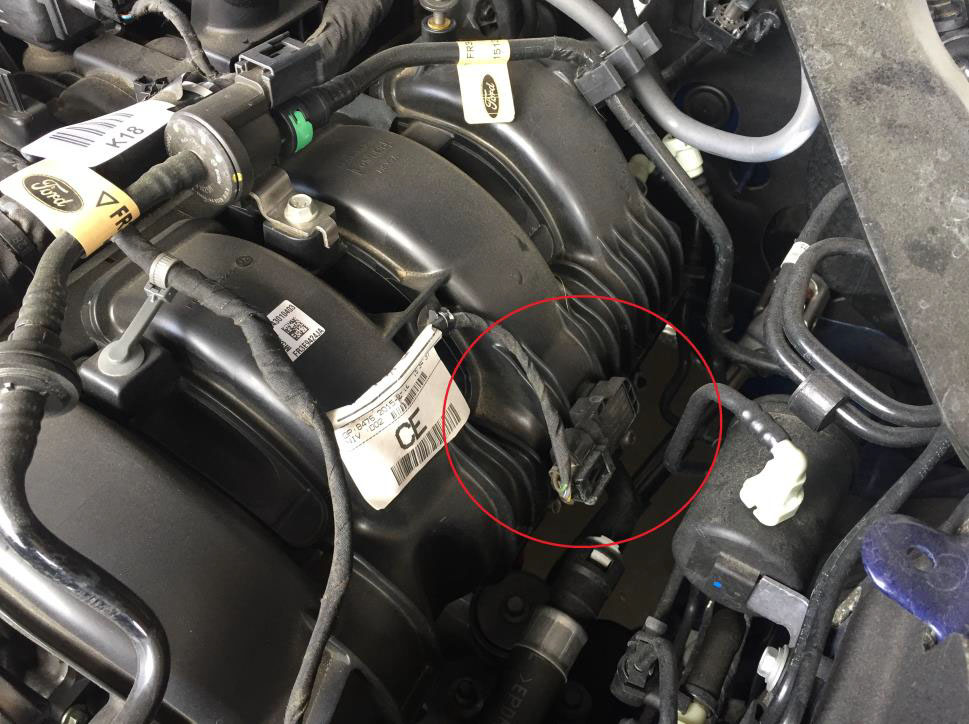
6.Next you need to loosen the hose clamps securing the stock cold charge pipe to the throttle body and the intercooler outlet. To get to the bottom hose clamp you will need to take off the under tray in the front of the car.
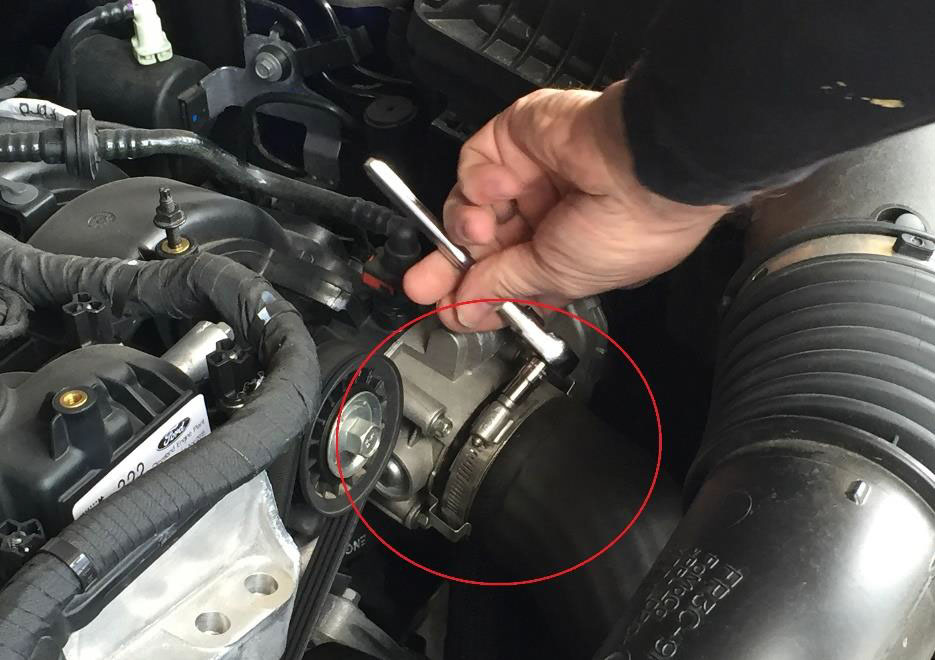
7.With the clamps removed you will need to remove the cold charge pipe from the throttle body and the inter cooler outlet.
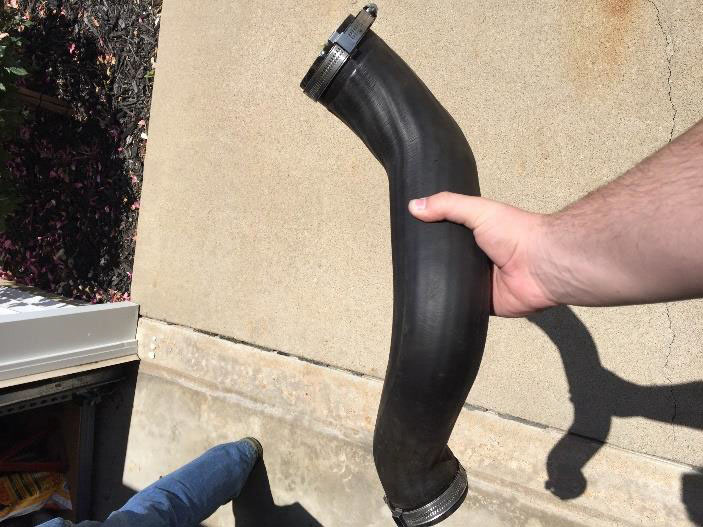
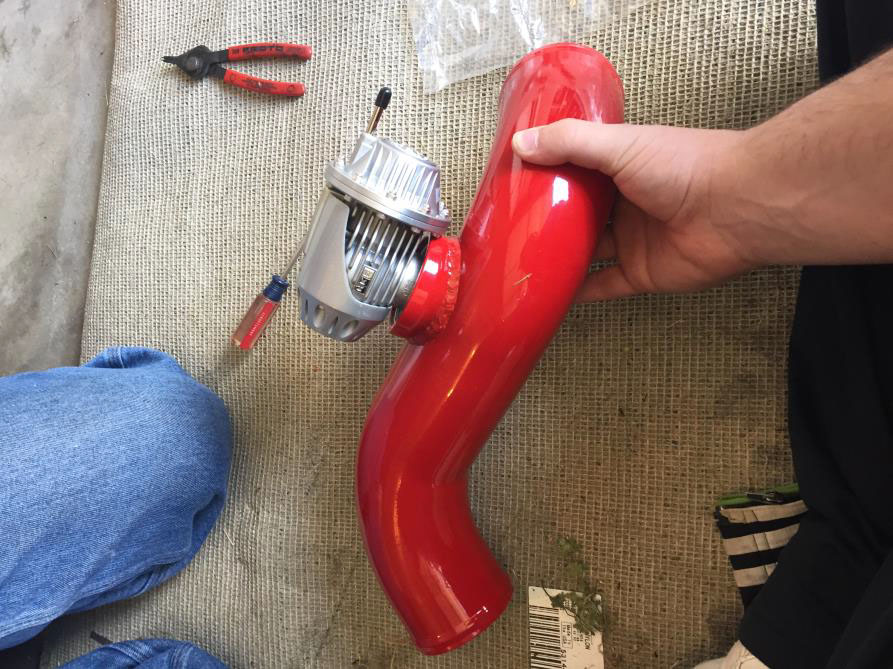
8.Next we need to get the HKS BOV assembled on the cold side pipe in your choice of race red or black.
Put the Rubber O-ring in the groove in the adapter flange.
Now place your HKS BOV above the Rubber O-Ring.
Next take the O-ring Pliers and push the O-ring into the place of the around the base of the BOV. (I recommend using a pair of Snap ring pliers to get the O-ring into place.)
When done the finished Pipe should look like this.
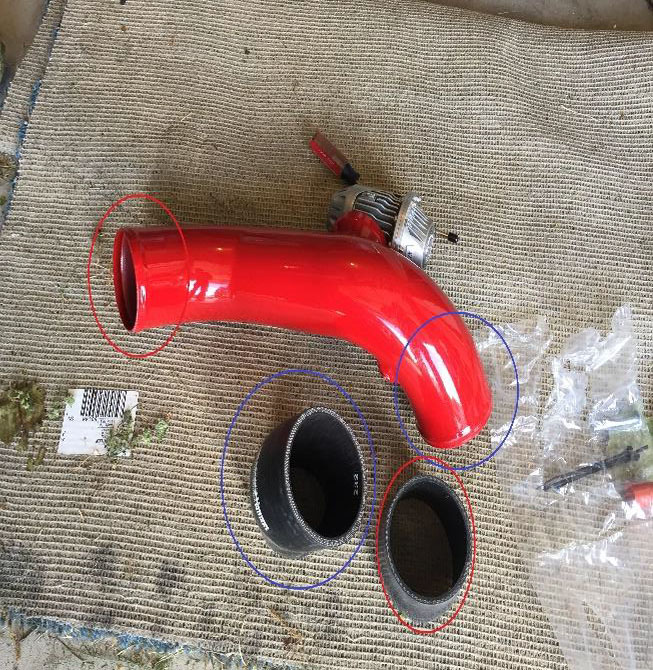
9.Now we need to add the rubber ends to the end of the Pipe. (The angled rubber piece goes on the right, while the straight piece that says “CPE” goes on the left side.) Next put the Hose clamps on the rubber end pieces but do not tighten them yet.
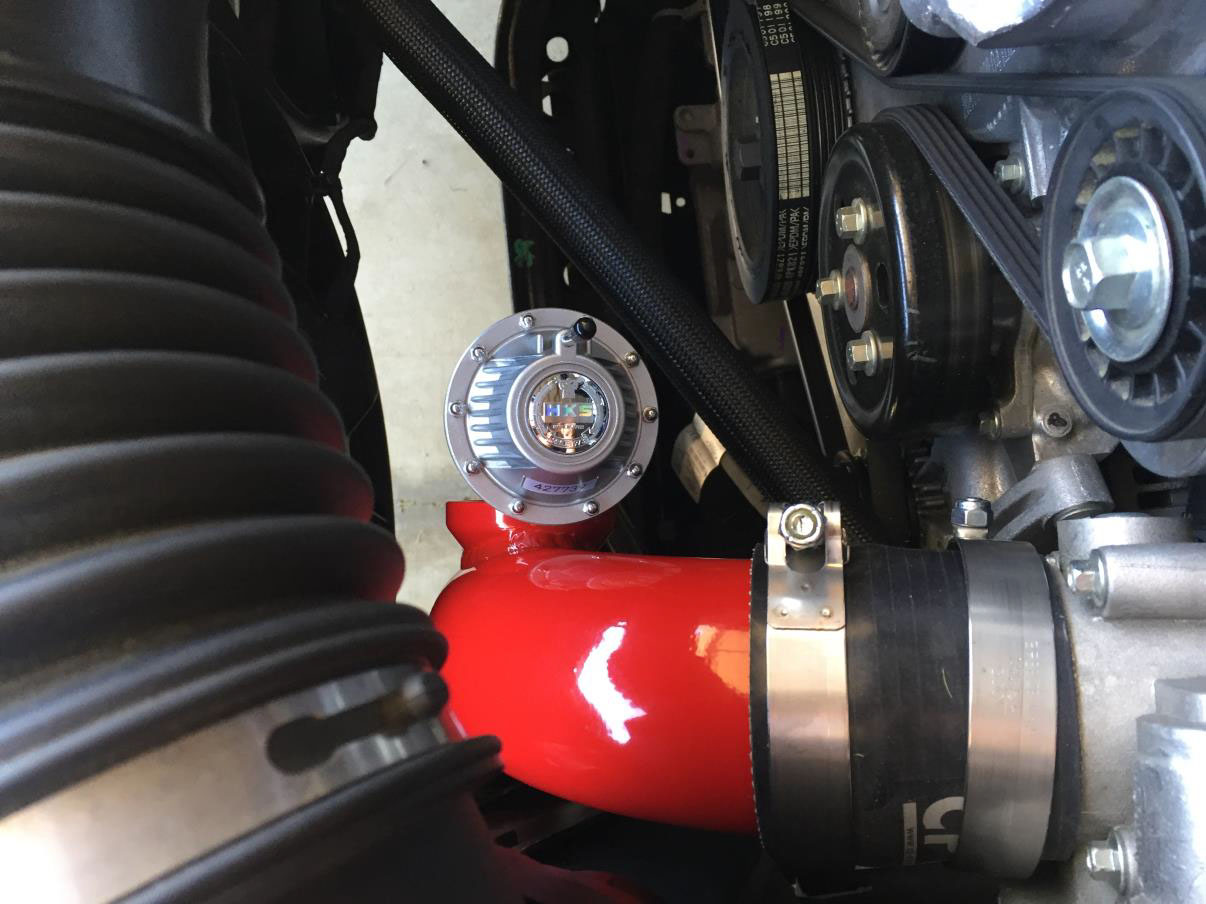
10. Next we can install the cold side pipe in place of the factory. Position the straight rubber piece on the end of the CP-E pipe into the throttle body. The angled piece will angle down in the intercooler outlet. Be careful to make sure you have a correct fit before you tighten the clamps. Once happy with how you have it set up tighten the hose clamps to secure the new cold side pipe that you just installed. To make the rubber pieces that go onto the throttle body we recommend using WD-40 and spray it into the inside of the rubber to let it slide onto the throttle body and inter cooler out let easier
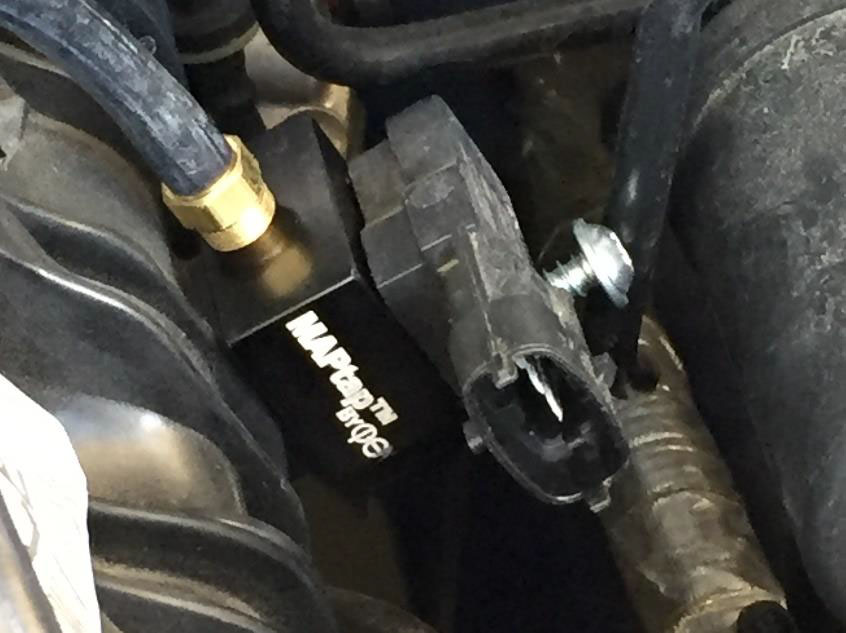
11. We now need to assemble the CP-E MAPtap to provide an accurate boost source for the new BOV. The Map tap should have come with the packaging you received with the cold side piping. Begin by threading the supplied brass NPT to the hose barb adapter into the CP-E MAPtap. Then install the supplied rubber o-ring into the machined groove in the manifold inlet port.
12.With the MAPtap fully assembled we now can install it on the intake manifold. The CP-e MAPtap will be sandwiched between the intake manifold and the stock MAP Sensor. With the MPtap installed on the intake manifold, install the stock MAP sensor onto the MAPtap using the supplied ¼”-10 torx head screw. Finally connect the vacuum tube provided from the MAPtap to the HKS BOV. The tube will be installed on the small tube coming up from the BOV and might have a black rubber tip blocking the hole. Take that off and replace with vacuum tube. (NOTE: you might have to cut the vacuum tube to get a better fit and not any excess tubing flying around. Use zip ties to tie it to another wire to keep it in place.)
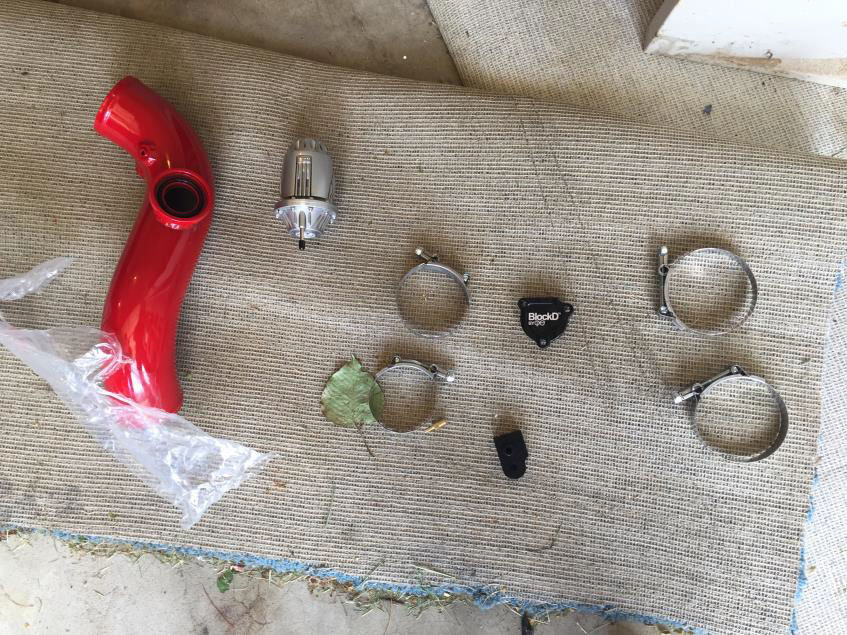
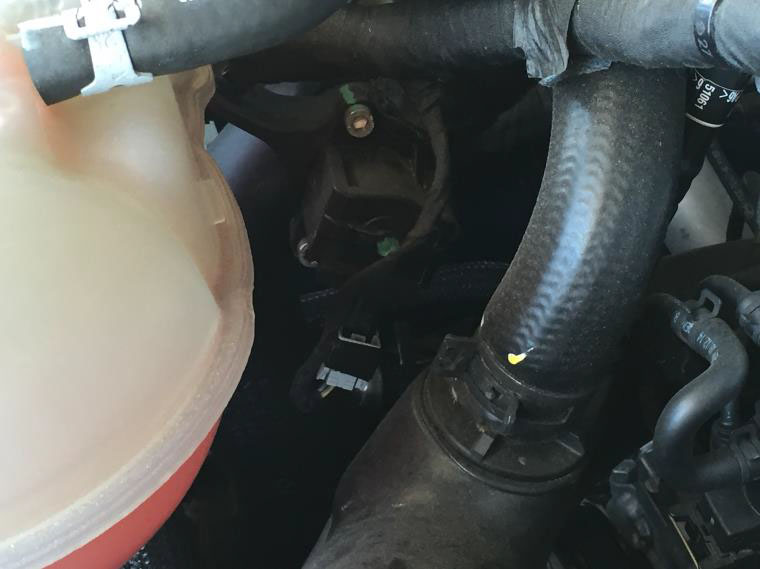
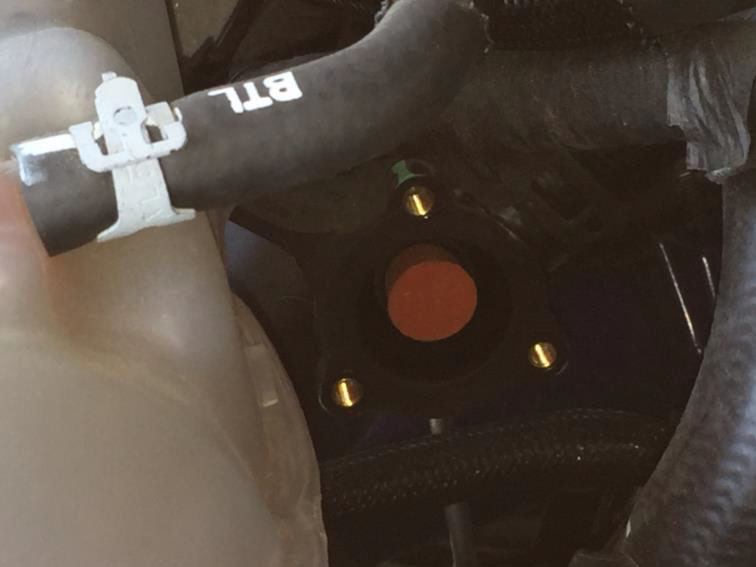
13.If you are re-using the factory hot charge pipe, remove the stock BPV and plug the outlet with the supplied tapered plug and the BLOCKD Plate. The factory hot charge pipe will not have to be taken out for this step. You will be using the factory bolts to keep the BLOCKD Plate in place. (Note: You will not be re-using the sensor taken off from the hot side piping and factory BOV.)
14. Now reinstall and reconnect the intake tube and the turbo outlet. Check all hose clamps are secure along with the vacuum tube leading from the MAPtap to the BOV is secure and not going to interfere with any anything. 15. If you decided to take off the under tray now reinstall it and you are good to go. Start her up and go for a Nice Drive.
Installation Guide Created and Submitted by AmericanMuscle Customer, Alex Patzke on 5/15/16
