 FREE 1 to 3-Day Delivery on Orders $119+ Details
Best Sellers


How to Install a BOSS/CS Style Lower Front Fascia on Your 2010-2012 Mustang GT

Shop Parts in this Guide
Installation

PREP
- Place a blanket down in the area which you will be working; used to prevent scratches on front fascia.
- Remove your License Plate ahead of time (if applicable).
- Just in case they break, acquire get some extra push tabs from local auto store.
SAFETY – Please ensure you follow recommended safety guidelines during installation.
- Utilize Eye Protection such as safety glasses/goggles
- Ensure parking brake is engaged
- Chock wheels
- If working on a lift or ramp – follow the appropriate user manuals
- Ensure vehicle has had ample time to cool down
- Wear gloves as needed
Work Safely and Think Safety!
STEP 1 - REMOVAL OF STOCK BUMPER
A. Open the hood and remove the radiator/grille cover by pulling out all the tabs shown in FIGURE 1. Note that the Lower Fascia will not fit onto the V6 Bumper Cover.
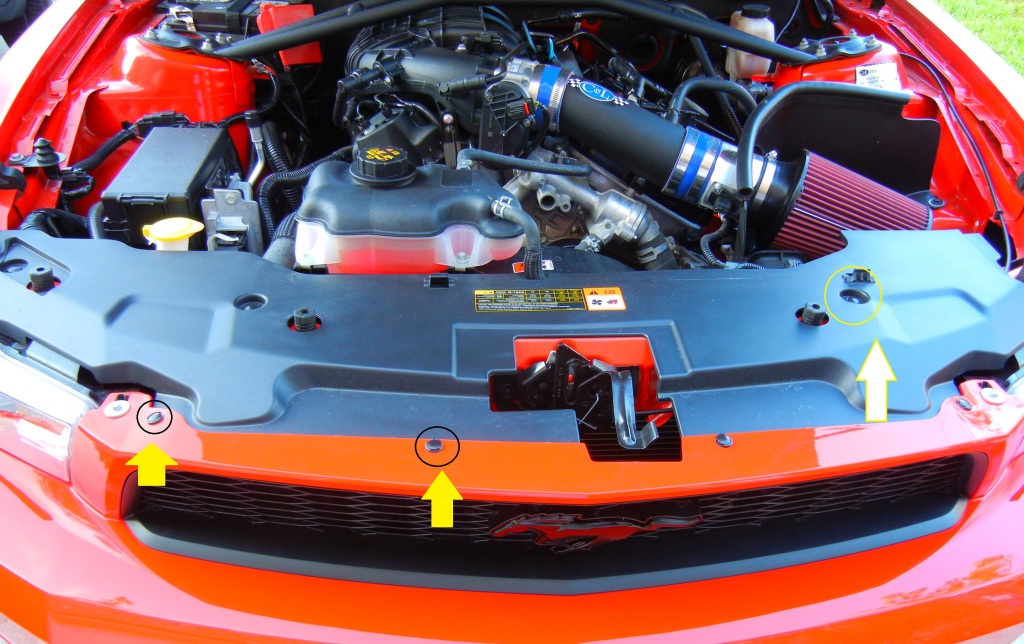
FIGURE 1
B. Slide out the radiator/grille cover and place aside.
C. Using the 8mm socket, remove the retaining bolts near the headlights. (FIGURE 2)
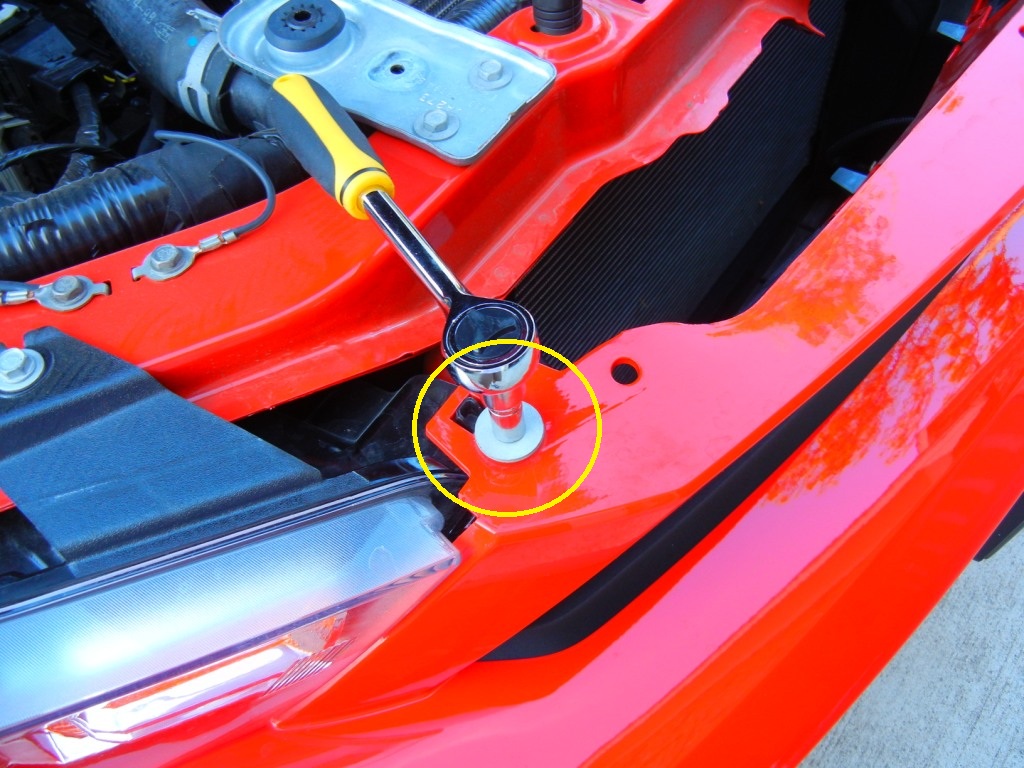
FIGURE 2
D. In the front wheel well, remove the (2) retaining bolts using 7mm or 6mm sockets. Note: in the picture below, the 2nd bolt is covered by the chin spoiler – yours may or may not have a chin spoiler. If you have a chin spoiler, you will have to remove it first to gain access. (FIGURE 3)
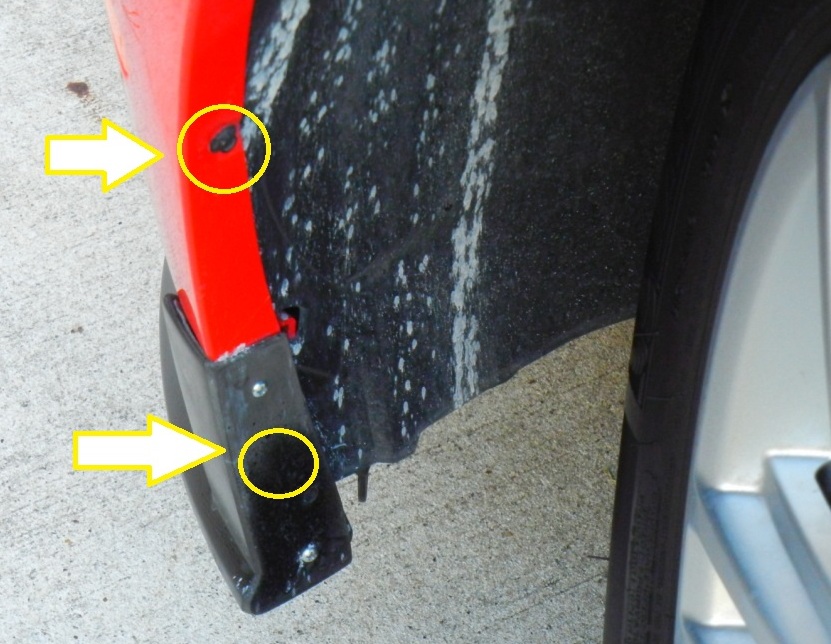
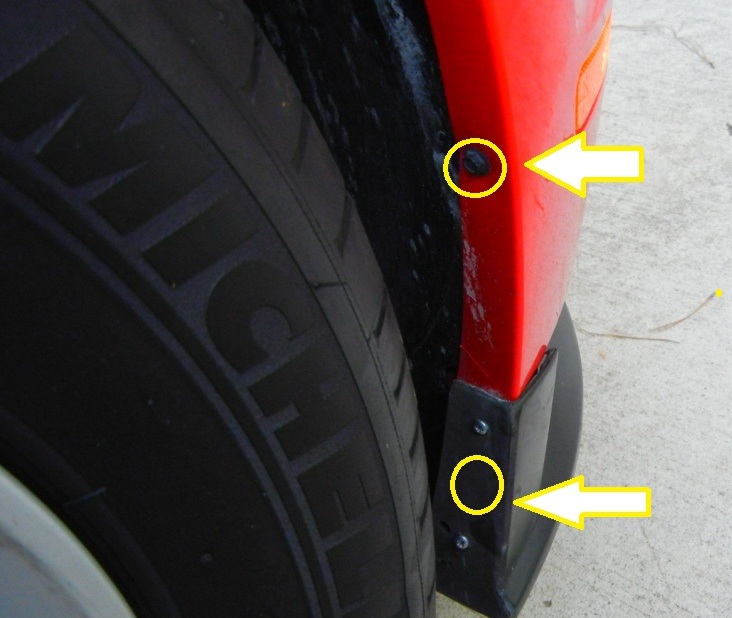
FIGURE 3
Tip: Steer your tires to the extreme left or right to give you easier access to remove these bolts.
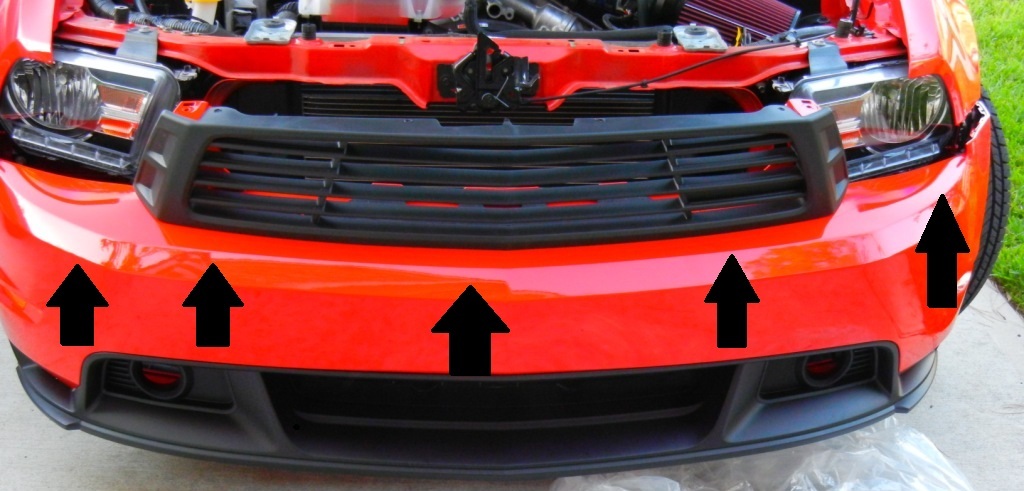
E. Underneath the front bumper cover will be several bolts. Remove these bolts as shown in figure 4 using the 6mm or 7mm socket. (FIGURE 4)
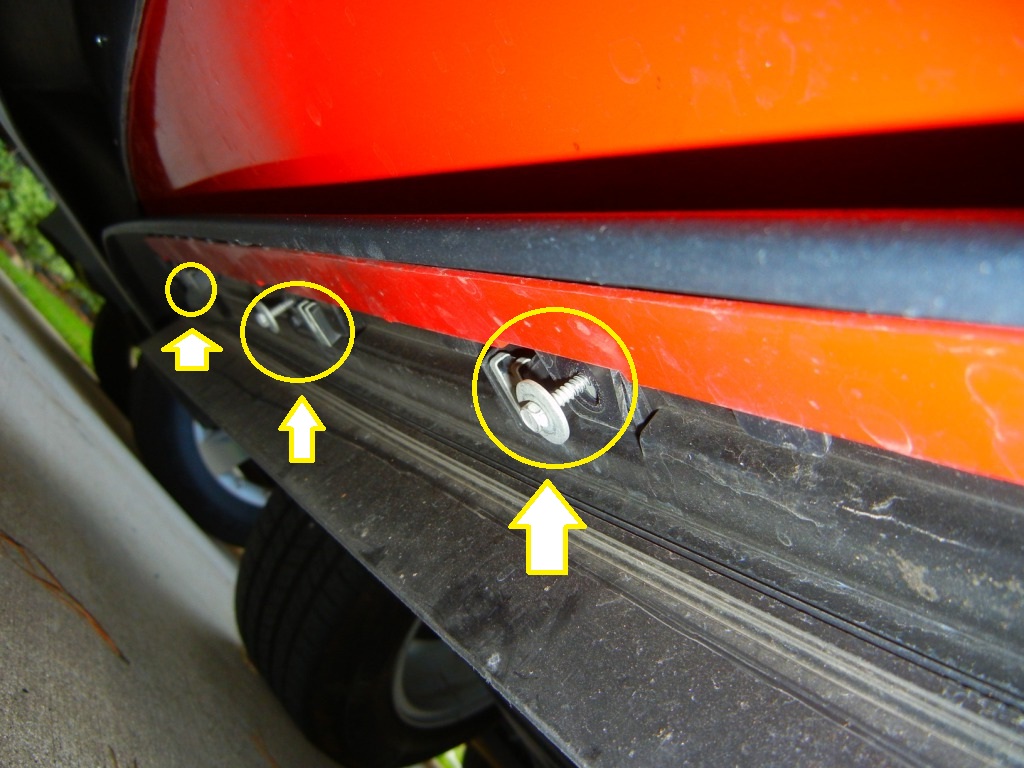
FIGURE 4
F. At this point, the bumper can be pulled off. Note: it will require some force to remove the bumper from the brackets and it is recommended that a second person be used for the removal. (FIGURE 5)
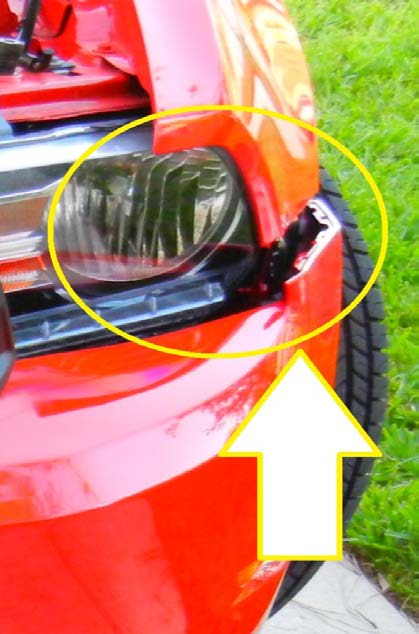
FIGURE 5
G. Before completely removing the entire bumper, ensure you disconnect the wire assemblies from both side marker lights and the temperature gauge sensor that is situated to the lower center of the bumper. (FIGURE 6)
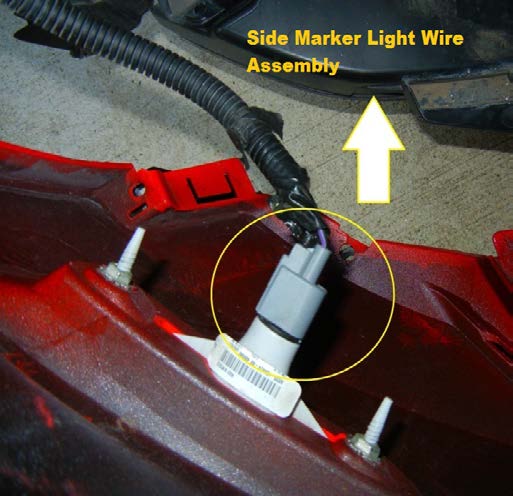
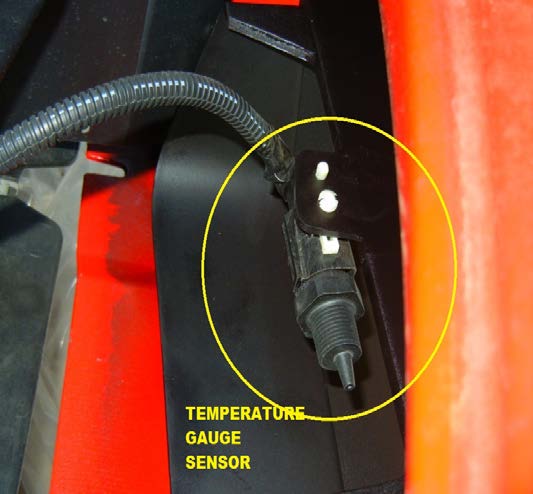
FIGURE 6
H. With entire bumper cover removed, you can now remove the existing lower fascia. This is done by removing the push tabs and simply popping the existing lower fascia out.
I. With the lower fascia removed, you will now be able to start the installation process. (FIGURE 7)
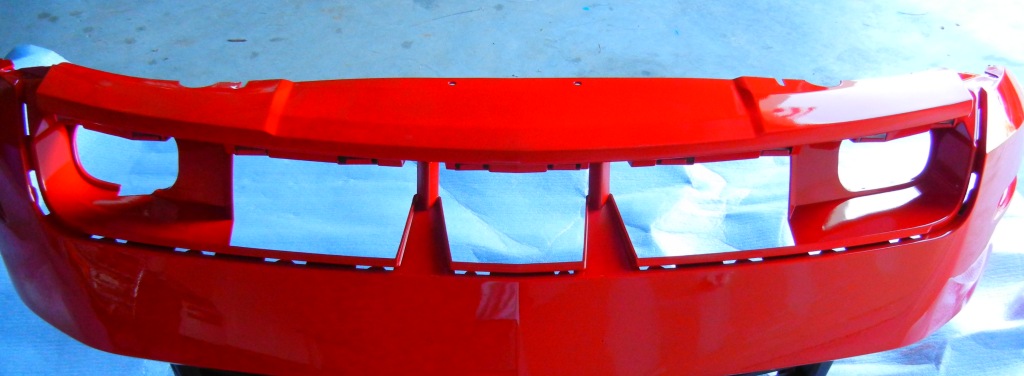
FIGURE 7
STEP 2 – INSTALLATION OF THE BOSS/CS Style Lower Fascia
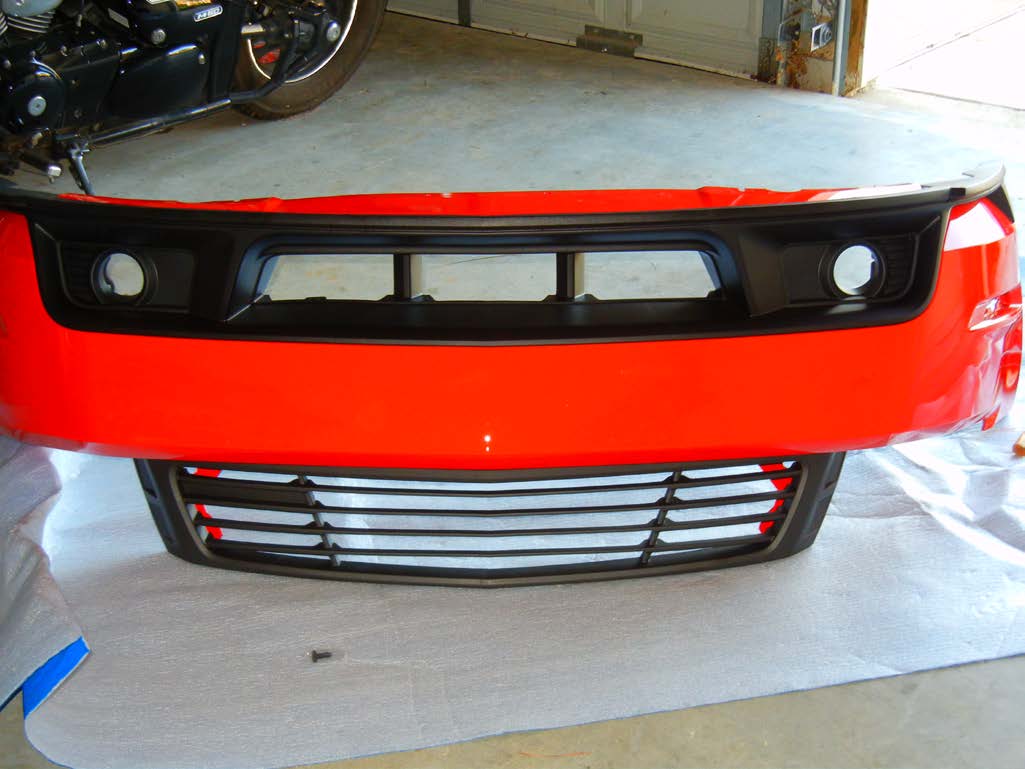
A. Install the lower fascia by lining up the black plastic tabs of the fascia with tab slots of the bumper cover and push the entire fascia into the bumper cover. Ensure that all the tabs are aligned with the slots or it will not fit properly. (FIGURE 9)
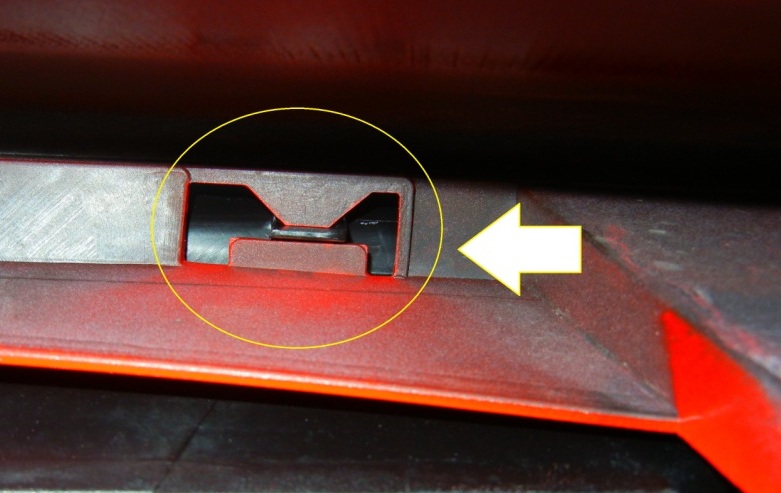
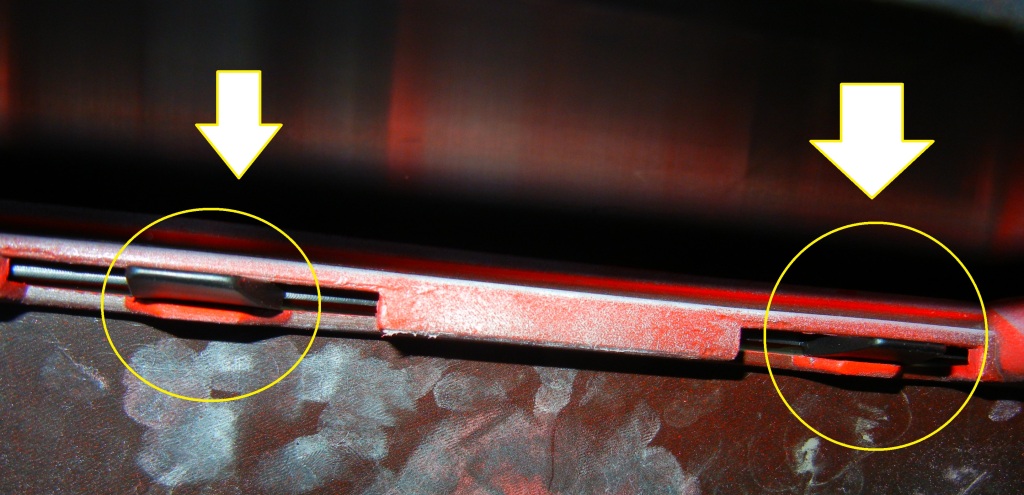
FIGURE 9
B. If done properly, everything will ‘click’ and fit into place as show in FIGURE 10.
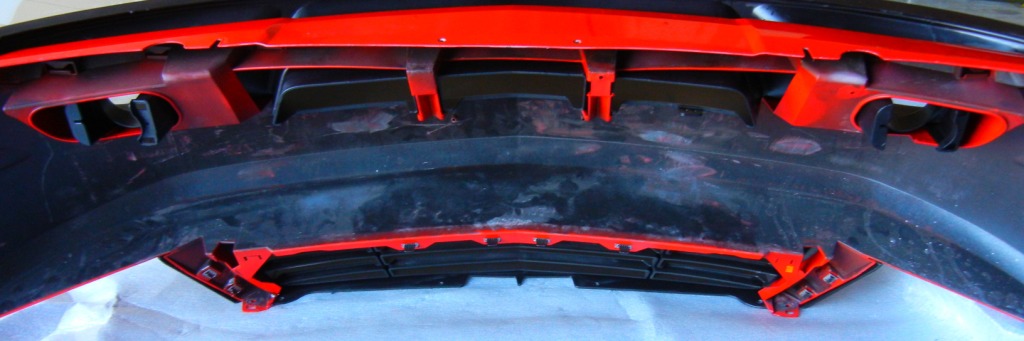
Figure 10
C. The BOSS/CS Lower fascia is now installed!
D. Now reverse the steps to reinstall the bumper cover with the attached lower fascia. It will be easier to reinstall the bumper with a second person, but is very possible to do alone.
E. Ensure all the bolts and push tabs are replaced in the proper reverse order. Test all connections to ensure everything is secured.
F. Note: I did not include installation for the fog lamps as there are two possible types
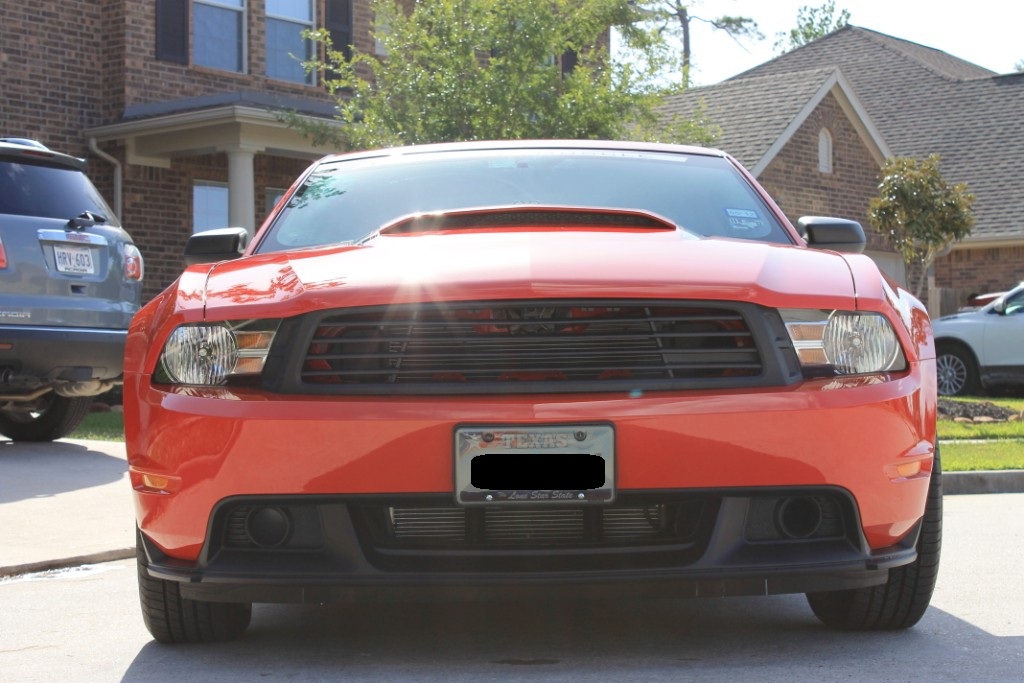
CONGRATULATIONS – You have officially completed the install!!
Installation Instructions provided by AmericanMuscle customer Elm Valle 8.11.11
