 FREE 1 to 3-Day Delivery on Orders $119+ Details
Best Sellers


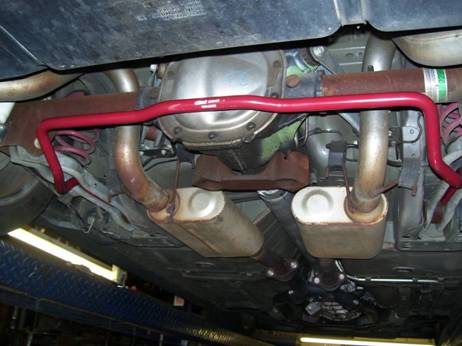
Eibach Sway Bar Installation Guide ('94-'04)
Tools Required
- Basic Standard and Metric Socket Sets
- Basic Standard and Metric Wrench Sets
- Locking Pliers
- Flathead Screwdriver
- Torque Wrench
- Safety Glasses
- Optional Materials:
- (4) 3/8-16 nuts used for the rear sway bar
- "Loctite"-brand adhesive
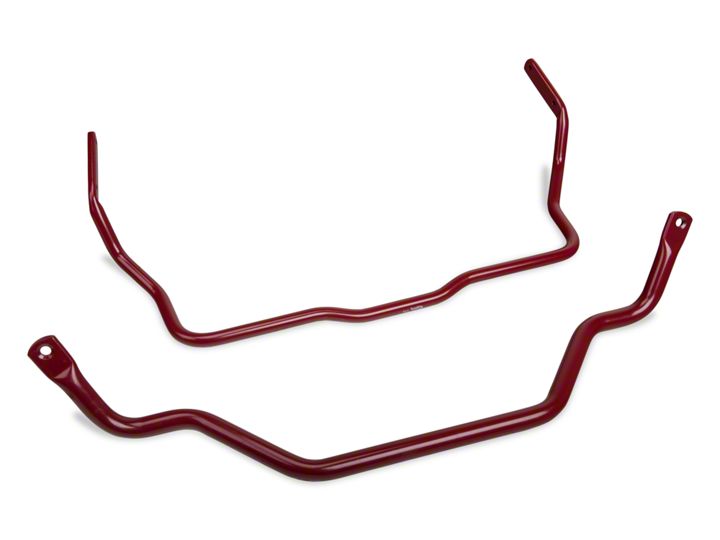
Shop Parts in this Guide
Installation
1. Begin by supporting the car either with jack stands or with a lift. I found the installation went really smooth with the car being put on a lift. The installation would have been extremely difficult had it been performed using jack stands, due to the overall size of the sway bar and the necessary movement to get it into place.
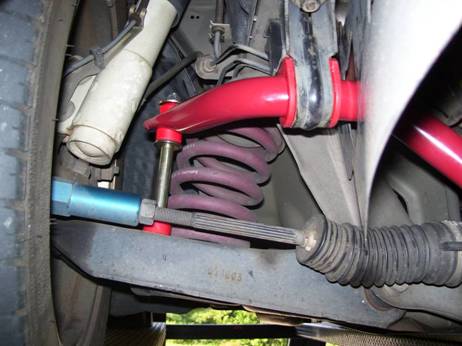
2. Locate the stabilizer bar and the end links on the front of the car. Remove the plastic push retainers from the plastic shroud with the screwdriver on both sides of the car closest to the roll bar. Clamp a pair of locking pliers onto the link to keep it from turning while removing the nuts on the top and bottom of the link. Repeat this process for the other side of the sway bar. It is necessary to support the sway bar at this point to keep it from falling, once the brackets have been removed. Locate the bracket and bracket nuts connected to the frame rails on either side of the motor. It will take some adjustment to get the sway bar away from the plastic shroud.
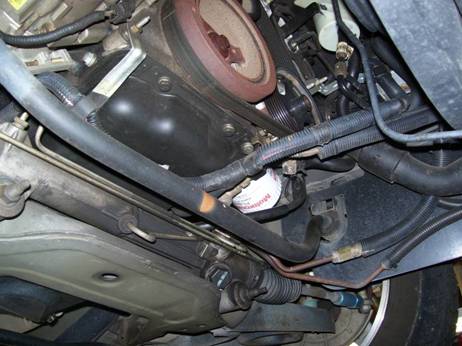
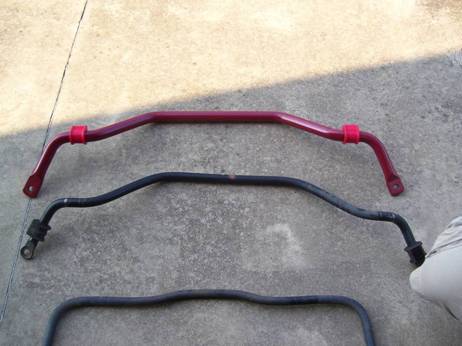
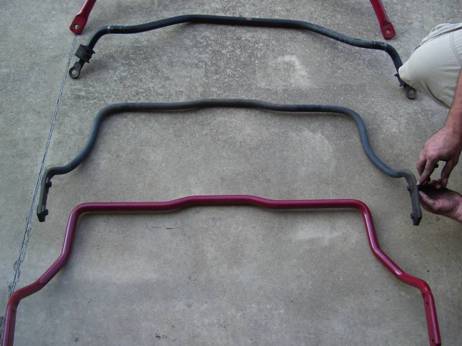
3. Pull the brackets off the sway bar by pushing the metal tabs outward with the screwdriver and pulling up. Be careful not to bend or distort the brackets too badly because these will have to be reused.
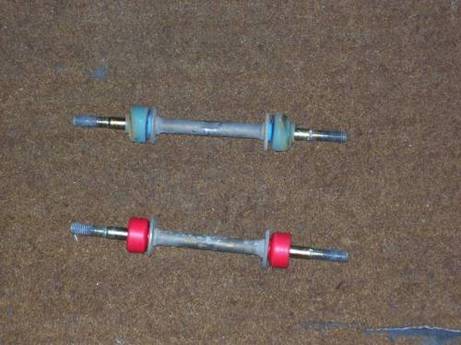
4. Take the new bushings supplied with the kit and install them on the new Eibach Anti-Roll bar. Lube will not be necessary since the bushings are already split for easy installation. Push the brackets over the bushings, and press the tabs on the bracket back into position.
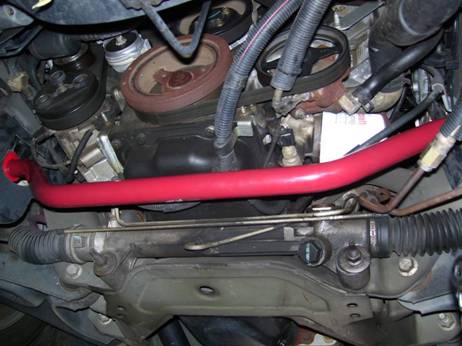
5. Raise the sway bar into position and install the brackets with the factory bracket nuts, being careful to mind the plastic shroud and not damage it. Do not tighten the nuts completely at this time.
6. The instructions from the kit say to use the supplied grade 8 bolts, but I found it easier to reuse the factory end links. I tried repeatedly to get the bolts to work, but the spacing was not correct and the bolts were too short. Install the bushings on the end links and put them into place between the sway bar and control arms. Install the rest of the bushings and spacers, as well as the nuts provided by the kit. Using the torque wrench, tighten the bracket nuts to 44 to 59in lbs and the end link nuts to 132 to 192 in lbs.
7. Push the plastic retainers back into place. The front sway bar is now installed.
Rear Anti-Roll Bar Installation and Removal
8. Locate the stabilizer bar in the rear. Detach the ABS lead located right behind the wheel on the frame rail. Remove the four bolts that attach the stabilizer bar to the lower control arms and remove the bar.
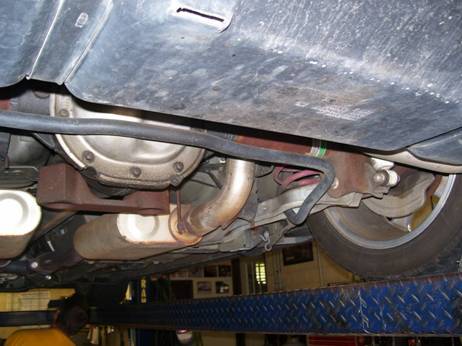
9. The nuts supplied by the kit for the rear sway bar did not work for me because the threads were marred up. I replaced them with 3/8-16 nuts from the hardware store. It is a good idea to have these prepared in case the supplied nuts do not work.
10. Install the rear sway bar in the reverse order of the removal instructions, making sure the get the brake lines back in place
11. Using the torque wrench, torque the bolts to 29 to 37 lbs.
12. Installation is now complete. Take the time to check for any leaks while under the car.
Installation instructions provided by AmericanMuscle customer Jesse McLean 7.29.08
