 FREE 1 to 3-Day Delivery on Orders $119+ Details
Best Sellers


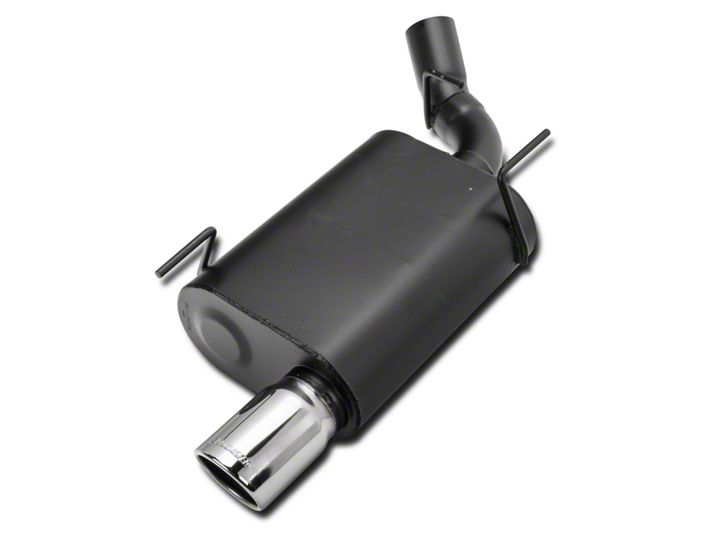
How to Install Axle-Back Exhaust on Your 2005-2009 V6 Mustang
Installation Time
1 hours
Tools Required
- 15mm deep socket
- 13mm deep socket
- 13mm box wrench
Shop Parts in this Guide
Installation
Please Note: This guide was completed using the Flowmaster Axle-back; however, the same basic process is used for any brand. Please note the number of hangers your axle-back has: some have 3 (like this guide shows) while some have 2.
Installation Instructions:
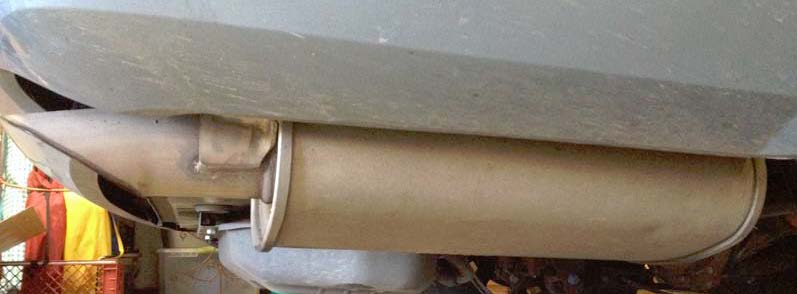
1. Use a 15mm socket to loosen the nut on the clamp connection between the muffler and the over-axle pipe. You may want to have a support stand under the muffler during removal.
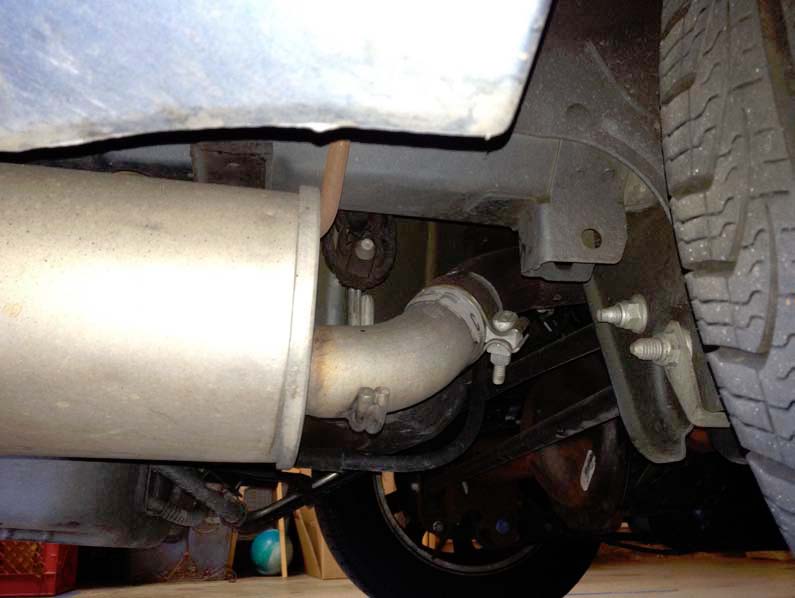
2. There are (3) hangers that support the muffler. Each hanger has (2) bolts securing them to the frame.
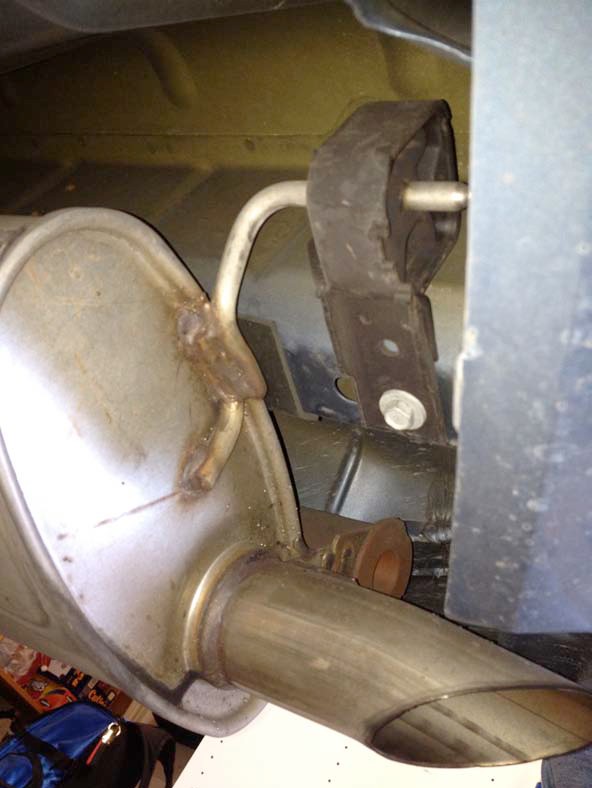
3. Use a 13mm socket to remove the bolts that secure the muffler hangers to the frame.
4. Use a 13mm wrench to remove the bolts above the muffler.
5. Remove the muffler.
6. Take the hanger mounts from stock muffler and put them on the new muffler.
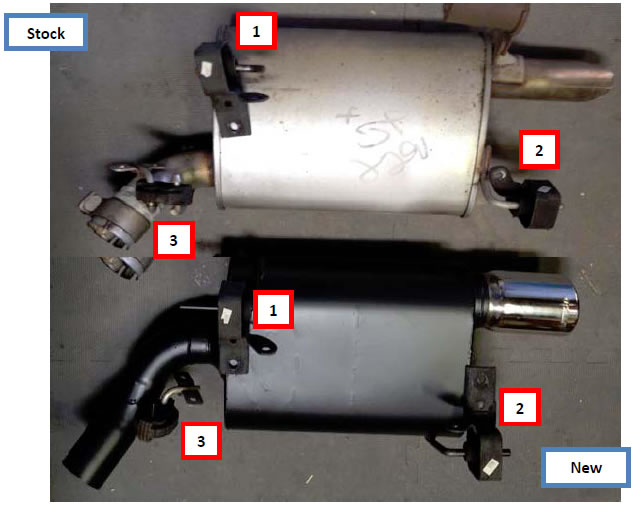
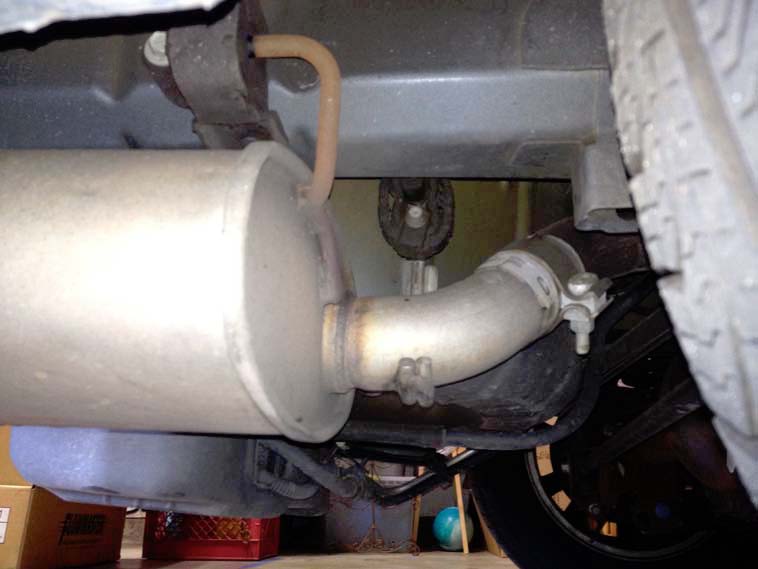
7. Place the ring clamp that came with the muffler (Part #MC250R) onto the inlet pipe of the muffler.
8. Slide the muffler back onto the over-axle pipe and support muffler with a stand.
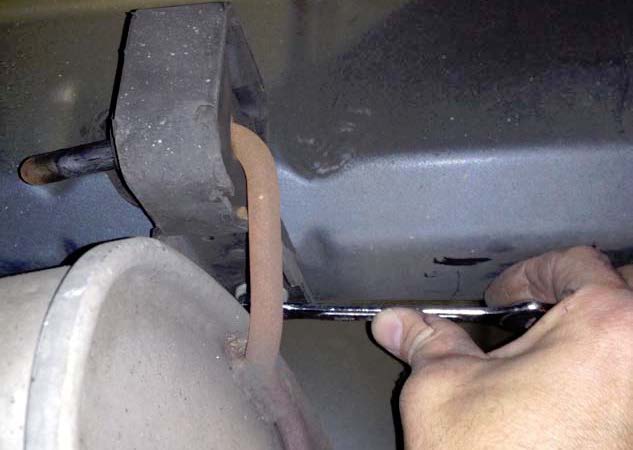
9. Re-attach the muffler hangers with the 13mm bolts. You’ll need a 13mm box wrench to tighten the horizontal hanger bolt located over the top of the muffler.
10. Tighten the ring clamp at the connection with a 15mm deep socket.
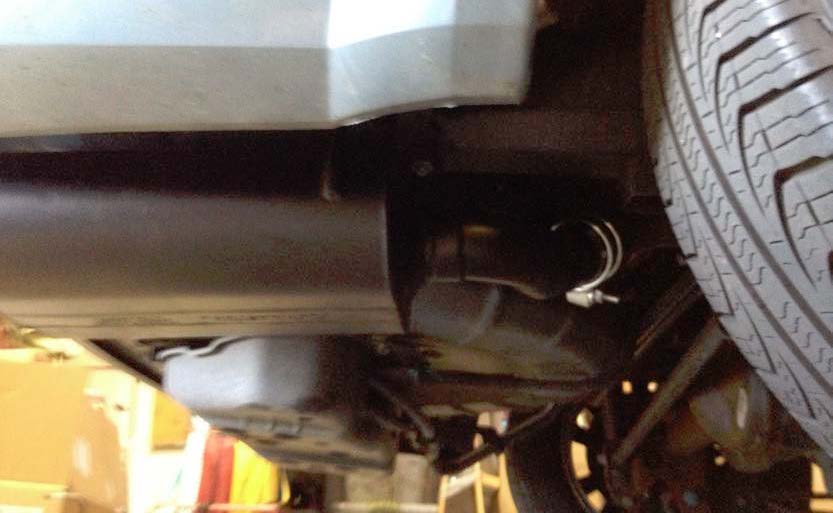
11. Check to make sure everything is secure.
12. Enjoy your new muffler!

Installation Instructions written by AmericanMuscle customer Chris Halter 3.30.12
