 FREE 1 to 3-Day Delivery on Orders $119+ Details
Best Sellers


How To Install a Ford Racing Bullitt Axle-Back Exhaust on Your 2005-2009 Mustang GT or GT500
Installation Time
2 hours
Tools Required
- 13mm Socket
- 13mm Wrench
- 15mm Socket
- 15mm Deep Socket
- Ratchet(s) [I used a bigger one for the 15mm and a smaller one for the 13mm]
- Ratchet Extension (optional)
- Jack (optional)
- Wheel Chocks (optional)
- Jack Stands x 2 (optional)
- Wheel Lug Remover (optional)
- PB Blaster or Liquid Wrench Super Penetrant (optional)
- 1 Rubber Mallet (optional)
- Degreaser (such as "Simple Green") and SOS Pad (optional)
- Flashlight (optional)
- Safety Goggles (optional)
- Latex Gloves (optional)
In the Kit:
1. 2 Ford Racing M-5230-GTB Bullitt Axle-backs
2. 2 Over-axle high quality exhaust clamps (pre-attached to the Axle-backs)
Installation Notes:
Although not a requirement, I strongly recommend jacking up your Mustang and placing 2 jack stands under the rear axle, and starting the job with removal of the back wheels. You will notice that it is much easier to see and access everything with the back wheels removed and the job will be less stressful for you. Having the wheels off makes the task of removing the above-muffler hanger mount bolts (one per side) simple.
Considerations:
1. Make sure that the exhaust system is cooled down prior to commencing this installation.
2. Use of safety goggles is advised since when removing the old axle-backs dust and dirt accumulated through the years can get in your eyes.
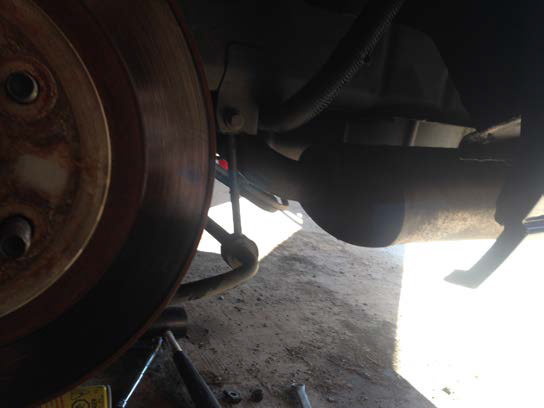
Figure 1: Driver Side Wheel Removed View
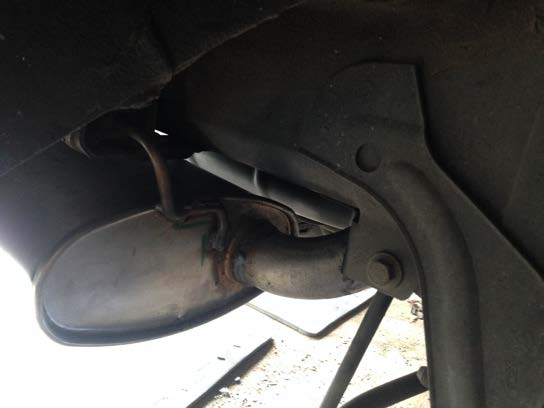
Figure 2: Passenger Side Wheel Removed View
Procedure:
1. Chock front wheels.
2. Raise Driver Side Using Ford Specified Lift Point for Rear of Vehicle. Break lug nuts loose before lifting.
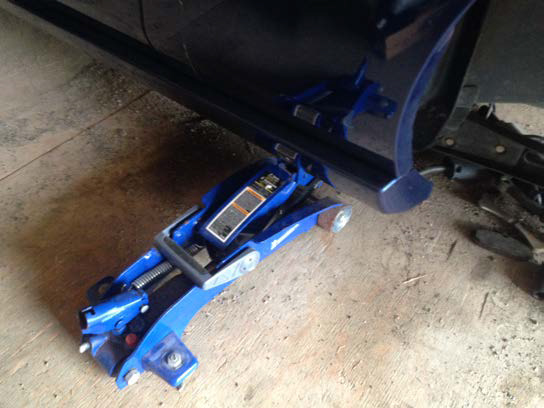
Figure 3: Driver Side Rear Lift Point
3. Once raised, remove Driver Side wheel. Removing the wheel also makes placement of the jack stand under the rear axle easier.
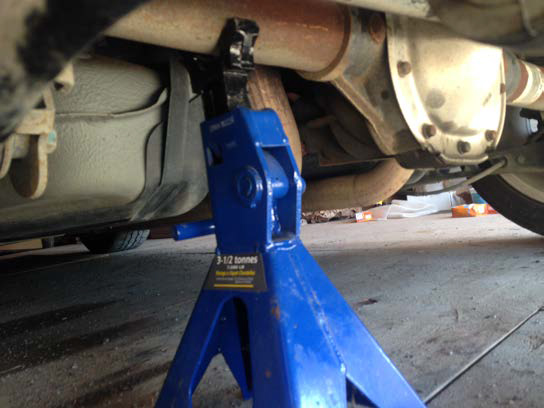
Figure 4: Driver Side Jack Stand Placement
4. With the Driver Side safely secured, remove the jack and proceed to the Passenger Side of the vehicle and follow the same procedure on that side.
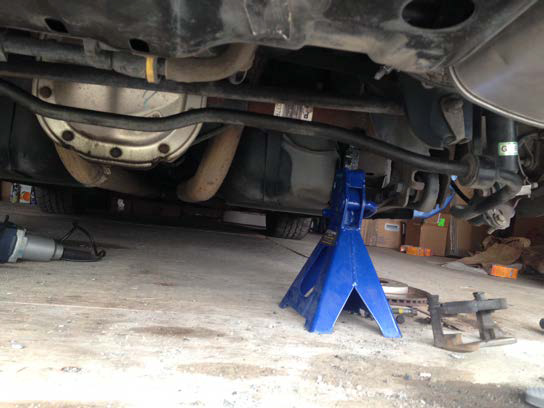
Figure 5: Passenger Side Jack Stand Placement
5. Prior to starting the exhaust removal I located the clamp on each over-axle pipe that connects to the axle-back and I sprayed each one liberally with PB blaster (you can use this or a similar penetrant). This is recommended, as it will make loosening of these clamps easier. I continued this procedure for all of the bolts on the two hanger mounts for each stock axle-back (8 bolts in total for both sides of the car).
6. After allowing several minutes for the penetrant to do its job, I began removal of the Driver Side stock axle-back (what side you choose to start with is simply a matter of preference). The first step is to break loose the clamp on the over-axle pipe using your 15mm deep socket and ratchet. I chose to loosen it good but not entirely at this point.
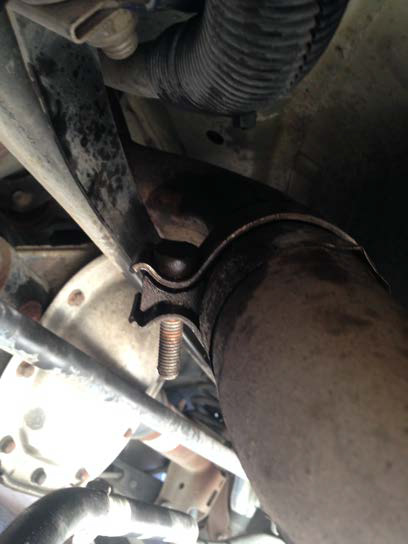
Figure 6: Over-axle pipe clamp
7. Next move on to the first muffler hanger mount closest to the clamp you’ve just loosened. Remove the hanger mount bolt situated above the top of the muffler using your 13mm wrench. You can remove the second bolt holding this hanger mount in place also using your 13mm wrench or a socket/ratchet if you prefer.
IMPORTANT: YOU MUST LEAVE ALL OF THE HANGER MOUNTS ATTACHED TO THE MUFFLERS AND ONLY REMOVE THEM AFTER YOU HAVE TAKEN THE AXLE-BACKS OFF THE CAR. FAILURE TO FOLLOW THIS STEP MAY RESULT IN PERMANENT DAMAGE TO THE HANGER MOUNTS.
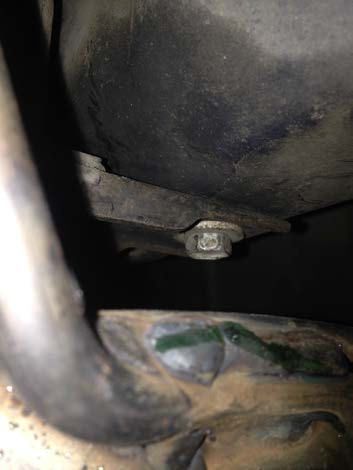
Figure 7: Hanger Mount Bolt Above Muffler (Passenger Side Shown)
8. Next move on to the muffler hanger mount located near the rear bumper. You can loosen these 2 bolts with a 13mm socket/ratchet or the 13mm wrench if you prefer. Note that as I was loosening each of the hanger mounts on the muffler, I was using my knee as support for the muffler from underneath. I did this to relieve some of the stress on the over-axle pipe.
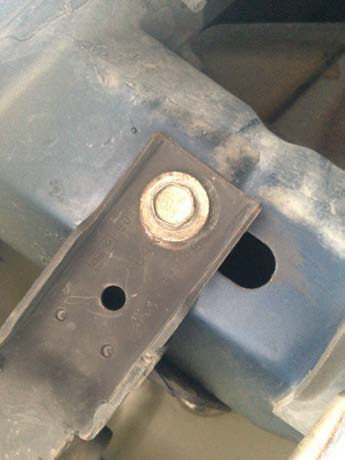
Figure 8: Rear Muffler Hanger Mount Bolt (Passenger Side Shown)
9. Once you have removed all 4 bolts holding the 2 hanger mounts in place, go back to the over-axle clamp and loosen it (all the way if you wish). Once this is loose, you will have to wiggle and twist the axle-back from the over-axle pipe. I sprayed some more penetrant in around the clamp and tapped it several times with a rubber mallet to loosen up any rust around the connection. I found it helpful to hold onto the muffler and use it as leverage to help pull and twist.
10. After a slight workout your axle-back should come free off the over-axle pipe. Remove the axle-back from beneath the car and lay it to the side, taking note of the orientation of the hanger mounts on the muffler. You will want to install those same hanger mounts on the new muffler prior to its installation. I took a photo of the muffler as a reference and removed the hanger mounts from the muffler at this point, setting them aside.
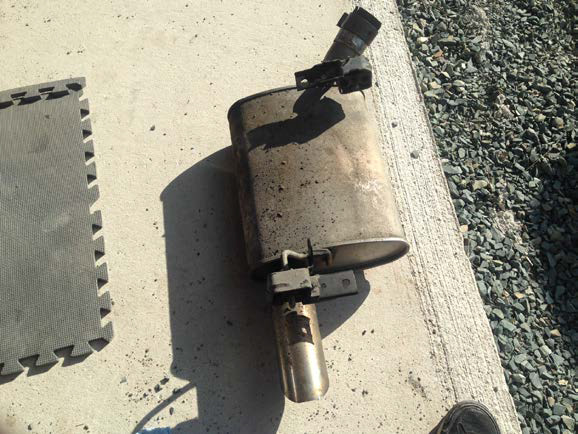
Figure 9: Driver Side Stock Muffler Removed
11. Now you can go to the Passenger Side and repeat the same procedure to remove the passenger side stock axle-back.
12. If you removed the clamps entirely from the pipes that attach over-axle, then take note of how those clamps are attached on the new axle-backs and reinstall the old clamps back on the old stock axle-backs the same way. It’s good to have those clamps if, for instance, you decide to sell the stock axle-backs to somebody.
13. Now that you have installed the hanger mounts on the new mufflers you are ready for installation of the new system. I chose to start on the Passenger Side. The first step is to position the pipe onto the over-axle pipe and tighten the clamp up a little with the 15mm socket and ratchet. I tightened so that the axle back was being held in place.
14. Next position the hanger mount closet to the over-axle clamp and install the bolts beginning with the bolt above the muffler using the 13mm wrench. Tighten this one snugly and then move onto the other one, also tightening it snugly.
15. Similarly install the hanger mount near the rear bumper and tighten each snugly using a 13mm wrench and/or 13mm socket/ratchet.
16. Now that your muffler is in place, go back to the clamp on the over axle-pipe and loosen it a little to allow you to move and adjust it on the over-axle pipe. You will notice a fair sized rivet on the over-axle pipe. Some people might choose to push the axle-back all the way in so that the rivet sits flush in the groove of the axle-back pipe. I chose to not push it in all the way so that the exhaust tips protruded through the bumper cut-outs more. My goal was to have the look of how the exhaust tips are on the Bullitt. I did lots of online research to get an understanding of how they look on the 2008-2009 Bullitt.
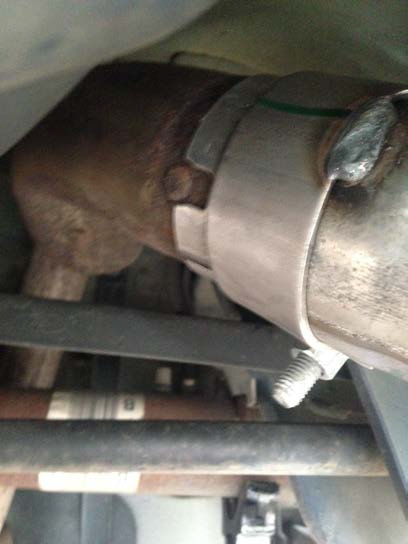
Figure 10: Position of Axle-Back Pipe on Over-Axle Pipe (Passenger Side)
17. You will need to get out from beneath the car to look at the appearance of the exhaust tip from behind, from the side, etc. Then you will need to adjust the location of the axle-back pipe on the over-axle pipe until your desired exhaust tip orientation is achieved. This may mean pushing it further onto the over-axle pipe, rotating it, etc. Once the desired look is achieved snugly tighten the 15mm bolt on the over-axle clamp.
18. Now you can follow the procedure above for the Driver Side axle-back to complete the installation.
19. Again you will need to play around with the position of the axle-back pipe on the over-axle pipe to get the desired exhaust tip look. You will want to compare the Driver Side to the Passenger Side to make sure that the look is symmetrical on the car. Once it is right tighten the 15mm bolt snugly. For me, the orientation on the driver side was as shown below. NOTE: If this procedure does not work for you, you may need to also loosen the clamps on the H-Pipe and move that pipe as well. You can Google information about that online. Some good information exists in online Mustang forums. For me, that step was not necessary.
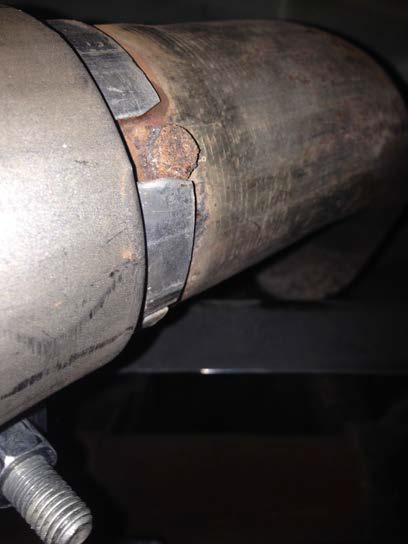
Figure 11: Position of Axle-Back Pipe on Over-Axle Pipe (Driver Side)
20. As mentioned above, it takes some trial-and-error to get your exhaust tips properly aligned. My aim was to get that Bullitt look where the tips stick out from the bumper cut-outs. I compared the car from different views to make sure everything looked symmetrical between the two sides. I was pleased with the results. Here are some of my quality control shots.
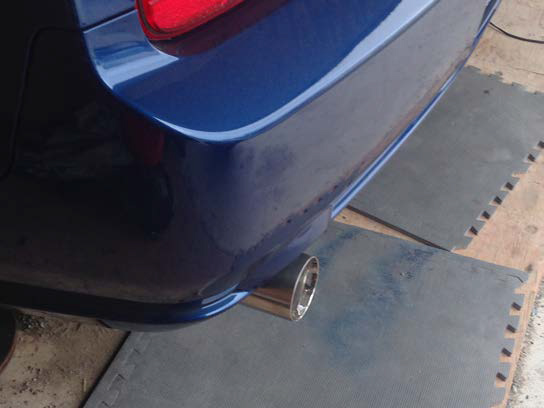
Figure 12: Driver Side QC Snapshot
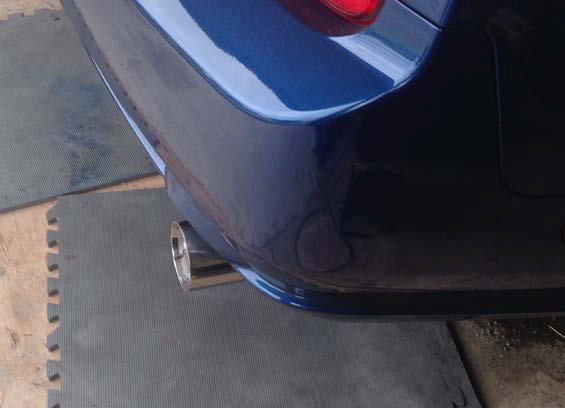
Figure 13: Passenger Side QC Snapshot
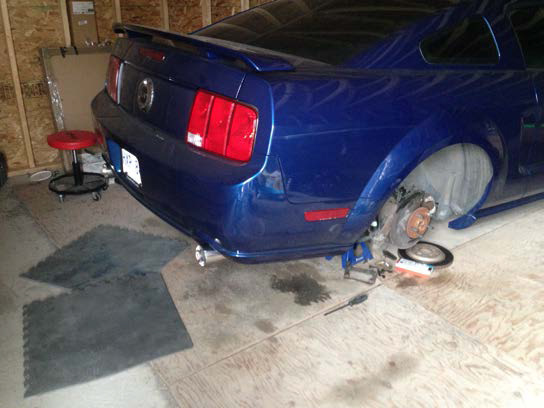
Figure 14: Finished Look from Angle
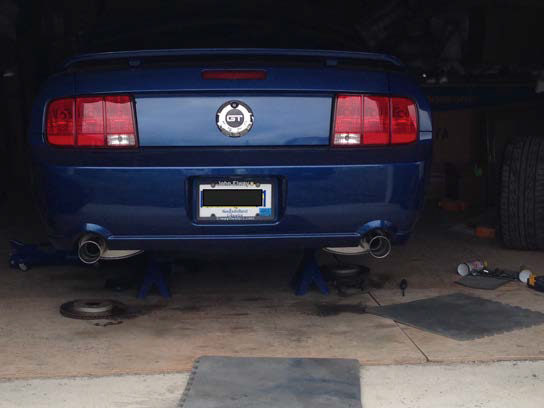
Figure 15: Finished Look from Rear
21. After being fully satisfied with the look I decided to use some ‘Simple Green’ and SOS pads to clean up the old mufflers and to clean the exposed muffler sections seen above from the rear view. The new mufflers come with some marker marks on them and some dirt and tarnish from the manufacturing welding procedure. The SOS and the ‘Simple Green’ cleaned them up nicely. The tips were perfectly clean from the factory and only required wiping with a cloth.
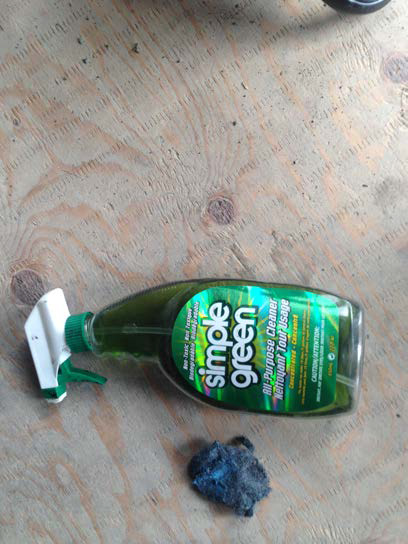
Figure 16: Degreaser and SOS Pad for Old Mufflers and New Ones
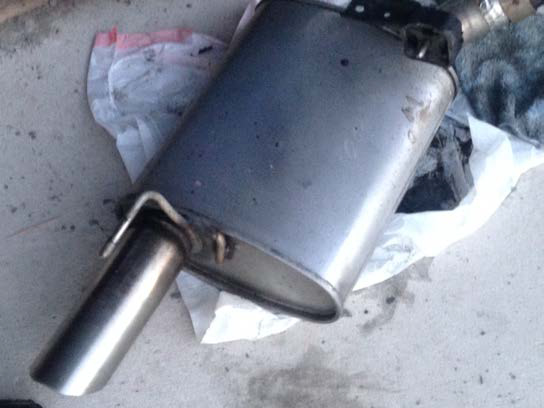
Figure 17: Removed Stock Axle-Back Cleaned Up (Driver Side Shown)
22. This completes the installation of your new Bullitt Axle-Back Exhaust! Enjoy that sweet, throaty new sound! It is recommended to re-check the 2 clamps and the 8 bolts after taking your car for a good cruise to ensure that everything has remained tight.
Installation Instructions Written By AmericanMuscle Customer Dean Smith, 8.08.2014
