 FREE 1 to 3-Day Delivery on Orders $119+ Details
Best Sellers


Ford Racing Mustang C-Springs Installation Guide (1979-2004)
Installation Time
4 hours
Tools Required
- Jack and jack stands
- Good size hammer. A sledge is recommended.
- 3/8" Ratchet
- Needle nose pliers
- Side cutting pliers
- Metric sockets sizes- 15mm deep, 18mm deep, 21mm and 24mm deep
- 12" or longer pry bar
- Standard torque wrench with a foot/pounds setting.

Shop Parts in this Guide
Installation
Installation - FRONT SPRINGS:
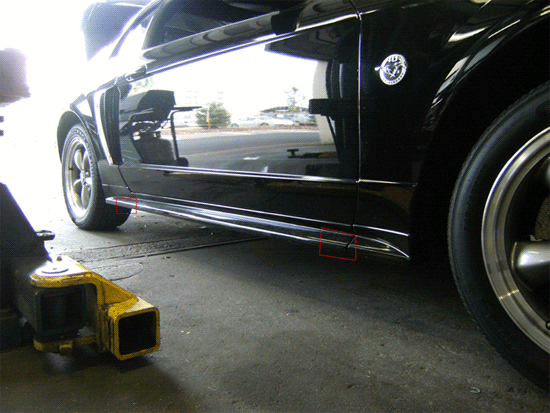
1. In order to begin installing the front springs, you will first want to set the car up on the jack stands, by placing one under each pinch rail, just behind the fenders.
2. Remove the tire and the wheel.
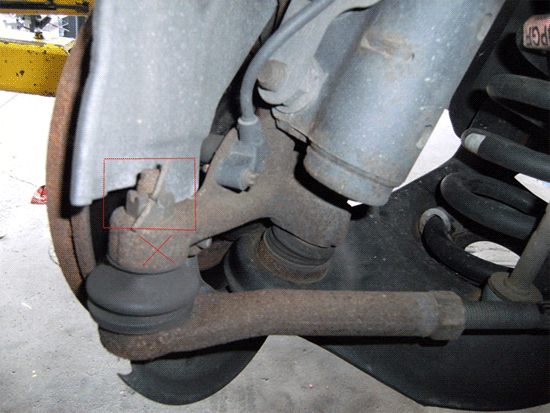
3. Next, remove the tie rod stud cotter pin, using needle nose or side cutting pliers.
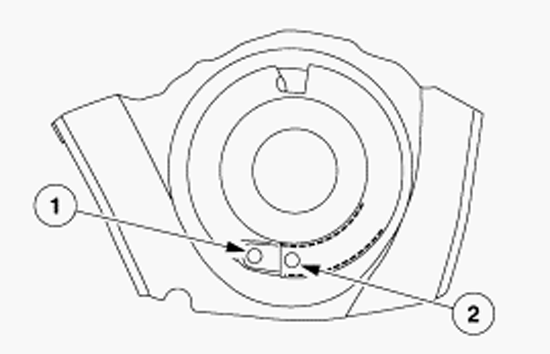
4. Remove the nut, using 18mm deep socket or wrench, and strike the spindle at the "X" shown in picture, to remove stud from spindle. If stud turns with nut, try using a pry bar to apply pressure on the tie rod stud to remove the nut. An air impact wrench is another possible way of removing the nut.
5. Remove the sway bar link bolt, by removing the nut underneath the lower control arm.
6. Now place a jack under the lower control arm, just enough to where there is slight pressure holding the arm in place.
7. Loosen the lower arm bolts by 2 or 3 turns, in order to take tension off the bushings. This lets the arm hang freer and makes installation easier. Use 21 and 24 mm wrenches.
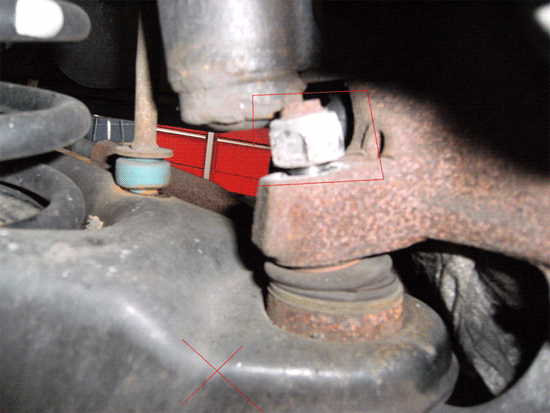
8. Remove the ball joint nut and strike the lower control arm with the hammer, where you see the "X" in the picture. Use a 24mm deep socket or a box end 24mm wrench. Clearance is tight, but either tool should work fine.
9. Move the spindle and strut aside and lower the jack, being careful not to catch the brake rotor backing plate on the arm, which could bend the backing plate.
10. Remove spring and rubber spring isolator bushing.
11. Install your new lowering springs, but first, place the isolator bushing and bottom of the spring in the lower control arm.
12. Check the spring position. The spring must be over the first hole, but the second hole should still be visible on the lower control arm. Below is a picture for reference.
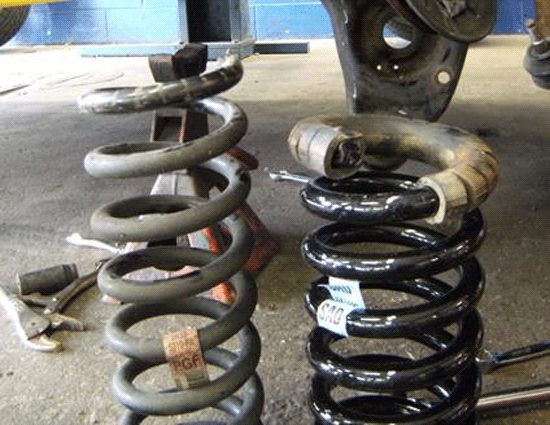
C- Spring vs. Stock Spring. Notice thicker coils and much shorter height
13. Raise the jack under the lower control arm, until the ball joint can be reinstalled. Make sure the sway bar link lines up properly before tightening.
14. Install ball joint nut. Tighten to 130 lbs-ft.
15. Now re-tighten the two bolts on the lower control arm that were loosened earlier. Tighten them to 150 lbs-ft and remove the jack.
16. Reinstall sway bar link and tighten that bolt to 20 lbs-ft.
17. Next, reinstall the tie rod end into the spindle, torque that nut to 40 lbs-ft and install a new cotter pin. Bend the ends up and cotter pin up, and cut with side cutting pliers.
18. Now throw the wheels back on and you're set for the front. Torque wheels with the impact wrench to 125 lbs-ft.
REAR SPRINGS
19. First, raise the vehicle and place the jack stands under the pinch welds. Now remove the rear wheels.
20. With the wheels removed, place the jack under the lower control arm as seen in the picture below. A screw jack is pictured, but the operation is the same with a standard jack.
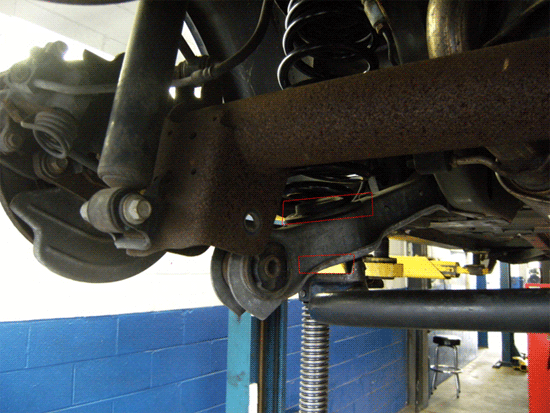
21. Remove the bolt attaching the lower control arm to the rear, using a 21mm bolt with 18mm nut.
22. Lower the jack and remove the spring, using a pry bar toward the inside of the vehicle, to prevent damage to the ABS sensor wire. Use caution when prying the spring free.
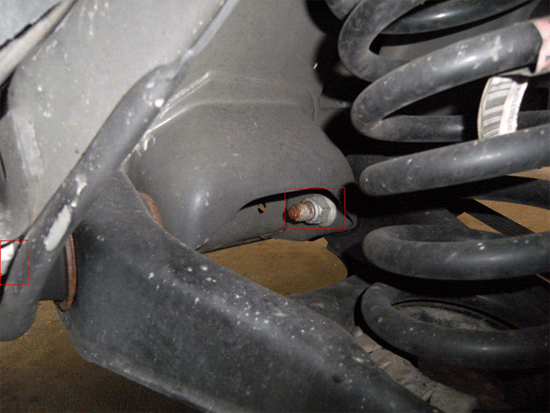
23. Install the new spring, taking care to keep the rubber isolator properly aligned on the lower control arm, and the top of the spring aligned into the spring perch. The rubber isolator is highlighted in the picture that follows "Step 20".
24. Jack the lower control arm up and reinstall the bolt. Torque the bolt to 150 lbs-ft.
25. Repeat for other side of vehicle, and be sure to check to make sure springs are aligned and bolts are tight.
Installation instructions provided by AmericanMuscle customer Max Young 8.30.08
