 FREE 1 to 3-Day Delivery on Orders $119+ Details
Best Sellers


How to Install Ford Racing Sport Axle-Back Exhaust on your 2013-2014 GT500, GT
Installation Time
1 hours
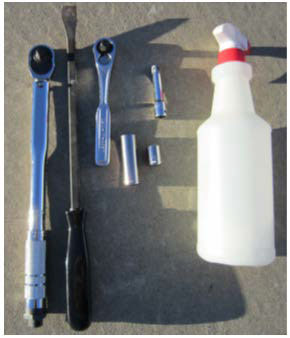
Tools Required
- Jack Stands (2)
- Floor Jack
- Pry Bar
- 13mm Socket
- 15mm Socket
- 3" Long Socket Extension
- 3/8” drive Ratcheting Wrench for Use with Sockets
- Torque Wrench
- Spray Bottle with Soapy Water
Shop Parts in this Guide
The below installation instructions work for the following product:
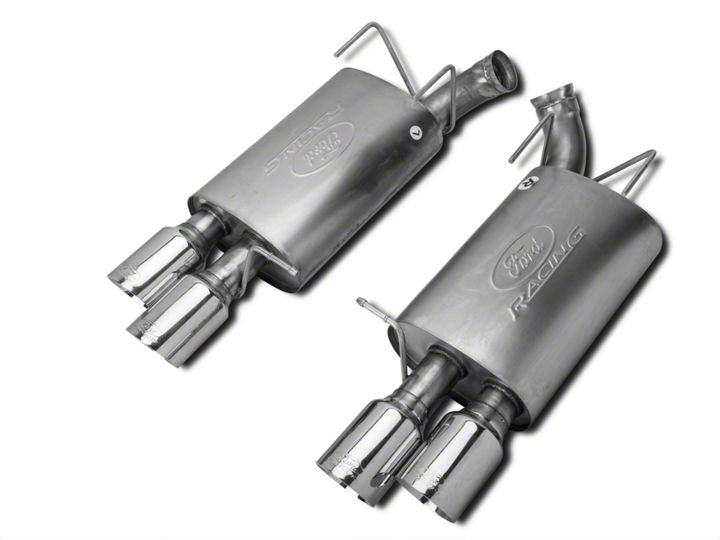
Ford Racing Sport Exhaust P/N: M-5230-MSVTLB (2013-2014 GT500)
Note: This Exhaust also fits 2013-2014 Mustang GT with use of the Shelby GT500 Rear Valance kit P/N: DR3Z-17F828-AB
Required tools:
• Jack stands (2)
• Floor jack
• Pry bar
• 13mm Socket
• 15mm Socket
• 3” long Socket extension
• 3/8” drive Ratcheting Wrench for use with Sockets
• Torque Wrench
• Spray bottle with soapy water
(or non-petroleum based suspension lube)
Suggested Hardware (not included with Exhaust):
• Exhaust Ball Clamp (2)
Installation time required: Approximately 1 to 2 hours.
Caution: Allow the Exhaust system to cool for at least 1 hour before working on the vehicle.
1. Verify that you have all hardware and required tools listed above before beginning this installation.
2. Set the emergency brake.
3. Block the front wheels.
4. Raise the rear of the vehicle and secure with jack stands.
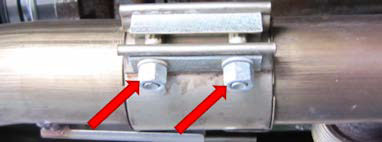
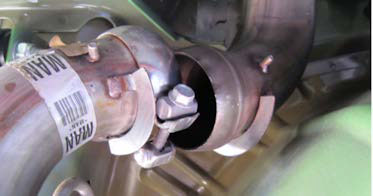
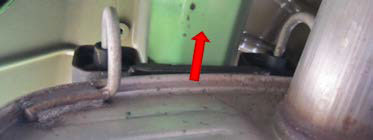
5. Using a 15mm Socket, loosen (but do not remove) the (2) nuts from the Exhaust’s axle mid-pipe Band Clamp at the center of the vehicle.
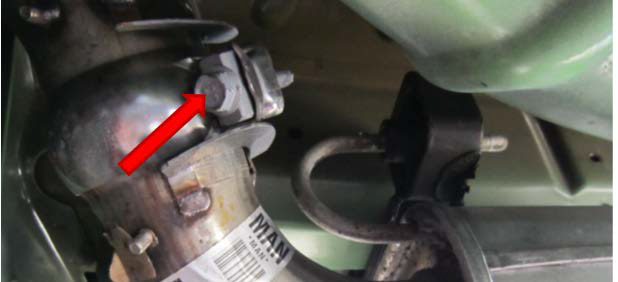
6. Using a 13mm Socket and 3” long extension, loosen the Exhaust Ball Clamp bolt.
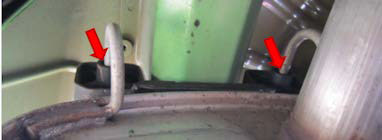
7. Using soapy water, lubricate the lower rear Exhaust hanger and rubber isolator to aid in removal.
Caution: Avoid using Petroleum-based lubes on the Exhaust isolators since they can cause premature deterioration of the rubber isolator.
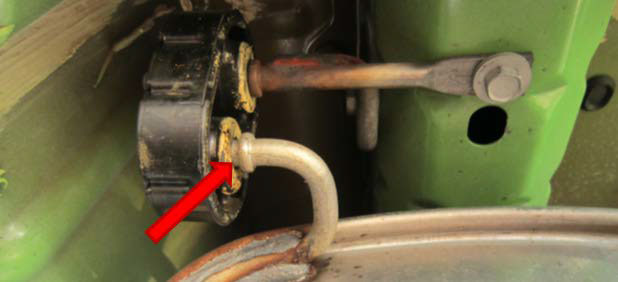
8. Using a Pry bar, separate the lower rear Exhaust hanger from the rubber isolator.
9. Free the muffler from the Exhaust axle mid pipe.
Tip: If you need extra clearance where the muffler meets the exhaust mid-pie, you can remove the upper Lateral Stiffener Bar (Panhard bar) using a 15mm Socket (for Drivers side) and an 18mm Socket (for Passengers side).
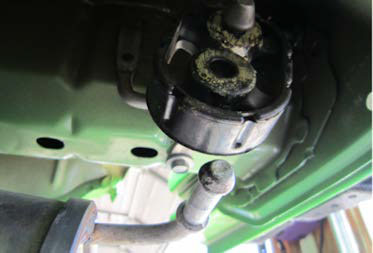
10. Using soapy water, lubricate the front Exhaust rubber isolators to aid in removal.
11. Push the Exhaust towards the front of the vehicle to slide the hangers out of the Front rubber isolators to remove the stock Exhaust from the vehicle.
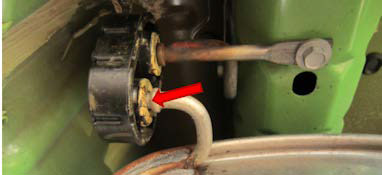
12. Remove the Exhaust Ball Clamp from the stock Exhaust.
• Per Fords recommendations, the Ball Clamps should not be reused, but many people are able to free the Ball Clamps from the stock Exhaust and reuse them.
13. Loosely position the Exhaust Ball Clamp onto the Ford Racing Exhaust.
Tip: Leave the bubble-wrap packing material on the new Exhaust tail pipes to protect the finish during installation.
14. Install the new Ford Racing Exhaust by sliding the (2) front exhaust hanger hooks into the Front rubber isolators.
15. Align the muffler inlet flare (clamp side) to the exhaust axle mid pipe and loosely position Ball Clamp.
16. Slide the rear Exhaust hanger into the lower rubber isolator hole.
17. Tighten the Exhaust Ball Clamp just enough to keep the exhaust in place.
18. Remove the bubble-wrap packing material from the muffler tail pipes if you have not already done so.
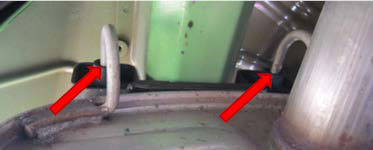
19. Check the Exhaust tail pipes for alignment within the lower bumper valance and adjust as necessary.
20. Position and tighten the Exhaust Ball Clamp and torque to 30 Nm (22 lb-ft).
21. Tighten the Exhaust axle mid-pipe band clamp nuts and torque to 54 Nm (40 lb-ft).

22. Repeat the same process to install the Ford Racing Axle-back Exhaust assembly for the opposite side of the vehicle.
23. Remove jack stands and lower the vehicle.
24. Unblock the front wheels.
25. Start the vehicle and ensure that there are no Exhaust leaks.
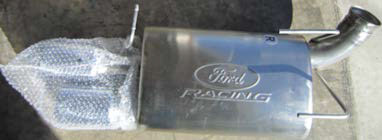
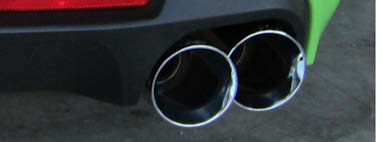
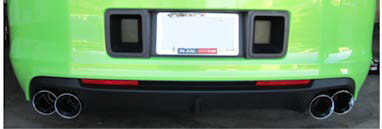
The below illustration is of the Ford Racing Exhaust after the installation has been completed.
Installation guide submitted by American Muscle customer J. Decker – 01/12/2014
