 FREE 1 to 3-Day Delivery on Orders $119+ Details
Best Sellers


How to Install a Ford Racing Touring Axle-Back Exhaust on your 2010 V6 Mustang
Installation Time
1 hours
Tools Required
- ½ Inch Socket wrench ( for hanger bolts)
- 5/8th socket wrench ( for bolt on the clamp in the stock muffler)
- 3/8th socket wrench ( for battery terminal)
- Clear safety glasses ( for your eyes )
Please read through the instructions carefully before starting this project. Take the time to get all the tools and safety equipment before starting the Project.
Fitment:
Ford Racing Touring Axle-Back Exhaust fits with your factory hangers. Please note that the Factory part has three hangers: one close to the connector factory Y pipe, second on the mid part of the muffler and the third at the end of the exhaust pipe. Your new Ford Racing Touring Axle-Back Exhaust has only two hangers that will fit snuggly with the factory hanger holders (See exhibit 2)
Exhibit 1 (Before)
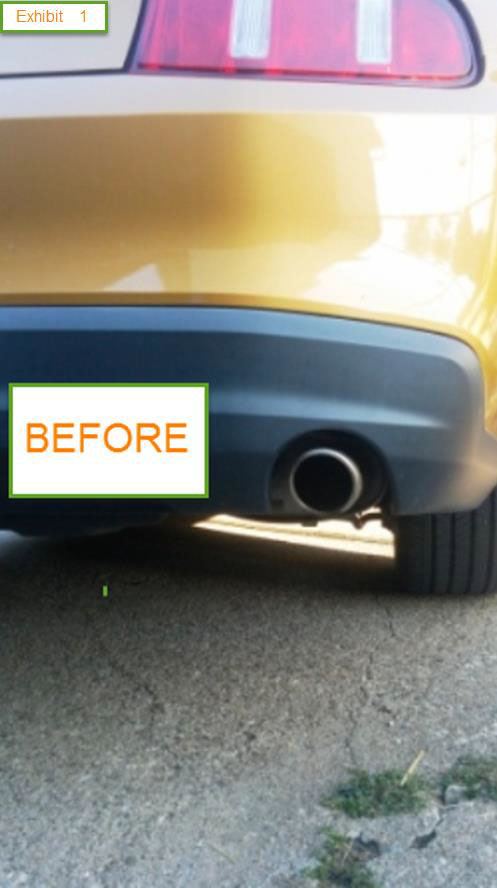
Exhibit 2

Before you begin, safety first: Disconnect your car’s battery. Use a 3/8” socket wrench.
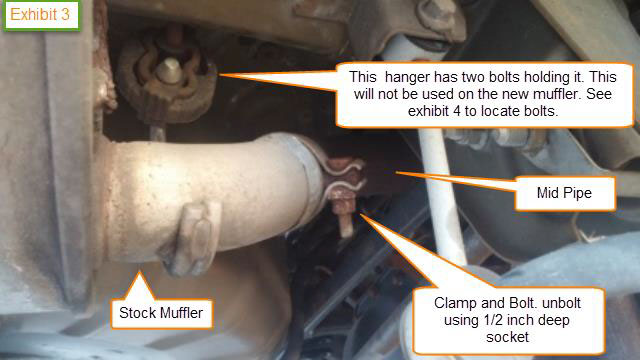
Step 1: Using a 5/8” socket wrench, loosen the bolt on the clamp that connects the back of your stock muffler to the factory Y-pipe (see exhibit 3)
Exhibit 3
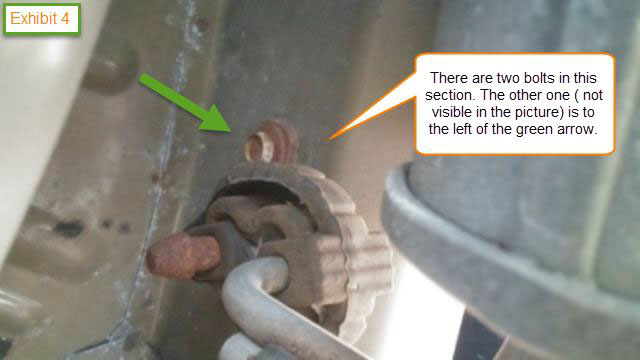
Step 2: There are 3 hangers that support the muffler. Each hanger has 2 bolts that will take . inch socket to unbolt. Moving from Front of the car to the rear, find first hanger. This hanger will not be used in the new muffler (Exhibit 4)
Exhibit 4
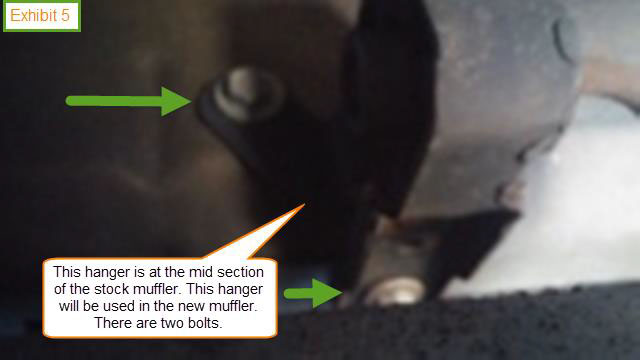
Step 3: Moving from the front of the car to the rear, locate the next hanger which is positioned at the middle of the muffler box. This hanger will be used in the new muffler (Exhibit 5)
Exhibit 5
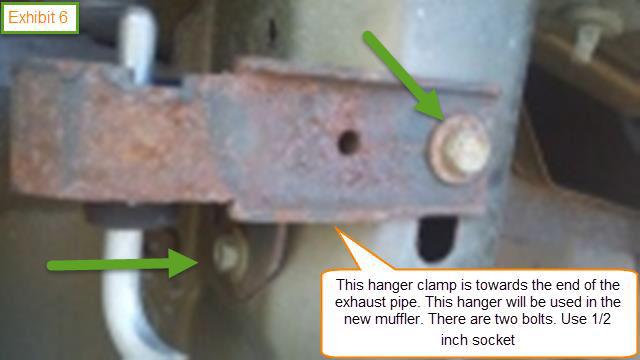
Step 4: The final hanger is towards the end of the exhaust pipe. This hanger will be used in the new exhaust (Exhibit 6)
Exhibit 6
Step 5: After removing all the bolts, pull the muffler off of the factory mid-pipe and remove the stock muffler from the two black hangers.
Step 6: Reattach the two bolts along with hanger holder towards the end of the exhaust (exhibit 6). Then, reattach the two bolts with hanger holder close the mid pipe and tighten the bolt on the clamp that connects the muffler to the mid pipe (recommended that the bolt be tightened to about 55-65 lbs)
Step 7: Place the ring clamp that came with the new muffler onto the inlet pipe. Guide the muffler back into the over axle pipe. Slide the two muffler hangers in the hanger holders that you just reattached in step 5. Tighten the ring clamp.
Step 8: Reconnect your battery terminal.
Step 9: Check to make sure that all the bolts, clamp and battery terminal Is tight and secure
Step 10: Enjoy your new Ford Racing Touring Axle back exhaust.
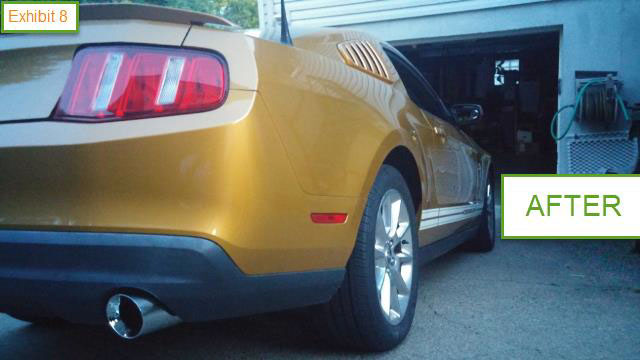
Final Exhibit
Instructions written by Loyal AmericanMuscle customer Manish kc 8.24.2015
