FREE 1 to 3-Day Delivery on Orders $119+ Details
Best Sellers


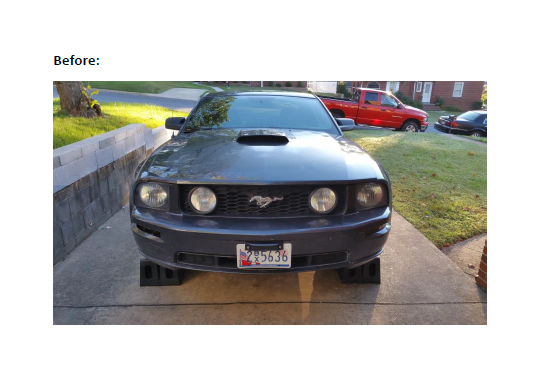
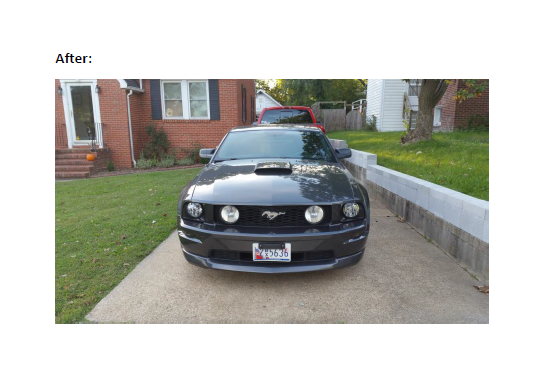
How to Install Front Bumper Cover - Unpainted on your Mustang
Installation Time
3 hours
Tools Required
- Flat Head Screwdriver
- Phillips-Head Screwdriver
- Jack and Jack Stands (2) or Ramps
- Wheel Chock(s)
- 3/8 Drive Ratchet
- 10mm Socket
- 6.5 or 7mm Socket

Shop Parts in this Guide
Overview:
This installation guide will cover installation of the Front Bumper Cover for all Mustang GTs from 2005-2009. You may want to have this bumper cover painted at your local auto body shop prior to installation.
Additional Parts:
Front Fascia to Fender Bracket – Right Side (A.M. Item No. 87002) – May be Required Front Fascia to Fender Bracket – Left Side (A.M. Item No. 87003) – May be Required Four (4) stainless steel bolts (1/4”W x 3/4”L), nuts and washers
1. Raise the front end of the vehicle using one of the following two options:
A. Drive the car up onto ramps and place the car in park (automatic) or first gear (manual). Engage the emergency brake. Place wheel chocks behind the rear wheels to ensure car does not roll back. I used this method for this guide.
OR
B. Loosen the lug nuts on both front wheels using a 21mm socket. Raise the front of the car and place onto jack stands. Place wheel chocks behind the rear wheels to ensure car does not roll back. After the front of the car is in the air and is secure, remove both front wheels. Note: although removing the front wheels is optional, it will make the install easier.
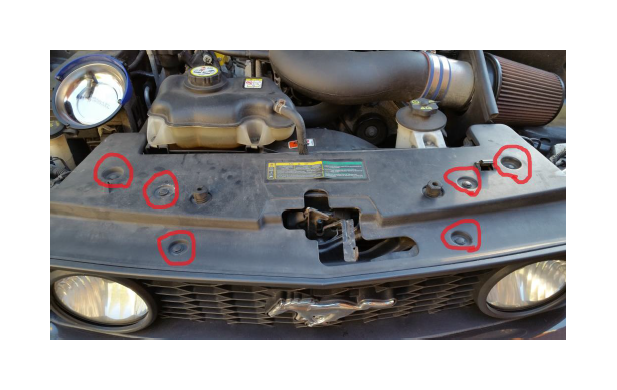
2. Remove the six (6) clips which are holding the upper radiator cover onto the vehicle. A flat-head screwdriver or panel remover tool will make this step easier. I have circled the clips in the picture directly below.
3. Remove three (3) screws at the bottom of each of the two (2) inner fender well covers with a Philips-head screwdriver. See picture directly below.
4. Remove the five (5) retaining clips from each of the two (2) front inner fender well covers. A flat-head screwdriver or panel remover tool will make this step easier. Remove each front inner fender well cover. I could not take a great picture of these because the wheel was in the way, but these retaining clips are easy to find in the wheel well.
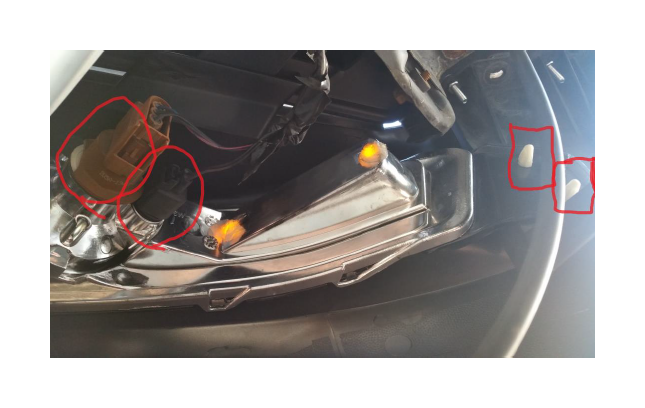
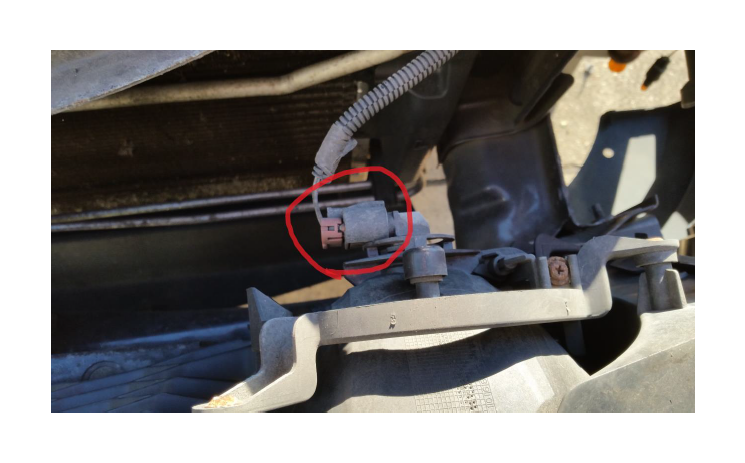
5. Remove the two (2) bulb sockets from each of the turn signal lamps on both sides of the vehicle by twisting the socket and pulling out of the turn signal lamps. I circled the sockets in the picture directly below.
6. Remove the two (2) turn signal lamps by squeezing the white clips until the outer side pulls out, and then pull the tab out of the inner side. I put squares around the white clips in the picture directly above.
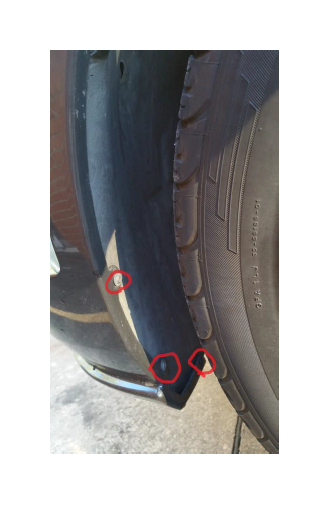
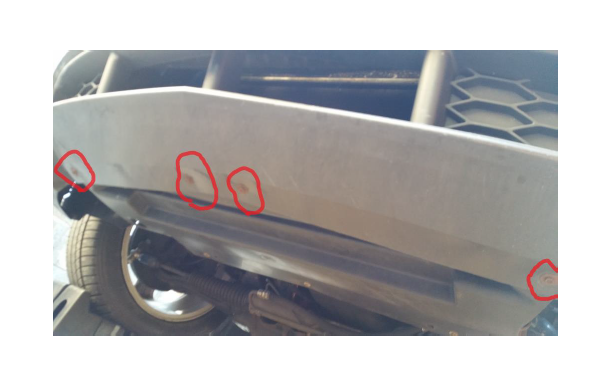
7. Using the 6.5mm or 7mm (the bolts are 6.5mm but 7mm worked for me since I didn’t have a 6.5mm) socket and ratchet, remove the four (4) bumper retaining bolts from the bottom of the bumper. See picture directly below.
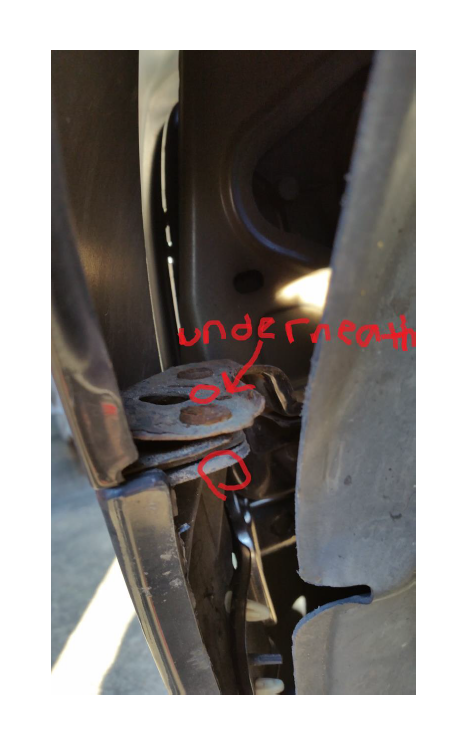
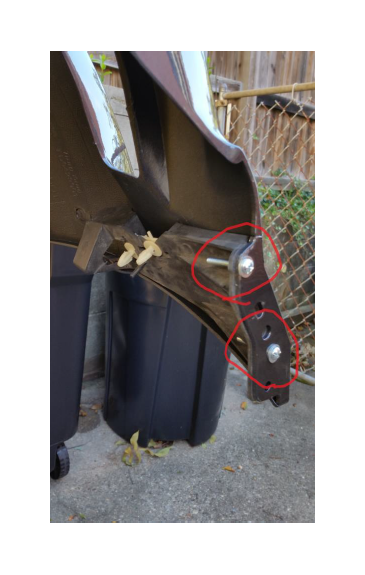
8. Using the 10mm socket and rachet, remove the two (2) front fascia to fender bolts from the each side of the vehicle. These are located at the connection between the fender and the bumper. Note: these two (2) bolts often snap when removed (because the bolts are not strong and are likely to be covered in rust). This is where the Front Fascia to Fender Bracket replacement comes into play if yours breaks (see additional parts list above). If one or both of the bracket bolts does break, remove the third 10mm bolt to remove the bracket from the car and replace it with a new one (there are only three 10mm bolts holding it on). See picture directly below.
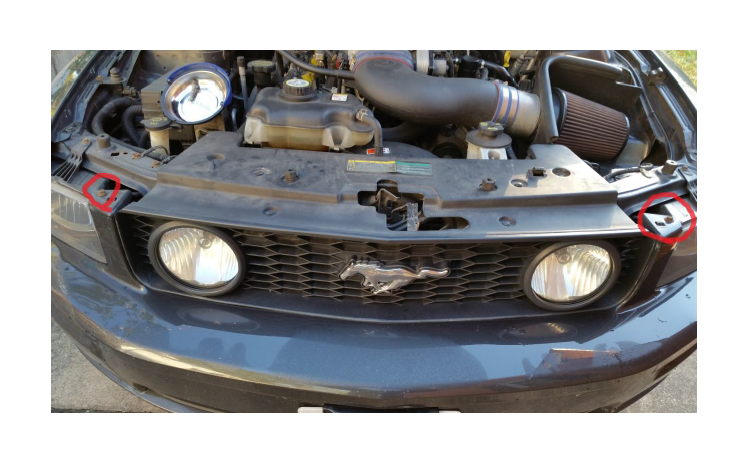
9. Using the 10mm socket, remove the two (2) upper bumper cover bolts from the vehicle. See picture directly below.
10. Pull the upper bumper cover mounts over the retaining tabs and pull the bumper cover partly away from the vehicle. The tabs are located directly next to the upper bumper cover bolts that you just removed.
11. Before removing the bumper, remove the bulb sockets from each of the two (2) fog lights by twisting the socket and pulling out of the fog lights. See picture directly below.
12. Remove the bumper from the vehicle. If you are going to do anything with the bumper cover other than throw it into a dumpster, be careful not to scratch the paint by placing it onto cardboard or other non-abrasive surface.
13. Remove the upper grill from the old bumper by pulling each of the eight (8) tabs free on the back of the upper grill. See picture directly below.
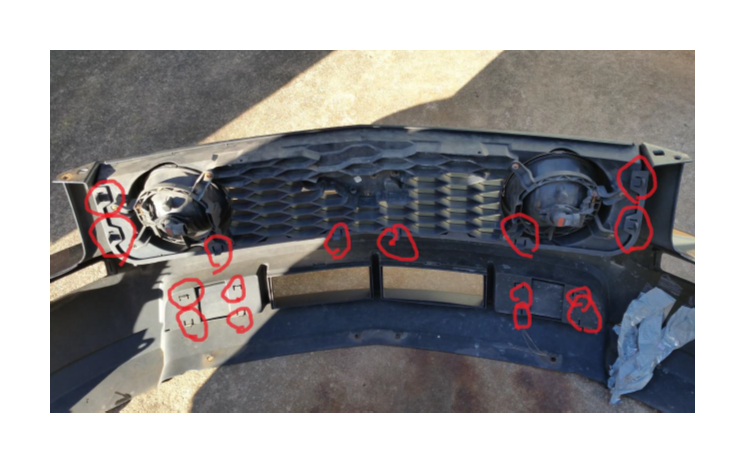
14. Remove lower grill from the old bumper by pulling and pulling each of the eight (8) tabs free on the back of the lower grill. See picture directly above.
15. Remove each front bumper reinforcement bracket from the old bumper. These brackets are held on by metal rivets. To remove the rivets, I cut them off using a Dremel with a cutting tool. Take care in performing this step if you plan on salvaging the bumper. Note: Cutting the rivets could heat the bumper up and melt the plastic. Alternative methods for removing the rivets include (carefully) drilling them out or cutting them with nippers. See picture directly below.

16. Install the old bumper reinforcement brackets that you just removed from the old bumper into the new bumper. I used stainless steel bolts, nuts and washers that I found in my garage. Make sure the head of the bolt is not too big since it needs to fit in between the bumper and fender (there is a cutout on the bottom of the fender for each). See picture directly below.
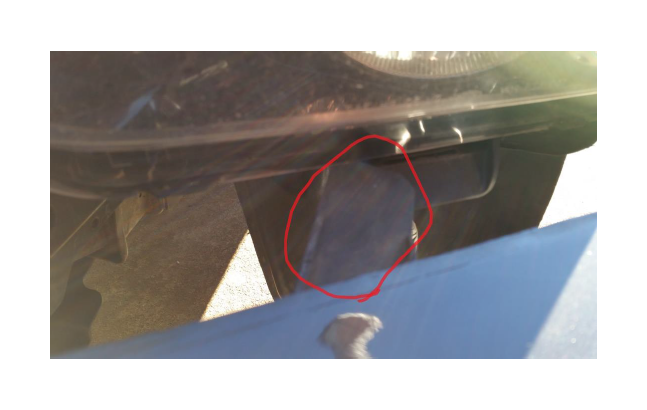
17. Installation of the new bumper cover is the opposite of the removal. Start by installing the two (2) 10mm bolts on the top of the bumper. Make sure that the large tabs on the bumper slide into the slot that is on the bottom of each headlight. I have circled one of the two (2) bumper tabs as it slides into the headlight slot in the picture directly below.
18. Reinstall the turn signal lamps by first pushing the inner tab into its slot on the bumper and then pushing the outer side onto the white clips. Ensure that the turn signals and driving lights function properly before moving on.
19. Install the four (4) 6.5/7mm bolts on the bottom of the bumper. Next, install the two (2) Front Fascia to Fender Brackets using the two (2) 10mm bolts on each side.
20. Replace the front inner fender well covers using the five (5) push pins on each side.
21. Install the lower grill by pushing it into the bumper so that each of the clips engages into the bumper.
22. Plug the two (2) fog lamps into the upper grill. Ensure that the fog lights function properly before moving on.
23. Install the upper grill by pushing it into the bumper so that each of the clips engages into the bumper.
24. Reinstall the radiator cover using the six (6) plastic pins.
25. Once the bumper cover is secured with the OEM hardware and you ensure that all lights function properly, reinstall the wheels back onto the car, remove the jack stands and lower the car (or simply drive the car off of the ramps if you used method A from Step 1). Make sure you adequately tighten the lug nuts and take the car for a test drive.
26. Enjoy the fresh new look of your front end!
Notes: You will notice below that I also installed new headlights and a chin spoiler. These parts are unnecessary for this instructions manual but I figured I would also replace these components since I had the front end of the car apart anyway. The headlights are the Pre-Painted Raxiom Retro-Style Headlights (A.M. Item No. 49162-HP) and the chin spoiler is the MMD Chin Spoiler (A.M. Item No. 386518). The headlights and the chin spoiler each take an additional ten (10) minutes to install.