 FREE 1 to 3-Day Delivery on Orders $119+ Details
Best Sellers


How to install a Ford Racing BOSS 302 Brake Duct Kit on your 2010-2012 Mustang
Installation Time
2 hours
Tools Required
- 12mm open end wrench
- 13mm socket
- 15mm socket
- Phillips head and flat head screwdrivers
- 3/8 inch or ½ inch drive ratchet
- Jack stands
- Floor jack
- Needle nose pliers
Installation
The following instructions apply to a 2010-2012 Mustang with VP / California Special lower grill insert. If vehicle is not equipped with this lower grill insert the part is available from Ford Motor Company dealerships Part Number CR3Z-17626-AB.
For installation of Front Brake Cooling Kit M-2004-MB on a standard 2010-2012 Mustang GT, please utilize the 2012 Mustang Boss 302 Laguna Seca Edition Front Brake Cooling Kit Installation Instructions.
The following instructions apply to a 2012 Mustang Boss 302 Laguna Seca Edition.
Before proceeding the standard splitter must be removed by removing the (16) bolts and (10) push pins located on the underside of the splitter.
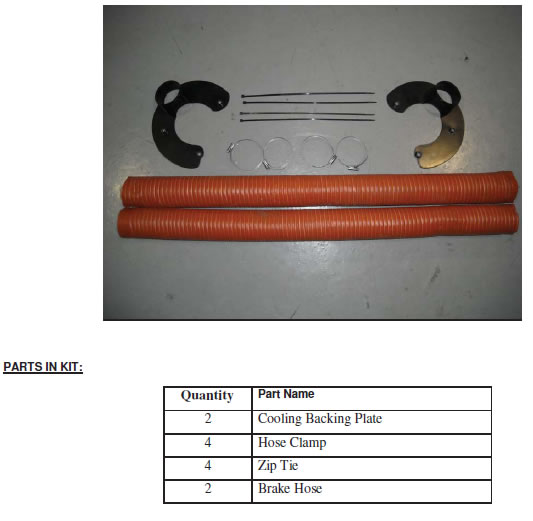
INSTALLATION INSTRUCTIONS:
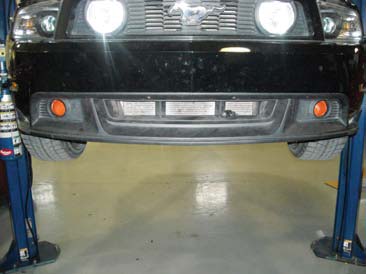
STEP 1: Support the vehicle to gain access to the undercarriage.
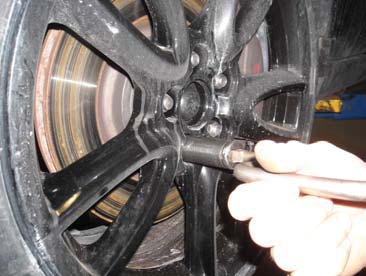
STEP 2: Remove the front wheels.
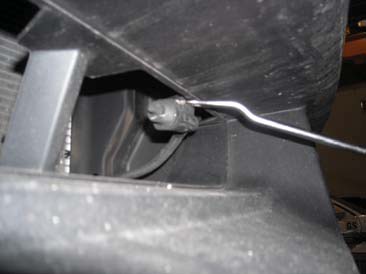
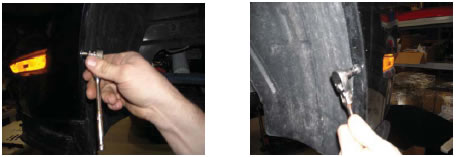
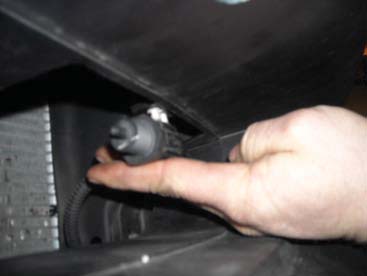
STEP 3: Unclip the ambient air temperature sensor in the lower grille from fascia
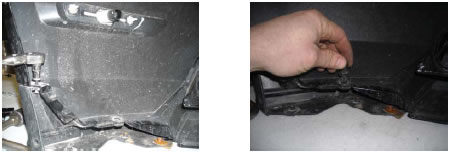
STEP 4: Remove the (2) outer and (4) center bolts holding the splash guard to the fascia.
STEP 5: Remove (2) front side inner fender liner bolts per side.
STEP 6: Remove (4) inner fender liner push retaining clips and remove front half of inner fender liner on each side
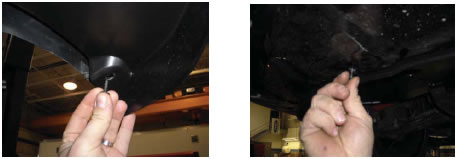
STEP 7: Remove (1) bolt and (1) retaining clip from each side on the lower grille insert.
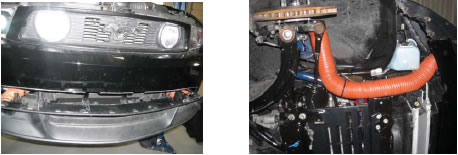
STEP 8: Gently unclip lower grille insert from fascia and remove by sliding forward.
STEP 9: Gently unclip both foglight delete bezels from outboard sides of lower grille insert and remove.
STEP 10: The back side of each foglight delete bezel features a center point dimple and telltale undercut. Using a 2 ¾ inch hole saw and from the back side of the bezel outward, drill out the plastic on each bezel using the dimple and telltale as a guide.
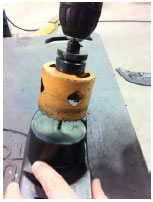
STEP 11: Lightly sand or debur any rough edges after drilling and then reinstall each bezel to lower grille insert.
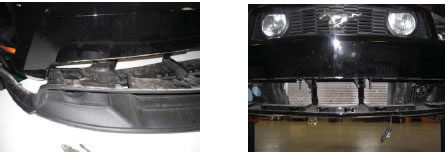
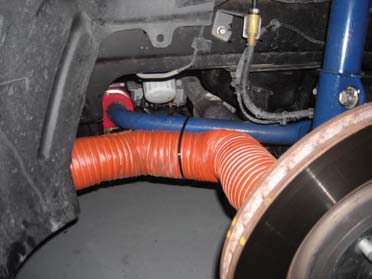
STEP 12: Install the brake hoses onto the lower grille insert with hose clamps and tighten.
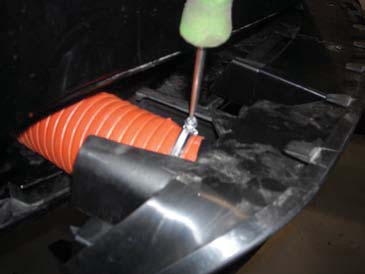
STEP 13: Slide the lower grille insert with hoses into fascia and clip into place.
STEP 14: Reference steps 4, 5, 6 and 7 to reattach the lower grille insert hardware and inner fender liners.
STEP 15: Clip the ambient air temperature sensor back onto the lower grille insert.
STEP 16: Remove the (2) caliper anchor bolts, remove the calipers and support.
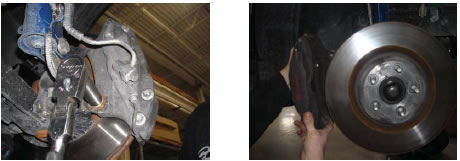
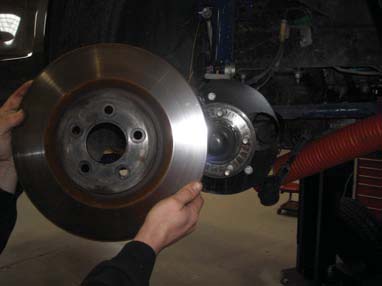
STEP 17: Remove the front rotors. Remove (3) bolts on the backing plate and remove plate.
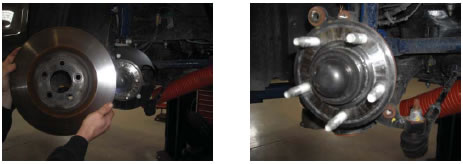
STEP 18: Install the new backing plate with (3) fasteners and torque to 15 ft.-lb.
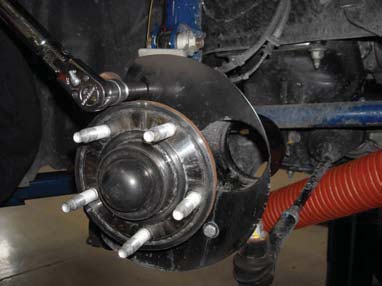
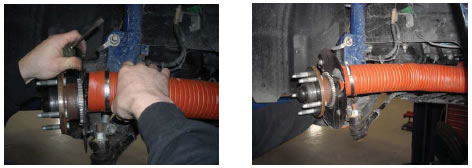
STEP 19: Install the provided tie wrap to fasten the brake hose to the anti roll bar.
STEP 20: Slide the brake hose over the new backing plates and secure with provided hose clamp.
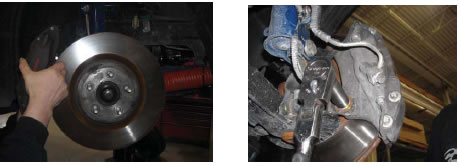
STEP 21: Install rotor.
STEP 22: Install the calipers and torque the anchor bolts to 85 ft.-lb.
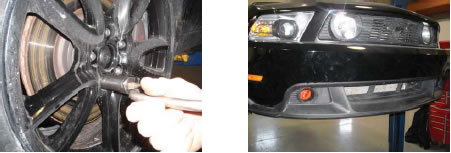
STEP 23: Install the front wheels and torque to 98 ft.-lb.
STEP 24: Prior to lowering vehicle, inspect clearance to brake cooling ducts by turning steering wheel lock to lock in both directions. Check for interference to moving parts and ensure duct free-play is correct each side.
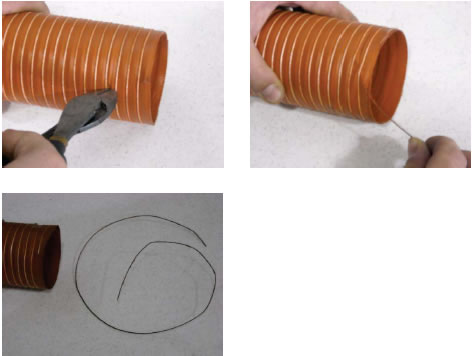
NOTE: Removal of wire is required to ease installation of hoses to bezels and backing plates.
STEP 1: Using side cutters, snip the retaining wire on brake hoses at both ends two to three wires inboard. Then gently pull the wire from the end of the hose to remove.
Best Sellers
Related Guides
-
Installation
-
Installation
-
Installation
