 FREE 1 to 3-Day Delivery on Orders $119+ Details
Best Sellers


How to Install a Ford Racing BOSS 302 Engine Oil Cooler in Your 2011-2014 Mustang GT
Installation Time
2 hours
Tools Required
- 14mm Hex Socket
- 7mm Socket/Wrench
- 8mm Socket/Wrench
- 10mm Socket (for airbox removal)
- 3/4 Inch or 19mm Wrench
- Torque Wrench
- Appropriate Ratchets
- Oil Filter Removal Tool
- Large Flathead Screwdriver
- Channel Lock Pliers
- Lift or Jack and Stands
- Something to Catch Coolant
- Something to Catch Oil
Shop Parts in this Guide
Tools needed:
14mm hex socket
7mm socket/wrench
8mm socket/wrench
10mm socket (for airbox removal)
¾ inch or 19mm wrench
Torque wrench
Appropriate ratchets
Oil filter removal tool
Large flathead screwdriver
Channel lock pliers (for coolant hose clamps)
Lift or jack and stands
Something to catch coolant
Something to catch oil
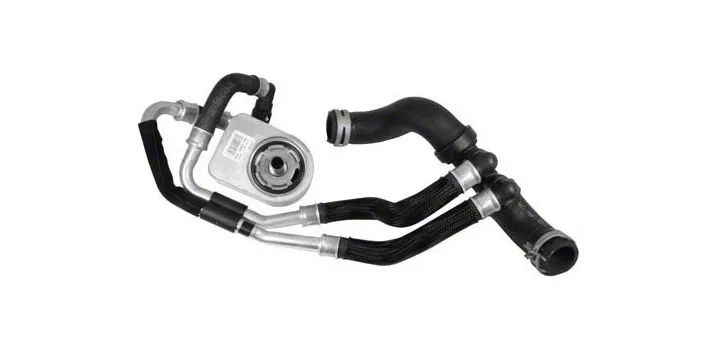
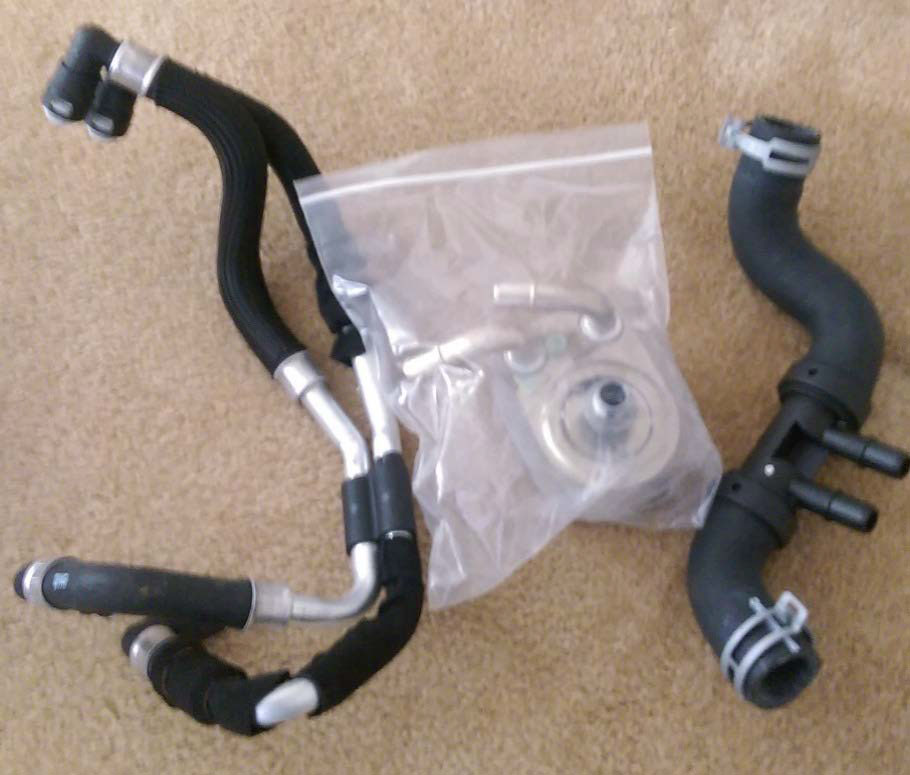
Parts Included:
Replacement lower radiator hose
Oil cooler assembly
Oil cooler line bundle
Parts needed:
Oil and oil filter
Orange Ford coolant concentrate and distilled water, or premixed orange ford coolant
Introduction
I used the ford installation PDF when I installed this and it was helpful. I did the install on a lift, but it can be done on jack stands without issues. It took me 2 hours for the install. Total I used just over 1 gallon of 50/50 coolant, if you buy 1 gallon of 50/50 you should be ok, but I used slightly more.
Steps:
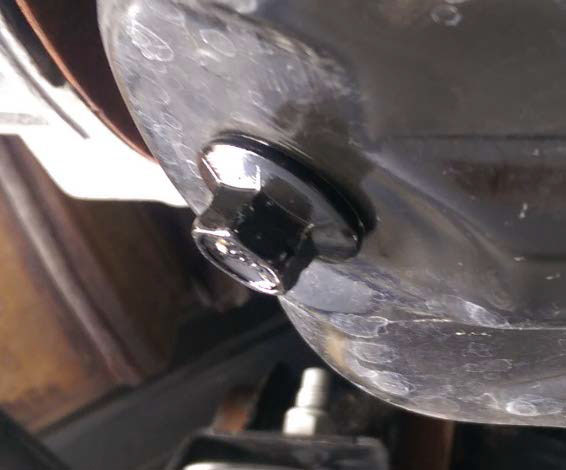
1. Oil Drain(if desired)
If you are doing a complete oil change at the same time (which I recommend), start by removing the oil cap. You should open the coolant tank as well before lifting the car if you are using a lift, saves time by not having to do it later. Before removing the plug make sure to put the oil catcher, preferably a normal drain pan, under the oil plug and aimed slightly to the rear, loosen the plug with the wrench then remove by hand. Let the oil drain while moving on to the next few steps. Once the oil is drained you can put the plug back, torque to 26 NM or 19 ft-lbs. Most people tighten the plug to finger tight then a little more, or as a few people said “tight, but not too tight.” Mine had a rubber seal permanently attached to the oil pan so it doesn’t need very much torque to stay sealed.
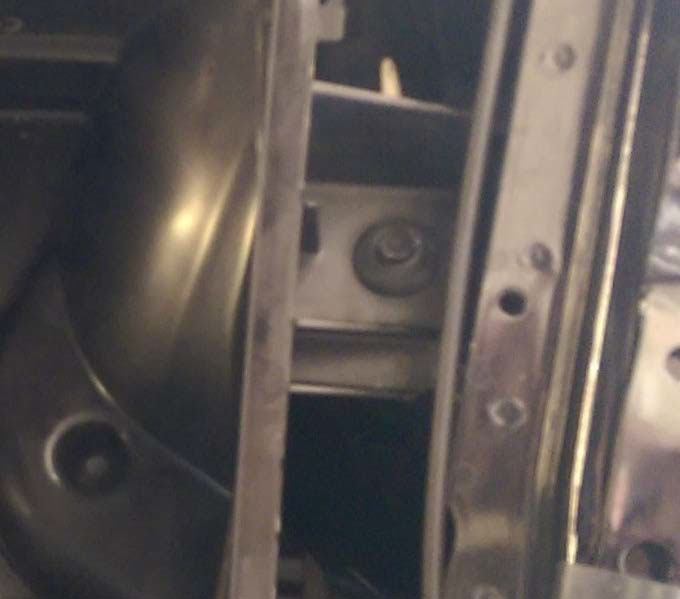
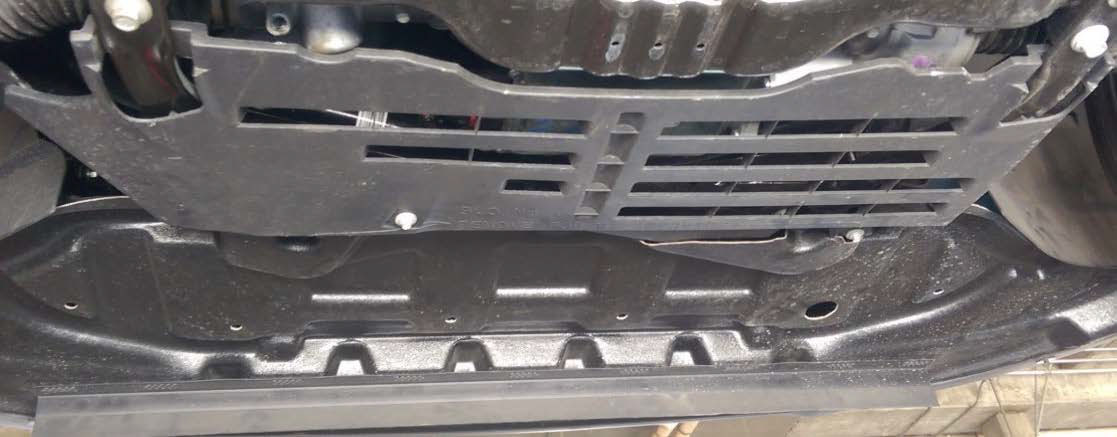
2. Lower panel removal
Next remove the lower panels, there are 2 that need to be removed. In the picture below you can see 1 panel hanging, and the other still in place but some screws removed. Once all the screws are removed the front piece slides out towards the rear wheels. The rear piece has 3 8mm screws and the front has 17 7mm screws. The ford PDF says to pull the front one first, but there is no interference between the two so you can remove them in any order.

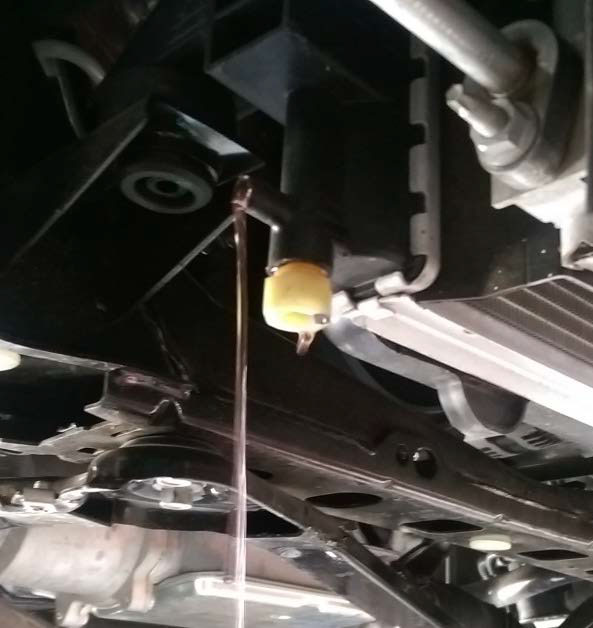
3. Coolant Removal
Once the panels are removed you need to do a few things, but the order isn’t important, but I found it best to start with draining the coolant, then removing the filter while letting the coolant drain.
To drain the coolant you need to open the coolant drain valve. To do this you need to unscrew the white portion in the picture. I used a ¾ inch wrench, but a 19mm wrench will work as well.
I started by unscrewing it a little as you can see in the picture, but eventually unscrewed it all the way without issues (except splashing).

4. Oil filter removal
Removing the oil filter should not be very hard, I used an oil filter wrench, the band type. I did not take any pictures of this part, but I hope you don’t need them. If you have never done an oil change then find a friend that has done one to help you with this part.
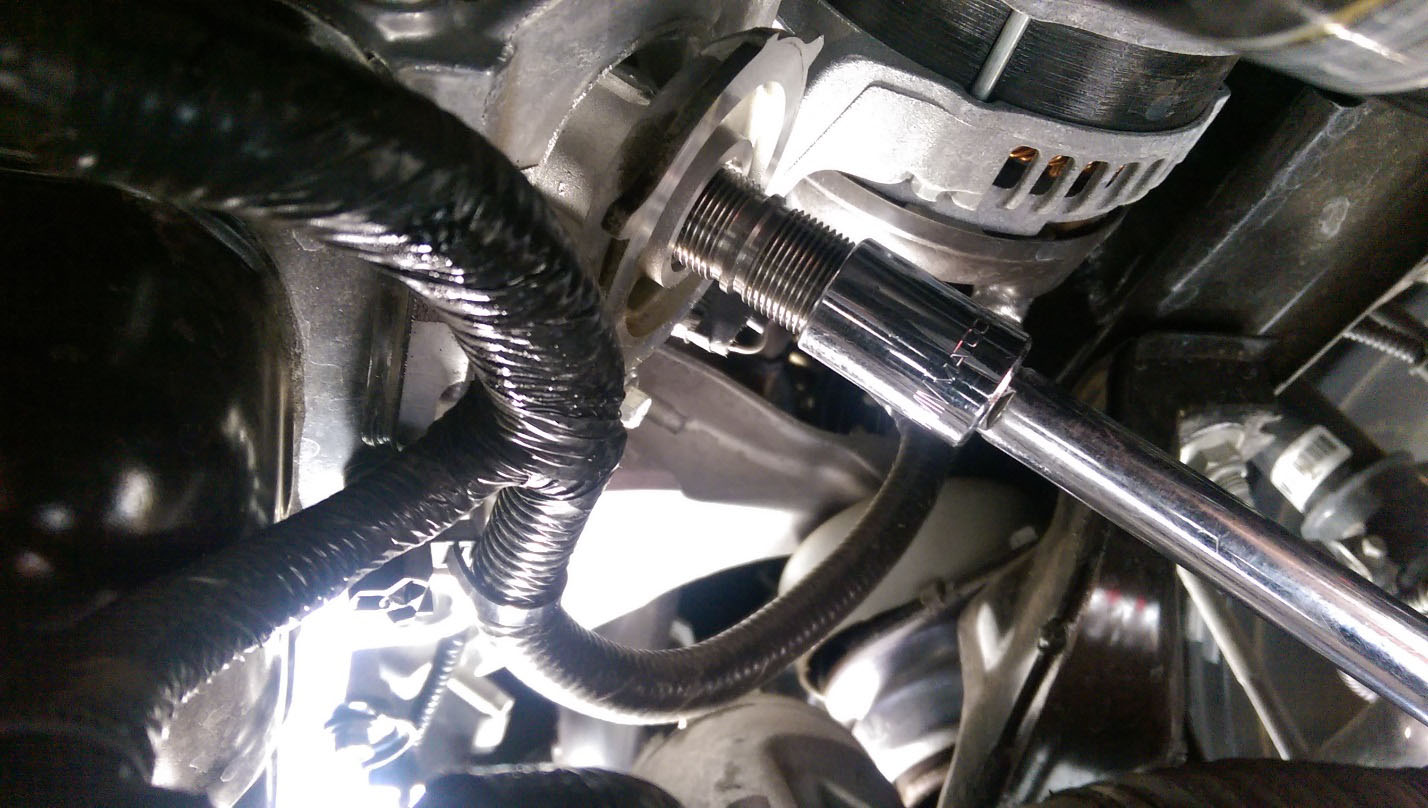
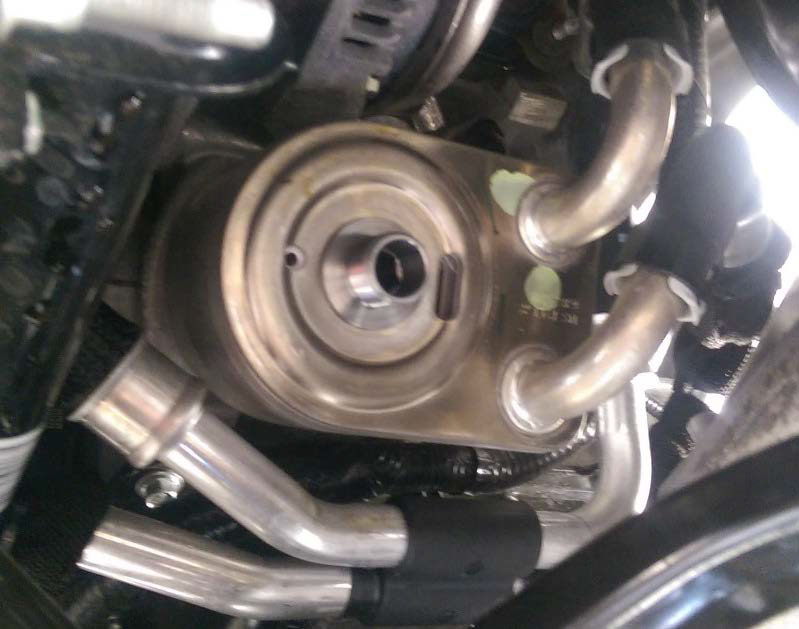
5. Oil filter threads removal
To remove the center post with the threads where the oil filter attaches you need the 14mm hex socket and extension, my socket was a ½ inch drive. I was surprised at how easy it was to remove this.
6. Airbox removal (if desired)
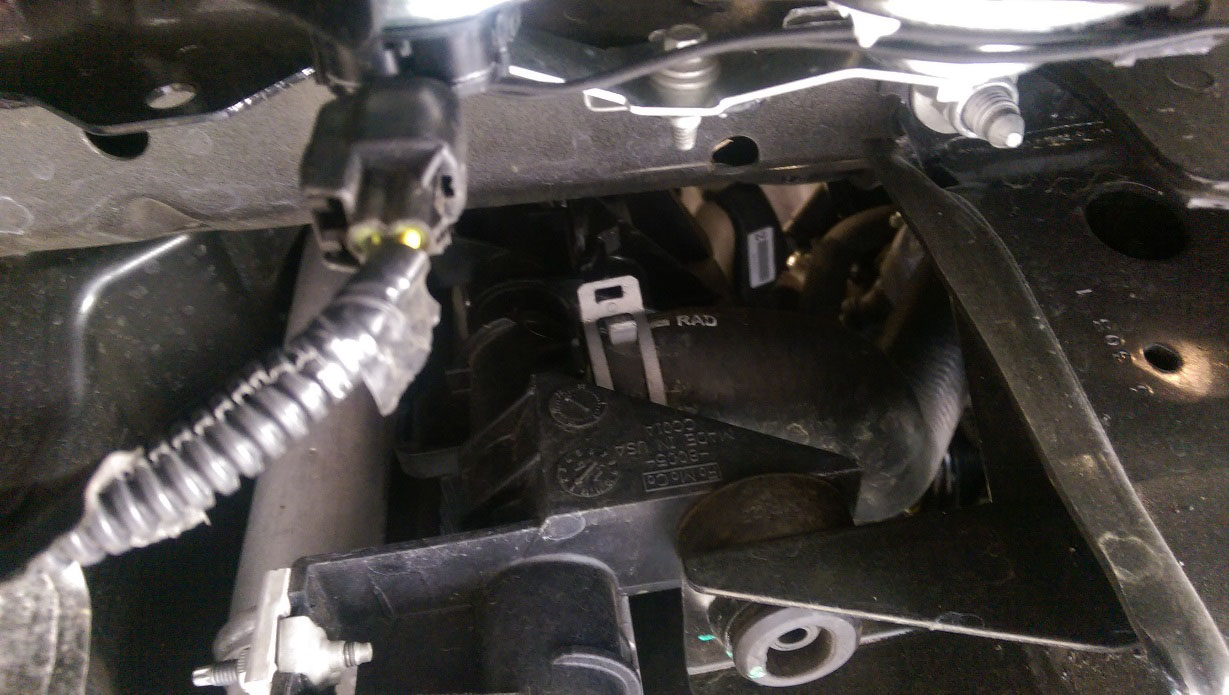
To remove the Airbox you need to pull the clamps off of the airbox lid, then pull the lid off. They are on the back side of the airbox, and they flip towards the driver’s seat. Pull the top part up by hand, pull the filter out, and then you need to remove 1 screw. I held the filter up by hand while working on the top clamp, without the box there is a lot of working room.
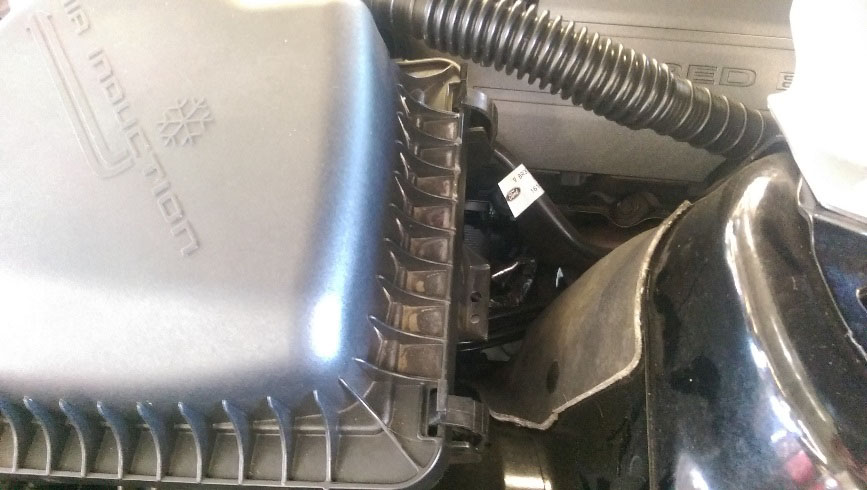
Below is the screw, it is on the driver’s side of the airbox. After this screw is removed all you need to do is remove the sound tube by pulling it up, pulling the airbox up, then back towards the driver’s seat. It is only held in with rubber grommets. The reason to remove the complete airbox it is to get to the top of the radiator hose clamp easier.
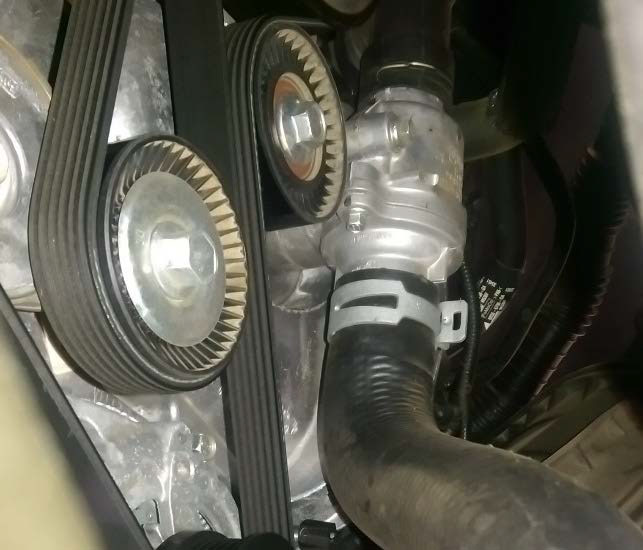
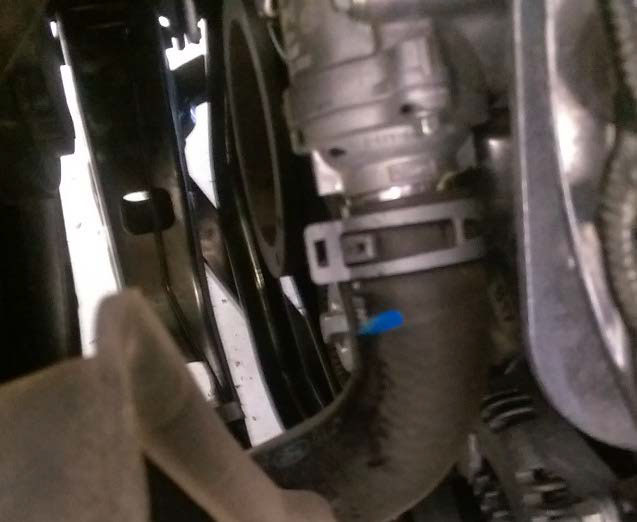
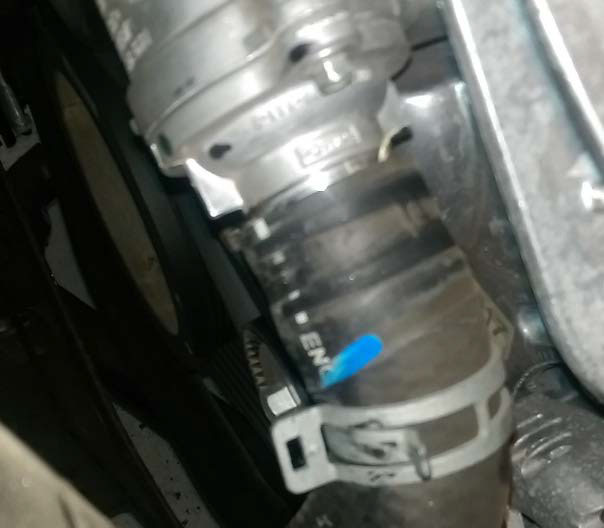
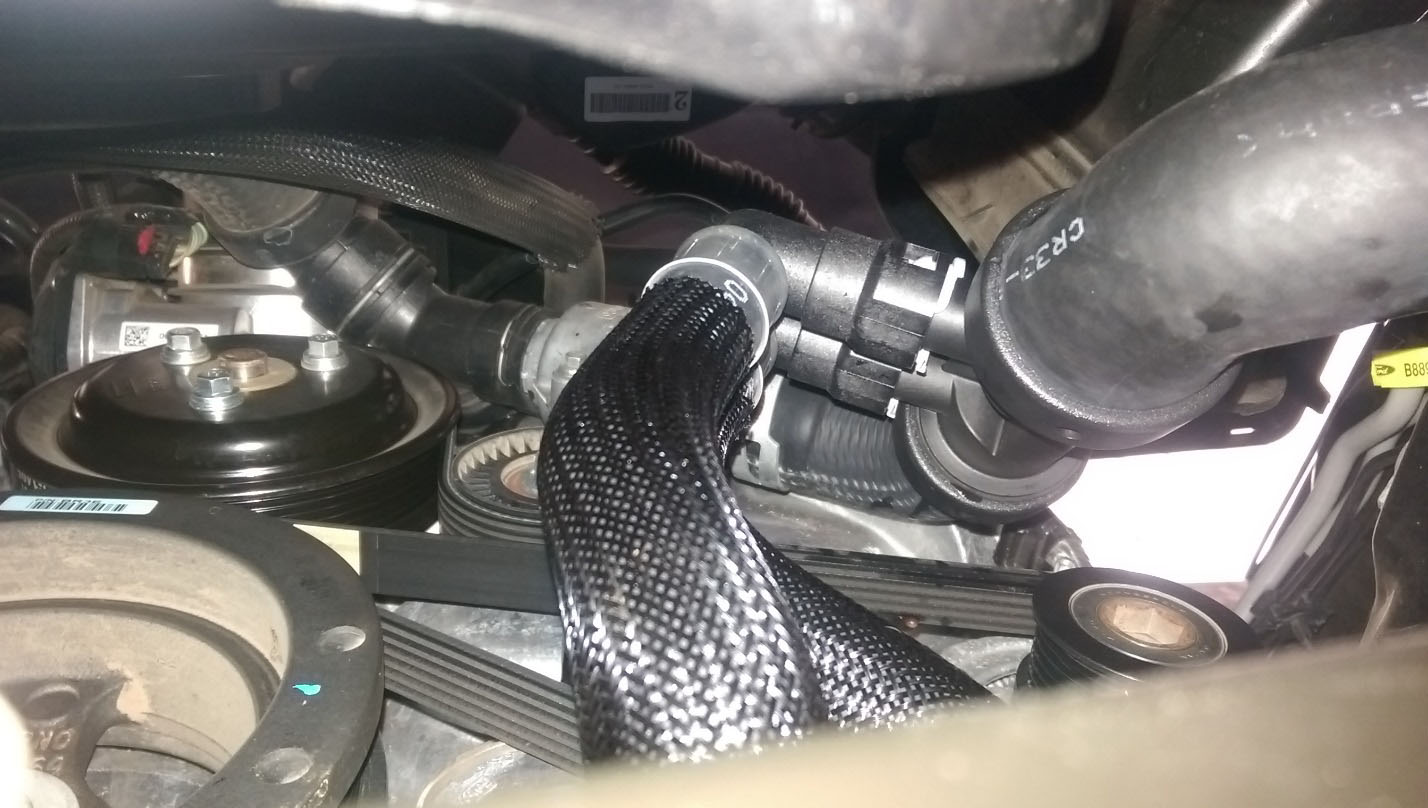
7. Radiator hose removal
I found that I got a little more coolant out after I pulled off the top radiator hose. The first picture, with the serpentine belt visible, is from beneath. The second is from above after removing the airbox. I found that it was much easier to get pliers on the hose from above, but your results may vary. To remove you need to squeeze the clamp with the pliers and then slide the clamp down the hose far enough to not be on the thermostat fitting anymore. The last picture is with the clamp moved off. Once the clamp is off squeeze, twist, and slide the hose to get it off.
I closed the radiator drain plug at this point (after it was not dripping anymore) and moved the bucket to the other side to catch any remnants in the hose. There was maybe a cup or two that came out when I pulled the bottom of the hose off, which is the next step. :)
To pull the bottom hose off you need to do the same thing, squeeze the clamp, and slide it off of the radiator. Once the clamp is off you need to squeeze and slide the hose to get it off of the radiator, just like you did with the top part.
8. Hose Installation
Reinstalling the hose is straightforward. You do the opposite of when you took the old one off.
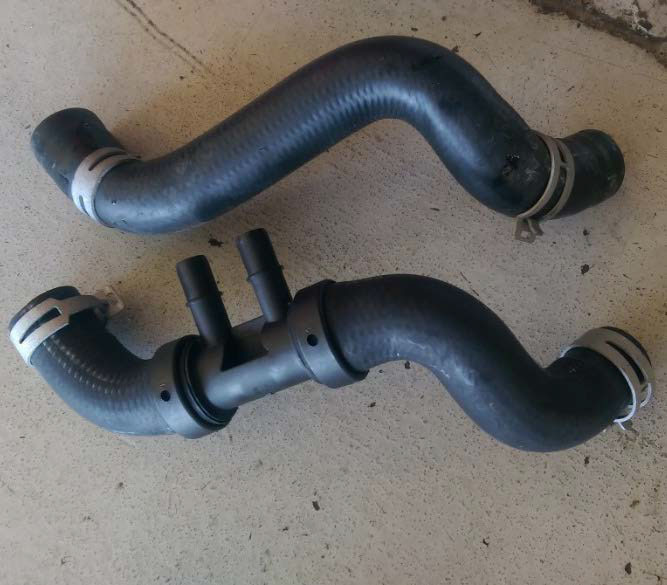
As you can see the hoses look the same, so make sure yours do as well before trying to install them. The double bend is the bottom part in case you forget. My new hose came with the clamps stuck on so that was really easy to deal with. Once I had the hose in the right spot I used the flathead screwdriver to pop the hose clamps off their stops. Made life real easy for the install.
9. Oil Cooler assembly install
This and the hoses was easier to install together. It took some work to get it right, but it wasn’t too difficult. I slid the whole thing in through the same spot where I would reach through to remove the filter.
The center post is what holds the assembly on, and it is torqued down to 43 ft-lbs or 58 NM. This is where the 14mm Hex socket comes in along with the torque wrench. The assembly aligns so the hoses connect on the rear portion of the car. It should make sense once you put the hoses on the assembly.
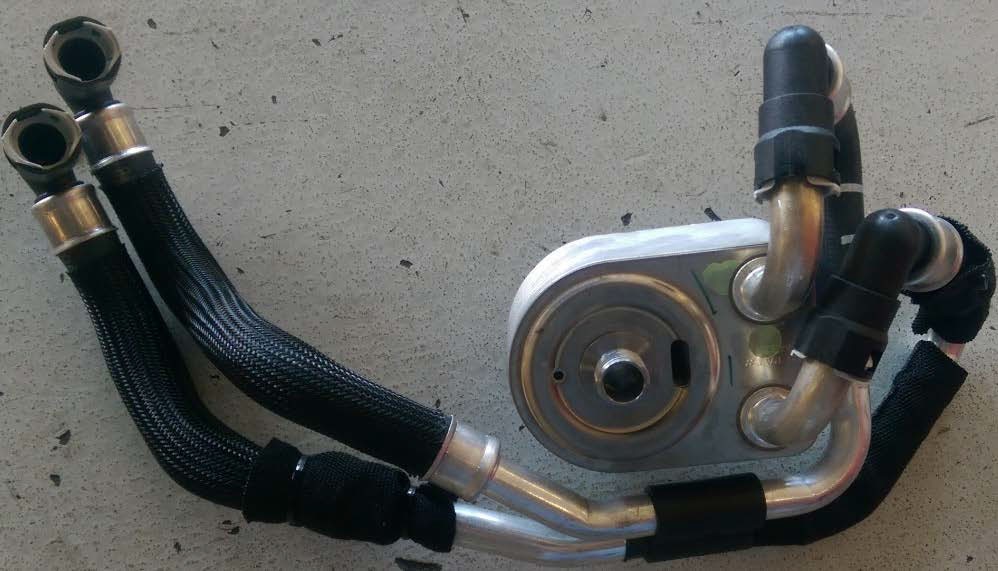

Be sure to start the center post by hand, you do not to strip the threads on the engine block. There are some alignment tabs on the back of the assembly to make sure it is aligned, sorry I didn’t get a picture of that.
The Ford PDF warns that the hoses need to be connected correctly. The top hose coming out of the assembly needs to connect to the top connection on the radiator hose. Translated that means the top hose in the picture stays on top. Once it is installed it is difficult, but not impossible to connect them incorrectly. Also once installed make sure that the hoses aren’t rubbing on anything, like the serpentine belt or the radiator fan.
Once the cooler assembly is in all you need to do is connect the hose assembly to the lower radiator hose.
10. Reassembly
After the oil cooler assembly and hoses and everything is installed you can start putting everything else back together. After you reinstall the oil filter following its directions, the ford directions say to torque it to 16NM or 142 in-lbs. Other than the filter there is no specific order to reinstall everything, but I did the bottom then the top. The screws for the two panels on bottom don’t need to be extremely tight. The back panel that has 3 screws has you torque them to 10NM or 89 in-lbs. The front one doesn’t have any numbers listed, and it requires a little more torque than the back panel’s screws, but not all that much. Just make sure that they are tight all the way.
After the bottom panels are reinstalled you can lower the car down and put the top parts back together, mainly the airbox. Once everything is installed it is time to put the fluids back in.
11. Fluids
Fill the oil like you would normally, I put in 7 quarts then check the level after starting the car, but don’t start the car yet, you still need to put coolant in.
If you bought concentrated coolant you need to mix it properly. To do this get a clean container and add equal parts coolant and equal parts water. If you bought your water in a gallon size you can use a kitchen pitcher, put half of the water in the pitcher then fill the original water container back to its normal level using coolant. This gives you a 50/50 mix. If you bought pre-mixed coolant you can add that directly to the overflow reservoir. After you have mixed it, or if you bought pre-mixed coolant you need to put the coolant in the reservoir until it is at least to the lower fill line. Once the coolant bottle is full, and once the oil has been put in, you can start the car. Once the car is running be sure to check for leaks and if you see any turn off the car immediately. Fix the leak, top off the liquids again, and start the car again and hope you fixed it correctly.
To fill the radiator the thermostat needs to open. This happens when the engine is warmed up, to check it you need to run the engine until it is warm. Check this by feeling the upper radiator hose, it should be hot to the touch once the car is warmed up. You can, and possibly should, turn the heater on in the car, set it to max heat and max fan, and once it starts blowing warm air you can check the hose and coolant level. Also you should check the temperature gauge in the dash, it should start moving fairly quickly. The coolant level in the overflow reservoir should have dropped by now, so turn the car off, let it cool, and refill the tank back to the refill line. Also now that the car is off check the oil level and add enough to put the level in the correct spot on the dip-stick.
12. Final Thoughts
When you are done make sure to dispose of all the extra fluids properly. Local auto parts stores should have the ability to take used oil and coolant. There is the option of reusing your old coolant, and if it stays clean there will most likely be no issues with that, but mine had floating particles in it, not sure if they are from the car or the catch can I was using, so I bought new stuff from Ford.
You should keep checking the fluid level a few days later to make sure all the bubbles are out of the system. If it is low, top it off.
With the oil at the right level, and the coolant filled you shouldn’t have any issues. If you do, make sure that the hose assembly connectors are on all the way, they click when installed correctly. The Ford produced guide has a phone number to call if you need assistance. If there are still problems then I can’t help you here, take the car to a mechanic to have it inspected and fixed.
Installation Instructions written by AmericanMuscle Customer Caleb Powell 9.24.2014
