 FREE 1 to 3-Day Delivery on Orders $119+ Details
Best Sellers


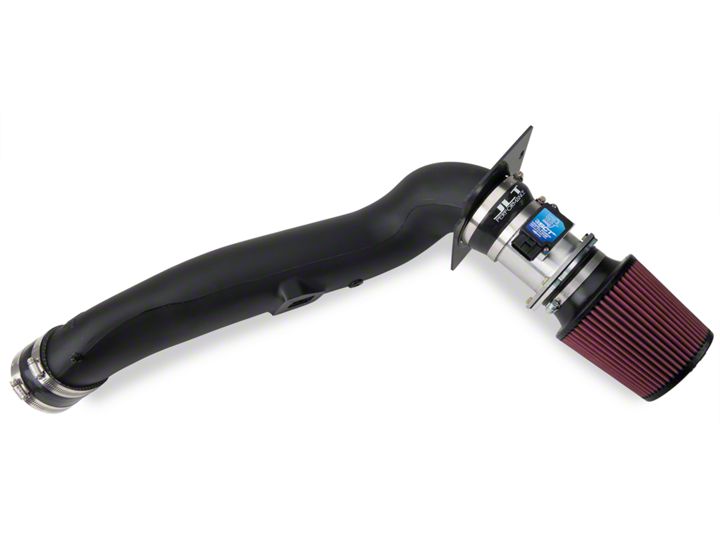
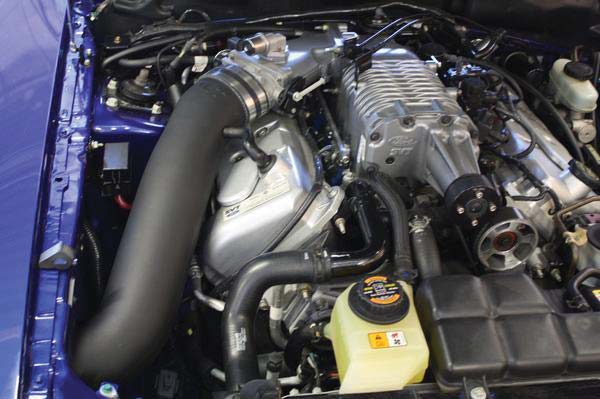
How to install a JLT Performance Next Generation Cold Air Intake on your 2003-2004 Cobra Mustang
Shop Parts in this Guide
INSTALLATION
Thank you for purchasing our product. We hope you are satisfied with the look and performance.
Please review complete instructions prior to installing.
1. Verify you have all of the following parts included in the kit:
(1) JLT intake tube with Vacuum fitting, PCV fitting and IAT grommet, (1) 4.5”x2” Silicone Throttle Body Coupler, (1) 4.5”-4” Silicone reducer, (1) Apron Plate, (1) Vacuum Line, (1) Billet MAF Adaptor with bolts, (1) MAF Gasket, (1) 4x6” Air Filter, (1) PCV fitting cap, (1) Vacuum fitting cap, (3) #072 Clamps and, (1) #064 Clamp
2. Gather all of the following tools needed for the installation:
5/16 Nut Driver, 10mm Open End Wrench, 11mm Open End Wrench, 8mm socket, ratchet, Car Jack and Jack Stands
3. Jack the car up using jack stands or drive it on some ramps. Removing the right wheel makes the install much easier, but not totally necessary.
4. Remove your stock intake system from the throttle body to the filter housing.

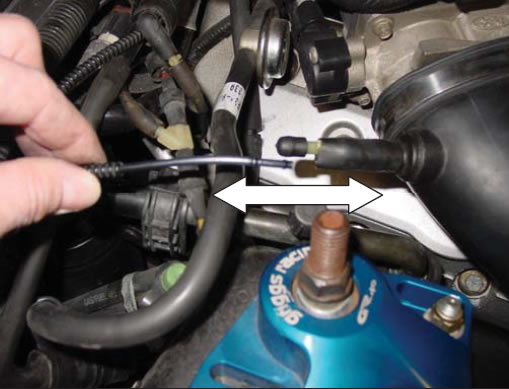
Pull the thin, hard vacuum line out of the large connection on the stock intake tube.
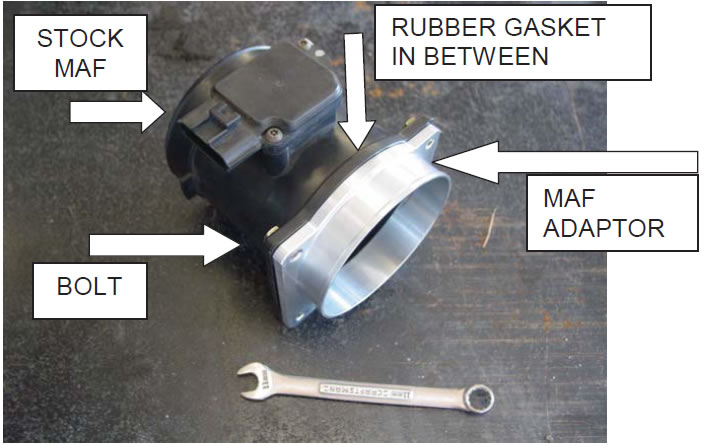
5. Unbolt your Mass Air Flow Sensor from the filter housing, and install the MAF filter adaptor using the supplied MAF gasket and bolts shown below. Do not reuse the screen BOLTS GO THROUGH MAF AND THREAD INTO ADAPTOR.
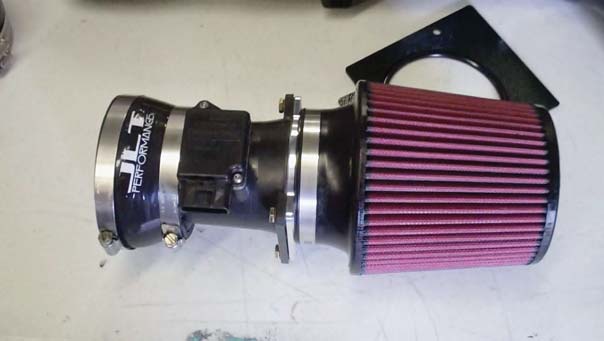
6. Install the filter onto the MAF adaptor and the silicone reducer onto the MAF as shown:
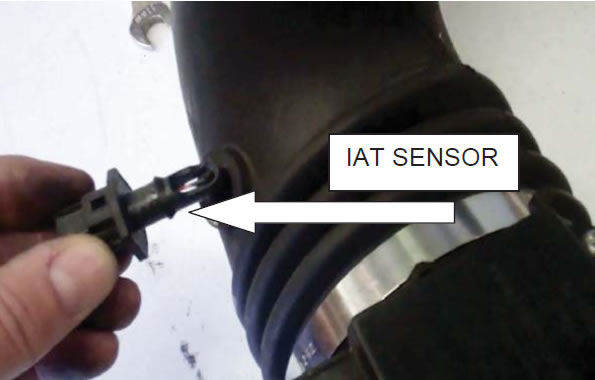
7. PULL the Inlet Air Temperature sensor from your stock inlet and install in the grommet on bottom side of JLT tube.
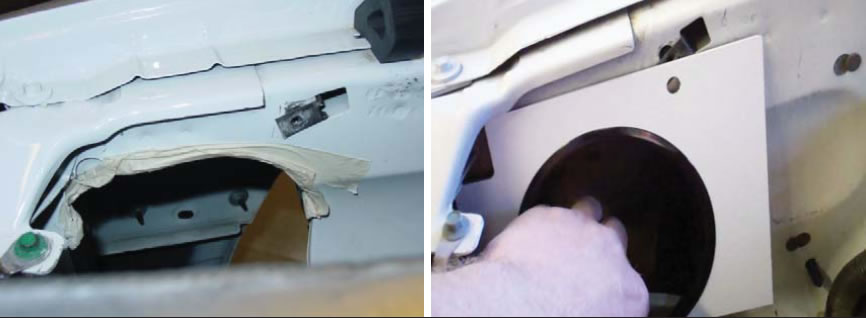
8. Unplug the hold down in the large wire harness where the MAF wire ties into it and pull toward the hole. Feed your MAF wires into the hole in the apron. You only need a few inches in there. Put some tape around the hole in the apron. This will help prevent scratching the pipe during install. Bolt Apron Plate up using the stock air box bolt.
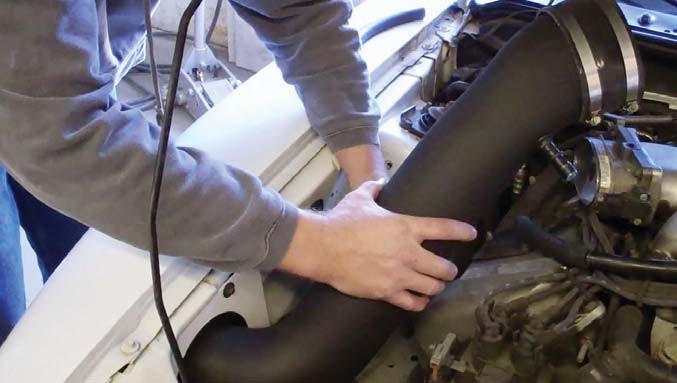
9. Install coupler and clamps on to the JLT tube, then insert round end into the hole in the apron plate and rotate it down and on to the throttle body. Tighten the clamp at the throttle body and leave the clamp on the tube loose for final adjustment.
10. Plug in IAT sensor, PCV connection on to the valve cover and vacuum line (using supplied tubing). If you are NOT using the PCV or Vacuum line use the supplied caps to seal the fittings.

11. To gain access in the fender well you must remove the Philips screw in the bumper cover edge and pull plastic fender liner back. There is also 2 push pins holding the shield into the frame rail, remove these too.
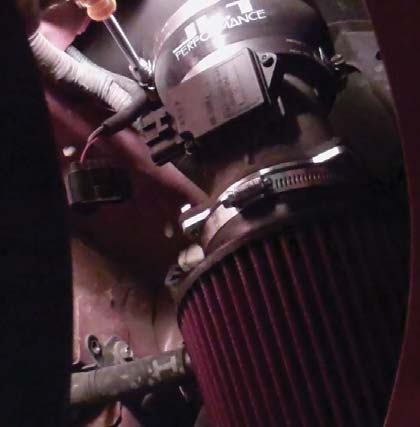
12. Raise the REDUCER/MAF/FILTER assembly up onto the JLT tube. Point MAF top toward the rear of the car and the plug will point toward the driver’s fender. By TWISTING the tube at the throttle body you can gain more room right or left. Plug in the MAF and tighten the clamps.
CLAMP ONLY NEEDS TO BE LIGHTLY SNUG:
13. Put the splash shield back in and reinstall the push pins and screw.
14. Up top, snug up the clamp at the throttle body and installation is complete.
This kit includes an S&B Powerstack pre-oiled reusable air filter. The frequency you should clean your filter will depend on your driving conditions. It is recommended to check your filter at every oil change or 3,000 miles. If there is a build up of dirt as thick as the wire mesh, then it’s time to clean your filter. As dirt builds up on your filter, the restriction of the airflow also increases. More frequent cleanings will improve your fuel economy and your vehicle’s performance.
