 FREE 1 to 3-Day Delivery on Orders $119+ Details
Best Sellers


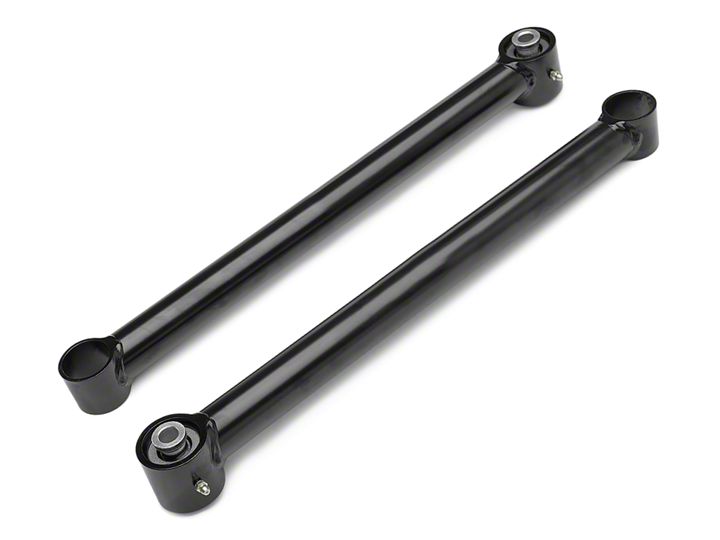
J&M Extreme Joint Mustang Lower Control Arms ('05-'11) - Installation Instructions
Installation Time
2 hours
Tools Required
- 18MM Shallow Socket (E)
- Ratchet (F)
- 21MM Deep Socket (Not Pictured)
- Breaker Bar (G)
- Torque Wrench (H) (That goes up to at least 130 lbs/ft)
- Rubber Mallet (I)
- 2 Jack Stands (Not Pictured)
- Jack (Not Pictured)
- Wheel Chocks (Not Pictured)
Shop Parts in this Guide
Installation
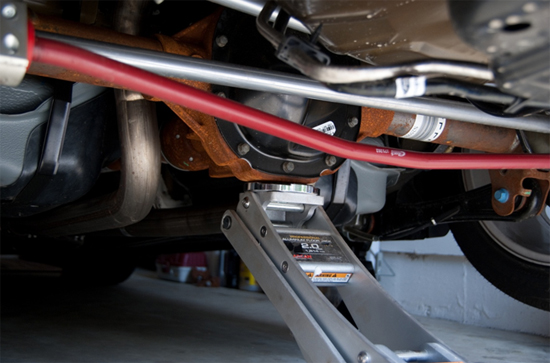
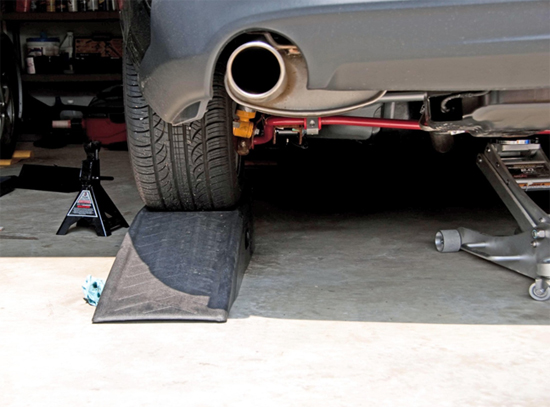
1. Before raising the rear of the car, loosen lug nuts on both rear wheels (21mm socket). Jack the rear of the car by the rear differential. If your jack does not have a rubber pad; use a piece of wood to distribute the weight. Support the rear end of the car with your jack stands and remove both rear wheels.
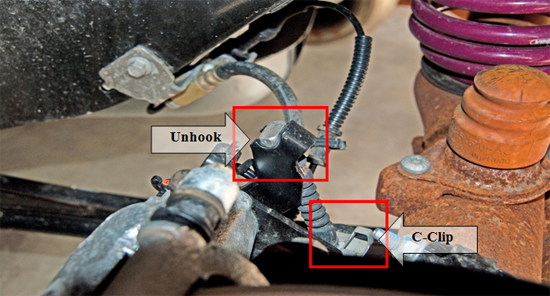
2. Release the emergency brake from inside car before attempting to remove cable.Remove the emergency brake cable from the brake assembly by removing the c-clip and pulling cable up and routing the cable through the stock Lower Control Arm and moving it out of your way.
3. Remove the two 18mm bolts (Front and Rear) that attach the Lower Control Arm to the car. Use your breaker bar to break the bolts loose.
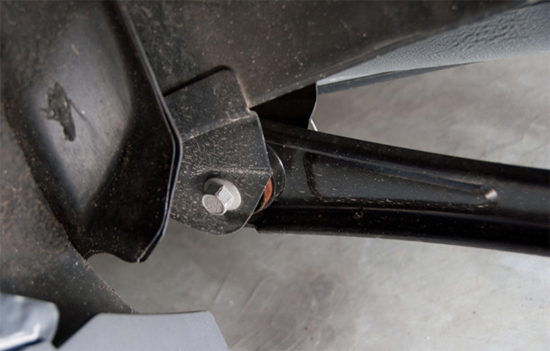
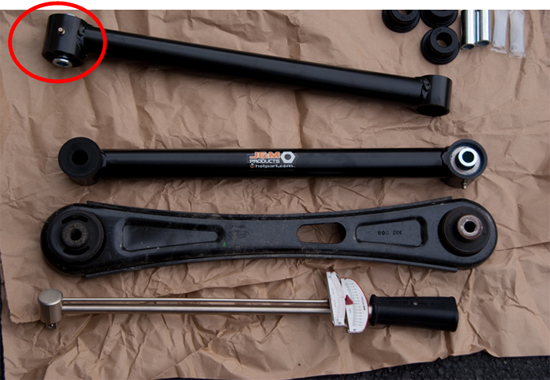
4.Remove the Lower Control Arm from the car. Pictured below is a side-by-side comparison of the stock LCA vs. J&M LCA. Take note of the offset and grease fitting, this is the rear of the Lower Control Arm.
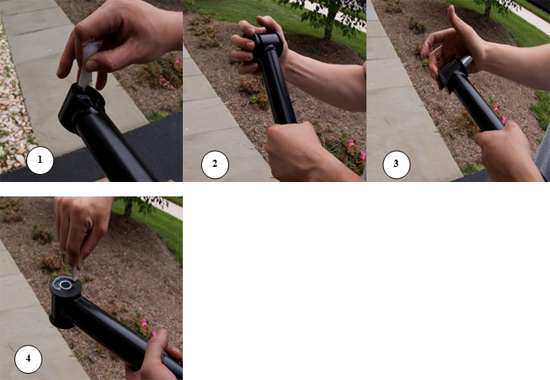
5. Use the supplied grease and lubricate the Lower Control Arm (1) and press in bushings to both sides(2). Grease the inside of the bushings and slide in the sleeve(3). Finally grease the outside face of the bushing (4).
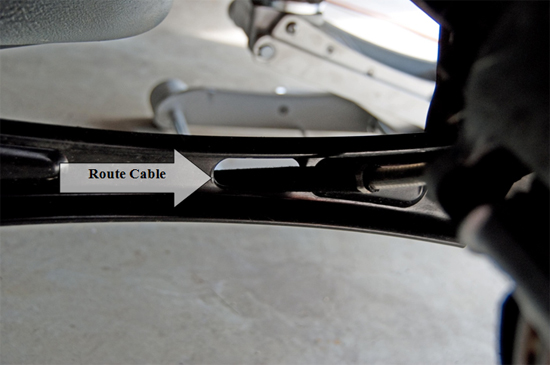
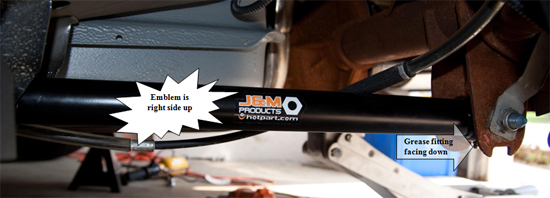
6. Install the assembled Lower Control Arm back onto the car. J&M has been nice enough to add a sticker to ensure correct installation. The J&M emblem should face the outside and right side up with the grease fitting facing the back end of theca towards the ground. Facing the fitting towards the ground ensures it will be much easier to grease that bushing in the future. Re-route emergency brake and reconnect it to brake assembly. Do not tighten the bolts to the LCA yet,the suspension needs to be loaded with weight before fully tightening.
7. Put your wheels back on and lower your car. I'd recommend lowering your car down on to some ramps or 2x4 to give you some clearance to get underneath the car. After the suspension is loaded, tighten both front and rear bolts to129lbs/ft.
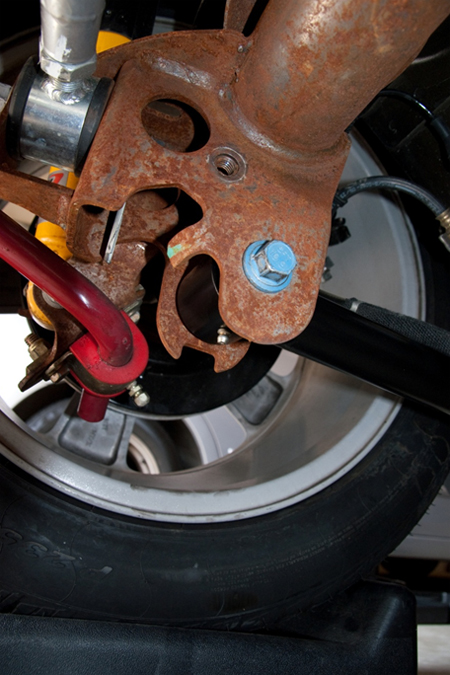
8. This is what the LCA should look like after you're done. Note the grease fitting is facing down. Take your car for a test drive and listen for any noise.
Installation instructions provided by AmericanMuscle customer James Yu 6.7.10
