 FREE 1 to 3-Day Delivery on Orders $119+ Details
Best Sellers


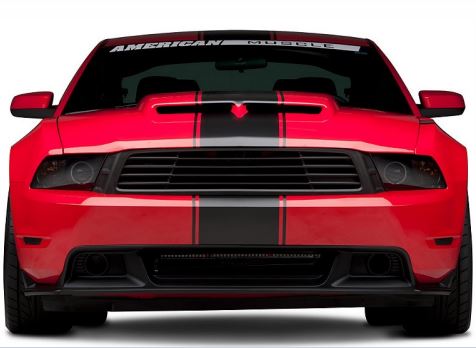
How to Install Black Lemans Stripes - 12 in. on your Mustang
Installation Time
1 hours
Tools Required
- Spray bottle with soap & water mixture
- Plastic Squeegee
- Pair of scissors
- X-Acto knife or razor blade
- Painters tape
- Surface cleaner -Mequiars Deep Crystal System paint cleaner
- Needle or pin

Shop Parts in this Guide
Prep
Clean car well to ensure good adhesion of the decal. Remove any wax from the car using a surface cleaner. Rewash the car to remove anything missed and to rinse any chemicals left behind. Fill a spray bottle with a mixture of water and soap (we use baby shampoo), about 4 large drops per 32 oz. spray bottle of water. Be sure to install decal out of direct sunlight. Also having someone to assist you if you can is very helpful.
At this point you can decide to install the stripes as a pair or separate the set and install one side at a time. If installing a center stripe this will not be an option. Installing one side at a time makes it easier to install but more measurements have to be made. Installing as one sheet is more difficult, especially over complex surfaces, but retains the spacing of the stripes. This might be impossible to do on complex surfaces and they should be installed with the one side at a time method. It’s easiest to do the Hood or roof first then move on to more complex areas such as the bumpers. The hood can be complex with hood scoops or contours but is easiest to see, while the roof is smooth it is harder to see and reach.
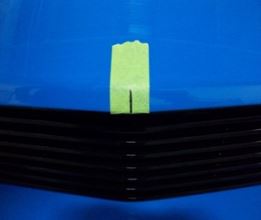
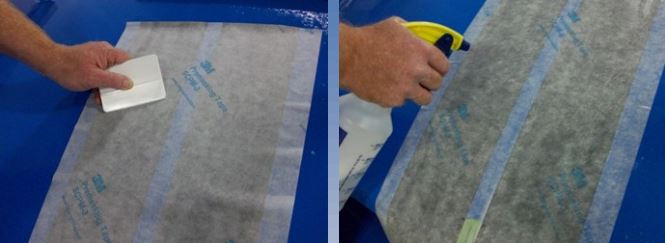
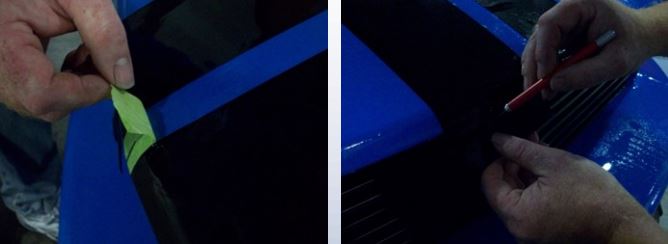
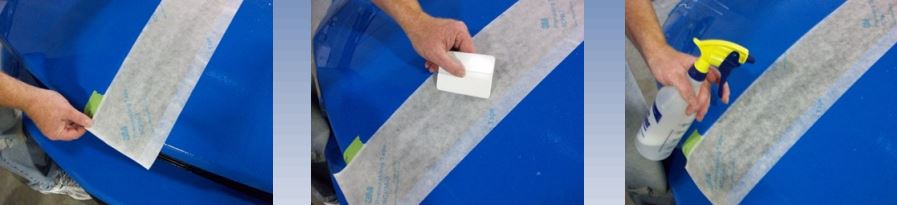
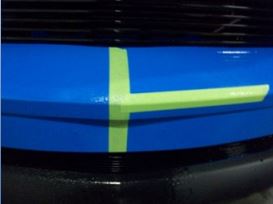
Step 1. Lay the stripe set out flat to help relax the stripes this will make it easier to handle. Mark the center line of the area at the front and rear using the painters tape.
Step 2. Next, spray hood generously with the soap and water mixture.
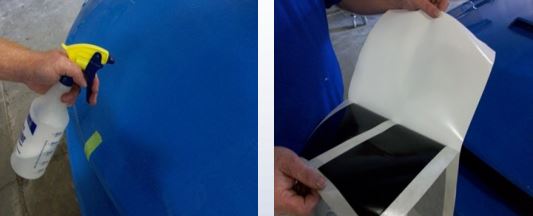
Step 3. Lay stripes on center of hood marked by the painters tape. You will be able to maneuver the stripes once on the hood because of the soap and water sprayed earlier.
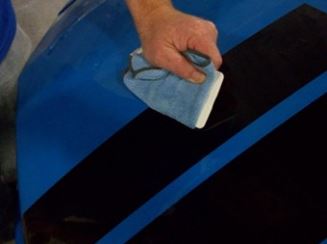
Step 4. Once you have the stripes in their final position, use the plastic squeegee to push any air bubbles out to the edges of the stripes. It is easier to remove bubbles by squeegeeing from the center out to the edges. Once the stripes are squeegeed and flat spray the transfer tape with the soap and water generously, the tape then becomes a little bit more transparent. Re squeegee to ensure the stripes are flat. Let the tape soak a while this will soften the adhesive of the tape and give the stripes a chance to dry and adhere underneath.
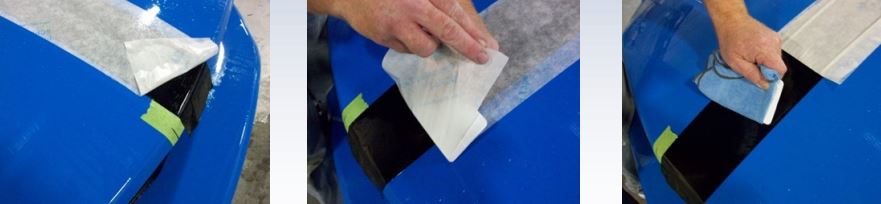
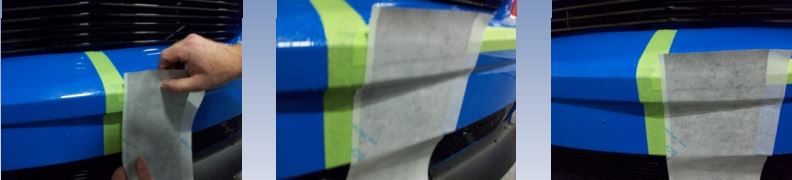
Step 5. Once you have all of the air bubbles out and stripes have dried underneath, slowly peel the transfer tape from the stripes. Pull the tape as flat on the car as possible this will help prevent the tape from pulling up the vinyl. One trick that may be helpful is to place a squeegee on the transfer tape and peel it back against the squeegee while holding the squeegee down on the decal keeping it tight on the tape that’s being pulled.
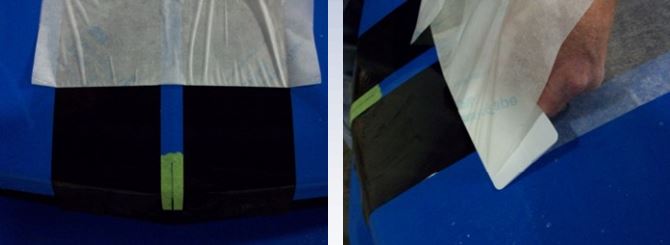
Step 6. Once the tape is off you can use a squeegee (covered in a cloth that will not scratch the vinyl and keep the vinyl wet) if you need to, but at this point you may need to use a pin or needle to release any bubbles, squeegeeing on vinyl that has been stuck to the surface may wrinkle instead of moving air from underneath the vinyl.
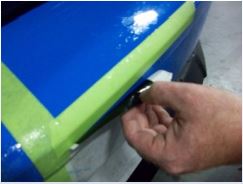
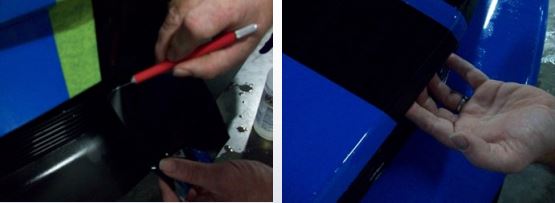
Step 7. Remove your tape. You can use an X -Acto knife or a razor blade to trim the excess material. Tuck around to the back side or underneath of the body were needed.
One Side Installation
The procedure is the same as above except for marking of the center. Lay out one side of the stripe on the car aligning the inside of the stripe with the tape. One trick is to use a tape the same width of the stripe spacing otherwise you will have to put the edge of the tape were you want the stripe edge to be. Then replace it for the other side of the stripes.
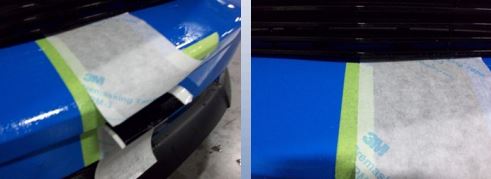
Bumper Installation
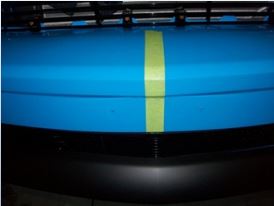
Step 1. Mark the center of the car with one side of the tape were the location of the inside edge of the stripe will be. Do this the entire length on the bumper
Step 2. Next, prep for putting the stripes on in pieces starting at the bottom. These sections need to be cut because they will not go on straight when going over the bumper. You can cut the stripes to shape on the car carefully. Tape the horizontal part of the bumper using several layers of tape. You will be cutting through the vinyl as it is applied to the car, the tape protects the finish but you must be mindful of how deep you cut. Cut only through the vinyl.
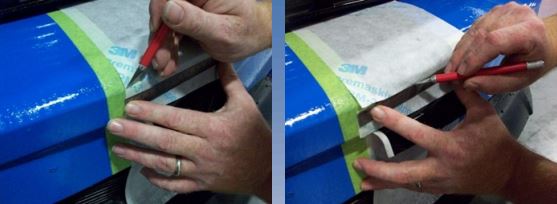
Step 3. Cut out one side of the stripe long enough to fit the section of the bumper you need. Leave a little extra for you have to trim to fit this piece. Wet down the car and stripe as you did before. Place stripe on the car by aligning it up on the edge of the tape. Applying it from the bottom up to the horizontal tape
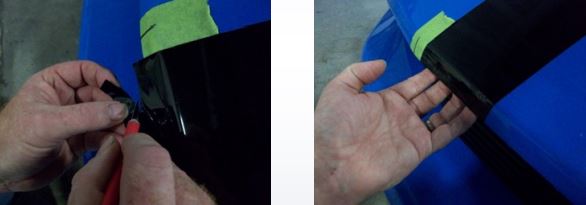
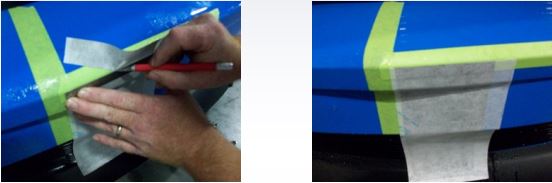
Step 4. Cut with the X-acto or razor knife through the stripe but not into the paint. Cut as close to the edge of the bumper where it bends using a straight edge
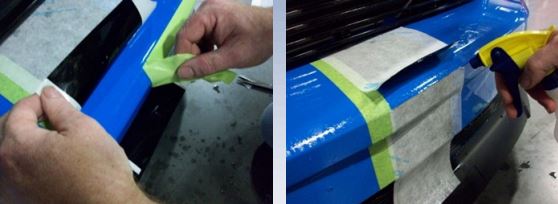
Step 5. Leaving the tape on peel back the vinyl out of the way on the bottom .
Step 6. Just as you cut a piece for the bottom cut one for the top. You can slide the piece under the grille were applicable and remember to leave enough extra to trim.
Step 7. Using a straight edge and with the bottom vinyl peeled back cut through the top section so that it will overlap the bottom section. Don’t cut through the tape into the paint.
Step 8. Peel back the top section and remove the protective tape. Then lay down and finish installing the bottom half first and completely. Using solution to spray tape as before and if squeegeeing the bare vinyl remember to cover it with a cloth that will not scratch the vinyl.
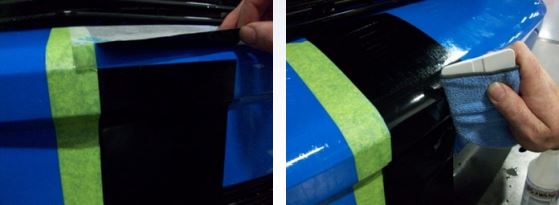
Step 9. Trim off and tuck vinyl as necessary as you did before
Step 10. Change tape locations as to center the other side of the stripe if you don’t have tape the same size as your spacing. Repeat for the other side of the stripe.
These steps above can be used for any complex section of the car. For areas were you want to cut out sections of the vinyl to fit around items like lights or emblems, use the multi-layer tape trick but be careful not to cut through to the paint. Other times it might be a nicer installation if you remove the item and reinstall over top the vinyl. Vinyl can be stretched and bent with the use of light heat from a hairdryer. This will help when tucking vinyl around a bend. Do not over heat it will shrivel or wrinkle.
Leave several hours, depending on climate, of dry time before cleaning car. Use a quick detailer in a spray bottle for the initial cleaning then hand wash car waiting at least several days for the first time after drying. Do not power wash vinyl or wax vinyl.
