 FREE 1 to 3-Day Delivery on Orders $119+ Details
Best Sellers


How to Install an MBRP Street Catback Exhaust w/ Y-Pipe - Black Tips on your 2015 EcoBoost Mustang
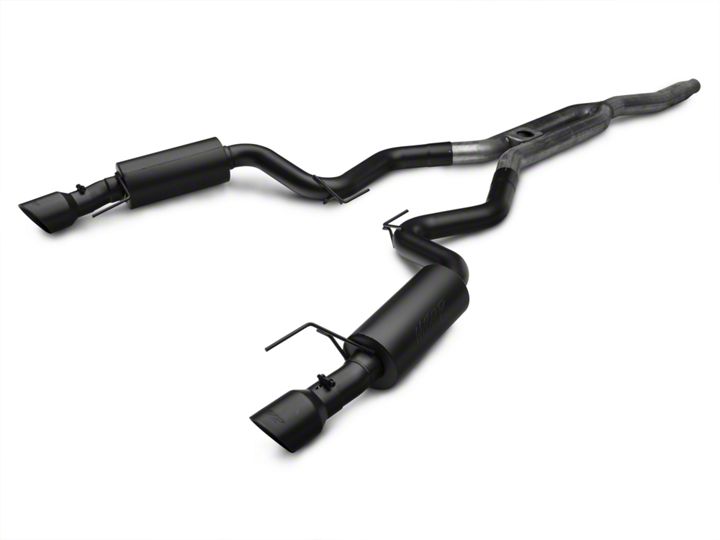
Shop Parts in this Guide
Removal of Stock System
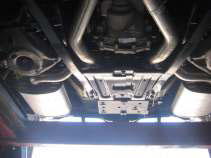
Figure 1
1. Apply a penetrating lubricant liberally to all exhaust fasteners, hangers and rubber insulators.
2. Convertibles require removal of the 2 piece undercar brace .
Refer to Figure 1.
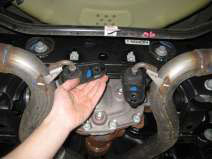
Figure 2
3. Remove the M8 bolts from the mid hanger brackets and remove them from the vehicle. Retain these parts as they will be reused.
Refer to Figure 2.
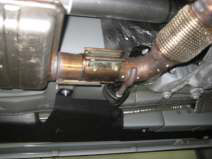
Figure 3
4. Loosen the clamp ahead of the resonator, lift the lock tab and slide the clamp rearward to disconnect the OEM catback exhaust. Use caution, The OEM catback is one piece and heavy.
Refer to Figure 3.
5. Remove the OEM catback by lowering the inlet end and sliding the assembly forward to remove it from the rear hangers. Remove the OEM clamp as it will be reused.
6. Unbolt and remove the rear hanger brackets. Retain these parts, they will be reused.
Installation of MBRP Inc. Performance Exhaust
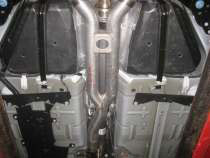
Figure 4
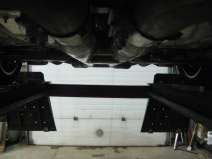
Figure 5
1. Install the previously removed clamp onto the inlet of the Extension Pipe and install the assembly onto the vehicle with the flat side of the pipe support brackets facing the ground. Tighten the clamp enough to allow for adjustment while ensuring the Extension Pipe is level as viewed from the rear of the car.
Refer to Figures 4 and 5.
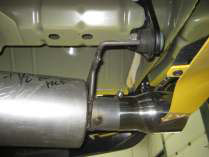
Figure 6
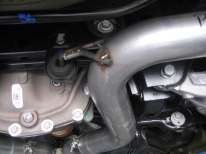
Figure 7
2. Install a 3” Clamp onto each of the Extension Pipe outlets. Install the Driver Side Muffler Assembly by pre installing the mid hanger bracket, and rear hanger bracket in the appropriate locations on the Driver Side Muffler Assembly. Install the Driver Side Muffler Assembly onto the outlet of the Extension Pipe then install the mid and rear hanger brackets on the vehicle. The mid and rear hanger brackets have hooks that will hold them in position on the vehicle until the M8 bolts are reinstalled. Tighten the rear hanger bracket bolts but leave the mid hanger bracket bolt loose for now.
Refer to Figures 6 and 7.
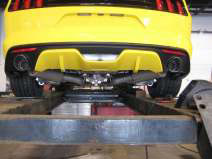
Figure 8
3. Install the Passenger Side Muffler Assembly using the same procedure as illustrated in step 2. Tighten both 3”
Clamps just enough to allow for adjustment.
4. Install both Tips and tighten just enough to allow for adjustment.
Refer to Figure 8.
5. Install the undercar brace if equipped, using the previously removed hardware.
6. Align the exhaust as required to center the Tips in the rear facia, and provide clearance around all other undercar components then tighten all clamps.
Note; The mid hanger brackets can be used to help center the Tips in the Facia. Once all clamps are tight, adjust the mid hanger brackets to fine tune the placement of the Tips then tighten the M8 bolts.
7. Check along the whole length of the exhaust system to ensure that there is adequate clearance around fuel and brake lines or any wiring. If any interference is detected relocate or adjust.
Congratulations! You are ready to begin experiencing the improved performance and driving pleasure of your MBRP Inc. performance exhaust system. We know you will enjoy your purchase.
