 FREE 1 to 3-Day Delivery on Orders $119+ Details
Best Sellers


How to Install a Mishimoto Heavy Duty Automatic Transmission Cooler on your 1979-2014 Mustang
Shop Parts in this Guide
(2011-2014 Mustang GT Instructions)
Parts in product box:
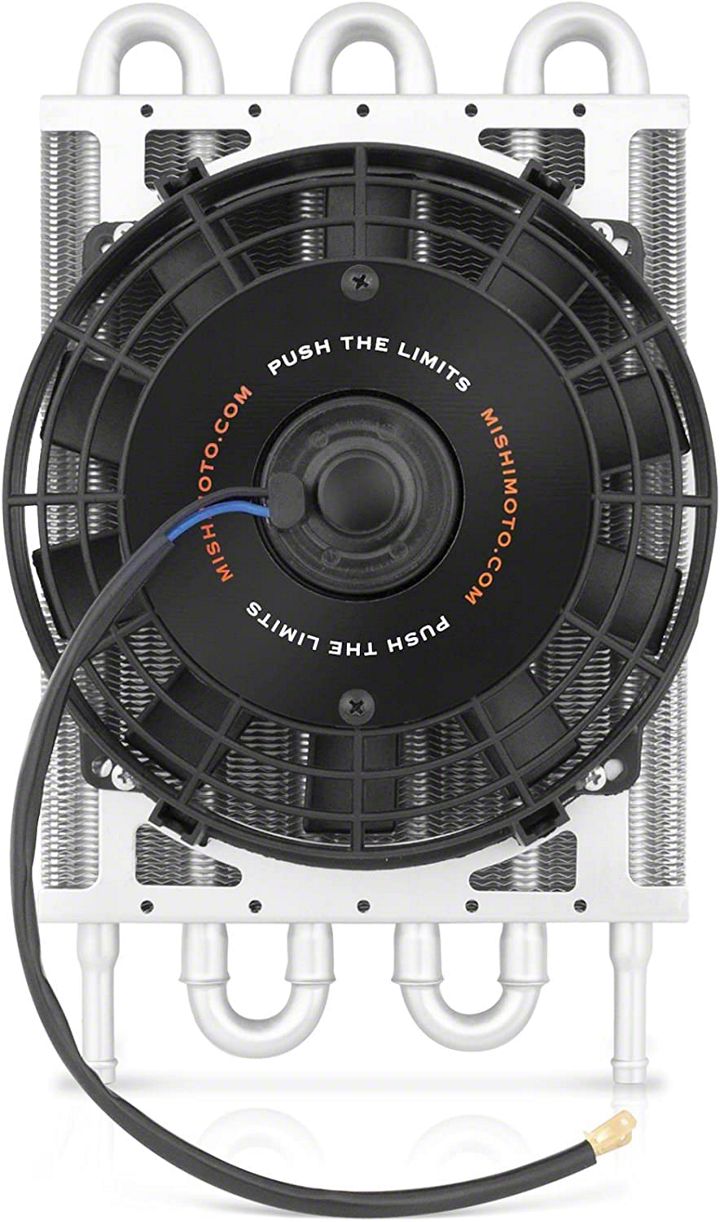
(1) Transmission Cooler
(2) Brackets
(10) Screws
(2) Bolts
(2) Nuts
Extra Parts Needed:
(4 feet) 1/2” transmission tubing
(2) “L” shaped brackets
(5) Hose Clamps
(1) Hose connector / Connector Assembly
(2) Bolts
(2) Lock washers
(2) Washers
(2) Nuts
(1) Role of foam insulation tape
Disclaimer:
The extra parts used in this installation guide do not necessarily have to be the parts used in your assembly. These parts worked for me, though other types of brackets and connectors should work just as effectively. I made this to act as a general guide line and reference to make the install process pain free for my fellow Mustang Brethren.
WARNING:
Do not attempt if you do not have the mechanical skill/experience required to accomplish this installation safely and properly.
STEP 1:
Locate your Mustang's hood latch and remove the two bolts that secure it to the frame.
STEP 2:
Drill/Bore out the holes that line the brackets that came with your Cooler till you can fit the hood latch bolts through the holes. You are doing this so you can mount the brackets directly where the hood latch mounts to the frame.
STEP 3:
Attach your “L” shaped brackets onto the connecting points on your cooler as shown.
Repeat this step for both sides until it looks like the photo shown below.
STEP 4:
Using your extra bought bolts, washers, and nuts.
Attach your bored out bracket to your “L” shaped bracket. It should turn out as shown below.
Repeat this step for both sides and ensure your cooler looks like the picture below.
STEP 5:
Prepare your hose connector if necessary. I used one of these 3 part connectors as seen below; although, there are many types out there that will work just fine. Just ask your local parts store for transmission hose connectors and choose accordingly.
STEP 6:
Sleeve your 1/2” transmission hose onto your cooler and tighten your hose clamps.
Your cooler should now look like this...
STEP 7:
Using your foam tape, apply tape to frame of cooler as shown below. The purpose of the foam tape is to reduce or eliminate movement against radiator once installed.
Repeat step on other side. Your cooler should now look like this...
STEP 8:
Your cooler is now prepared to be installed. Line up makeshift brackets with hood latch mounting points. Thread original hood latch screws back into holes securing cooler and hood latch together. It should look like this when completed...
STEP 9:
You now need to locate the lower transmission line that runs to your Mustang's existing cooling line. It will be on the passenger side of the vehicle toward the bottom corner of the radiator. Search in that area and you should find this...
Soon you will have to disconnect the hose clamp the yellow arrow is pointing at.
STEP 10:
Make two holes in the rubber/plastic wall in order to feed your 1/2” hose to the location found in “STEP 9”.
STEP 11:
Once you have fed the cooler hose through the holes created in the rubber/plastic wall, you need to disconnect the lower transmission line. WARNING: Once the line is disconnected, transmission fluid will start to drain. You need to quickly take your TOP cooler hose and fit it onto where the transmission line used to be.
Once you have fitted the cooler hose, clamp it tight.
Once the top cooler hose has been secured onto the existing transmission cooling line and fluid leaking has ceased, you can now focus on connecting the other line. As shown in the picture above, you need to connect the bottom cooler hose to the transmission line using the hose connector. Tighten the hose clamps once everything is lined up and you are finished.
FYI:
You may need to add transmission fluid to accommodate the increase in line and loss in fluid during installation.
WIRING:
You can wire in a manual switch to turn your transmission cooler fan on and off or you can splice into your radiator fan so they operate in unison. I personally recommend wiring in a switch because you don't have to tamper with existing factory wire. Besides, creating your own line from scratch turns out cleaner. I'm going to leave out pictorial directions for wire because there are so many ways to route the wire and so many pictures I would have to take to properly depict the process. I recommend routing the wire and switch through where the sound tube connects to the cabin. It works even better if you have already deleted your sound tube.
After you feed enough wire into the cabin, choose where you'd like to install your switch. In the end, when it comes to wiring, its all personal preference.
This is what your finished product should look like from the exterior of your Mustang:
You are now completely finished installing your Mishimoto Heavy Duty Automatic Transmission Cooler w/ Electric Fan.
Thank you, American Muscle, for your customer support and for giving me the opportunity to give back to the Mustang community.
Installation Instructions Written by:
American Muscle Customer Christopher Hirsch
on 06/10/2015
