 FREE 1 to 3-Day Delivery on Orders $119+ Details
Best Sellers


HOW TO INSTALL A CARBON MMD BOLT ON HOOD STRUT KIT ON YOUR 2005-2014 MUSTANG
Installation Time
1 hours
Tools Required
- Flat-Head Screwdriver
- Ratchet with Extensions
- 10mm Socket
- 13mm Socket

Shop Parts in this Guide
1.
BEFORE BEGINNING
If you are installing this hood strut kit on a 2010 Mustang, be sure to follow the instructions on the flip side of this manual for relocating the sound tube canister on the driver's side inner fender.
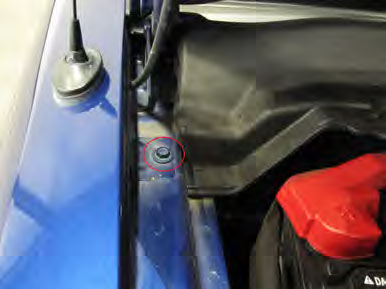
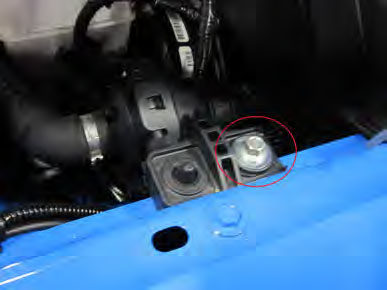
Prop hood open and remove the fender bolt shown below.
2.
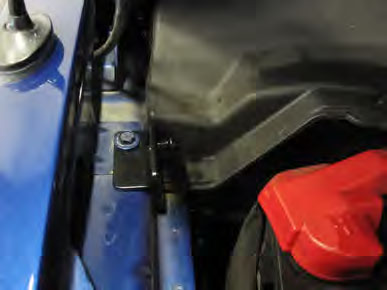
Install bracket marked P-L using factory fender bolt as shown.
3.
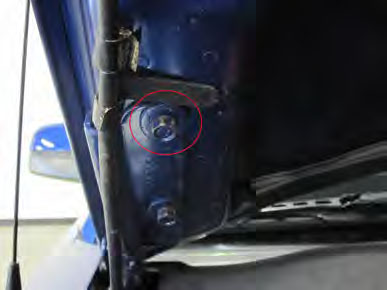
Making sure the hood is properly supported by the factor prop rod, remove the forward-most bolt on the hood hinge.
4.
Loosen the rear-most bolt on the hood hinge just enough to slide the larger bracket (marked P-U) in between the hood hinge and bolt. (Do not install the bracket between the hood hinge and hood.) Re-install/tighten bolts to secure bracket.
5.
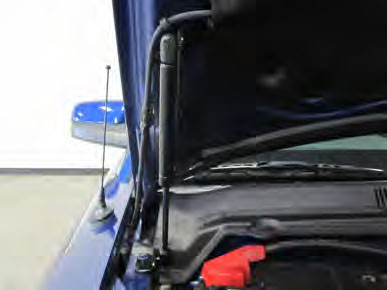
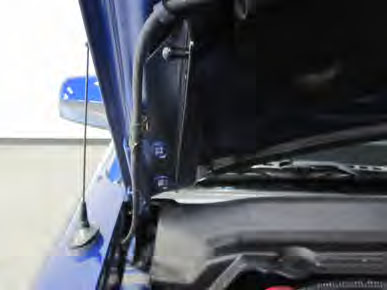
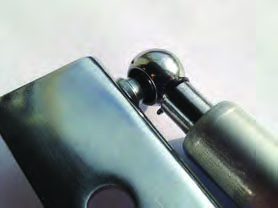
Pop the ends of the strut over the ball mounts on the brackets. Repeat steps 1-5 for drivers side. (Do not slam hood shut yet.) Check bumper/fender alignment by slowly lowering the hood. If okay, remove factory prop rod and enjoy.
6.
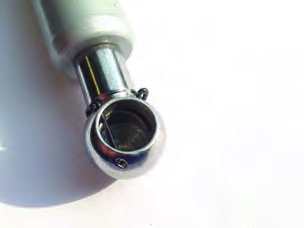
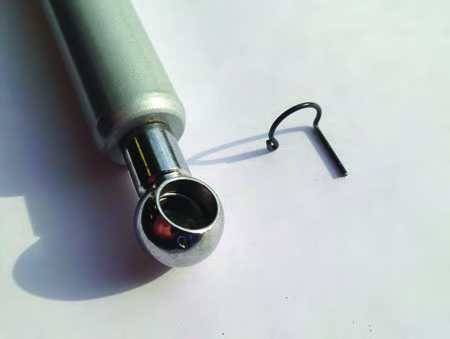
Remove the retaining clip. Place strut on the ball stud. Then reinstall the retaining clip.
**Note: Make sure the retaining clip slides all the way through.
FOR 2010+ ONLY
1.
Remove the bolt holding the canister bracket to the inner fender. Also remove the factory u-nut from the fender for reuse.
2.
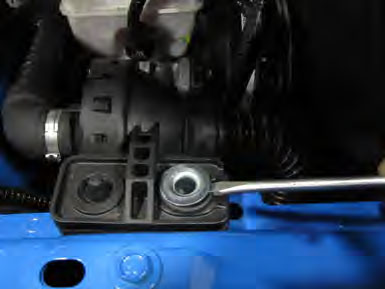
Using a flat-head screwdriver or trim removal tool, pry the metal bushing from the bracket as shown.
3.
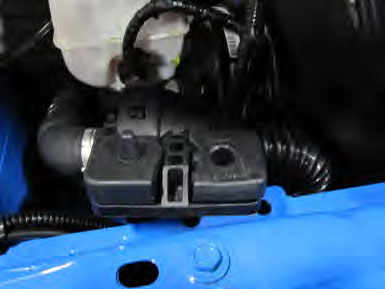
Remove the square rubber bushing from the bracket and cut ½” from the center of it. Place the two halves of the bushing onto the top side of the bracket as shown.
4.
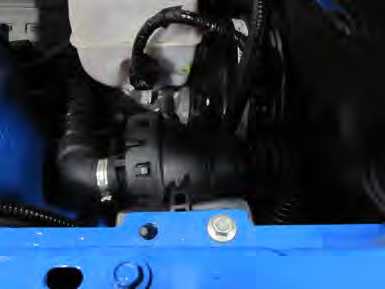
Reinsert the metal bushing (removed in Step 2) into the bottom right side of the bracket and re-install assembly on the bottom side of the inner fender using the original hardware (removed in Step 1).
