 FREE 1 to 3-Day Delivery on Orders $119+ Details
Best Sellers


How to Install MMD Boss Style Fog Light Deletes on your 2013 Mustang GT
Installation Time
2 hours
Tools Required
- Flathead Screwdriver
- Trim Removal Tool
- 7mm & 10mm Socket
ESTIMATED TIME
It is highly recommended to remove the bumper cover prior to installing your fog light deletes to ensure a proper install. Before beginning, follow the separate included instructions for removing the front bumper cover from your vehicle.
TOOLS REQUIRED
► Flat-Head Screwdriver
► Trim Removal Tool
► 7mm & 10mm Socket
ESTIMATED TIME
1.5 Hours
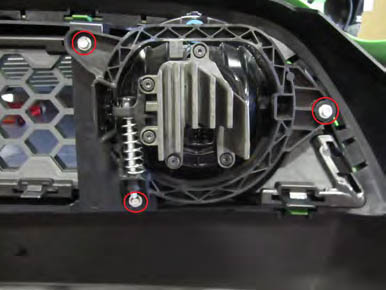
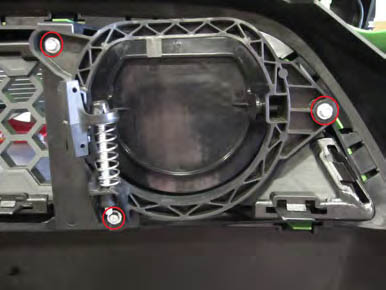
1. Remove the three 7mm screws securing the fog light bracket to the grille assembly and remove it from the grille with the fog light still attached.
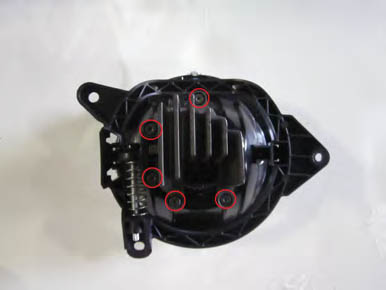
2. Remove the five T15 Torx Head screws securing the LED resistor housing to the fog light and carefully remove it.
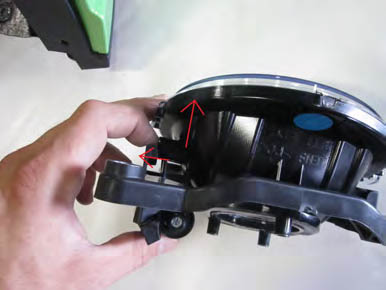
3. Pull back the tab on the fog light bracket to release the light as shown.
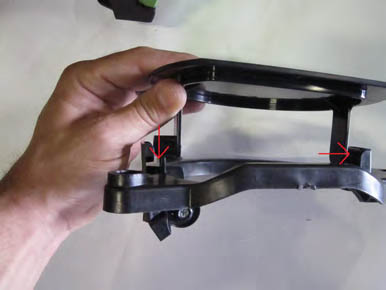
4. Install the delete plate in the bracket by placing one side over the post in the bracket and snapping the other side in as shown. *The delete plates are marked “L” & “R”, be sure to install them in the correct brackets
5. Re-install the bracket onto the grille assembly using the three 7mm screws removed in Step 1. Be sure that the delete plate is flush with the factory fog light opening before fully tightening the screws.
6. Repeat Steps 1-5 for the opposite side fog light delete. Find a safe place in the upper radiator support to secure the factory fog light harnesses so they cannot be seen and are protected from the elements.
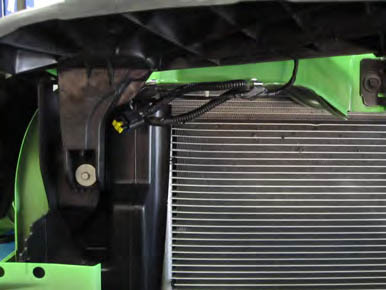
7. Repeat Steps 3-7 for opposite side fog light. Once both fog light deletes are installed in the grille assembly, find a safe place to secure the factory wiring harnesses.
