 FREE 1 to 3-Day Delivery on Orders $119+ Details
Best Sellers


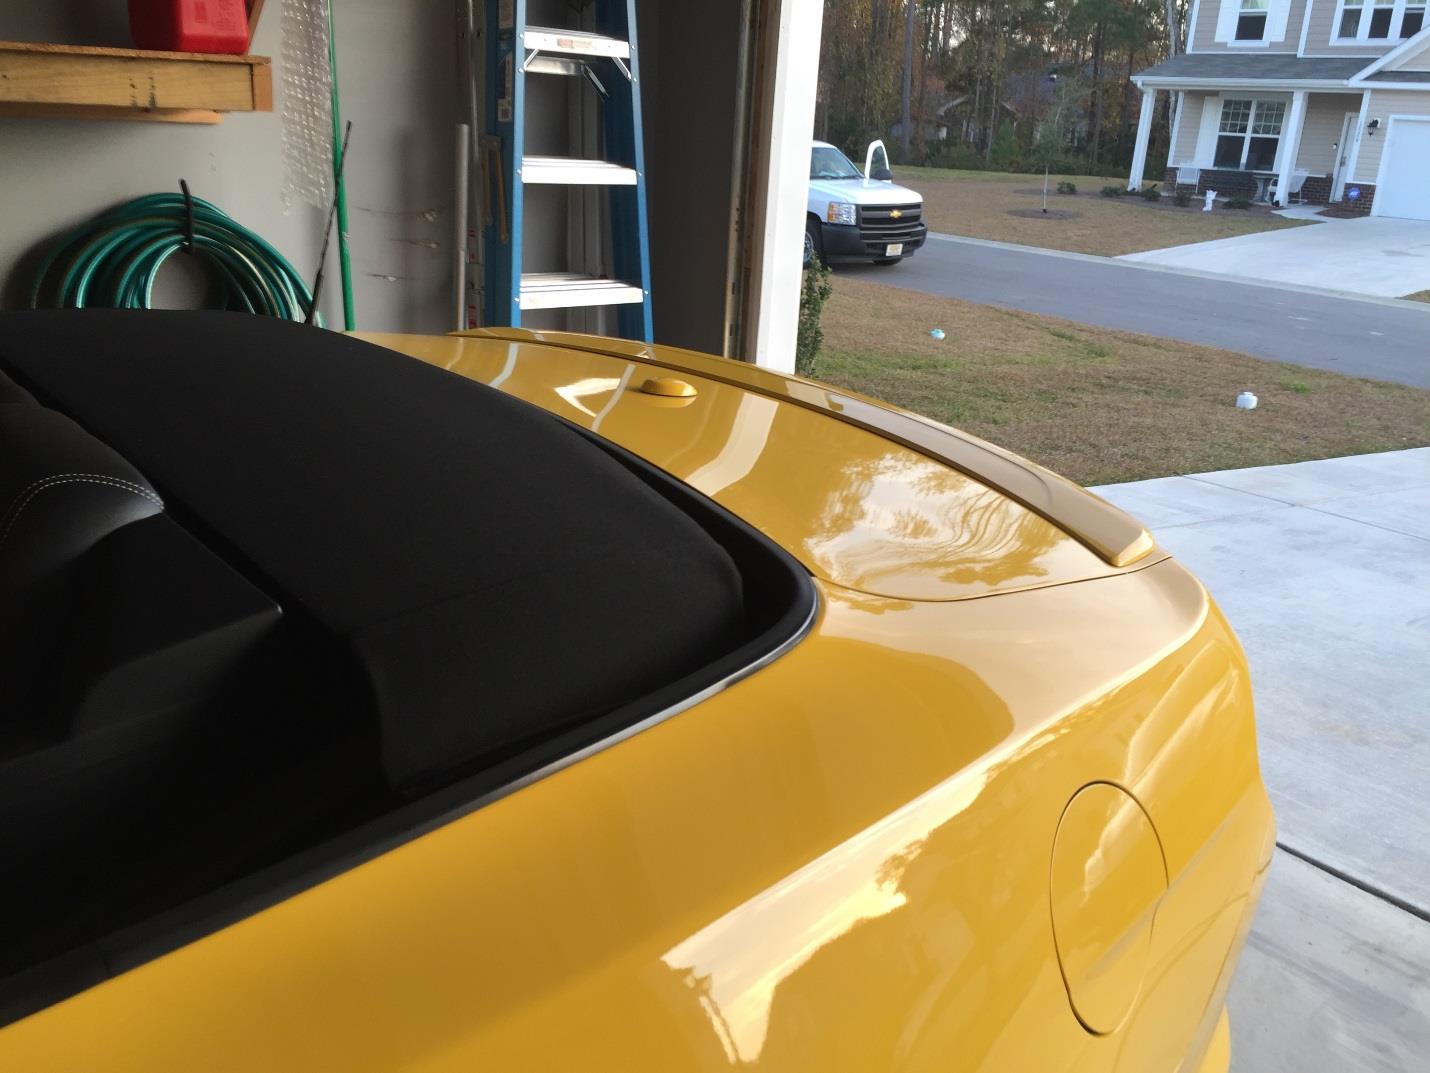
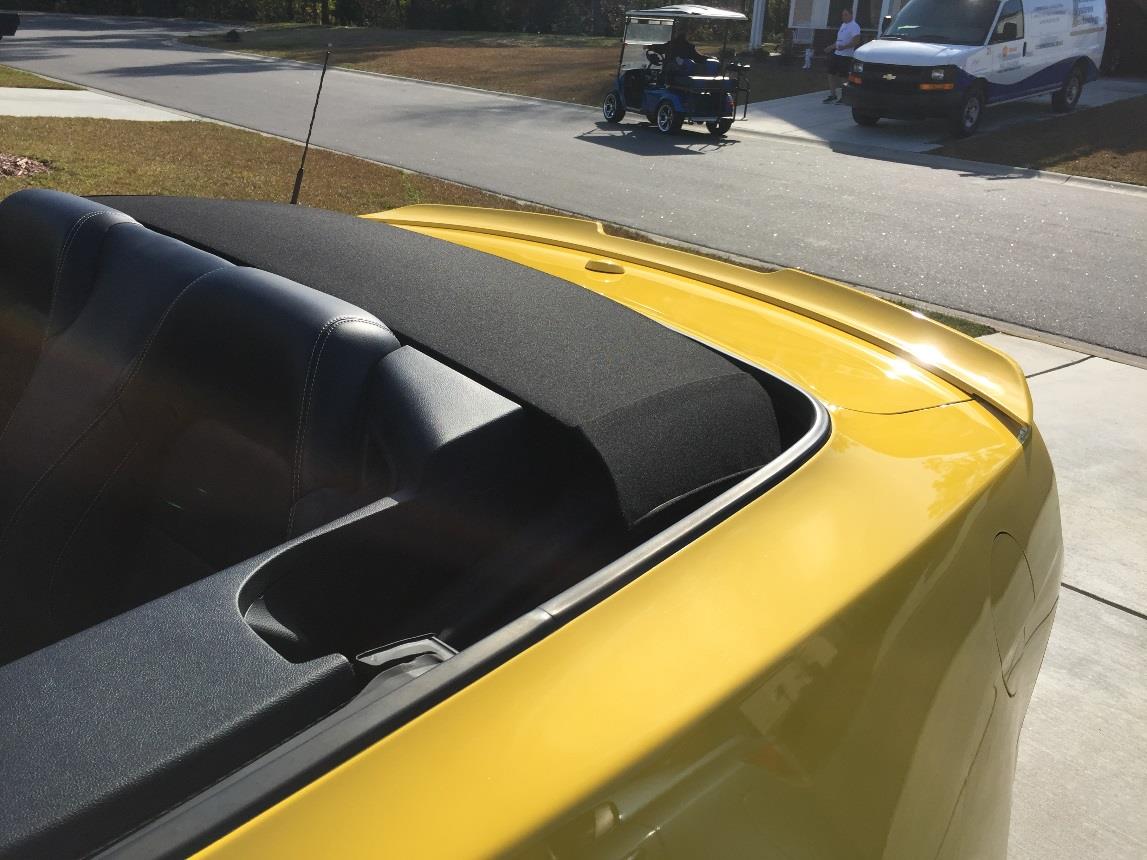
How To Install a MMD by Foose Rear Spoiler - Pre-Painted on your 2015-2016 Mustang
Installation Time
2 hours
Tools Required
- 10mm deep socket and ratchet
- Phillips head screwdriver
- Panel/trim removal tool or needle nose pliers
- Painter’s Tape
- Rubbing Alcohol
- Clean Microfiber Towel or Terry Cloth
- Drill
- Several drill bits finishing with 1/4in bit.
- ONLY if removing a factory spoiler: Fishing Line (use “big game” line 30lbs+ to avoid breaking)
- OPTIONAL Touch up Paint or clear Nail Polish
- OPTIONAL Small wood block

Shop Parts in this Guide
Please Note:
Install was completed on 15-16 Mustang Convertible WITH factory rear spoiler. Install can be completed on Mustangs WITHOUT factory rear spoiler by skipping steps 3 through 10.
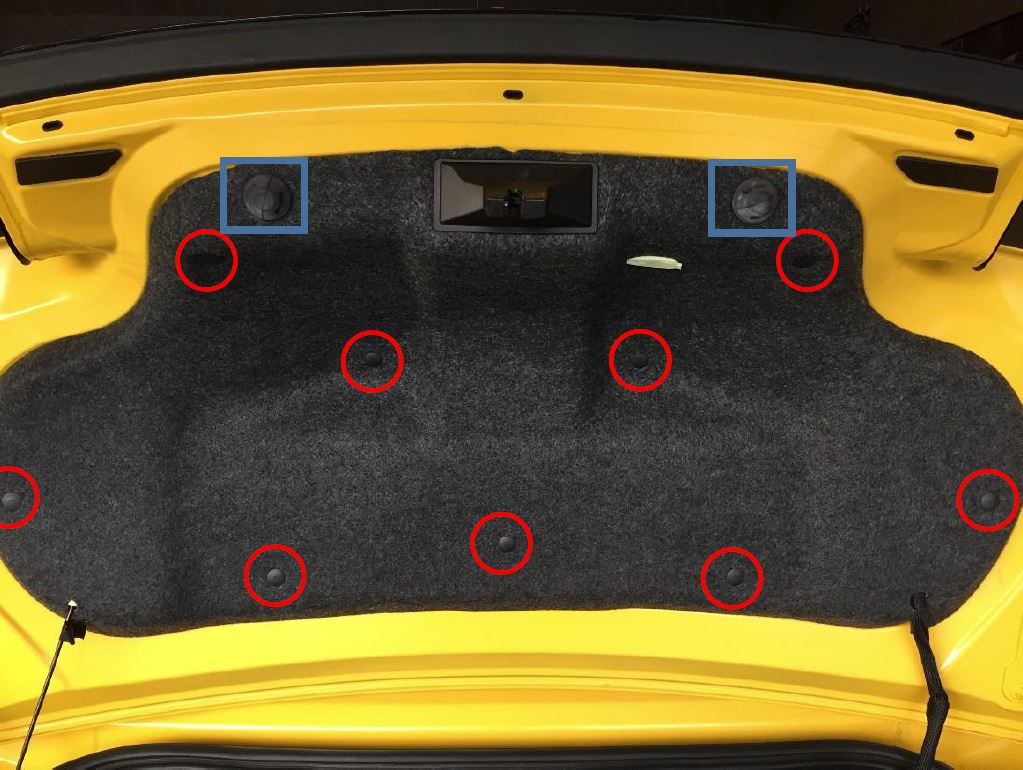
Step 1: Remove the trunk inner liner. There are 9 panel screws (red circle), 2 trunk stops (blue square) that will need to be removed. Use a trim removal tool or needle nose pliers to remove the trim screws. The trunk stops can be removed by hand by turning counter-clockwise. Once complete, the trunk liner can be removed by slowly working it around the trunk latch. The emergency trunk release can simply be popped through the trunk liner by hand to be removed.

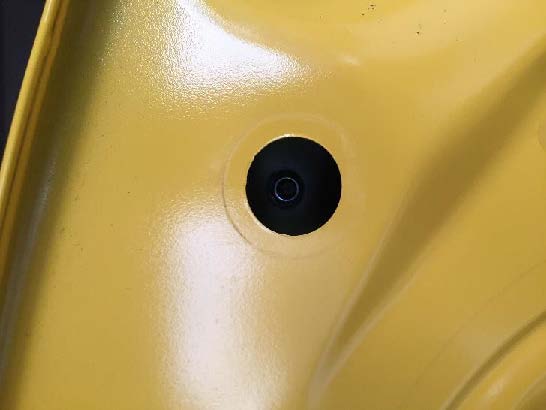
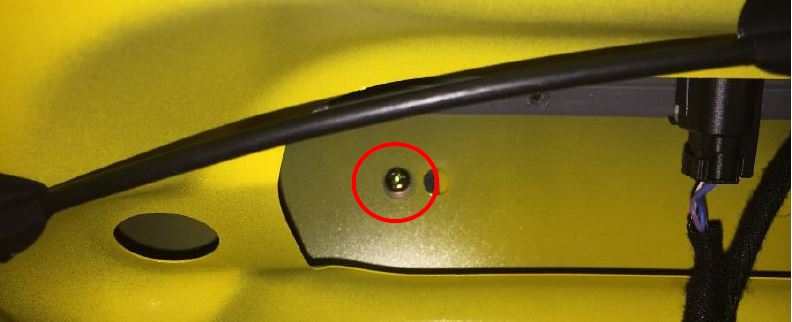
Step 2: remove the factory rubber grommets from the driver and passenger sides of the trunk. This can easily be done by hand. On models equipped with a factory spoiler, this will expose a mounting stud on each side. (see picture on right)
**For cars WITH a Factory Spoiler – proceed to Step 3. For cars WITHOUT a Factory Spoiler – skip ahead to Step 10**
Factory Spoiler Removal
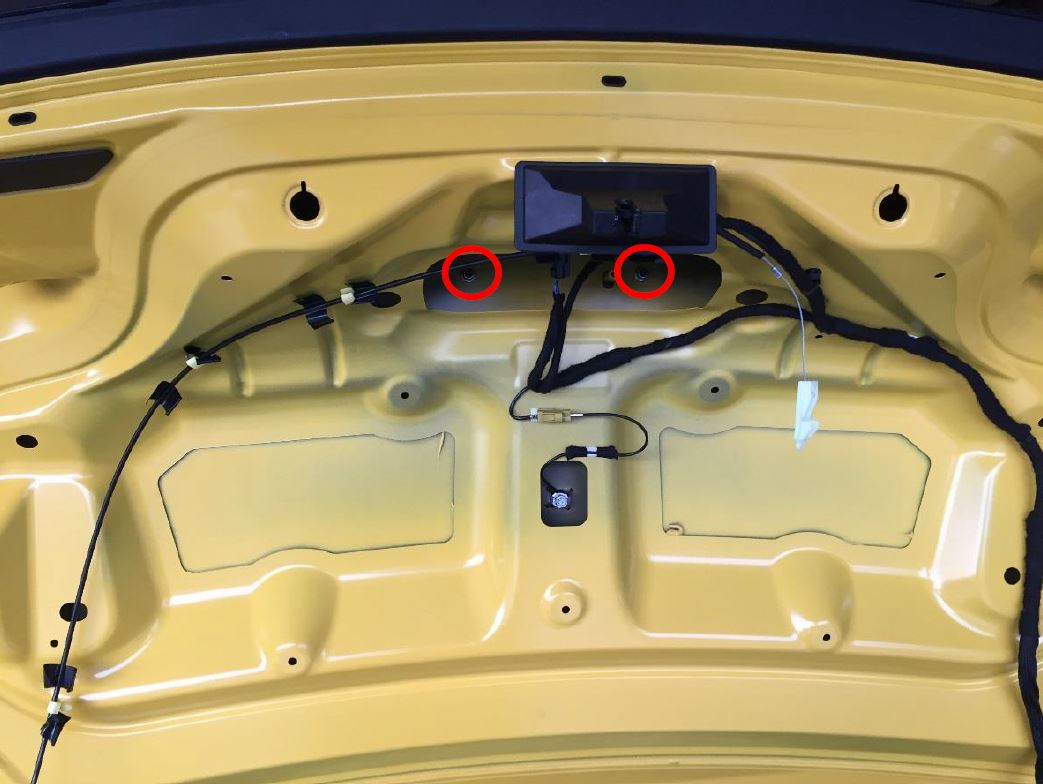
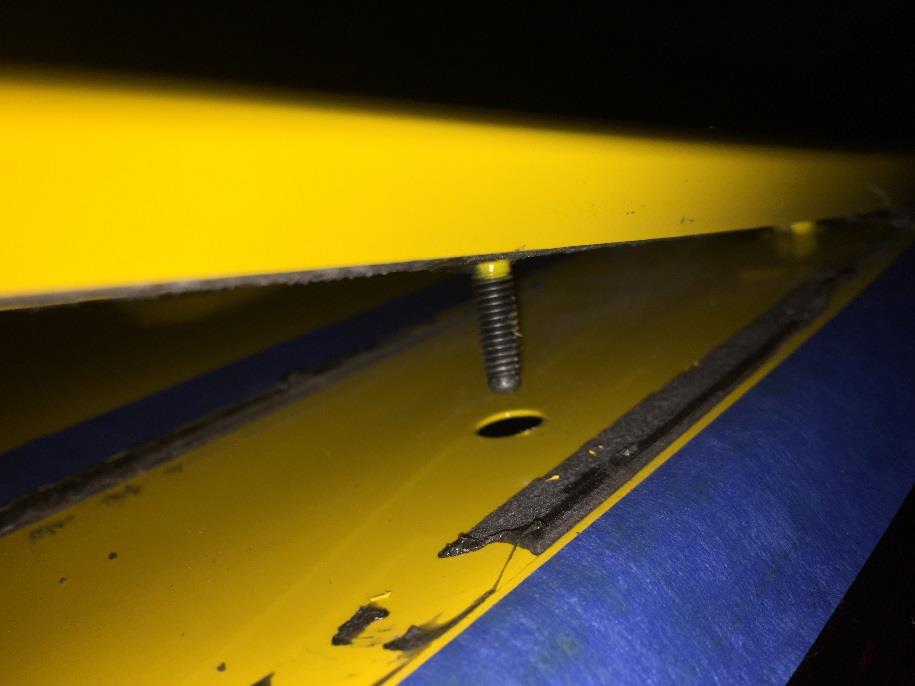
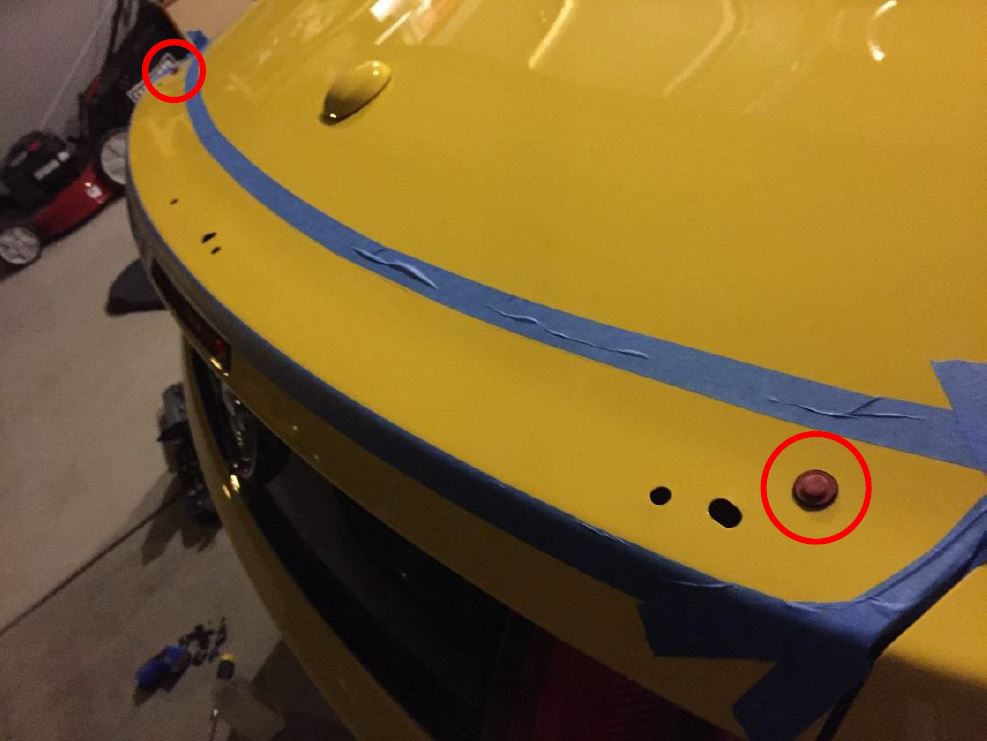
Step 3: Using a 10mm Deep Socket and ratchet, remove the 4 nuts on each of the 4 mounting studs for the factory spoiler. One can be found under the grommets removed in Step 2. The last 2 can be found behind the high mount brake light near the center of the trunk lid. (pictured above)
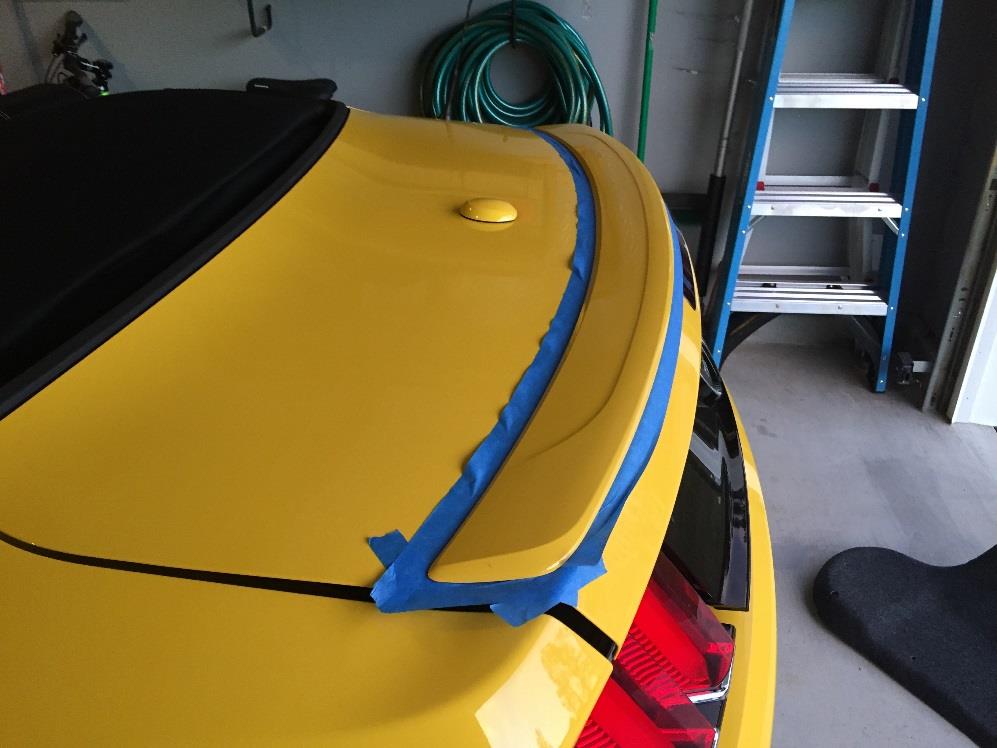
Step 4: Use painter’s tape to mask off the edges of the factory spoiler to protect your trunk lid paint.
Step 5: Beginning on either end of the factory spoiler, run fishing line under the corner of the spoiler (heavier gauge or “big game” fishing line – as mentioned in the tools section – will be less prone to breakage and make this process much easier!) Slowly move the line back and forth until you can go no further (this means you will have hit the outer mounting studs) This process will help separate the factory double sided tape.
Step 6: Gently pry up on the edge of the factory spoiler. You will need to feed the fishing line around the factory mounting studs (near circle above) on the outer edge of the spoiler to continue cutting through the double-sided factory tape. I found a trim removal tool wrapped in painters tape to protect from sharp edges to be the best at holding the spoiler up while feeding the line.
Step 7: Continue sawing back and forth with the fishing line until you reach the inner mounting studs. Gently pull up on the spoiler to expose the studs and feed the line under. Repeat with each stud until you have cut through to the other side. Now carefully remove the factory spoiler.
Step 8: Remove the residual mounting tape. The larger sections can be removed by hand. After the larger sections are removed, the fine residue lines can be removed with a microfiber towel and rubbing alcohol. Continue until you have a clean mounting surface.
Step 9: Remove the factory mounting plugs (pictured above) with a trim removal tool or needle nose pliers. Be sure to tape around them to protect your paint during removal. Clean any dirt with a microfiber towel. Your factory spoiler removal is now complete!
MMD by Foose Spoiler Install
Step 10: Begin by prepping the trunk surface with the supplied alcohol wipes or rubbing alcohol and a microfiber cloth. This will remove wax and dirt and ensure a clean mounting surface.
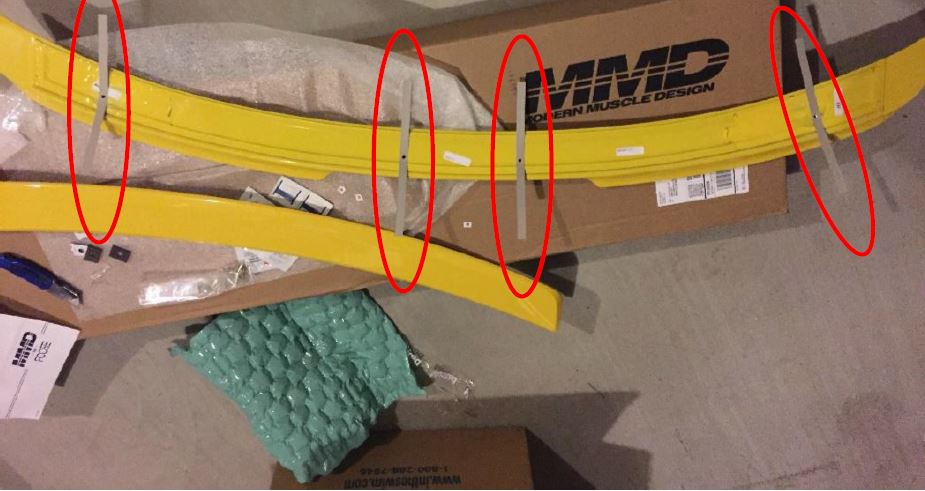
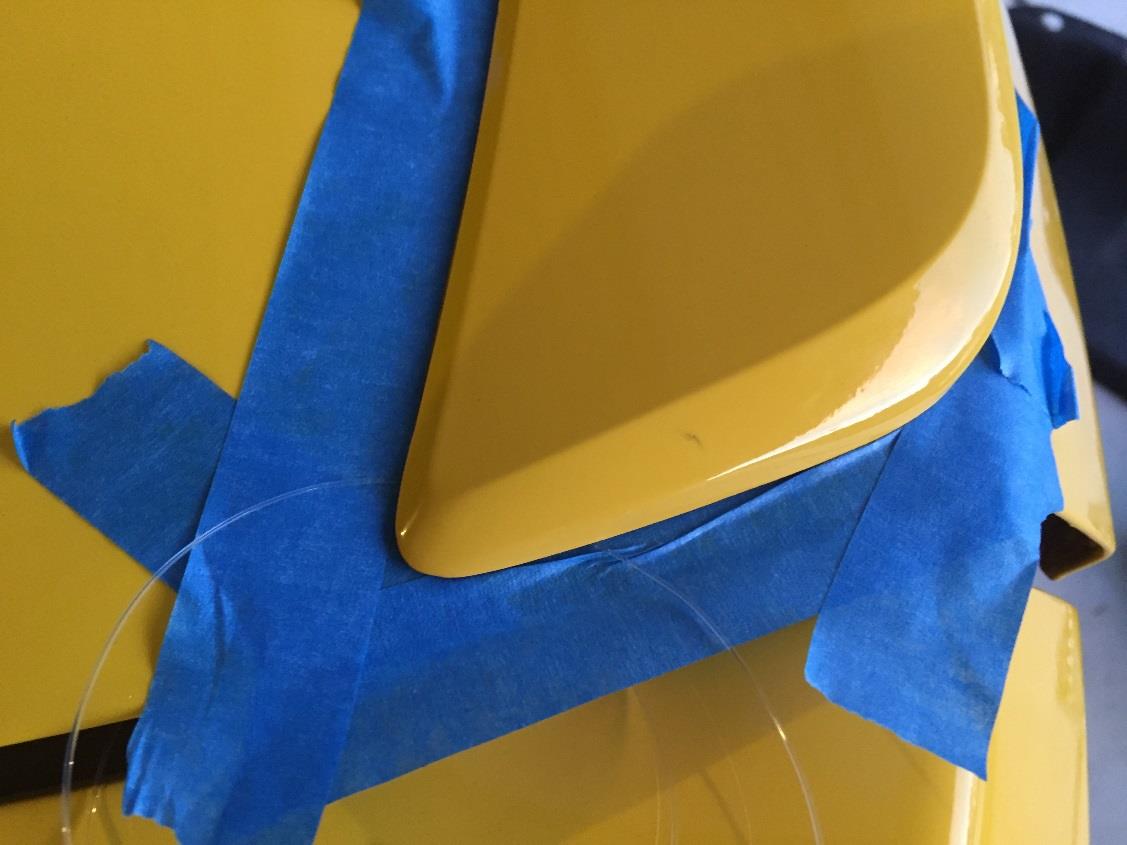
Step 11: Using the supplied mounting templates, locate the 4 mounting points on the bottom of your MMD by Foose spoiler. Center the mounting templates over each and apply. There is an adhesive section of each template near the drill hole. This is the MOST IMPORTANT step for drilling accuracy.
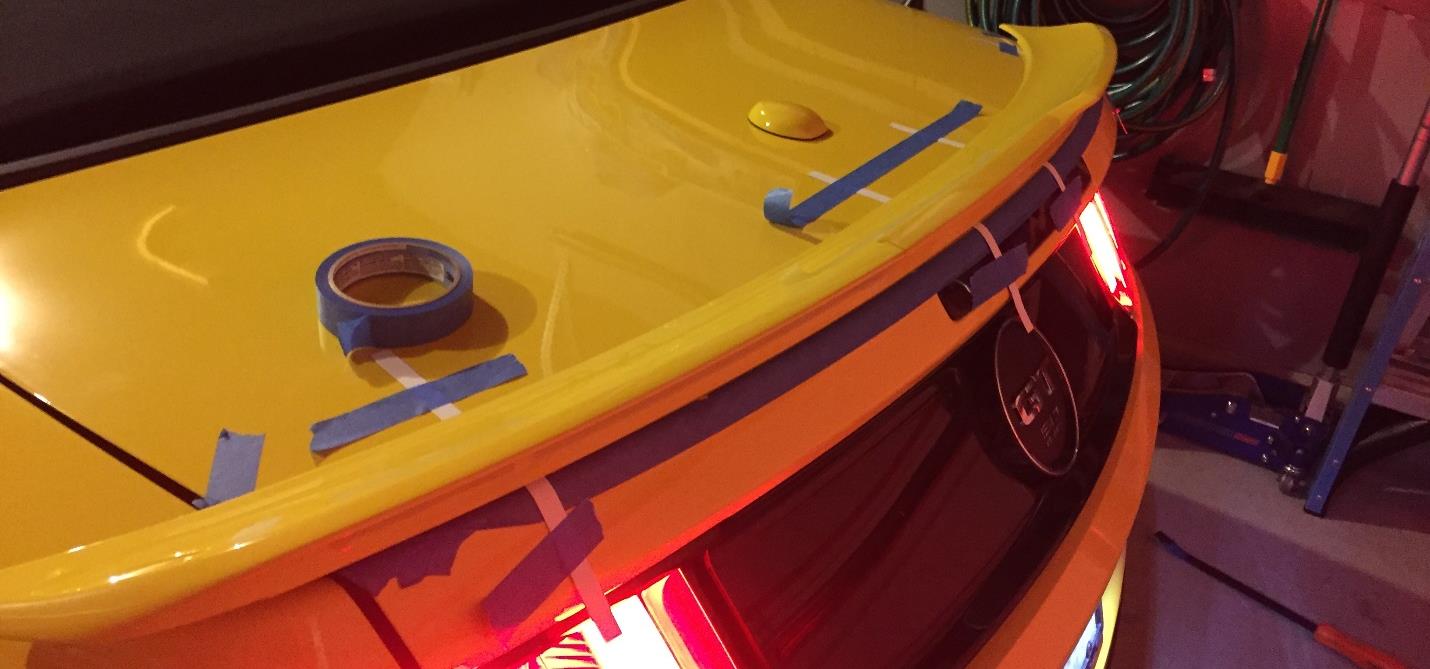
Step 12: Center and test fit the MMD by Foose spoiler. BEFORE securing each template, you will want to add painters tape beneath each template to the trunk lid to protect your paint from cracks while drilling. (see next picture for example) Now secure the templates to the car as shown above with painters tape. Carefully pull the MMD by Foose spoiler away to reveal your drilling templates.
Step 13: **For cars WITHOUT a factory spoiler, begin by drilling a pilot hole in the center of each template. Continue drilling, finishing with a 1⁄4 inch bit. NOTE the MMD instructions will say finish with a 7/32 bit. I found this was a bit tight fitting around the new hardware and a 1⁄4 bit worked best. For additional protection, place a small block of wood beneath the outer drill spots to make sure the bit does not contact the top of the tail light housing.
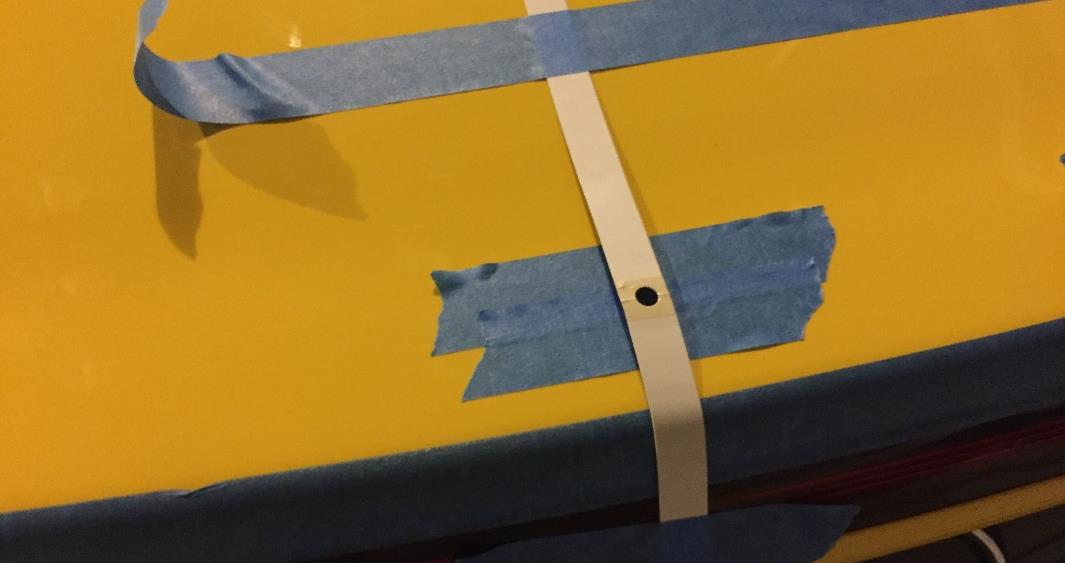
** For cars WITH a factory spoiler, begin by drilling a pilot hole in the center of both MIDDLE templates (closest to the brake light) Continue drilling, finishing with a 1⁄4 inch bit.
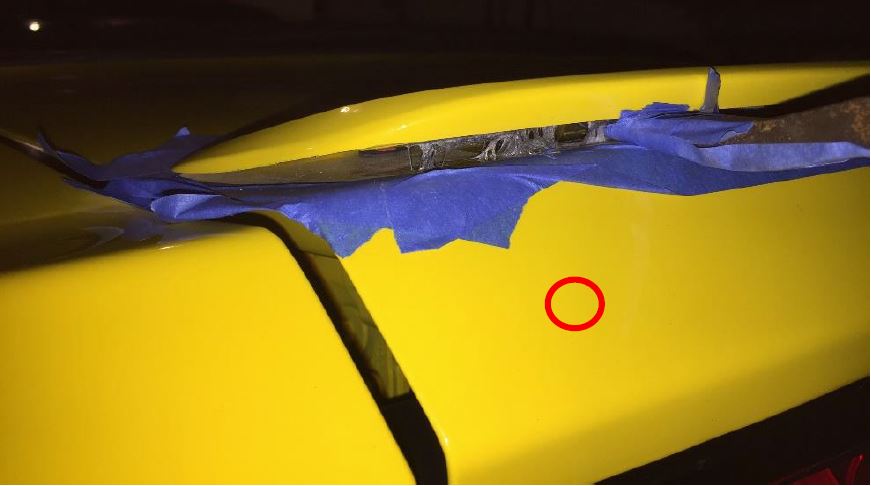
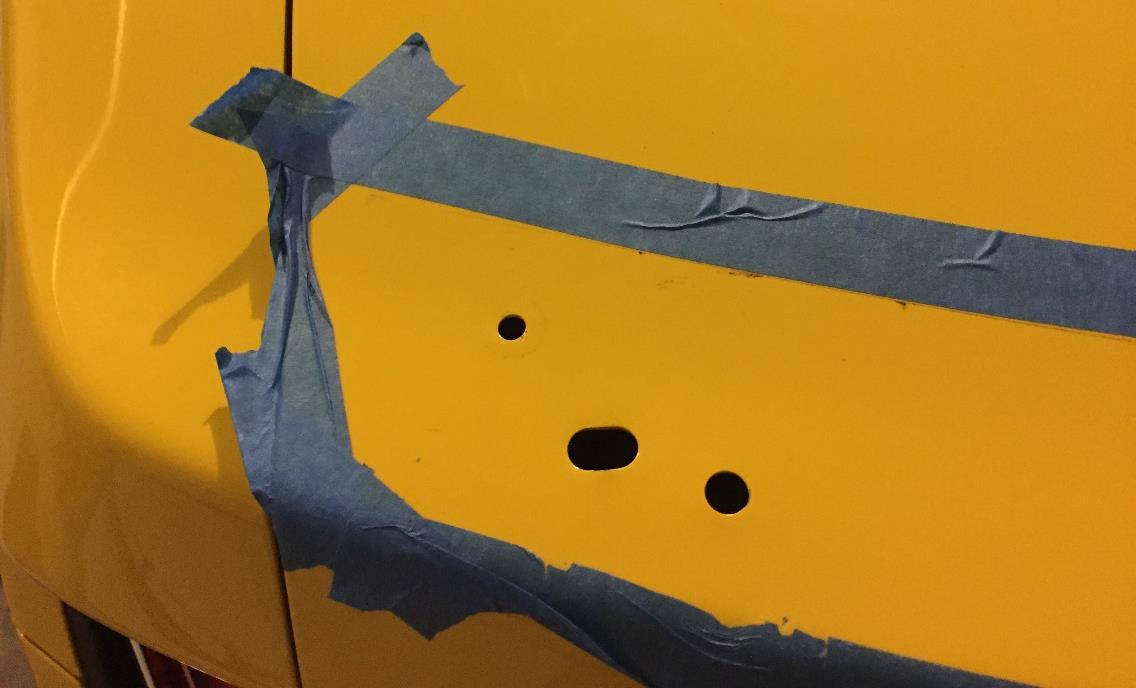
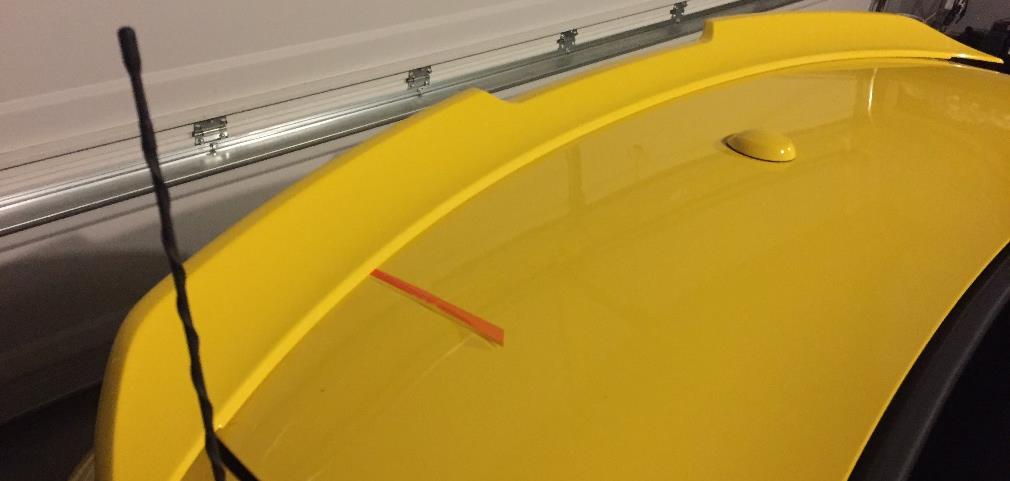
**The two outer factory holes will need to be elongated on the edge closest to the center of the trunk. Notice the red colored section of the picture above for reference as to the material to remove. Use your 1⁄4 inch drill bit to remove the material colored above. Repeat the procedure on the opposite side.
Step 14: Wipe excess material from trunk lid with microfiber towel. Seal the newly drilled holes with touch up paint, touch up clear coat or clear nail polish. This will insure the new holes are protected from rust or corrosion in the future.

Step 15: Prep the MMD by Foose spoiler for install by removing the backing tape from around the mounting holes. Install the supplied foam pads, centering them over the 4 mounting holes in the spoiler. Trim any excess so it does not interfere with the double-sided mounting tape. BEFORE fitting to the trunk – peel back a corner of the double-sided tape protectant from each piece and fully remove the protectant from both end pieces.
Step 16: Spread the supplied adhesion promoter to the trunk mounting surface before final install of the spoiler.
Step 17: Begin mounting the MMD by Foose spoiler, starting with the two inner most screws. Hand tighten to start but DO NOT fully tighten the screws yet.
Step 18: Peel back the double-sided tape protector and firmly press the MMD by Foose spoiler to the trunk surface. Finish by installing the last two mounting screws on the outer most mounting holes. Tighten all mounting screws down with a Phillips head driver.
Step 19: Reverse the trunk liner removal process from steps 1 and 2.
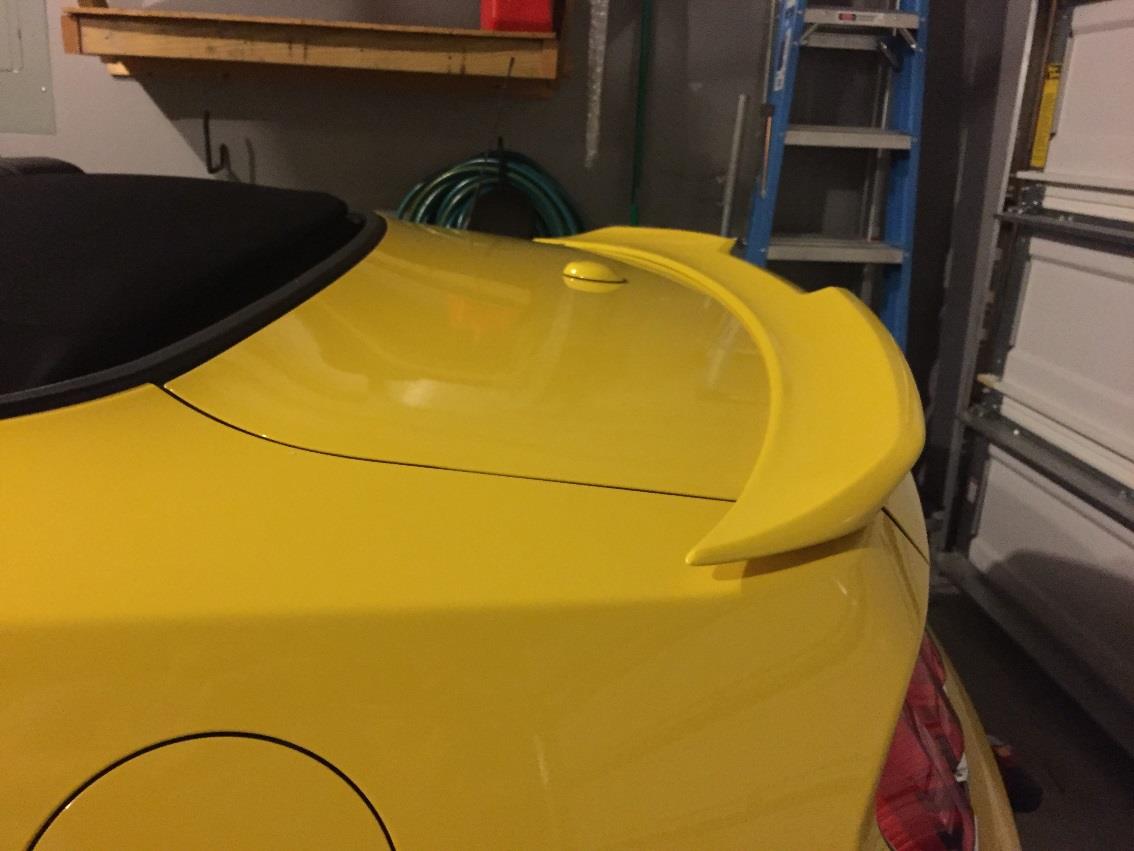
Step 20: Sit back and enjoy your new look!
Written by American Muscle Customer Ryan McCallum: 12/14/15
