 FREE 1 to 3-Day Delivery on Orders $119+ Details
Best Sellers


How to Install a MMD Hood Scoop on your 2005-2009 Mustang GT and V6
Installation Time
1 hours
Tools Required
- Power Drill
- Tape Measure
- 3/16" Drill Bit
- Trim Removal Tool
- 9mm Socket & Ratchet
- Masking/Painters Tape

Shop Parts in this Guide
Before beginning, make sure hood has been thoroughly cleaned
to prevent scratching
TOOLS REQUIRED
Power Drill
Tape Measure
3/16” Drill Bit
Trim Removal Tool
9mm Socket & Ratchet
Masking/Painters Tape
Step 1
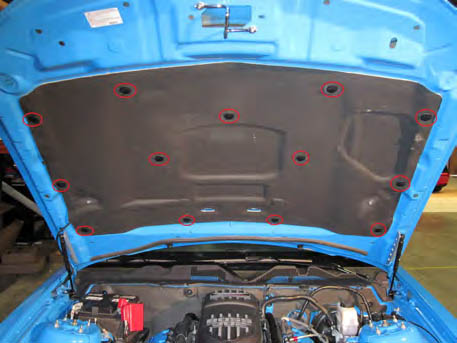
Using a trim removal tool or side cutters, carefully remove the 13 push pins securing the hood insulation pad and set it aside.
Step 2
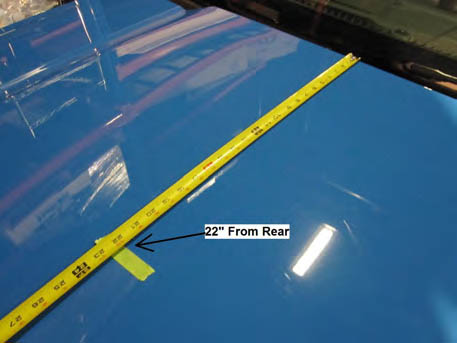
Use a tape measure and masking tape to mark a spot 22” in the center of the hood from the rear.
Step 3a
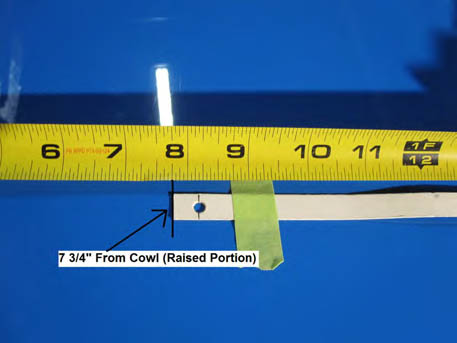
Measure 7 ¾” from the edge of the cowl (raised portion of hood) on either side to center the drill template.
Step 3b
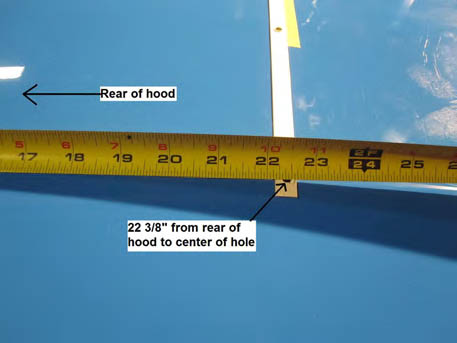
Measure 22 3/8” from the rear of the hood to the center of the hole on the template to align it.
Step 3c
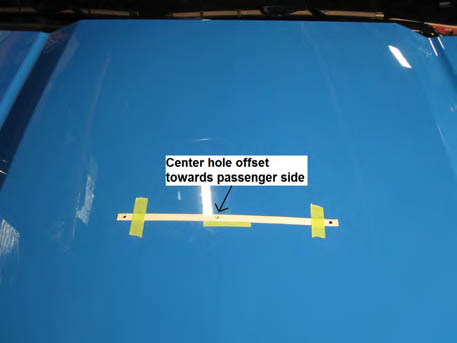
Once in the correct position, tape the template to the hood as shown. (Make sure center hole is offset towards passenger side as seen above)
Step 4
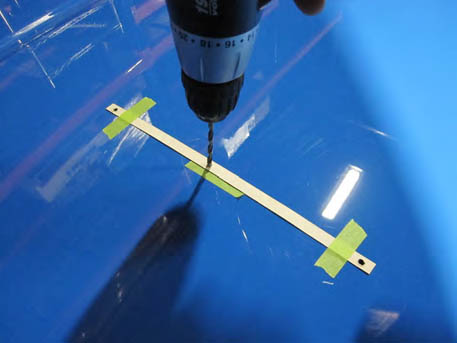
Using a 3/16” bit, drill 3 holes through the hood using the template as a guide. Use a shop-vac to clean up any metal shavings after drilling.
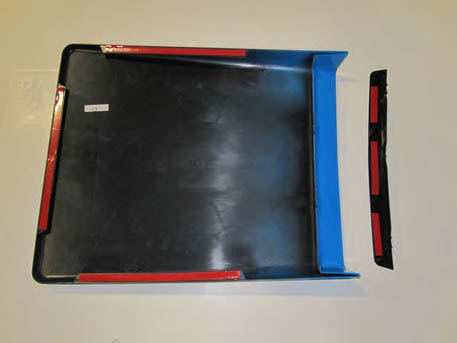
Step 5

Lay the scoop upside down on something soft so as not to damage the finish. Wipe the supplied 3M Adhesion Promoter on the reverse side of the insert and the tabs of the scoop.
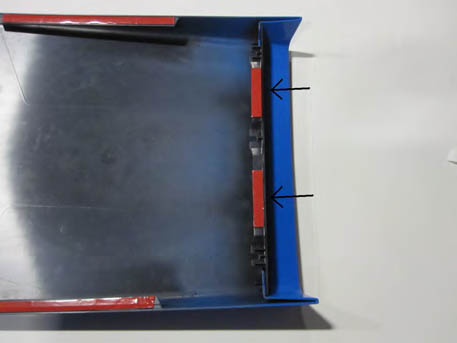
Step 6
Apply the supplied adhesive tape to the areas wiped with Adhesion Promoter.
Step 7
Remove the backing from the adhesive on the scoop’s insert and install it on the front of the scoop as shown. Place the final two adhesive strips to the underside of the insert.
Step 8a
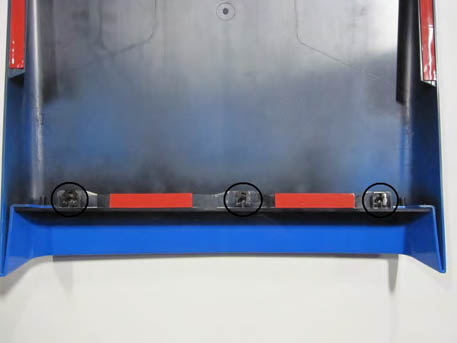
Install the 3 included U-Studs on the scoop insert.
Step 8b
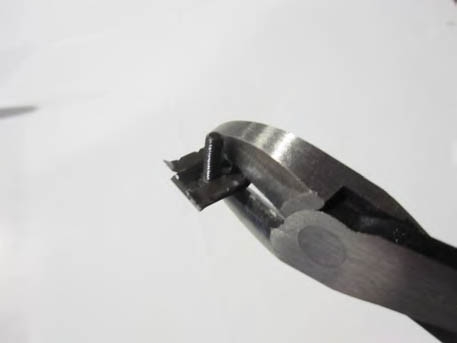
If they are loose on the insert, squeeze the backside with a pair of side cutters to tighten the gap.
Step 9
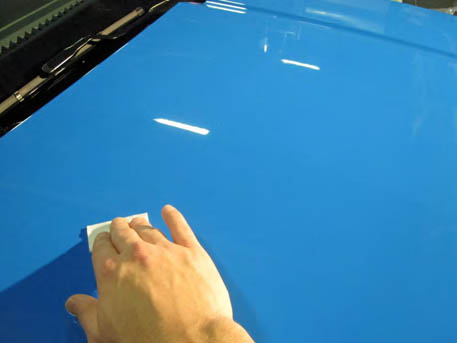
Thoroughly wipe the area of the hood where the scoop will be applied with the supplied alcohol pads to ensure a clean bond.
Step 10
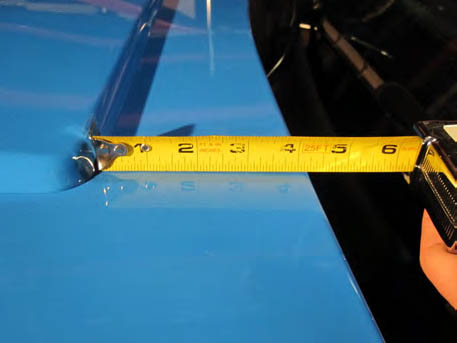
Remove the backing from the adhesive strips and place the scoop on the hood using the pre-drilled holes as a guide. (DONT PRESS DOWN YET) The scoop should sit about 4 1/4” from the rear
of the hood. Once each side sits equally from the rear edge, the scoop is centered.
Step 11
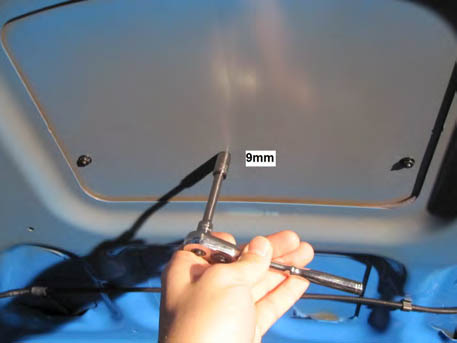
Once you are sure the scoop is centered, press down firmly around the edges and the front insert to fully seat the adhesive. Open the hood and install the nuts on the U-Studs. Tighten
firmly with a 9mm socket.
