 FREE 1 to 3-Day Delivery on Orders $119+ Details
Best Sellers


How to Install a MMD Rear Window Louvers - ABS on your 1994-2004 Mustang
Installation Time
1 hours
Tools Required
- Socket Wrench
- 8mm Socket
- Painter's Tape
- A Lint Free Cloth*
- Windex or a Like Window Cleaning Solvent
- Small Ziplock or Other Freezer Bag
- Rotary Drill or Drill Bit just larger than the holes in the louver
- Glass Scraper of Razor Blade
- Silicone Sealant
Time Required:
Less than 1 hour of labor (5 hours total installation if the 4 hours of letting the brackets set are included).
Required Tools:
• Socket Wrench
• 8mm Socket
• Painter’s Tape
Extra Suggested Tools
• A lint free cloth
• Windex or a like window cleaning solvent
• Small Ziplock or other freezer bag
• Rotary Tool or Drill Bit just larger than the holes in the louver
• Glass Scraper or Razor Blade
• Silicone Sealant
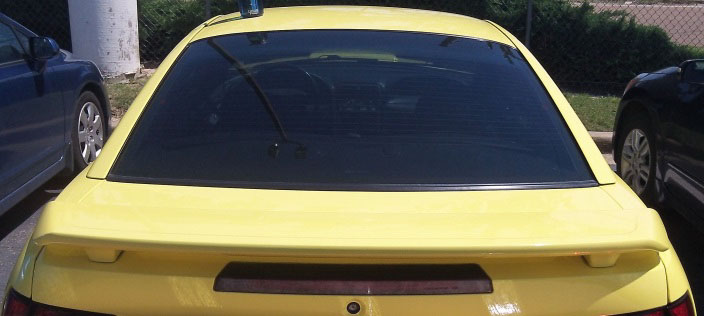
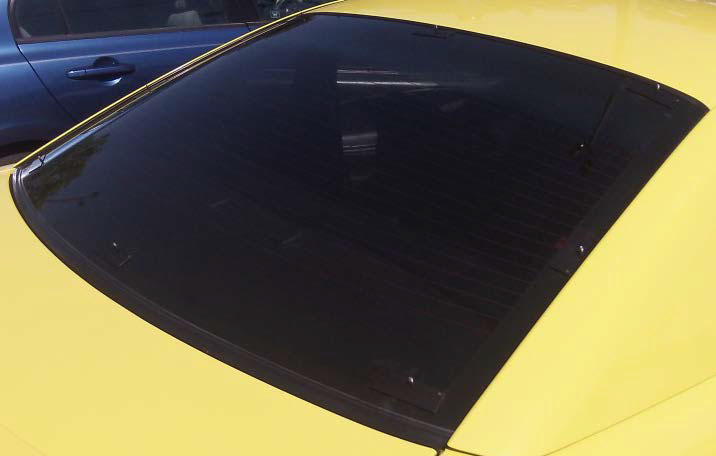
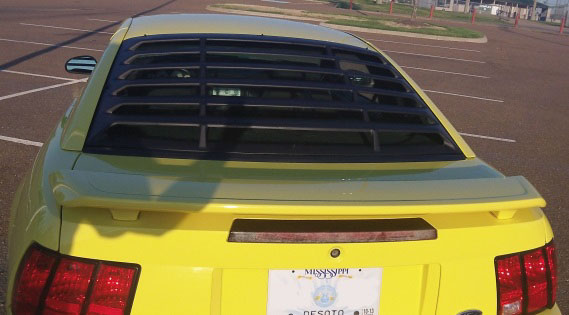
My 2001 Mustang GT before the MMD Rear Window Louvers were installed.
These louvers look great and are easy to install. For a quick installation, follow the basic instructions below. To ensure that your louvers look their best and last the longest they can, make sure to take the additional suggested steps also.
Instructions:
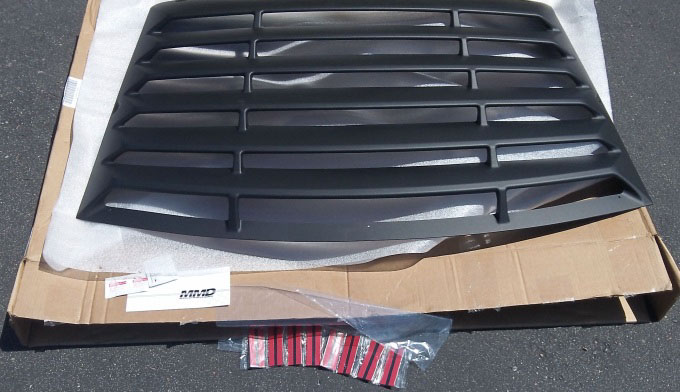
1. Unpack the louvers and ensure that all parts are included in the box. You should have the rear window louver, 8 black mounting brackets (with washers and nuts on them), a couple alcohol pads for prepping the window, and a single 3M adhesion promoter pad. If any of these are missing, don’t attempt installing. Contact American Muscle to have replacement parts sent.
2. (Suggested Step) With the Windex and lint free cloth, thoroughly clean the window of any and all dust, pollen, and dirt. Don’t spare any effort here since the cleaner the window is, the better the louver mounting brackets will adhere.

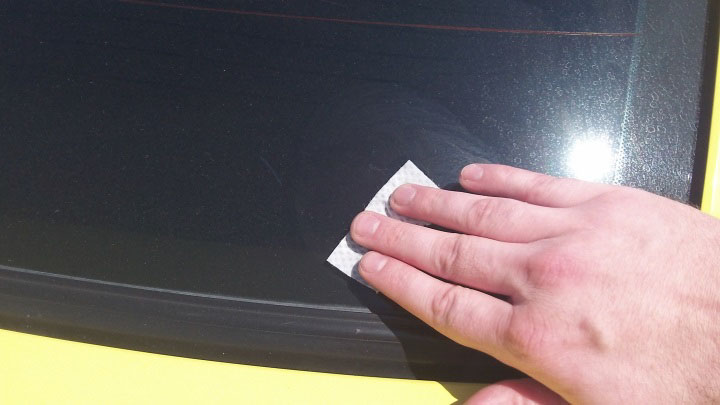
3. Temporarily place the louvers on the rear window and take note where the mounting holes line up on your window. Remove the louvers and wipe the areas noted with the alcohol pads to ensure no residue or solvent remains on those areas.
4. Next, repeat the process with the 3M adhesion promoter pad. While doing this step, be sure not to touch the louvers or your paint with your fingers. The promoter is much like a rubber cement and it will leave fingerprints that are difficult to remove. Once finished, either thoroughly wash your fingers or wait until the promoter has completely dried to prevent fingerprints.
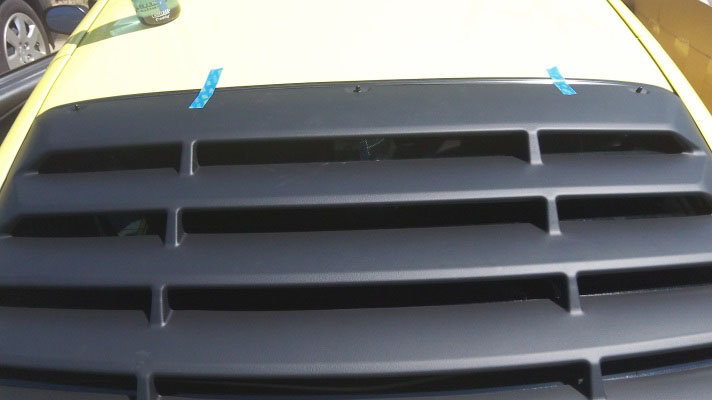
5. Next, place the louvers back over the rear window. Line it up with the bottom of the upper window seal and position it centered between the left and right sides. There will be a very small amount of glass visible on each side. Hang the louvers in place using two or three strips of painters tape so that you can lift them without losing alignment.
6. Remove the washers and nuts from the 8 mounting brackets. I suggest placing these in the Ziplock bag to ensure they aren’t lost.
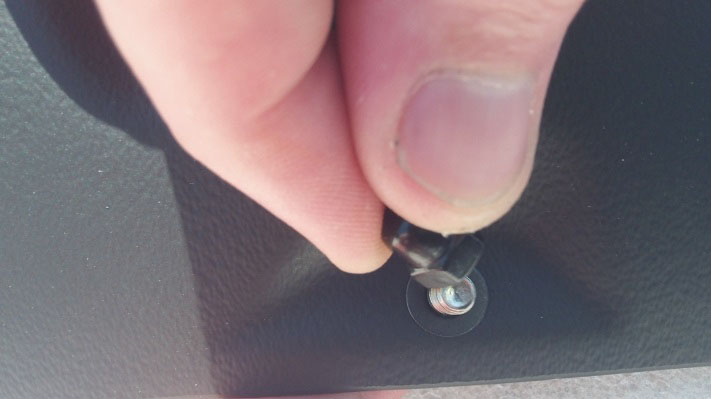
7. Starting with the top left mounting bracket, remove the red backing from the 3M adhesion strips on them, lift the louver, place the bracket in the mounting hole on the louver, and hold the bracket straight while lowering the louver back in place to position the bracket. Once in place, press hard on the louver just above the bracket to permanently set it in place. Repeat this process with the top right bracket next. Now that the louvers are securely held in place by the brackets, remove the tape and continue the same process for the remaining 6 brackets.
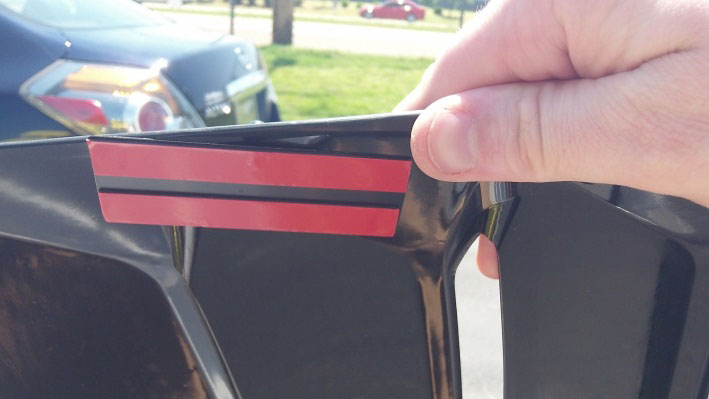
8. Remove the louvers from the brackets. The fit will be tight and it will take a little effort to remove them. Be careful not to pull against the brackets too hard to prevent peeling them from the window before they’ve set. At this point, I suggest letting the brackets sit for about 4 hours so that they can completely set. As long as the louvers aren’t on the brackets, it is safe to drive during this time.
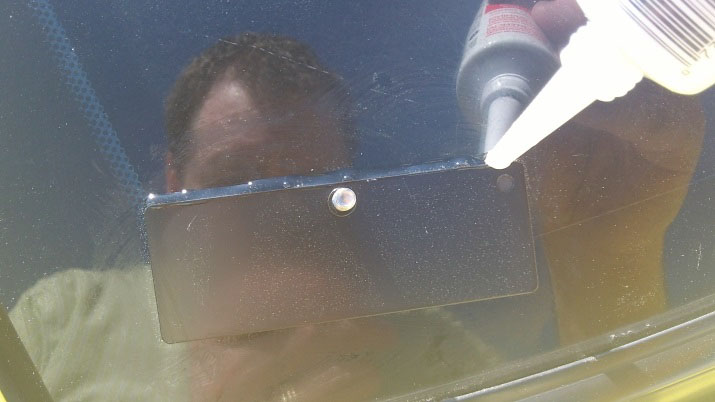
9. (Suggested Step) With a glass scraper or razor blade, scrape any overlapping 3M adhesion promoter off the window. This will collect dust and pollen and will be noticeable under close inspection. Be careful not to damage the brackets while doing this. Use the silicone sealant to seal off the edges of the brackets from weather. The adhesive is designed to hold up to water and dirt, but sealing it off ensures that you get the maximum lifespan out of the adhesive.
10. As you noticed when removing the louvers from the brackets before, the holes are a tight fit. This can be good, but if you plan on removing the louvers often (for visibility or to run the car through a carwash for instance) they are tight enough that they will probably pull a bracket from the window eventually. To prevent this, bore the hole out slightly with a drill bit just bigger than the hole or a rotary tool. This makes all the difference in the world when putting the louvers on and removing them!
11. Finally, once all steps have been completed, it’s time to put the louvers on and admire your newly styled Mustang. Place the louvers back on the brackets and put the washers and nuts on each bolt until finger tightened. Go back with a 8mm socket and slightly tighten a little more on each (no more than 1/8 rotation past finger tight). CAUTION: Do not over tighten! The bolts can twist off the mounting plate if you do.

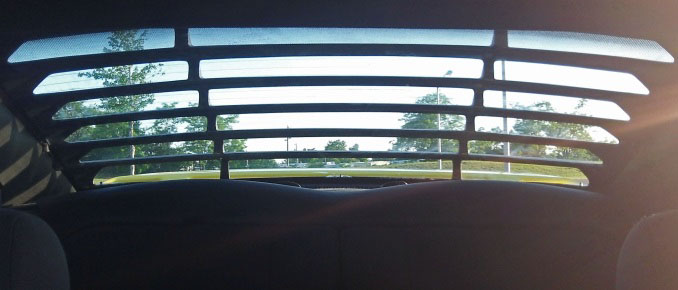
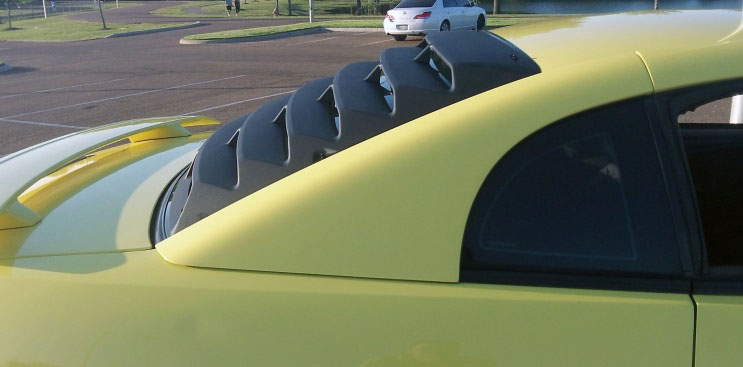
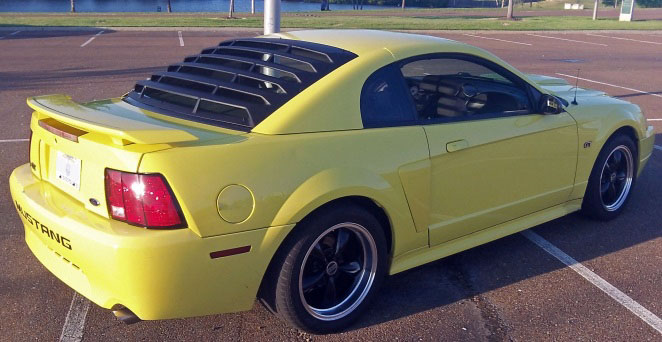
12. Enjoy your awesome new louvers! As you can see from my pictures below, they look great and visibility is only lightly affected. I already used to catch attention when driving down the street, but I have gone from people saying they like my car to asking what I want for it since installing these.
Installation instructions provided by AmericanMuscle customer Benjamin Olds 6.13.13
