 FREE 1 to 3-Day Delivery on Orders $119+ Details
Best Sellers


How to Install MMD V-Series Hood Scoop - Pre-Painted on your Mustang (15-16 GT, EcoBoost, V6)
Installation Time
1 hours
Tools Required
- Power Drill
- 1/4" Drill Bit
- 1/2" Drill Bit
- Trim Removal Tool
- Phillips Head Screw Driver
- Masking/Painters Tape

Shop Parts in this Guide
Pre-Installation Notes: Be sure to use the Alcohol Prep Pads and 3M Adhesion Promoter Pads as instructed. While not absolutely necessary, it is recommended to remove the hood from the vehicle before installing this hood scoop as holes need to be drilled from the underside
Step 1: Remove the 15 plastic retainers holding on the hood liner.

Step 2: Remove the cowl weather stripping.
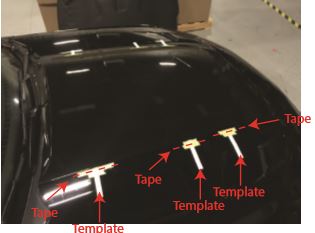
Step 3: Remove the adhesive tab on the supplied drilling templates, and stick them on the hood scoop.
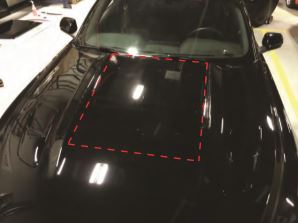
Step 4: Place the hood scoop on the vehicle, line the back edge of the scoop up with the back edge of the hood. Then center the hood scoop side to side.
Step 5: Tape the template to the hood as close to the edge of the scoop as possible. Repeat this process for all template mounting locations. (3) On both sides.
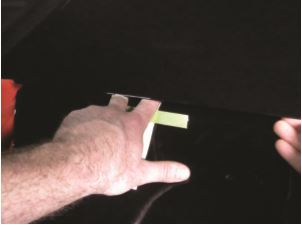
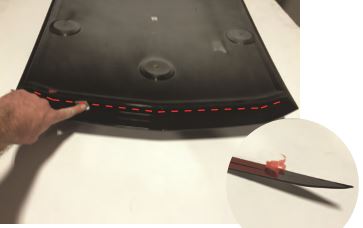
Step 6: With help, start by pulling up on one side of the scoop, you may need to reach your finger under the scoop in order to remove the template from the underside of the hood scoop. Repeat the process for remaining template.
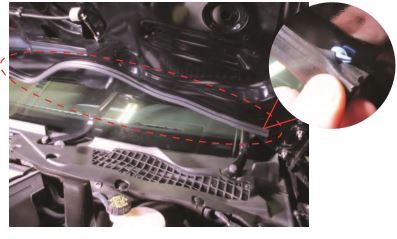
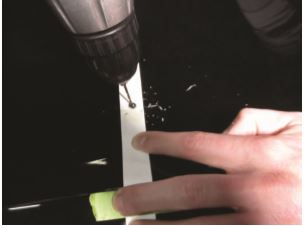
Step 7: Take the necessary steps to prevent metal shavings from scratching the paint, also prevent metal shavings from getting all over the engine bay using a drop cloth. Mark and drill a pilot hole on each of the (5) mounting locations. Once the pilot hole is drilled, drill a 9/32” hole through both the upper, and structural skins of the hood. **Note: Be careful not to drill past the structural layer as you may drill into important engine components.
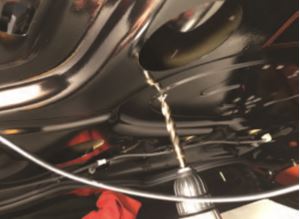
Step 8: Enlarge only the holes on of the structural skin. **Note: Drill slowly so that the drill bit does not make contact with the top of the hood. Drill a 17/32” hole so that the washer and phillips screw can pass through and sit flat on the underside of the hood skin.
Step 9: Paint any bare metal to protect bare surfaces from the elements, this includes top and bottom hood surfaces. You will want to tape o any paint you do not want to get overspray on if using spray pain. **Note: Using nail polish is a good mess free alternative to spray paint.
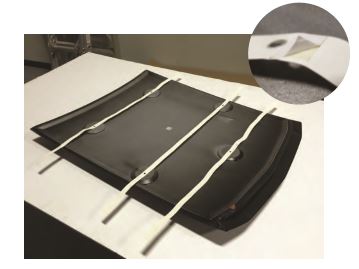
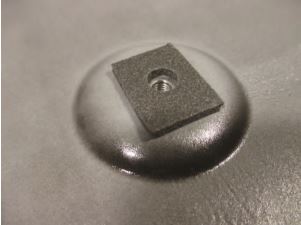
Step 10: Peel the adhesive backing o the provided foam pads and install them to the underside of the hood around the mounting holes.
Step 11: Install the hood scoop inserts, first clean the painted surface with alcohol and apply adhesion promoter.
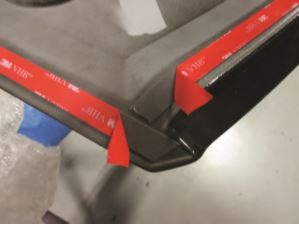
Step 12: Peel the adhesive backing o the corners of the double sided tape so once the scoop is set in position the backing can be pulled from the hood scoop.
Step 13: Prep the painted surface of the hood with the supplied alcohol and then adhesion promoter only where the double sided tape will make contact.
**Note: Be cautious when installing the screws, it is easy to drop them in between the hood skins. This will require hood removal in order to retrieve lost dropped screws.
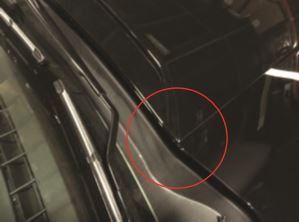
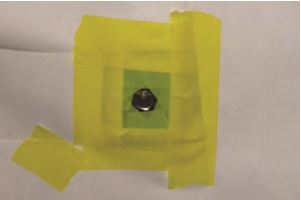
Step 14: Loosely install the hood scoop with the provided screws. Center the scoop side to side. Make sure there is still room between the wiper arm and the back of the hood scoop. Once you are happy with the placement peel the tape backing all the way o . Apply firm even pressure on the tape edges to ensure adhesion. Then tighten the hood scoop screws.
