 FREE 1 to 3-Day Delivery on Orders $119+ Details
How to Install Moroso Coolant Expansion Tank w/ Overflow on a 05-10 Mustang
Installation Time
40 minutes
Tools Required
- Small vise grips
- 1/4" ratchet
- 9/32 & 5/16 socket
- 9,11,21 mm open end wrench or adjustable wrench if those aren't available
- 1/4" syphon pum
- 1/2" fuel hose clamps 3 needed
- Razor knife to cut fuel hose
- 1 gallon container rinsed out for fluid removal
- A Couple shop rags
- Teflon tape
- Towels to lay around engine bay to keep everything clean
- If a radiator drain pan is handy it helps to have it slid under the car to maintain spills if they occur

Shop Parts in this Guide

See attached images
2)1 foot of 3/8 ID rubber hose and clamps
3) Teflon tape
4) The syphon pump is not mandatory but is helpful and inexpensive ($4 dollars at any hardware store) Keep in mind spilt antifreeze fluid is hazardous to children & pets BEST TO START WITH COOL ENGINE Pre inspection check new tank for flaws and valve operation before starting installation
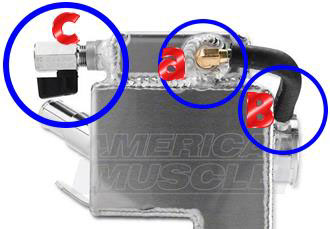
NOTE On the 9 ounce secondary tank the top right-hand corner see pic (1) tank has a 1/16 vent hole drilled in it for expansion this is necessary this and is supposed to be there

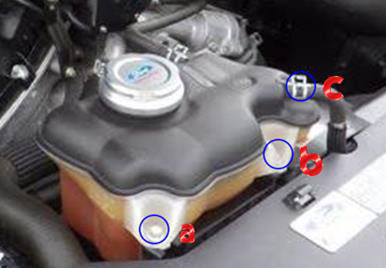
Let's get started, remove two 5/16 tank mounting bolts (a and b picture 2) that secure tank Next, pinch the spring clamp(c picture 2) on front 3/8 hose, best with small vice grips slide past nipple. Do not remove hose at this stage just move hose clamp (2)
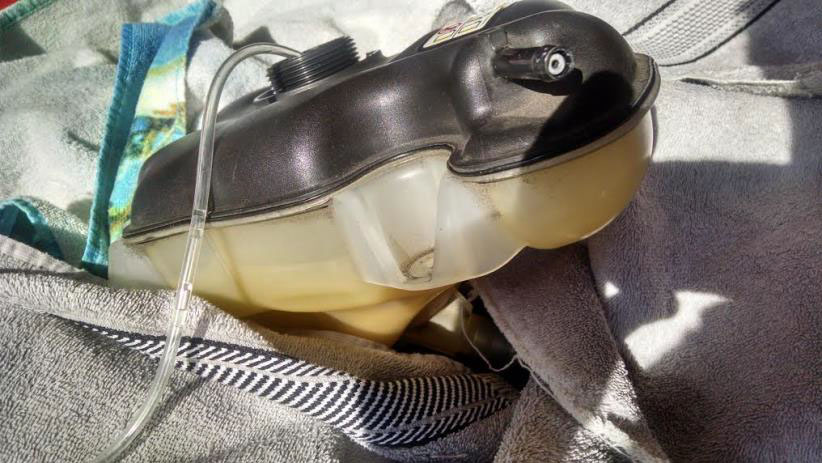
Next syphon all the fluids out of old tank, (refer to picture 3) before syphon stops remove the loosened hose clamp (picture 2 c) this will allow the tank to be tilted granting access the balance of fluid to be syphoned. Now if you tilt the tank counter clockwise it will capture the remaining antifreeze (picture 3)
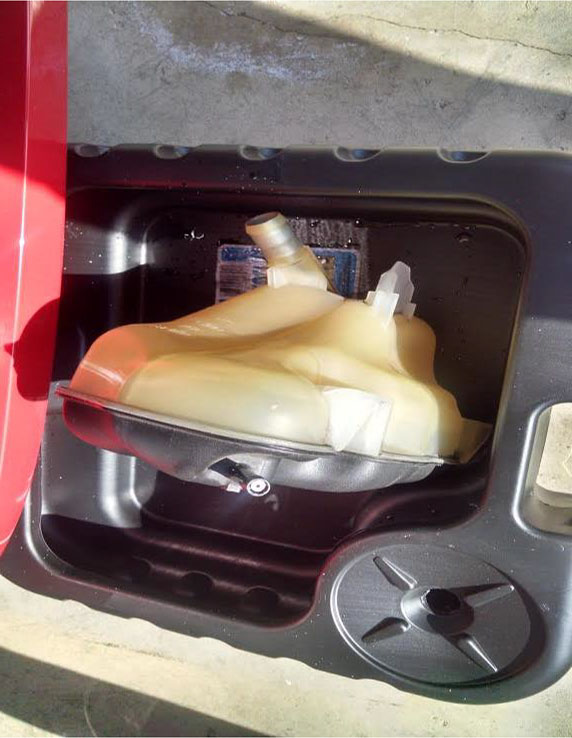
(4) Now make a mental note of angle the bottom hose sits on the bottom fitting so you install it the same way it came off repeat hose removal on bottom hose and remove disconnected old tank (4)
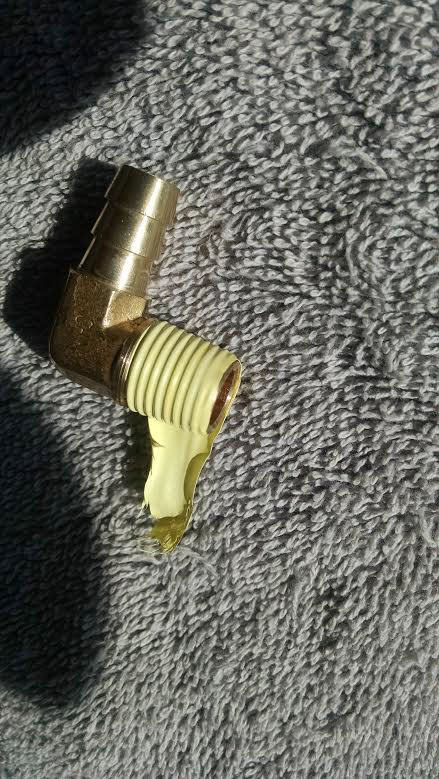
(5) Prior to installation of the new tank take a picture of it so it's easier to align the nipples as they came (5). Remove all threaded pieces (two nipples picture 5 a and b), use 13 mm open end wrench. Now remove the petcock (picture 5 c). Use a 21 mm open end wrench, then rinse the tank with water to remove any tooling debris before proceeding to next step.
This is where Teflon tape is used (6)
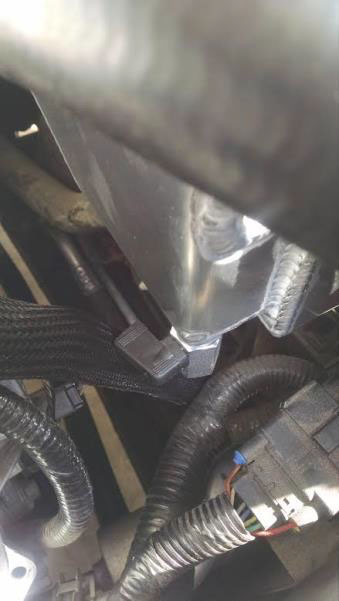
(7) When you are installing the bottom shut off make sure the valve is in the closed position when done (7). It’s closed when it looks like a ball bearing is in the fitting, not a hole. Do not over tighten the valve shut off, it must be on the face of the tank. Then check for operation of shut off (as shown in picture 7).
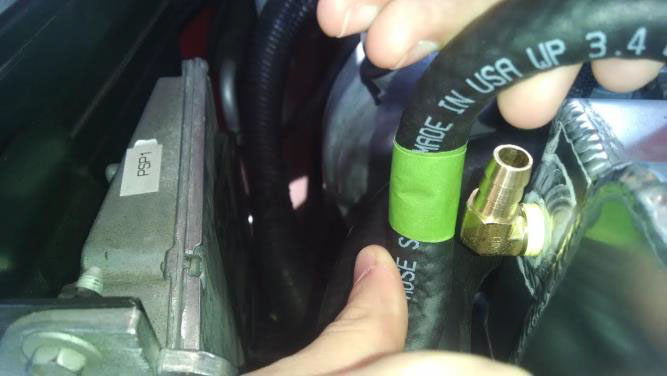
(8) Now install and clamp the purchased 3/8 ID rubber hose on the top nipple. On other end mark length (8) with a piece of masking tape. Leave an extra 1/2 " so it doesn't bend when going around the edge of the tank (use a razor knife to cut the hose).Place the clamp on the hose before pushing it on to the side nipple. Then tighten the clamp. Next install the lower 1 inch hose and make sure the clamp rides over nipple edge. Now align the tank with 5/16 th bolts and adjust it before snugging in place (picture 9 blue circle)
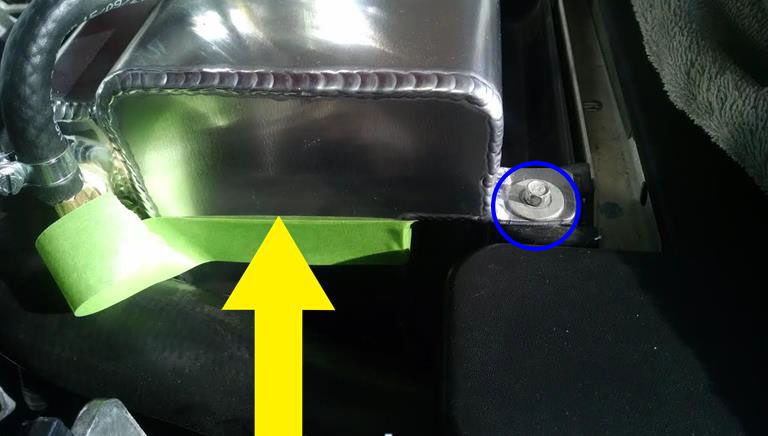
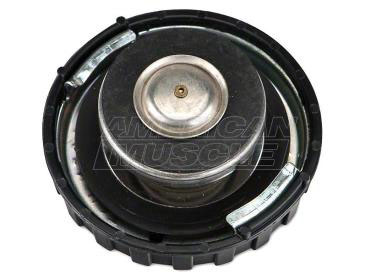
(9) If your fluid is clean then it can be reused, but I prefer fresh 50/50. Bring your fluid up to the first ledge (top of tape designates the fill mark picture 9 arrow).Install the new ford racing cap and let the engine run in neutral with its parking brake on until it is at operating temp. Then shut the engine off and check for leaks.
After a couple days of driving put a drain pan under car / tank and check to see if the one pint overflow is empty. It should be. If it's not then too much coolant was put in. If that is the case then drain it via petcock into to a disposal tray on the bottom of the reservoir tank, then close valve and enjoy.
Finished Result
Installation Instructions Written by AmericanMuscle Customer Bob Caputo 05/13/2016