FREE 1 to 3-Day Delivery on Orders $119+ Details
Best Sellers


How to Install Ford Performance EV6 High Flow Fuel Injectors - 47 lb on your Mustang
Installation Time
2 hours
Tools Required
- 8mm Deep Socket
- 13mm Standard Socket
- Short Ratchet Extension
- 3/8 drive Ratchet
- 5/8 Spring Lock Coupling Tool
- Rags
- small amount of clean engine oil (about a teaspoon)
Shop Parts in this Guide
Overview:
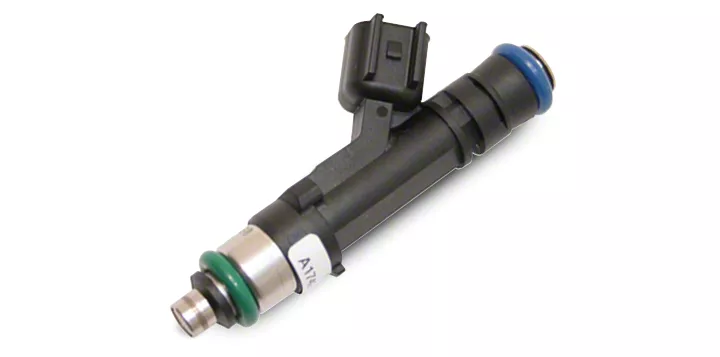
This installation guide will cover installation of the Ford Performance EV6 High Flow Fuel Injectors for all Mustang GTs from 1999-2017. Installation of these fuel injectors will require a custom tune following installation.
Installation of these fuel injectors is simple and should take the average do-it-yourselfer about one and one half (1 ½) hours from beginning to end. The photos provided within this guide are from a 2007 Mustang GT.
Warnings: As gas is extremely flammable, don’t smoke or allow any open flames or bare light bulbs near the work area and don’t work in a garage where a gas-type appliance such as a water heater or clothing dryer is present. If you spill gasoline on your skin, rinse it off immediately with soap and water. Always wear safety glasses and clean up and fuel spills immediately.
1. Make sure the vehicle is turned off and the emergency brake is on. For automatic vehicles, the transmission should be placed in park.
2. First, you need to relieve the fuel system pressure. Disconnect the fuel pump driver module (simple wiring harness), which is located in the trunk to the left of the spare tire. See picture directly below.

3. Start the car and let it idle until it stalls. Crank the engine for a few seconds to make sure all fuel pressure in the fuel rail is released. Turn the ignition switch to OFF.
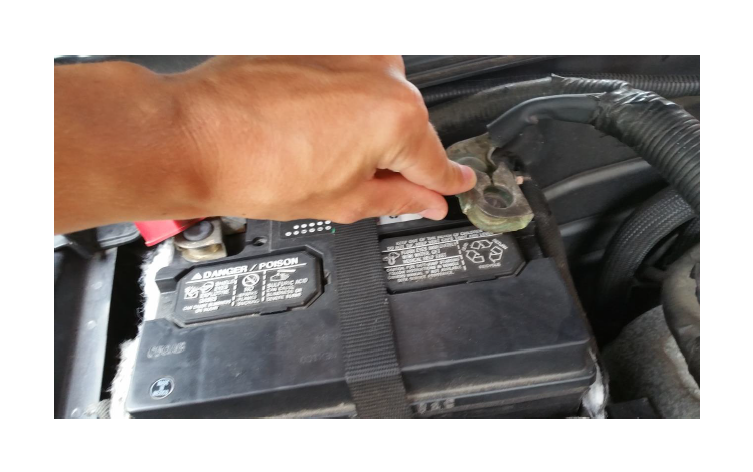
4. Disconnect the negative battery cable with an 8mm socket. This is always important when performing any work on the fuel system. See Picture Directly Below.
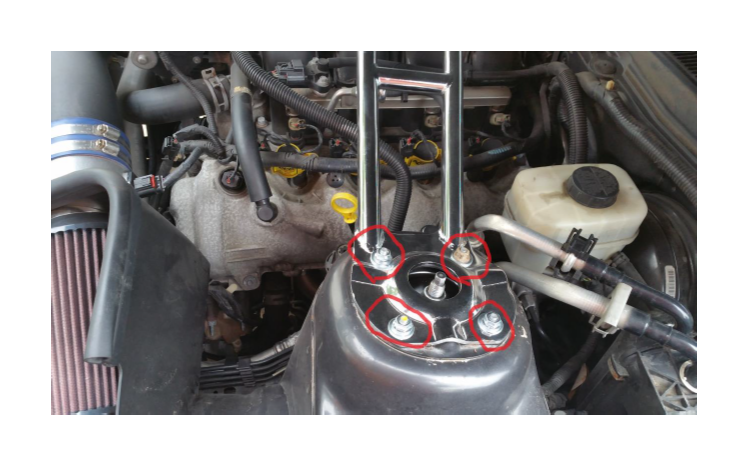
5. Remove your front strut tower brace (if your car is equipped) by removing either four (4) or eight (8) 13mm nuts (depending on the strut tower brace style – the one below has eight total) and then lift the strut tower brace up and out of the engine compartment. See Picture directly below.
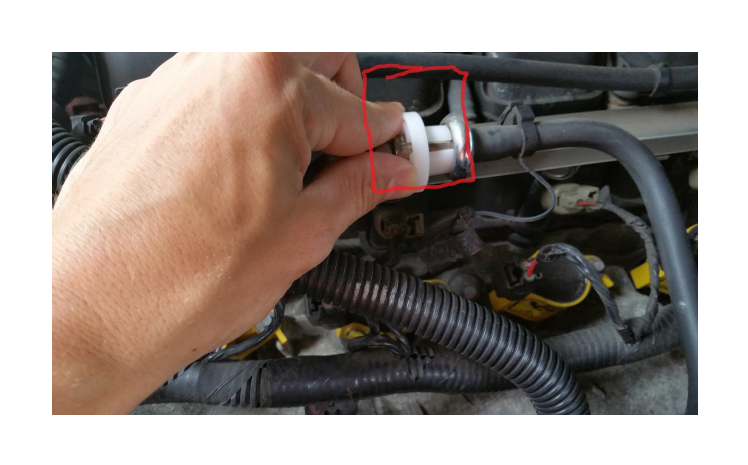
6. Disconnect the fuel supply line spring-lock coupling from the fuel rail on the driver’s side of the engine vehicle. First remove the retaining clip (circled in the picture below) and then use a 5/8 spring-lock coupling tool to detach the fuel supply line (marked with a square in the picture below). Make sure you have several rags on hand to absorb residual gasoline that will spill out of fuel supply line and fuel rail.
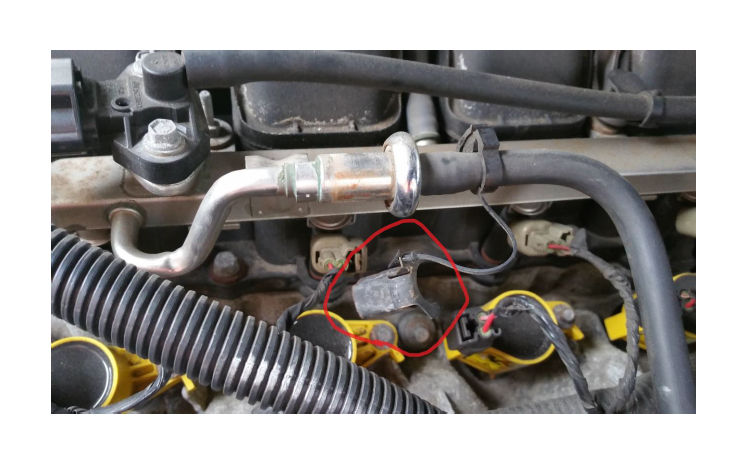
7. Disconnect the electrical connector and the vacuum hose from the Fuel Raul and Pressure and Temperature (FRPT) sensor. Both components are circled in the picture directly below.
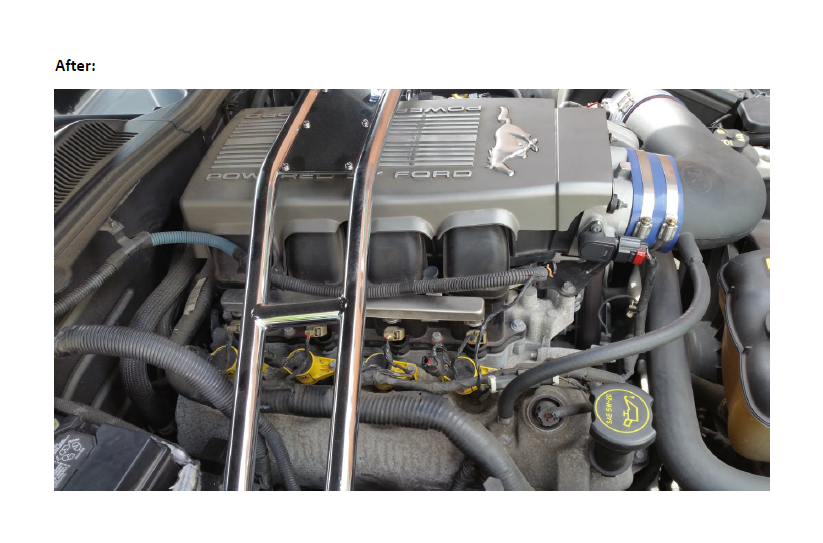
8. Remove the intake manifold plenum (if equipped – this is referring to the decorative intake manifold cover) by gently pulling it up and out of the engine compartment. You may need to loosen the top throttle body bolts to release the plenum.
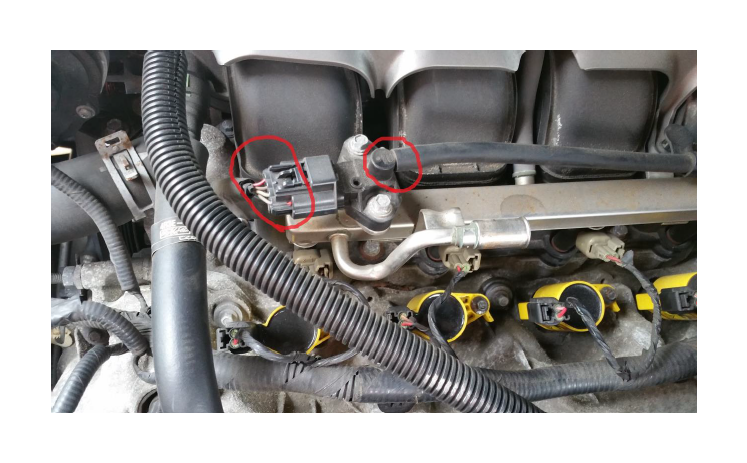
9. Detach the wiring harness retainer clips from the fuel rails. There are several, just pull up to remove them. See picture directly below – the clips on the passenger side are marked with squares.
10. Disconnect the electrical connectors from all eight (8) fuel injectors by depressing the release tab which pulling each connector off. The harnesses are circled in the picture directly below. Note: the picture below is displaying the passenger side of the vehicle for clarity (fewer obstructions) but these need to be removed from both sides, for a total of right (8) harnesses.
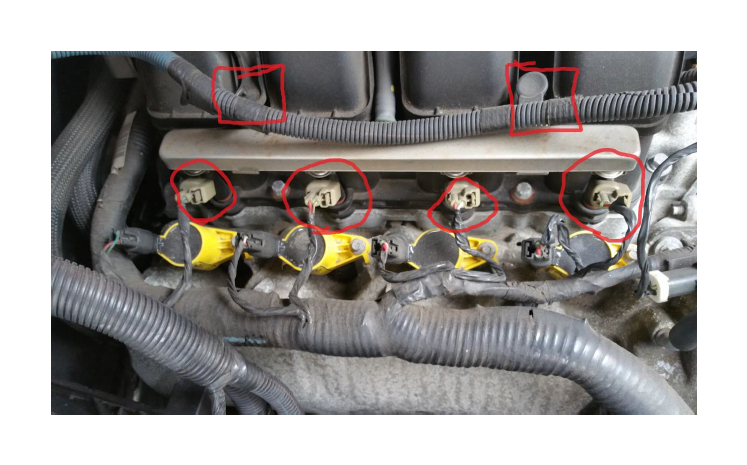
11. Remove all four (4) fuel rail mounting bolts (two on each side) with the short ratchet extension and 8mm deep socket, each of which is located on the top of the fuel rail. These are located under the clips that were removed, which are marked with squares in the picture directly above.
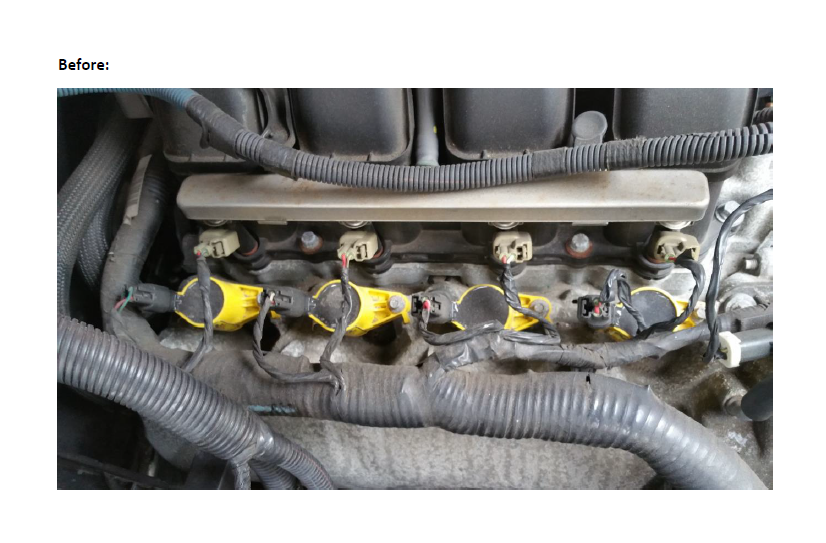
12. Remove the fuel rails and injectors as a single assembly. Make sure you have some rags ready to absorb the residual fuel that runs out of the injectors and fuel rails. See picture directly below.
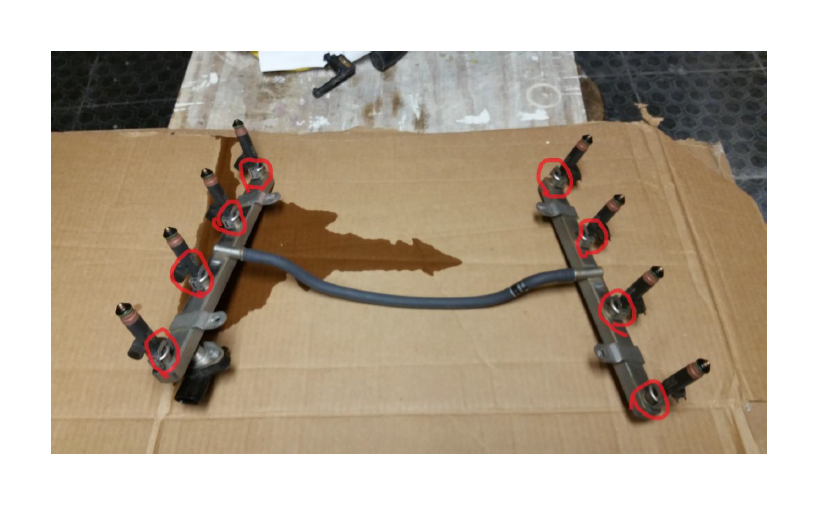
13. Remove each fuel injector retaining clip and then the injector from the fuel rails. If an injector sticks in the fuel rail, you may gently wiggle it side-to-side while simultaneously pulling on it. The injector clips are circled in the picture above and have been removed in the picture directly below.
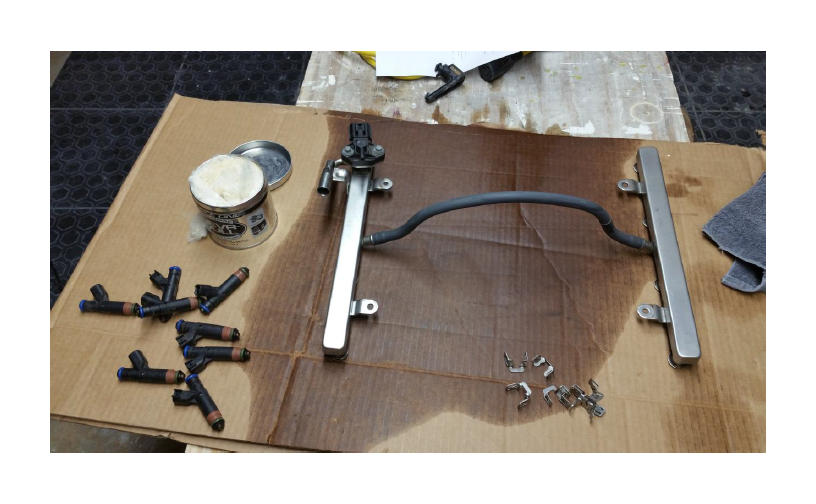
14. As you can see in the picture above, I decided to quickly polish the metal fuel rails with a wadding metal polish that I typically use on my exhaust pipes. Other metal polishes may be used, just read the container and determine whether it is an appropriate product. This step is optional.
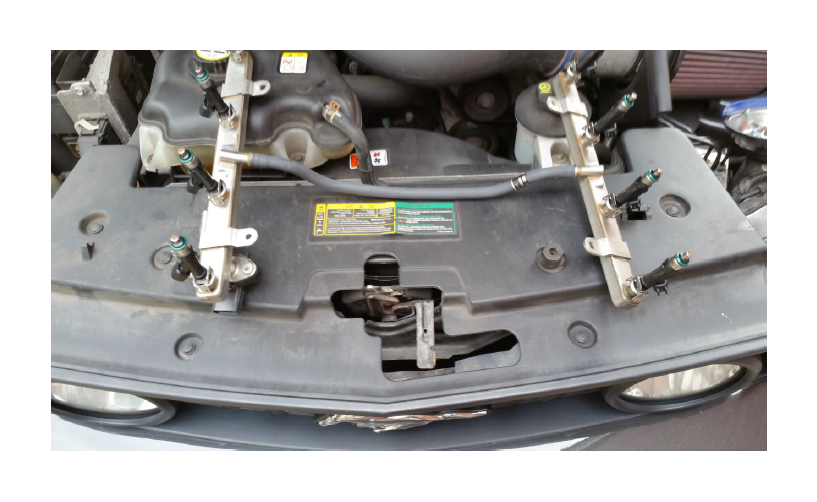
15. Coat each of the two (2) O-rings on each new injector with a small amount of clean engine oil and then install each injector into each fuel rail in the same manner each was removed. Replace the retaining clip into each injector after it is installed in the fuel rail. The picture directly below shows the finished product prior to reinstallation.
16. Installation of everything else back into the vehicle is the opposite of removal.
17. Once everything has been put back together, flash the PCM with a new tune. Do not start the engine until you load the tune.
18. Turn the key until the fuel system reaches operating pressure. Correct any leaks prior to starting the engine.
19. Start the engine and check for any fuel leaks for at least a few minutes while the engine is running.
20. Drive car for about thirty (30) minutes and check again for leaks. Tighten anything if necessary.
21. Enjoy your increased fuel flow!