 FREE 1 to 3-Day Delivery on Orders $119+ Details
Best Sellers


Mustang GT Cold Air Intake Kit ('96-'04 GT) - Installation Instructions

Shop Parts in this Guide
Installation
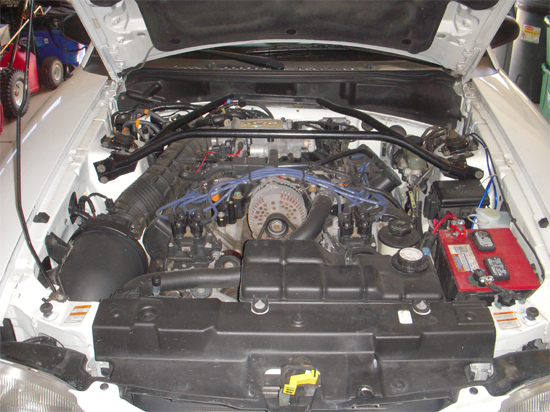
1. This is your stock air intake system. (Image below).
2. Disconnect all electrical connections and hoses.
3. Unscrew the bolt holding the filter housing to the body, located by the passenger side fender. Save the bolt for later.
4. Separate the air filter housing from the rest of the intake. This might take a little adjusting, but it should come out pretty easy.
5. When the air filter housing is removed, make sure the circular rubber pieces at the bottom of the filter did not come off. If they did, just reinstall them by setting them back in their hole. You will need these later.
6. Loosen the hose clamp at the throttle body with a flathead screwdriver. You should be able to remove the rest of the assembly now by just sliding it out.
7. One piece you will need from the old assembly is the Mass Air Flow meter. Just unscrew it from the old intake assembly, but be sure not to touch or clean the inside.
8. Attach the smaller rubber gasket from your new kit at the throttle body.
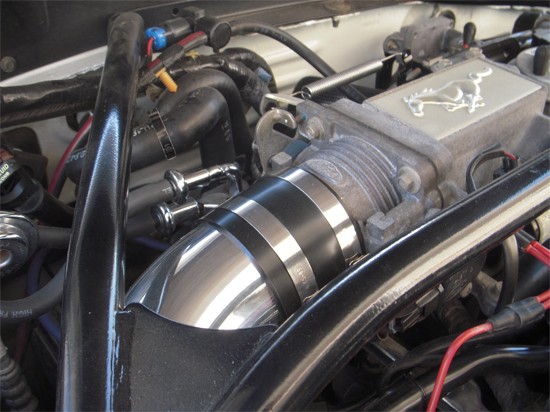
9. Place the two smaller hose clamps on this piece, and tighten them so they do not fall off. You can tighten these all the way when the assembly is all in place. This is the connection at the throttle body. (Image Below)
10. Take the temperature sensor from the old intake and place it in the new pipe. There is a rubber hole for this piece in the new intake assembly. Make sure that the sensor is perpendicular to the way the air will be flowing.
11. Install the upper pipe into the rubber gasket already on the throttle body. Twist the pipe so it lines up with the necessary hoses and electrical connections.
12. Tighten the clamps on the throttle body a little more, so the upper pipe will not fall out.
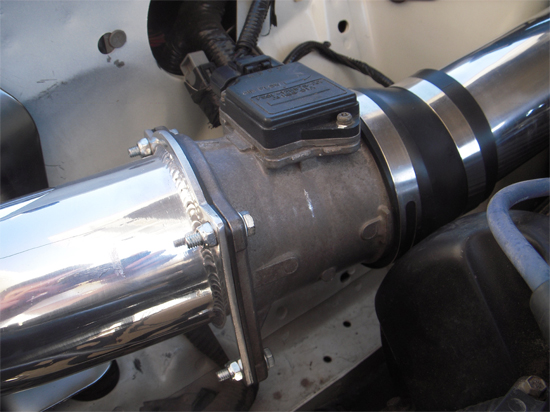
13. Take the Mass Air Flow meter and attach it to the lower pipe. Do this before placing this part in the car. There should be a rubber gasket provided to put between the two. This is the connection at the Mass Air Flow meter between the upper and lower pipe. (Image Below)
14. Slide the metal plate on the lower pipe on the opposite side of the Mass Air Flow meter. The angled edge should be facing the pipe.
15. Attach the filter to the opposite end from the Mass Air Flow meter on the lower pipe. Tighten these clamps now, because you will not have access to the filter after it is installed.
16. Add the mounting points into the circular rubber pieces that were previously mentioned in Step Five.
17. Slide the assembly into its place. Slide it in filter first. This should have the filter, lower pipe, and the Mass Air Flow meter.
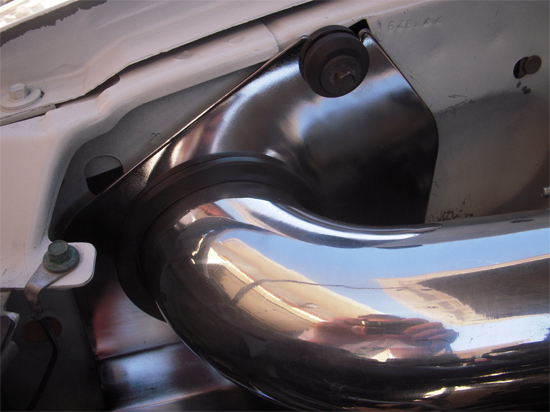
18. Take the rubber mount and bolt mentioned in Step Three and place it at the top of the metal plate, into the fender, to hold the intake in place. This is the connection at the fender (Image Below)
19. Take the other rubber gasket and connect the upper pipe to the lower pipe. The larger end of the rubber piece should be on the Mass Air Flow meter side.
20. There is also a spot for two screws at the bottom of the metal plate that go into the mounting points from Step 16. Go ahead and screw these in.
21. Go through and tighten all clamps so the intake is secure.
22. Also remember to reconnect all electrical connections and hoses.
23. After everything is secure, fire up the engine.
24. Check for check engine lights. If there is one, make sure all of your hoses and electrical connections are attached. Otherwise, enjoy your new Cold Air Intake!
Installation instructions provided by AmericanMuscle customer Jason Funk 3.19.09
