 FREE 1 to 3-Day Delivery on Orders $119+ Details
Best Sellers


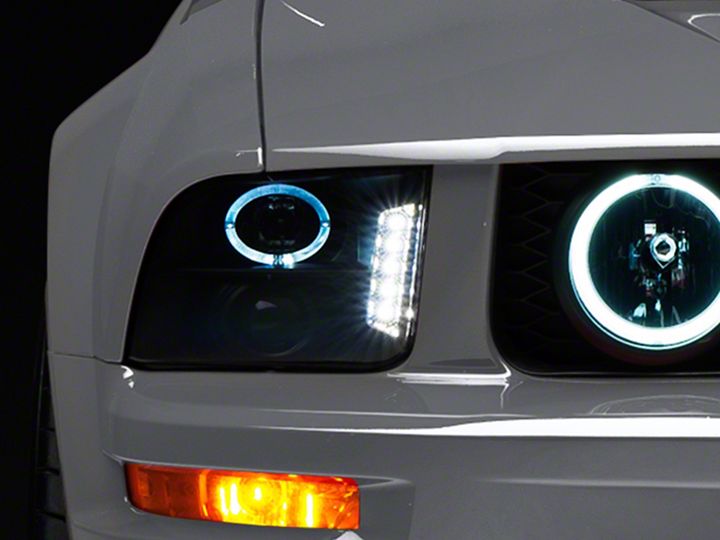
Mustang Halo Projector Headlights - LED ('05-'09) - Installation Instructions
Installation Time
2 hours
Tools Required
- 3/8 Drive Ratchet
- 3/8 Drive Wobbly Adapter
- 3/8 Extension 6 inch
- 3/8 Drive 10 mm Socket
- Phillips Screwdriver
- Drive 10 mm Socket
- Drive Ratchet
- Small Flat Blade Screwdriver
- Solder Soldering iron
- Heat Shrink Tubing
Shop Parts in this Guide
- Raxiom LED Halo Projector Headlights; Black Housing; Smoked Lens (05-09 Mustang w/ Factory Halogen Headlights, Excluding GT500)
- Raxiom LED Halo Projector Headlights; Chrome Housing; Clear Lens (05-09 Mustang w/ Factory Halogen Headlights, Excluding GT500)
- Replacement Turn Signal Lights (05-09 Mustang)
Installation
1. Disconnect negative battery cable.
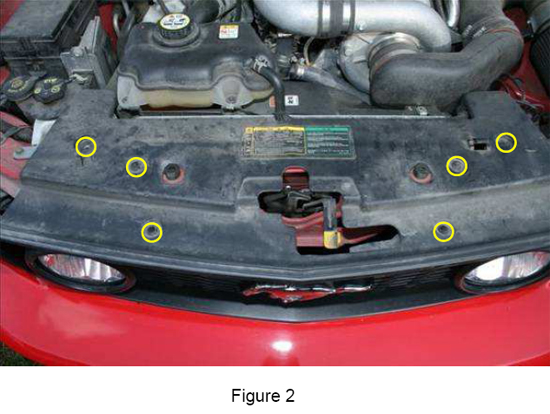
2. Locate six push pins as shown in figure 2. Insert small flat blade screwdriver under the head in the center. Twist screwdriver to raise the center pin. Using your fingers pull center pin all the way up. Remove push pins and shield.
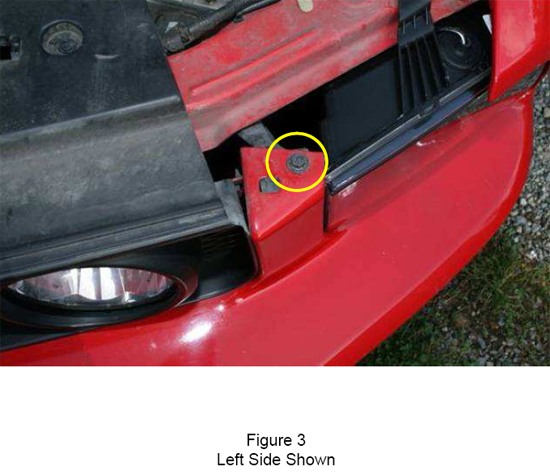
3. Remove one left and one right upper bumper cover bolts as shown in figure 3.
4. Remove the three lower screws from fender to inner fender liner. This will allow access to the two side bolts on each side.
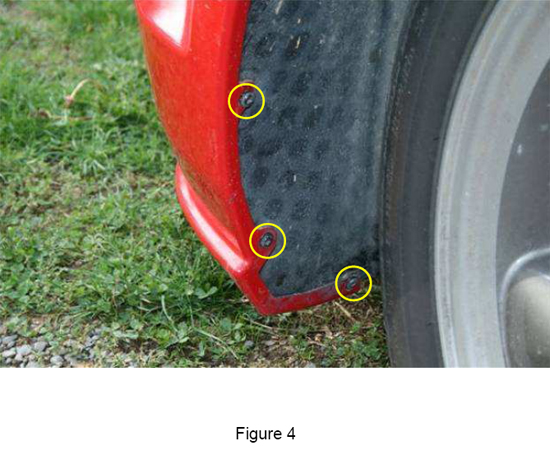
5. Loosen front of belly pan. Remove six bolts securing pan to bottom of bumper cover as shown in figure 4. Note: While under vehicle disconnect connectors from blinker and marker light. Two connectors each side.
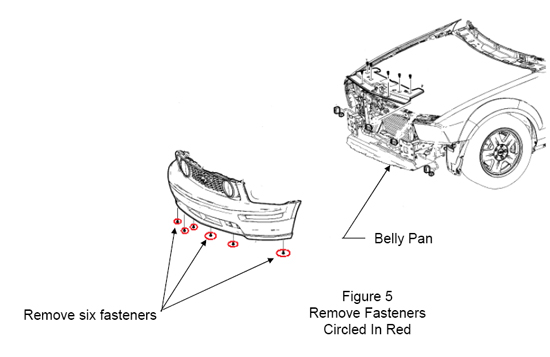
6. By moving the fender liner aside access is gained to the two fasteners in the location shown in figure 5. A ¼ inch ratchet, wobbly and 10mm socket work well here. Perform this step on both sides. Note: Bumper cover is in place when performing this step.
7. Bumper cover is now ready for removal. If equipped, disconnect fog light connectors.
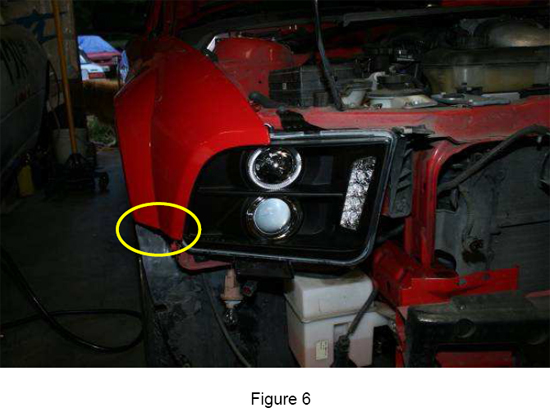
8. With one person on each end grasp bumper cover and gently pull out on top in the area of the upper bolts. At the same time gently pull down on the cover in the area shown in figure 6. There is a Christmas tree fastener here and the cover needs to be pulled down approximately 1 ½ inches to clear. Leave fastener in place. After Christmas tree fastener is cleared continue pulling bumper cover forward. If there are any snags work them free. Once bumper cover is clear of vehicle store in selected area being careful to avoid scratches.
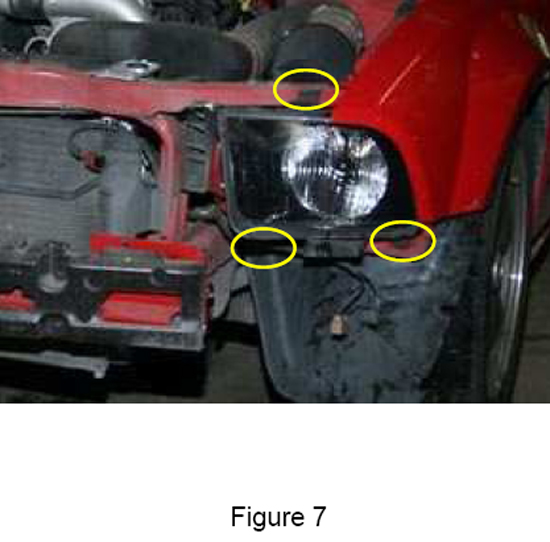
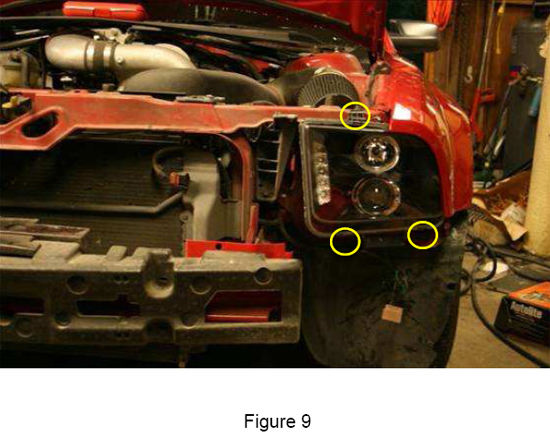
9. Remove the original headlight assembly use the following steps: Remove the three bolts as shown in figure 7. Pull headlight assembly forward. Disconnect headlight connector from back of headlight assembly. Pull assembly forward to remove.
10. This is what the car should resemble when ready to install new headlights.

11. For wiring connections see wire diagrams enclosed with headlights. Side marker wire colors are as follows: Right Side, black and black/pink. Left Side, black and dark green. These colors apply to all models through 2009. Black is ground.
12. Headlight wiring options. Option one; See video on American Muscle web site. Use the splice connectors included with your headlights. After the connections are made seal the splices with liquid electrical tape or equivalent.
13. Option Two; Solder the connections, if soldering some experience is required. Cut the appropriate wires from the vehicle side marker wiring harness. Strip approximately one inch of insulation from all wires to be soldered. Before connecting wires cut approximately 2 inches of heat shrink tube and slide on the wires. Assure that heat shrink is far enough from soldering so as not to shrink the tubing. After wires have cooled slide heat shrink in place and use heat gun to shrink tubing in place.
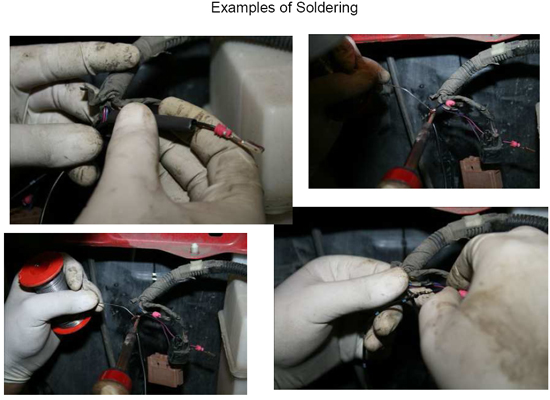
14. On the following slides the examples shown had the pins removed from the connectors to ease soldering. Do not attempt this if you have no experience removing pins from connectors.
15. After soldering connect the headlight connectors. Before reassembly test headlights to assure they are in working order. Install the headlight assemblies using the three fasteners removed in figure 6.
16. Since access to the adjusters is limited after installation, now is good time to adjust the headlights. To do this you need a level surface and a flat wall with plenty of room. Position vehicle as close to the wall as possible with headlights shining on wall. Place a piece of tape in the center of the headlight beam. Back vehicle up so that it is approximately 25 feet from wall. Using adjusters align the light beam so that it is centered on the pieces of tape.
17. Place vehicle back on jack stands or ramps. Using care not to scratch or crack the paint position the bumper cover in place. Two people are necessary to perform this step. Have an assistant plug in fog lights if equipped. Assure that the two Christmas tree fasteners are positioned over their respective holes. Apply pressure to bumper cover flange to reinstall Christmas tree flange.
18. Reinstall two fasteners each side, see figure 6. Torque to 44 lb-in. These fasteners will also help install the Christmas tree fasteners. Install left and right top bumper cover fastener, see figure 3, torque to 45 in lbs. Install six fasteners on forward edge of belly pan, see figure 5. Install three fasteners, left and right side, to secure inner fender liner, see figure 4. Install three fasteners, left and right side, to secure inner fender liner, see figure 4. Install the upper radiator shield by inserting push pins into applicable holes and pushing center pin in to lock the pins in place. See figure 2.

Installation instructions provided by Brad Belcher 11.4.09
Best Sellers
Related Guides
-
Installation
-
Installation
-
Installation
