 FREE 1 to 3-Day Delivery on Orders $119+ Details
Best Sellers


Mustang Honeycomb Trim Panel Installation Guide ('99-'04 GT)
Installation Time
30 minutes
Tools Required
- Screwdriver(s)
- Razor scraper
- Adhesive solvent
- Isopropyl Alcohol (rubbing alcohol)
- Heat gun or Hair dryer
- Small prying tool
Installation
1. Remove license plate and trim if necessary.
2. Remove Rear emblems - GT and Ford Oval
- Use a heat gun or hair dryer to heat up the double-sided bonding tape.
- Be careful not to damage the paint with too much heat.
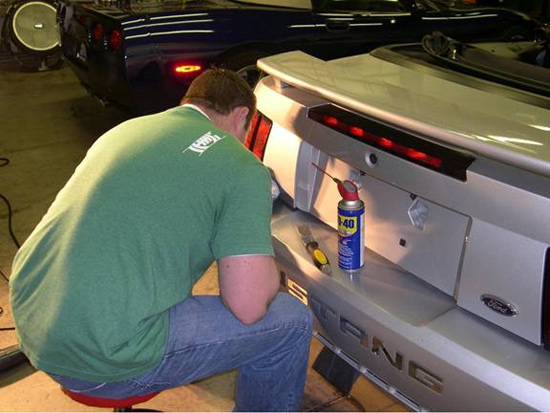
- Use a prying tool or a razor scraper (be very, very careful to not damage the paint)to remove the emblem as you heat or after applying the heat to the emblem. It should slowly come loose as the glue is reactivated. Expect the old tape to be damaged. It’s a small sacrifice for not damaging the paint underneath.
3. Clean between rear taillights and license plate thoroughly. Use rubbing alcohol to remove any wax and use a solvent to remove any leftover glue from removing the emblems. Allow area to dry. Remember the new trim panel adhesion depends on how clean this area is so make sure it is as good and clean as it can be.
4. Test fit the center panel. Get a very good idea of where the center panel will be placed before you peel the backing and stick. Once it is stuck it will not be an easy task to remove and reapply, so make sure it’s right the first time.
5. Starting with the center section, peel the red backing from the double-sided tape on the back of the panel. Make a mental note of where the tape is located on the back. Get the panel into the exact position and very lightly press into place. Check alignment and adjust if necessary. When alignment is good, press firmly in the areas of the tape to seal it to the trunk. You can also use a J-roller or lightly tap with a rubber mallet to ensure good adhesion to the vehicle.
6. Repeat procedure for left and right side panels. Test fit both sides. You may need to heat up the side panels with the hair dryer and bend them slightly to get a good fit to the trunk. Don’t flex them into position and expect the tape to hold them. The tighter they are to the trunk shape the better the adhesion will be. The sides may be a bit harder to align perfectly. Once they are on and aligned correctly, again press on firmly to get a good seal.
7. Reinstall emblems. If the tape on your emblems is damaged, clean off the Ford Oval and GT emblems of all old double sided bonding tape. Again test fit emblems so you can see fit before applying. Use new double-sided tape or plastic trim adhesive to reinstall emblems in their respective recesses. Give some time for the adhesive to set up if used.
8. Reinstall license plate.
9. Enjoy the view and compliments on your new look.

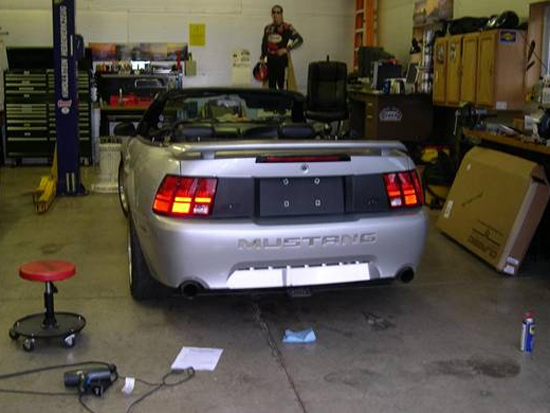
Finished Installation
Installation instructions provided by AmericanMuscle customer Bryan Whipple
Best Sellers
Related Guides
-
Installation
-
Installation
-
Installation
