 FREE 1 to 3-Day Delivery on Orders $119+ Details
Best Sellers


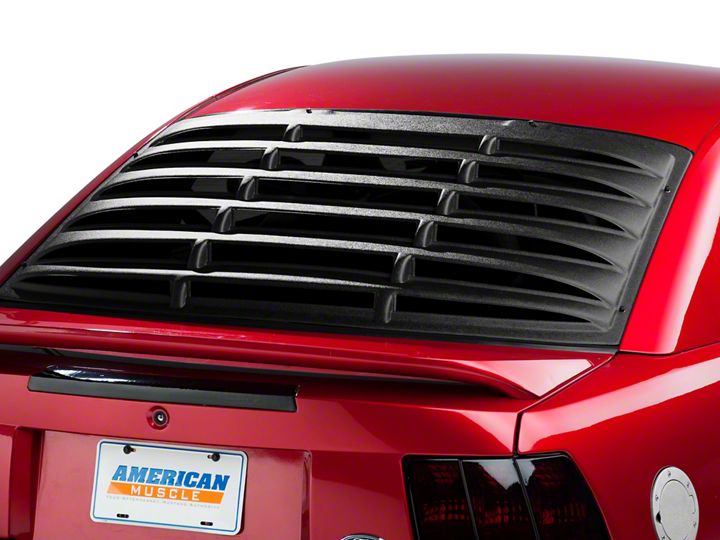
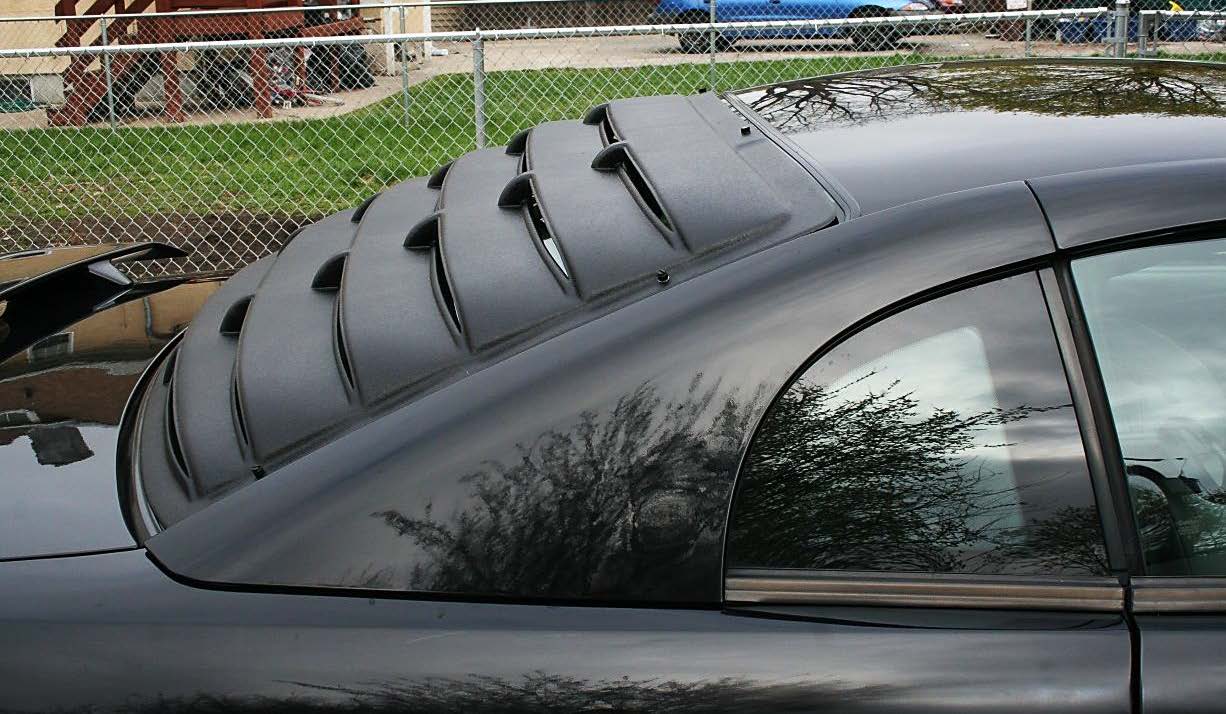
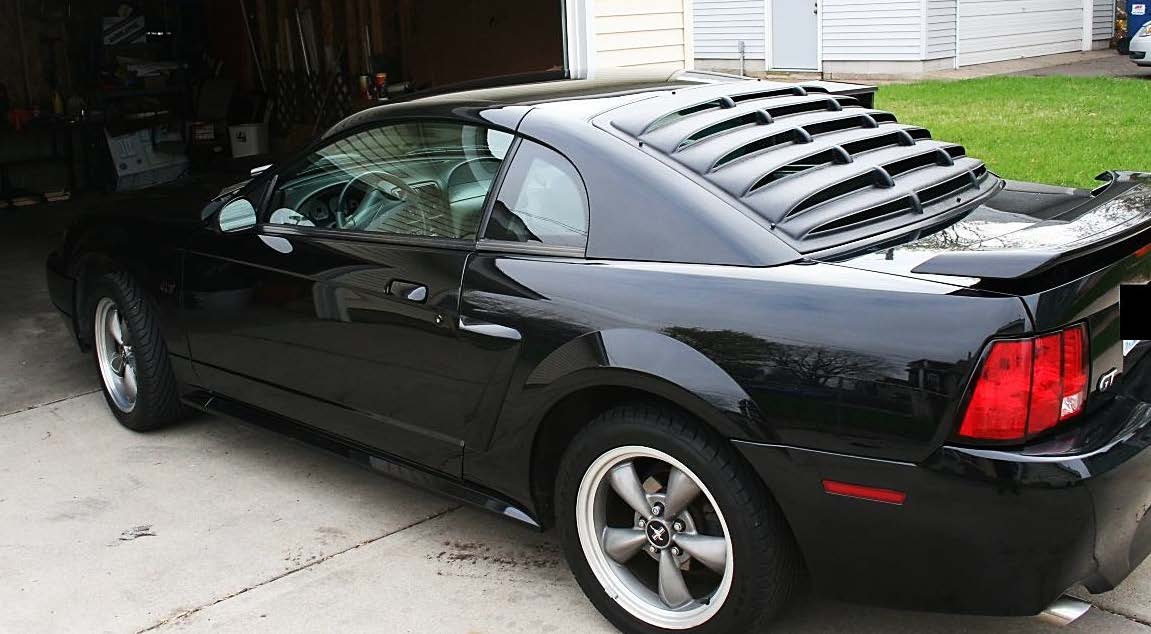
How to Install Rear Window Louvers - Textured ABS on Your 1994-2004 Mustang
Installation Time
1 hours
Tools Required
- Clean rag
- Soapy water
- Waterproof Silicone Sealant
- 3/8" Socket wrench
- Squeegee or X-Acto knife
- Felt tip marker or grease pencil
- Blue painters tape -- > not necessary but recommended
- Auto paint and clear coat -- > only necessary if you are painting the Louvers
Shop Parts in this Guide
Installation
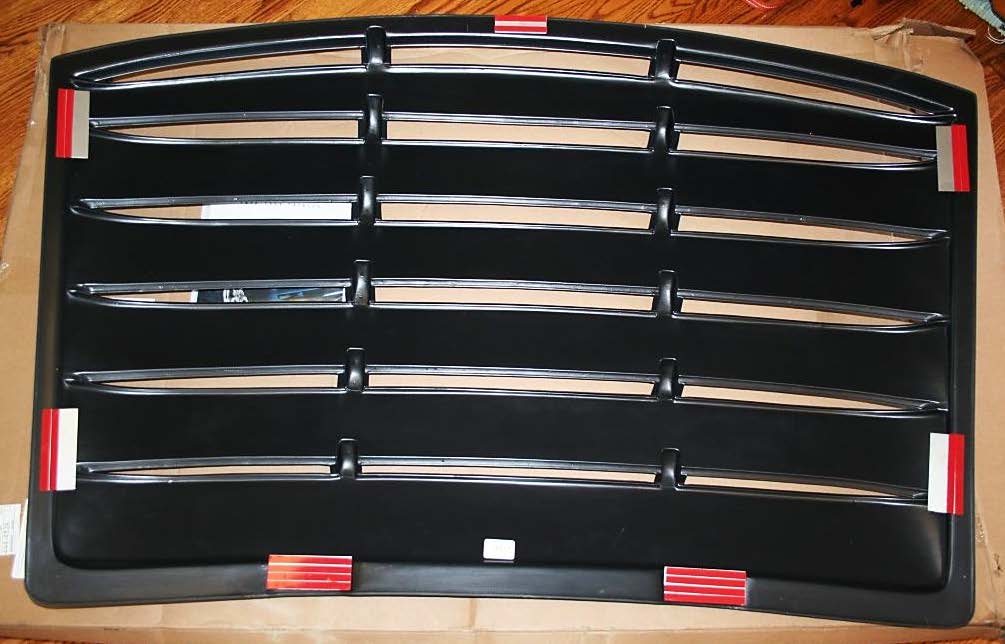
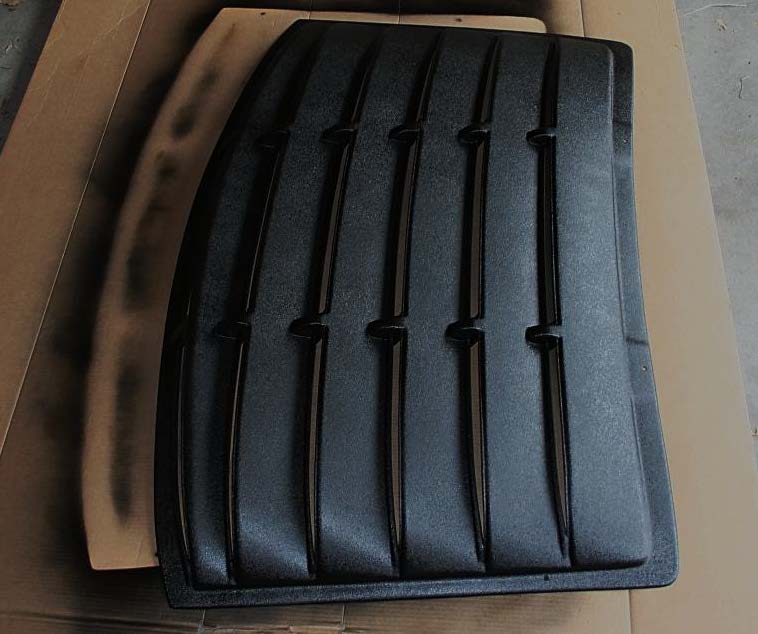
Package Contents:
- 1-piece Rear Window Louver
- (2) Hinged metal mounting plates
- (4) Flat metal mounting plates
- (1) Small, flat metal mounting plate
- (5) Plastic thumb nuts
- (2) Plastic 3/8” nuts
- (7) Metal washers
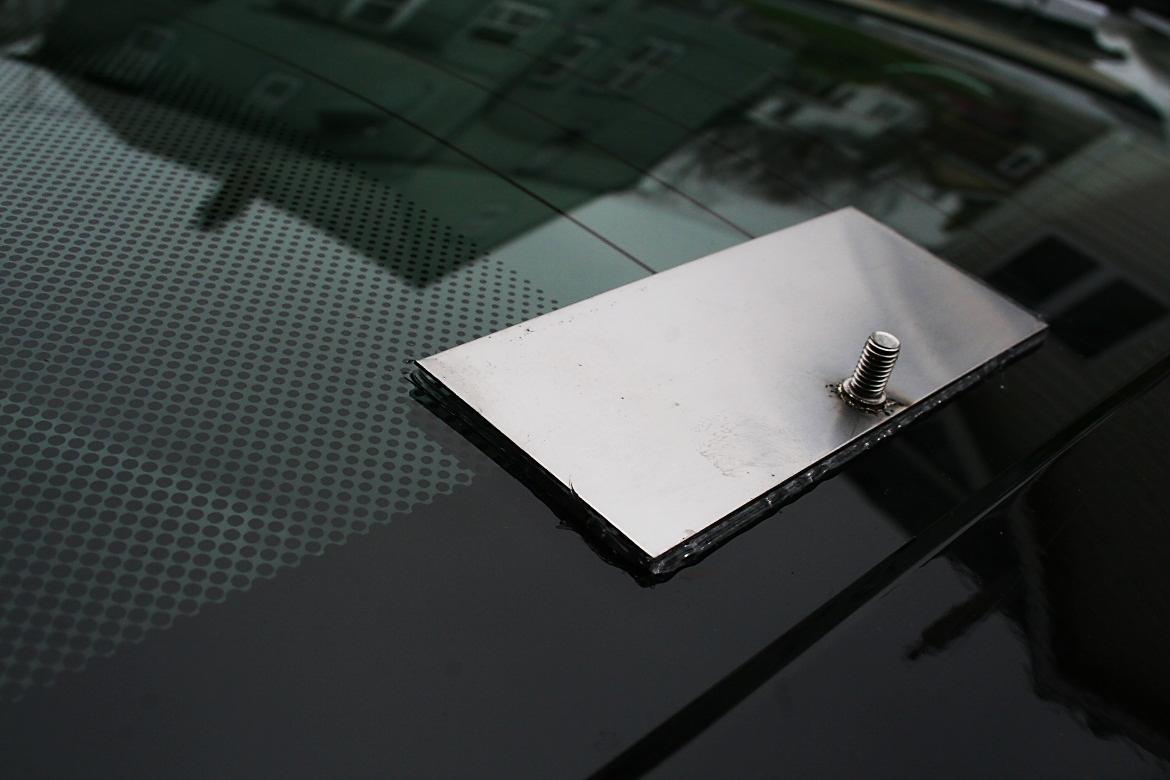
**Note: all of the metal plates should have the 3M adhesive tape attached to one side
Installation Instructions:
1. Mount all (7) plates onto the Louver with the tape side facing down towards the rear windshield. The (2) hinged plates attach to the top of the Louver, the small plate attaches to the bottom and the (4) others attach to the sides. Use the washers on all (7) pieces. Use the (2) 3/8” nuts on the top hinged plates and the other plastic thumb nuts on the rest of the plates.
2. Now you need to wash the rear windshield of your Mustang. Make up a soapy water solution of warm water and mild dish soap. DO NOT USE WINDEX or other similar window cleaning products! These chemicals will leave a residue on the glass that can affect the adhesive. Use a clean rag to wash the entire rear windshield and focus on the edges where the plates will mount.
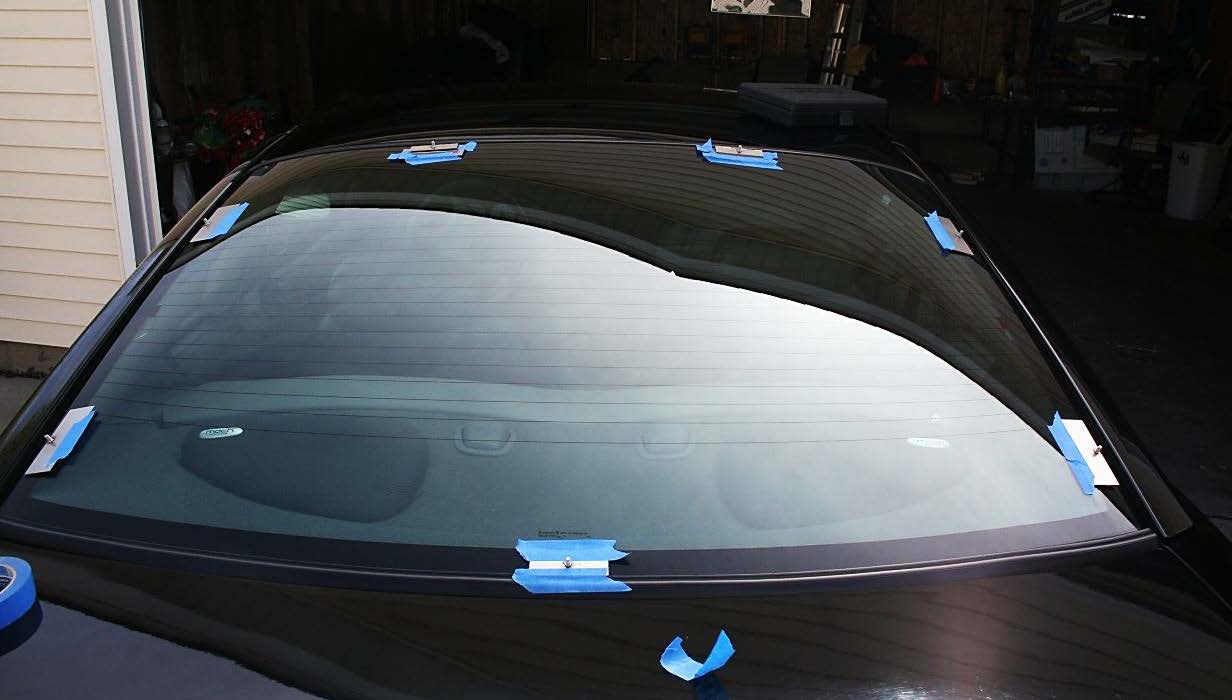
3. Next, to make things easier, use blue painters tape and loop a piece of tape under each plate so they will stick to the car when you remove the louver later. This step is not necessary but it will make marking the location of each plate much easier.
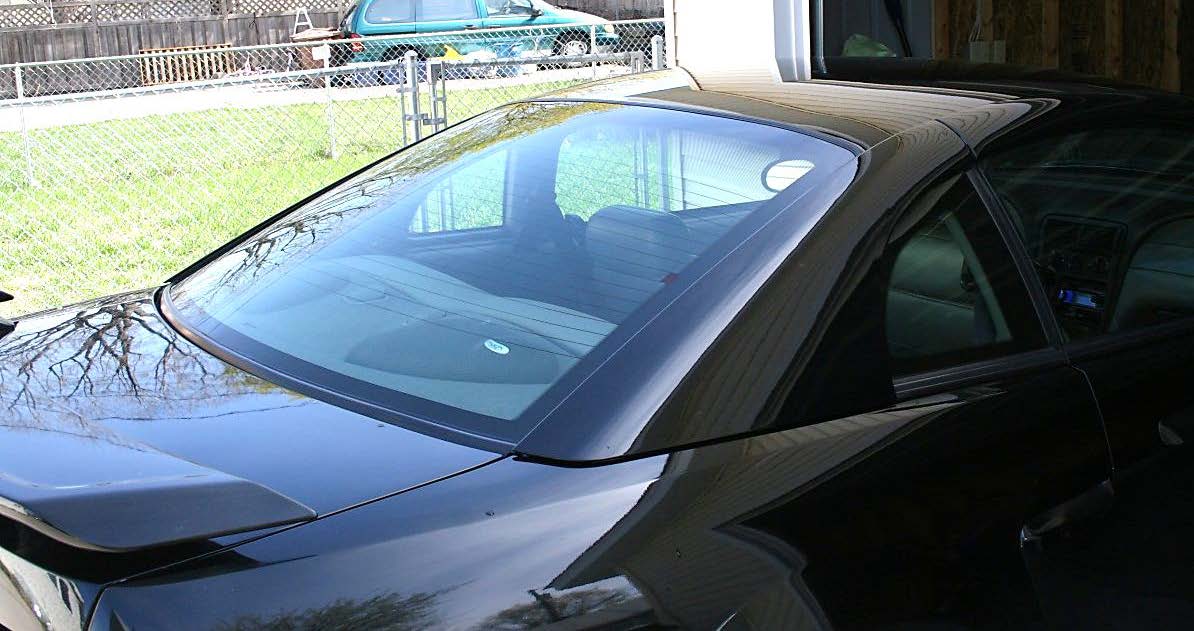
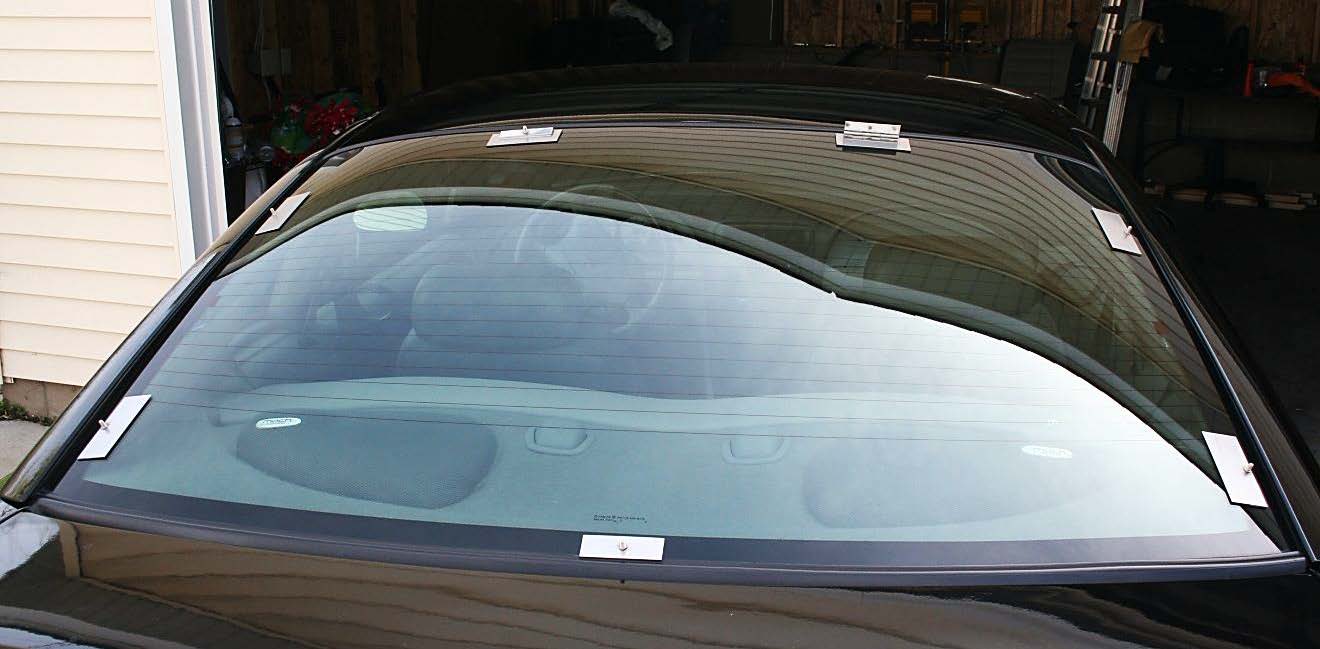
4. Place the louver with the mounted plates onto the back of your windshield. Position the louver onto your back windshield and make sure the mounting plates are straight. NOTE: When you are making your final position check of the Louver on the rear windshield, make sure you have clearance to open your trunk. If you have the louver placed too low, it will scrape against the trunk lid.
5. Next, carefully remove the nuts and washers from the louver and slowly the louver from the window, leaving the mounting plates stuck with blue tape to the glass. If the plates are moving around on you, use more painters tape to secure each plate individually.
6. Place the louvers back onto the car to make sure your position is correct. You want to get this right the first time before you use the adhesive tape.
7. Take a washable felt tip marker or grease pencil and trace the location of each mounting plate onto the glass.
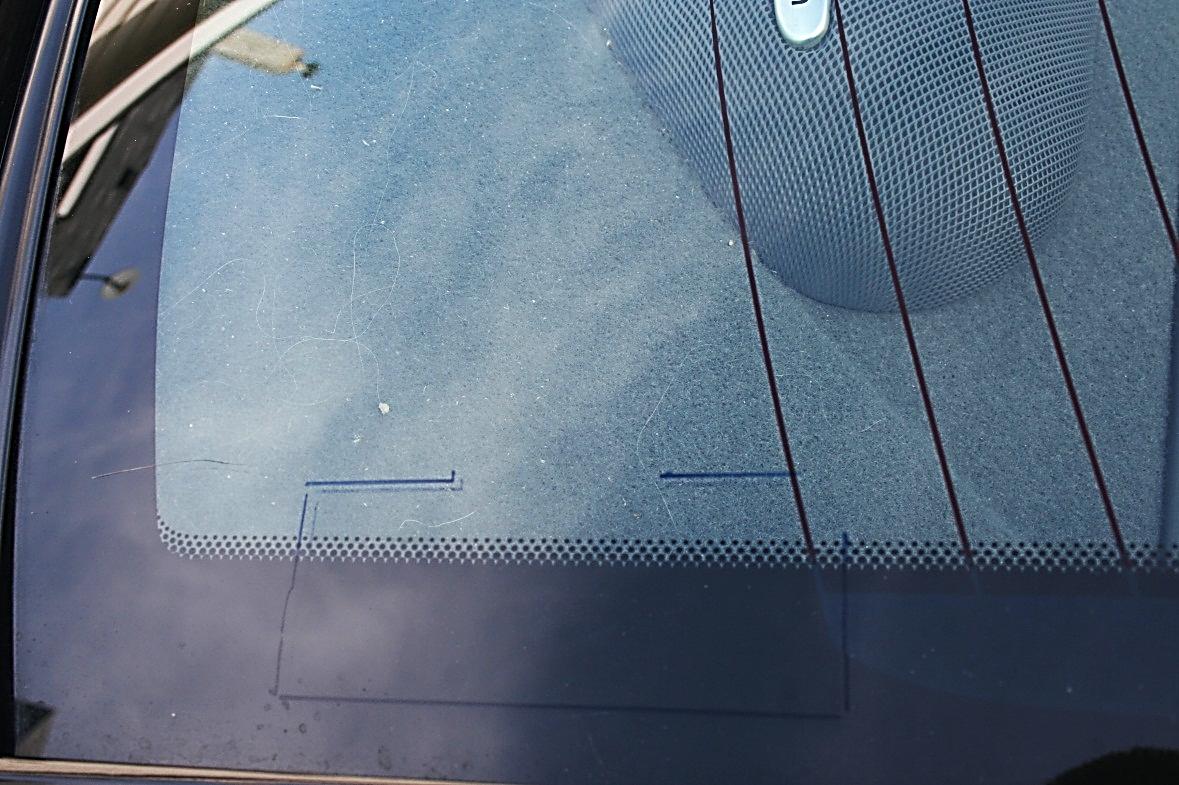
8. After tracing the location of each mounting plate, use your clean rag to make sure that each location is clean and dry. Remove the red backing from the tape on the mounting plates and carefully attach them to the glass in your marked locations. Make sure you line up the plates as you place them onto the glass; it is not a good idea to remove or move the plates after you first place them on the glass. Press firmly on each plate for several seconds when you mount them to make sure you get a good seal.
9. After each mounting plate is secured to the glass, use the rag to remove any excess tracing marks that may be left behind.
10. Take your Waterproof Silicone sealant and place a small line of silicone along the edge of each mounting plate. This is to seal the edges of the tape to prevent any possibility of water coming in contact with the adhesive. Use a small squeegee or X-Acto knife to push the silicone up against the tape and to remove any excess.
11. Wait at least 24 hours for the mounting plates to set; do not install the louvers yet. The adhesive tape and the silicone needs time to set. Make sure the car is stored in a dry place and not in direct sunlight. Water and excessive heat can negatively affect the tape’s bonding process.
12. If you are going to paint the louvers, do so now when the mounting plates are setting. It is not necessary to paint them, but even painting them black and using a clear coat will greatly improve the louvers appearance.
13. After you’ve waited at least 24 hours, check the mounting plates and make sure they are all firmly secured to the glass. You can also use an X-Acto knife to remove any extra silicone that may have seeped out.
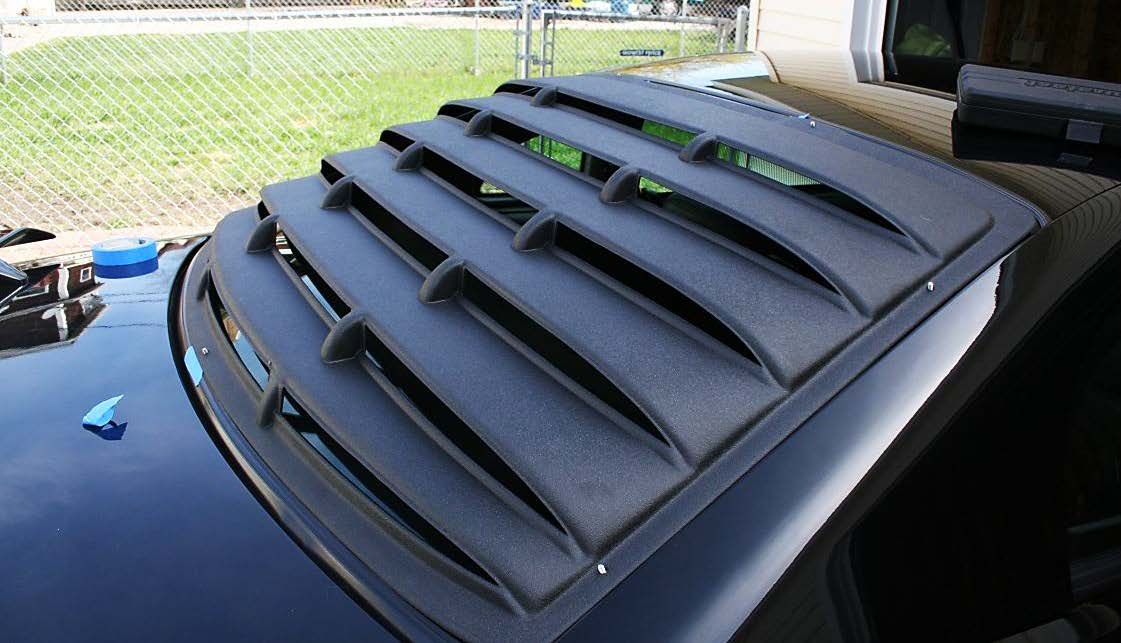
14. Install the louvers onto the mounting plates and secure it with the washers and plastic nuts. Use your fingers to tighten the sides and the bottom nuts and use a 3/8” socket to tighten down the top (2) nuts. Check all nuts twice for tightness. NOTE: do not over tighten the top nuts with the socket wrench; they are plastic nuts and can strip easily.
Your install is now complete!
Installation Instructions written by AmericanMuscle customer Matt Wilkinson 4.20.12
