 FREE 1 to 3-Day Delivery on Orders $119+ Details
Best Sellers


Mustang Subframe Connector Installation Guide
Installation Time
3 hours
Tools Required
- Jack and jack stands or a drive-on lift
- Arc grinder (best), power sander (good) or sanding block with at least 100-grit sandpaper (not great)
- Ratchet with 5/8" socket
- Hammer
- Permanent marker
- MIG welder or a shop that has a MIG welder and a drive-on lift
- Isopropyl alcohol (rubbing alcohol), available at any pharmacy
- Clean rags or shop towels
- Rust-prohibiting primer
- Painter's masking tape
- Plastic sheet
- Eye protection
- Gloves
- A dust mask (okay) or respirator with replaceable cartridges (better)
- Hearing protection, if using power tools
- Welding mask or helmet if welding it yourself
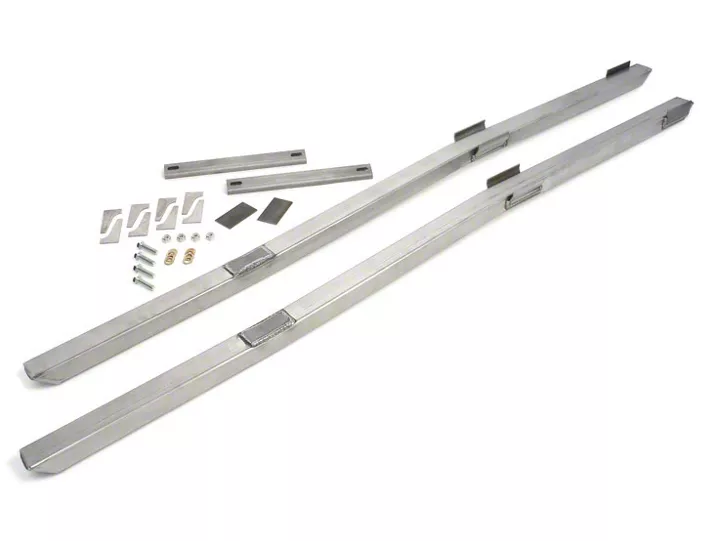
Shop Parts in this Guide
Installation
NOTE:SET THE PARKING BRAKE BEFORE STARTING ANY PART OF THIS PROCEDURE. ALWAYS USE APPROPRIATE SAFETY EQUIPMENT.
1. Raise the car and support it on jack stands. Because the chassis needs to be under the same load as it is when sitting on the tires, place the stands under the rear axle and under the spring cup molded into the front lower control arms.Make sure the car is stable before working under it.
2. Test fit the torque box adapters to the torque boxes. The long lip on the plate rests against the inner side of the torque box. The short tab goes up into the recessed area in the rear of the torque box where the control arm is connected. There are left and right torque box adapters.
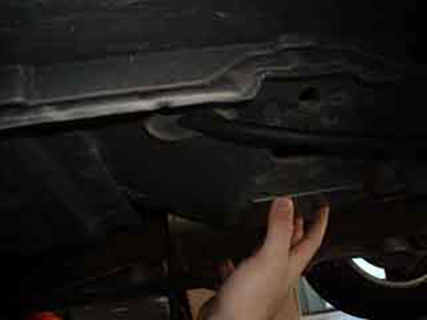
3. Most torque boxes have metal "lips" where the pieces of metal that make the box are joined. I had a really bad one inside the control arm areas on the rear of both torque boxes. Pound on these areas until you have a smooth surface free of too many gaps that would make welds weaker.
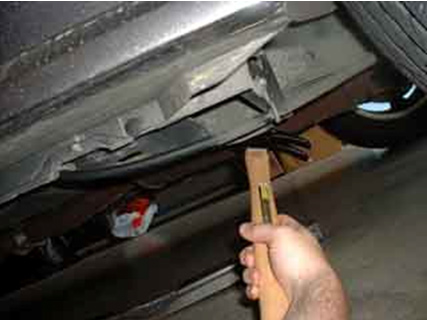
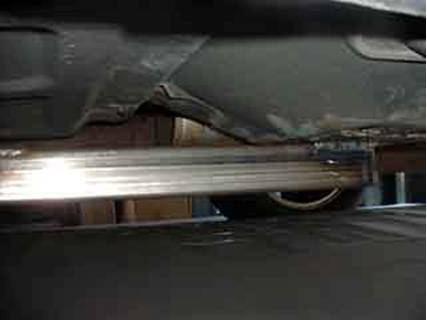
The hammer pictured above was too light for this work; I had better luck with a heavier hammer with a sturdier handle.
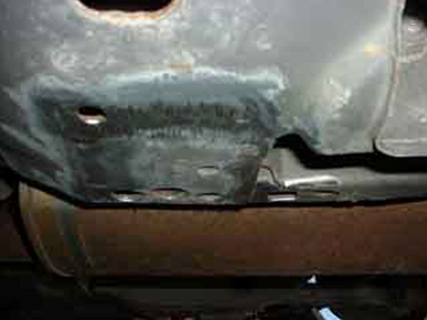
4. Once you've hammered your torque boxes into shape, line the adapter plate back up and trace around it with your marker. Grind any and all paint and rust from around this area. An arc grinder with a standard grinding wheel makes quick work of it. A power sander would add a significant amount of time to the install, and a sanding block would take several Hrs.Remember to use appropriate safety equipment as directed by the manual that came with your power tools. Always wear eye protection and a breathing mask or respirator when sanding.
5. The cross braces are directional, and there is a left and right brace. You can see that one side is taller in the photo to the right – this side faces the front of the vehicle. Also, one mounting hole is round while the other is elongated– the round hole goes toward the center of the car
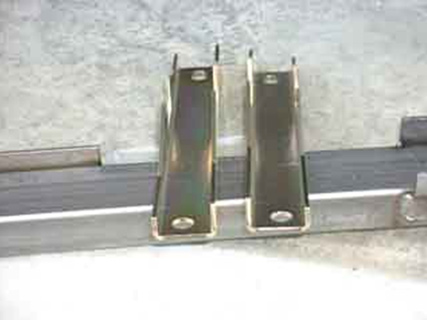
6. Using a 5/8" socket and the included lock nuts, bolt the cross braces to the seat bolts. Be sure to double-check the orientation of the braces.
7. Line the subframe connector up under the car. The angled end goes toward the front, and the square end goes toward the back. Note that the subframe connector should end about in the middle of the rear torque box. Trace around the tabs on the front frame rail with the permanent marker. You may wish to support the subframe connector with a jack while performing this step. Grind around the tabs, as well as every two to four inches along the rail where you want the subframe connector welded.
8. Either put your rails and torque box adapters in the trunk and find a muffler shop that will do the job (it should take a professional less than an hour to do the welding), or use your own welding rig. Make sure the shop has a drive-on lift and MIG welding equipment available for the install.If you are inexperienced, the underside of your vehicle is a bad place to start practicing welding.If you do know how to weld, weld the torque box adapter to the torque box first, then lineup the subframe connectors and support them with a jack. Weld the subframe connector to the front frame rail first, then to the rear torque box adapter. Finish by welding the subframe connector to the cross brace.Be aware of fuel and brakelines, especially along the passenger side frame rails on 99-04 Mustangs!
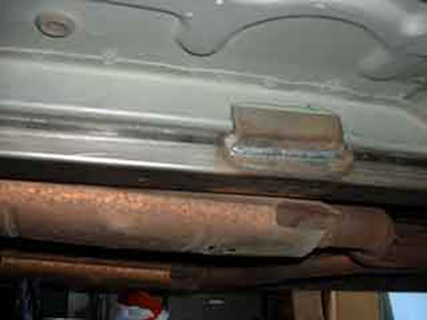
The image above shows the welded subframe connector on the front frame rail.
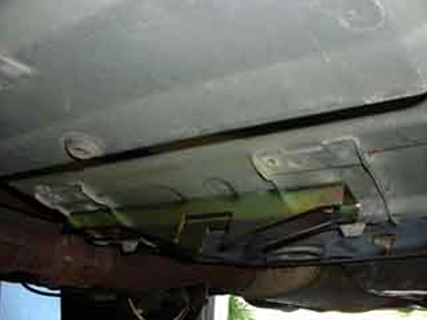
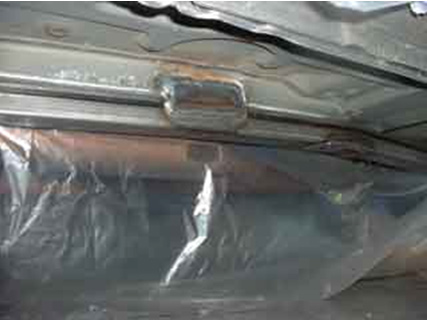
The image above shows the welded torque box adapter and rear of the subframe connector.
9. Time to protect that bare metal from the elements. Mask along the edges of the rocker panels and inside the wheel wells to the back and front of the subframe connector. Allow exhaust components to cool before masking them off. Prep the area by wiping the parts to be painted down with isopropyl alcohol, using a clean rag or paper towel each time. Continue to clean until a clean rag is still clean after wiping.
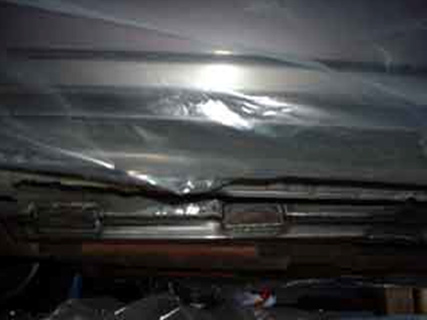
10. Now that the exhaust pipes are cool, mask them off, along with the driveshaft. This isn't really necessary, but if you don't do this step you'll smell the paint being burned off your catalytic converters and mufflers for the next few days.
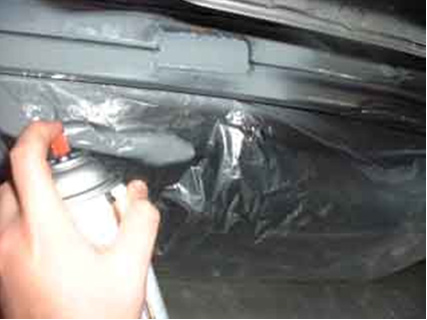
11. Spray the parts using light, even coats of primer. You can add a finish coat after the parts are primed, but my car is far from show quality and I just wanted to make sure my new parts didn't begin rusting immediately.
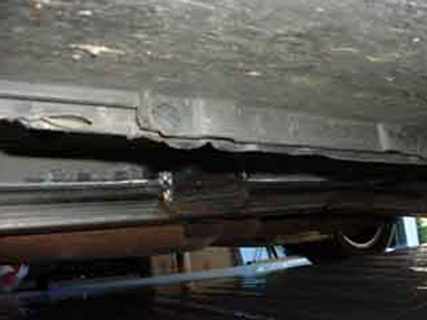
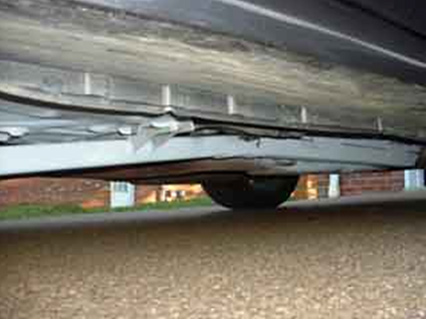
12. Here is a shot of the finished passenger-side rail. The car now handles much better during spirited driving due to the decreased chassis flex!
Installation instructions provided by AmericanMuscle customer Mike Strawbridge
