 FREE 1 to 3-Day Delivery on Orders $119+ Details
Best Sellers


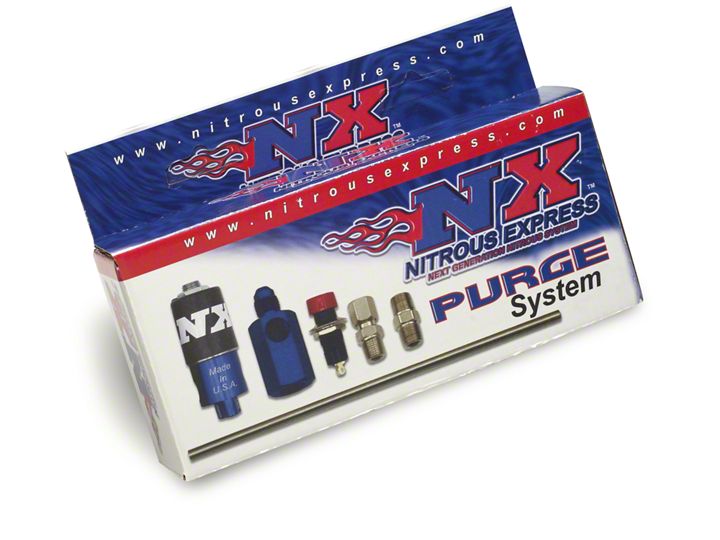
How to Install an NX Purge Kit - D-4 on Your 1979-2012 Mustang
Shop Parts in this Guide
Installation
The installation of this valve will add to the value, consistency, and performance of your NX system. The purpose of the purge is to remove all gaseous nitrous and air from your main feed line at the solenoid. This puts liquid nitrous at the N2O solenoid resulting in a harder leave or “hit”.
NOTE: Before you begin make sure that your bottle valve is closed. and your main feed line is empty. Liquid nitrous can cause severe frostbite if it comes in contact with your skin!!!
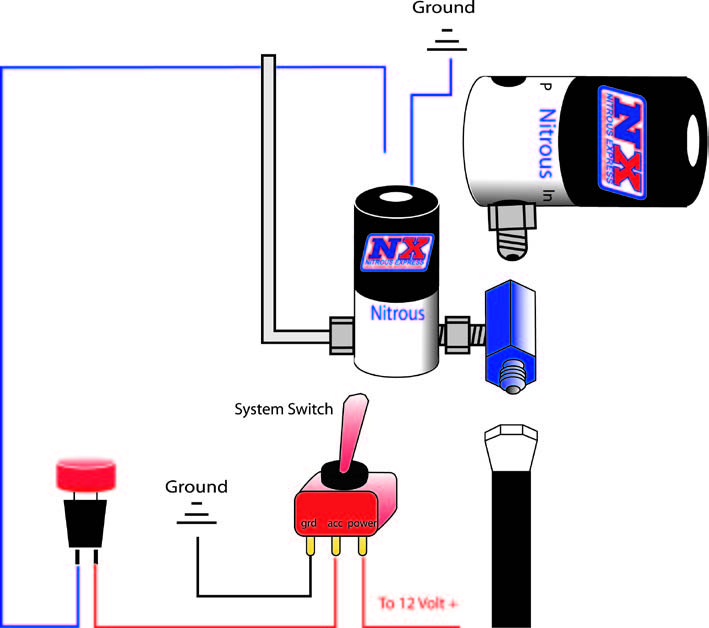
1. Disconnect the feed line from the N2O solenoid. Install the purge valve manifold; check for any clearance problems. (See illustration A). NOTE: (Never use Teflon tape on AN fittings). Reinstall the main feed line and tighten. Slowly open the bottle valve. Now is the time to check for leaks, if any are seen or heard tighten the fitting that is leaking. Install the vent line so it does not vent in the engine compartment. The preferred is venting is at the windshield base so the nitrous flow can be seen. You are looking for a liquid (white) plume not just the sound of air.
2. Wiring the purge valve is easy but care must be taken. One of the two wires on the solenoid will go to ground, the other will attach to your push button. The other terminal on the push button will go to the N2O side of your arming switch. (See illustration A).
3. TESTING: Turn the arming switch on and push the purge activation button; you should hear a click and see liquid (white) N2O coming from the vent line. Now you are ready to use your new NX purge.
Note: The nitrous and fuel solenoids are rated only for intermittent duty. Do not engage either solenoid for more than 20 continuous seconds. Solenoids that have “burned or scorched” electro-magnets will not be replaced under warranty.
“ICEMAN” PURGE VALVES PN 15603
The installation of this valve will add to the value, consistency, and performance of your NX system. The purpose of the purge is to remove all gaseous nitrous and air from your main feed line at the solenoid. This puts liquid nitrous at the N2O solenoid resulting in a harder leave or “hit”.
NOTE: Before you begin make sure that the bottle valve is closed, and the main feed line is empty. Liquid nitrous can cause severe frostbite if it comes in contact with your skin!!!
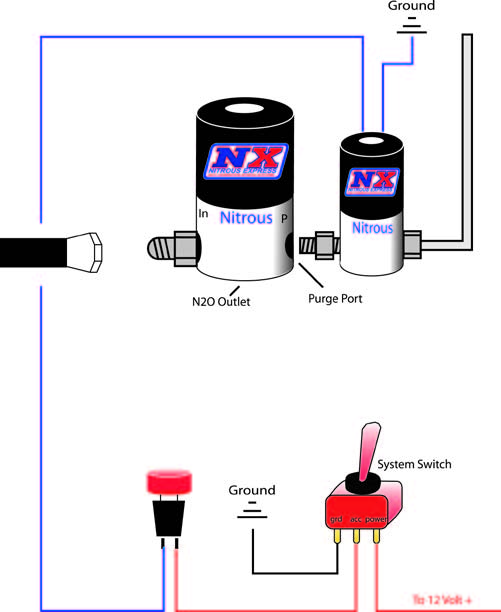
1. Disconnect the feed line from the N2O solenoid. Using the 1/8-inch male union apply Teflon paste to the threaded ends of the fitting. (NOTE: Never use Teflon tape on any fittings). Now thread the 1/8inch fitting into the 1/8inch inlet port marked “P” in the “Iceman” nitrous solenoid. Thread this completed assembly to the inlet port of the purge valve and remount the nitrous solenoid. Install the fitting and vent tube on the outlet port of the purge valve. Install the main feed line and tighten. Slowly open the bottle valve. Now is the time to check for leaks, if any are seen or heard, tighten the fitting that is leaking. Install the vent line so it does not vent in the engine compartment (a piece of 3/16 vacuum line may be used). The preferred is venting out at the base of the windshield so the nitrous flow can be seen. You are looking for a liquid (white) plume not just the sound of air.
2. Wiring the purge valve is easy but care must be taken. One of the two wires on the solenoid will go to ground, the other will attach to your push button. The other terminal on the push button will go to the N2O side of your arming switch. (See illustration A).
3. TESTING: Turn the arming switch on and push the purge activation button; you should hear a click and see liquid (white) N2O coming from the vent line. Now you are ready to use your new NX purge.
Note: The nitrous and fuel solenoids are rated only for intermittent duty. Do not engage either solenoid for more than 20 continuous seconds. Solenoids that have “burned or scorched” electro-magnets will not be replaced under warranty.
Best Sellers
Related Guides
-
Installation
-
Installation
-
Installation
