FREE 1 to 3-Day Delivery on Orders $119+ Details
Best Sellers


How to Install a Performance Automatic AOD Throttle Valve Kickdown Cable on your 1987-1993 5.0L Must
Shop Parts in this Guide
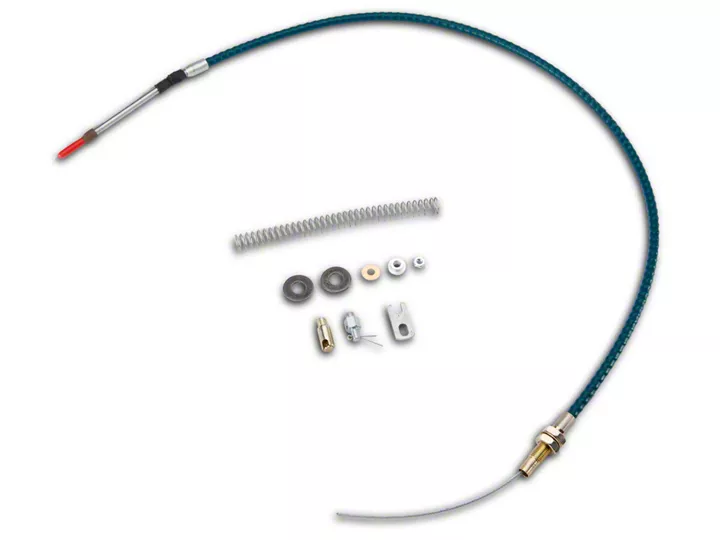
PA53500 AOD Throttle Valve Cable
Congratulations on the purchase of your new AOD transmission throttle cable. This cable is designed to fit 1987-1993 Fox body Mustangs with the 5.0 engine and AOD transmission (Read all instructions before starting!)
This replacement cable does not resemble the original Ford factory cable. The new cable is constructed around a specially designed green outer housing and Teflon liner. The inner cable is built to military specs for long life and negligible stretch. You'll see this cable will actually be easier to install and adjust compared to the original style cable.
Removing the old cable
1- It is not necessary to completely remove the old cable from the vehicle. The OEM cable is attached to one of the upper transmission bell housing bolts and is difficult to remove without lowering the transmission. The cable can be removed from both engine and transmission brackets and secured out of the way without any problems.
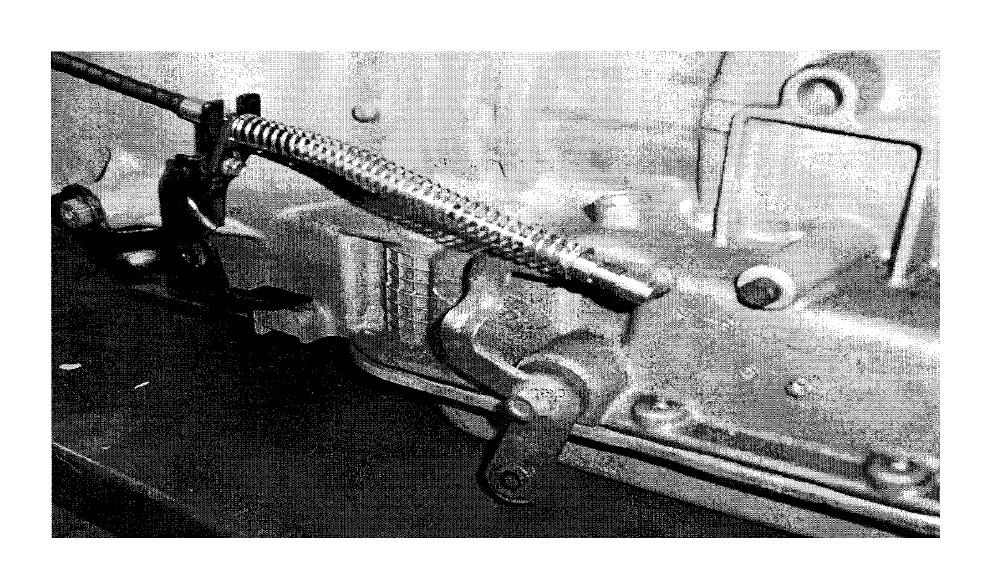
2- To remove the cable at the engine throttle body bracket
1- Remove the air intake hose to gain access to the throttle body
2- Remove the cable end from the throttle body by prying down, or removing the retaining clip. (Depending on application)
3- Remove grommet from throttle lever.
4- Twist outer cable housing to remove it from engine bracket.
5- At this time you may secure cable to.the firewaltlfeyeu decide to leave it on the vehicle.
Removing the cable from the transmission
1- Support vehicle on lift or jack stands.
2- On the driver's side of the transmission, pry /pop off the cable end at the transmission lever. This is not to be confused with the lower cable coming from the shifter and attached to the lower transmission lever.
3- Remove cable retaining bolt and cable bracket from the transmission.
4- You may at this time secure the OEM cable out of the way or remove the entire cable from the vehicle by removing the upper bell housing bolt that retains the cable housing. Again, the transmission would need to be lowered to access this bolt.
Preparing the cable for installation
1- Place the cable retaining bracket (#2) onto the cable next to the black rubber boot. Insert all the way. Pinch together the open ends of the bracket either in a vise or you can use a pair of vise grip pliers so that the cable is securely retained in the bracket.
Installing the cable in the car
1- Attach the cable to the transmission bracket using the same self-tapping screw that was used on the OEM cable.
2- Feed the cable up over the bell housing in the direction of the throttle assembly. You may want to check at this time that the cable is not hung up and can be routed through the engine bracket just like the OEM cable.
3- With the transmission cable still not attached to the transmission you can now finish the assembly of the transmission end of the cable.
4- Install cable spring (#4) so that it rests against the cable bracket
5- Install the 10/32 nut onto cable end to stop (#7).
6- Install small flat washer (#6).
7- Install quick disconnect (#5) onto cable until it stops.
8- Secure 10/32 nut against the washer and quick disconnect centering the washer on the cable.
9- The cable assembly can now be reinstalled back onto the transmission and the quick disconnect can be attached to the transmission lever. Make sure the lever is against its stop.
10- You are finished down below.
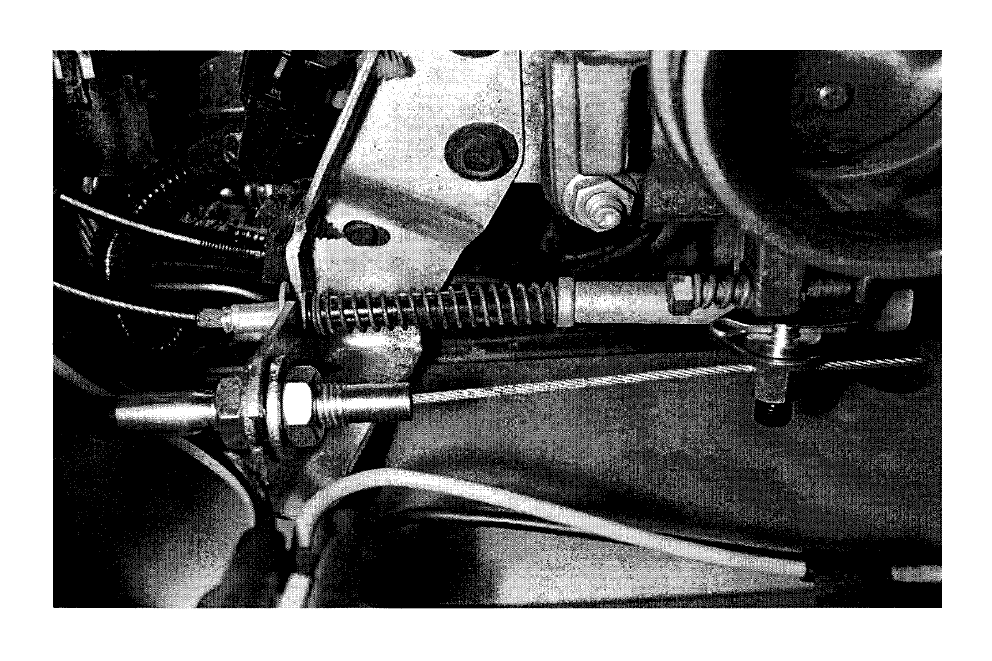
Final Installation
1- Remove one of the 11/16 nuts from the cable housing and install one of the large (#3) washers onto the cable housing. Route the cable and cable housing through the same hole as the original cable.
2- Install second (#3) washer and nut and tighten on to cable bracket.
3- Place (#8) throttle lever bushing onto throttle lever with the wider end on the topside of the lever. Place a little grease on and in it at this time.
4- Slide the (#9) cable adjuster onto the cable.
Adjustment
1- Align (#9) cable adjuster with the (#8) bushing in the throttle lever and install (#9) cable adjuster into the bushing and retain with cotter pin supplied. Do not push or pull on the inner cable. This should be the correct adjustment. Tighten Allen set screw at this time.
2- Re-install air intake hose and road test.
3- Any further adjustments can be made in accordancewith a factory shop manual.
4- Slightly later shifts can be accomplished by loosening the set screw and advancing the inner cable 1/8 inch at a time.
5- Adjusting outside factory settings is not recommended.
6- Re-check all your work.
Questions? Contact Performance Automatic at 301-963-8078 M-F 8-6 EST