 FREE 1 to 3-Day Delivery on Orders $119+ Details
Best Sellers


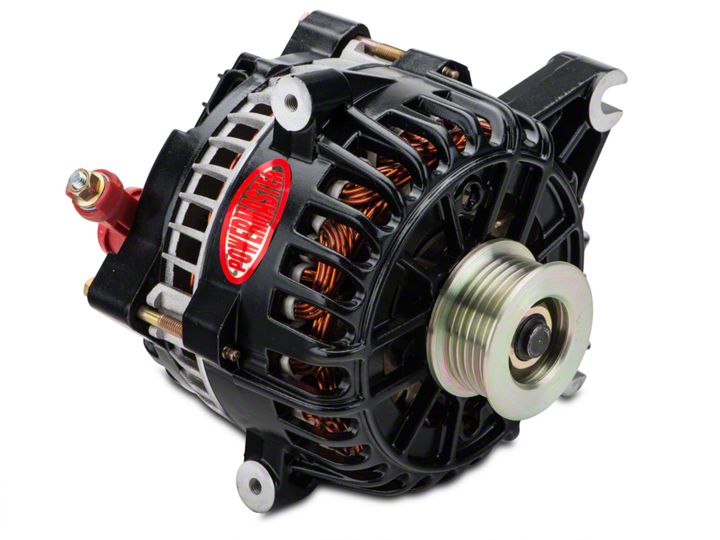
How to Install a Powermaster Alternator - 200 Amp Black - on your 1999-2004 GT Mustang
Installation Time
1 hours
Tools Required
- 1/4” Drive Ratchets
- 10mm Socket for 1/4" Drive Ratchet
- 3” Extension
- Flat-Head (Regular) Screw Driver
- 8mm Socket for 1/4" Drive Ratchet
Shop Parts in this Guide
Installation Difficulty: 1/5

Installation Instructions:
1. Unplug the negative battery cable using the 8mm socket and ratchet. Make sure to secure the negative battery cable in a location that is away from the battery.
This is important because the cables have a tendency to work themselves free and any inadvertent contact could electrify the system. As an added safety measure, a non-conductive barrier could be placed over the negative battery cable and/or the battery terminals.
2. (BLUE) Loosen the drive belt with the belt tensioner by inserting the 1/4" ratchet into the tensioner and turning clockwise. Then remove the belt from the stock alternator pulley while keeping tension off of the belt.

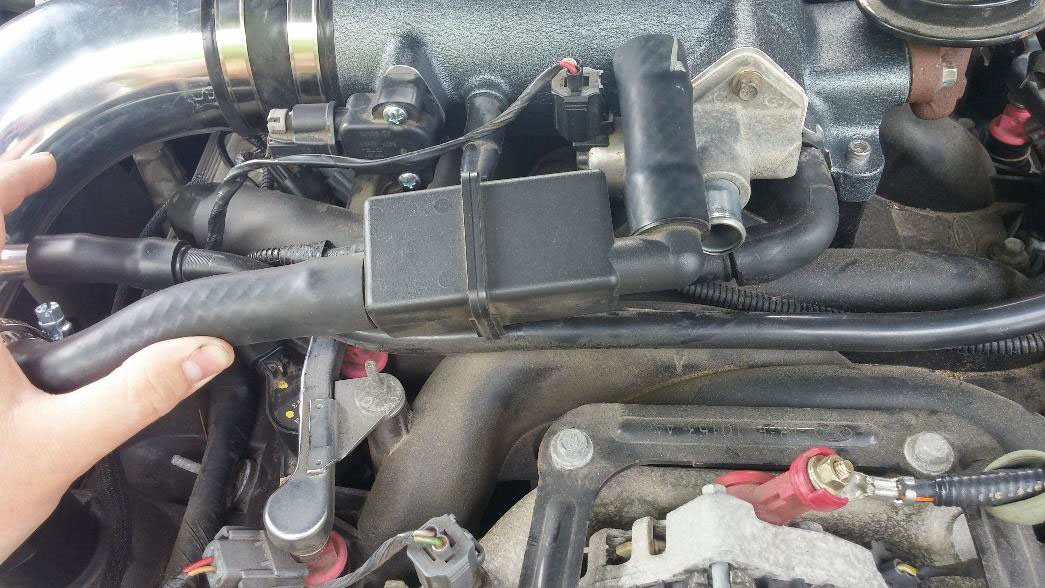
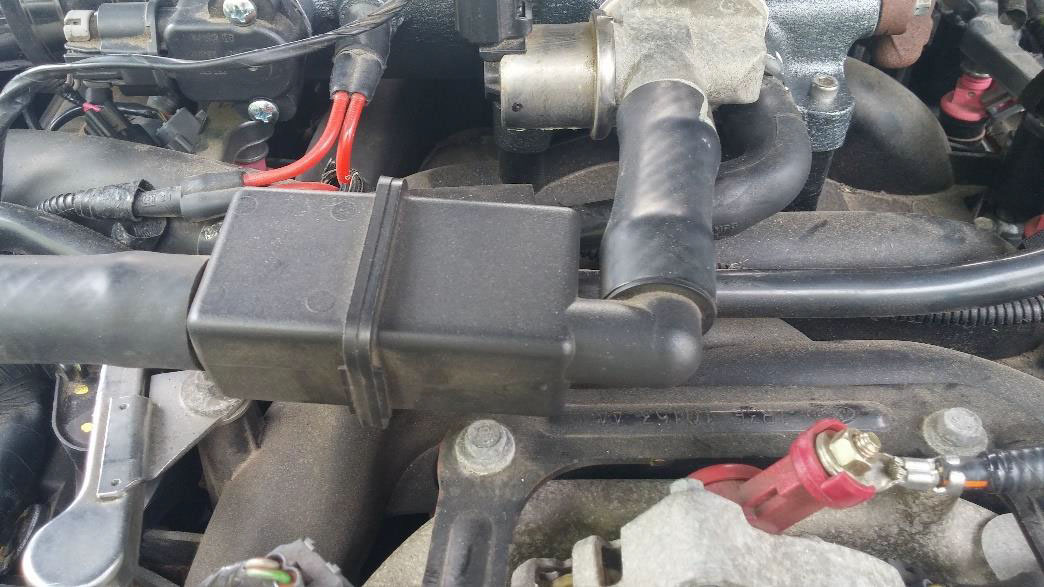
3. (PURPLE) Loosen and then remove the angled intake hose into the throttle body. To do this, insert a flat head screwdriver into the gap between the hose and the throttle body and slowly and gently work off the rubber hose.
Note, be careful not to damage the hose, working carefully this process should be easily accomplished. Removing this intake hose allows for easily access one of the bolts on top of the alternator.
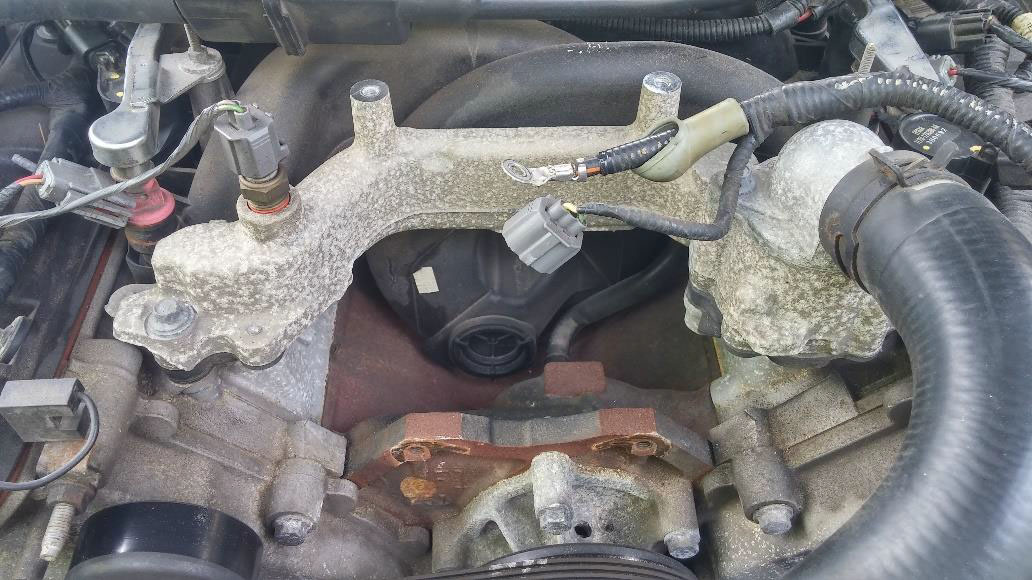
4. (RED) Loosen and then remove the four 10mm bolts on top of the stock alternator with a 10mm socket and then remove the power cable. Remove the metal alternator bracket that was held on by these bolts.
You will need ALL the hardware from the previous alternator. Set it aside so that it can be easily located when installing your new alternator.
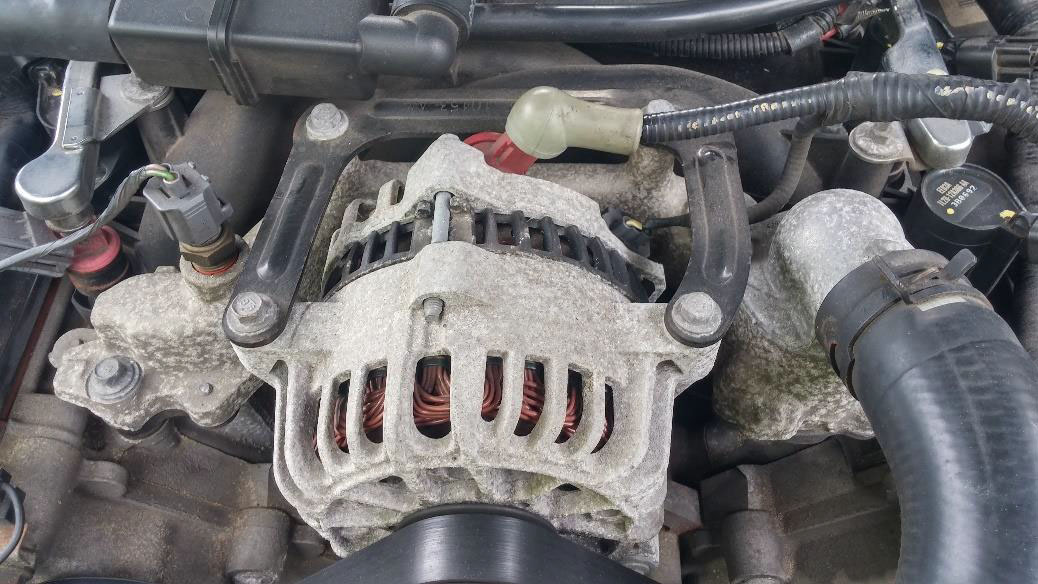
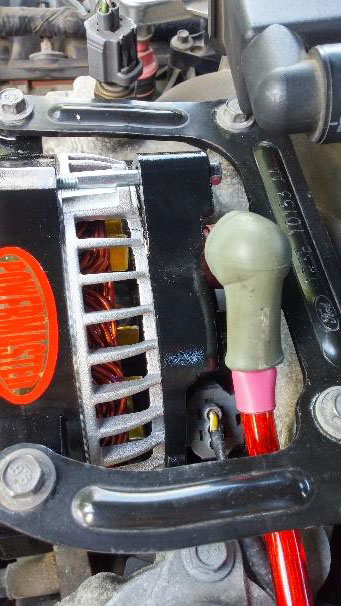
5. (GREEN) Remove the rubber boot on the alternator charging cable.
6. (GREEN) Remove the 10mm nut holding the alternator charging cable to the alternator.
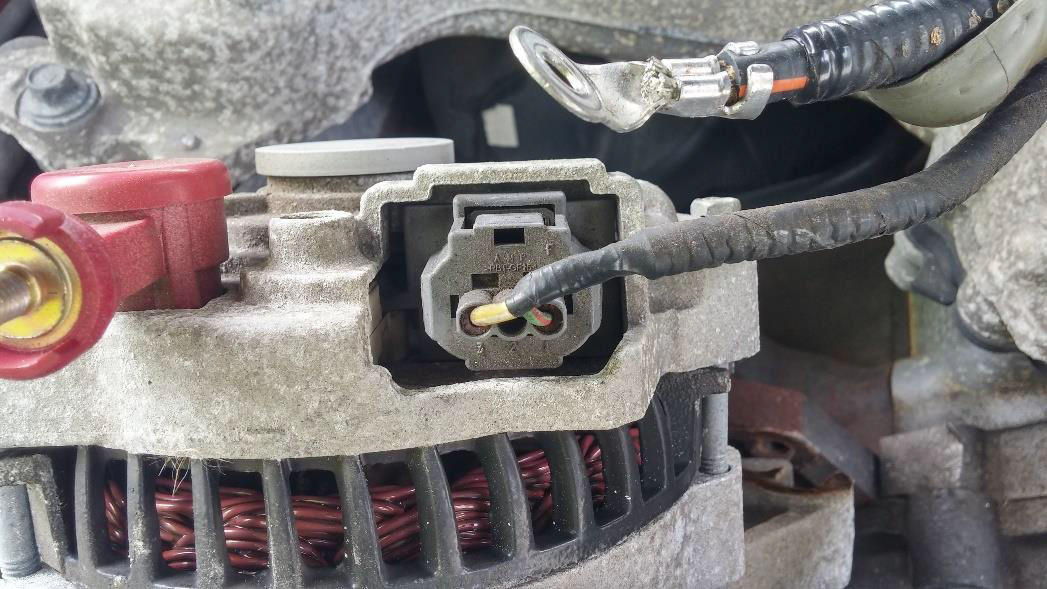
7. (GREEN) Remove the plastic pin connector cable from the back of the alternator. To do this, gently depress the rectangular tab on the face of the connector.
Be careful not to apply to much force to the tab as these plastic connectors will break. By using a finger, depress the tab and pull up and away from the alternator.

8. (GOLD) Remove the lower 10mm bolts holding the bottom of the alternator in place. Note, these bolts are difficult to access with a socket and ratchet. If possible, the use of a ratcheting wrench would be ideal in this situation.
9. Remove your old alternator and set it aside. Clean off the old alternator bracket and locate all the hardware you just removed as you will need it for the installation of your new alternator.
10. When installing your new alternator it is important to keep in mind that your new alternator may not be able to operate at its full potential using the stock alternator charging cable. In order to utilize the additional current output from your new alternator it is important to consider upgrading your stock alternator charging cable.
When choosing a new alternator charging cable it is important to size this cable properly. It is helpful to remember that the alternator charging cable is the pipeline the alternator uses to complete its job. Upgrading the alternator without upgrading this pipeline prohibits the alternator from achieving its true potential.
In many applications, it is necessary to upgrade the alternator charging cable in order to see the true gains of the alternator. More information on choosing the proper gauge wire for different alternators can be found through online searches. For this installation, I selected a 4 gauge (AWG) wire that had an in-line 250A fuse.
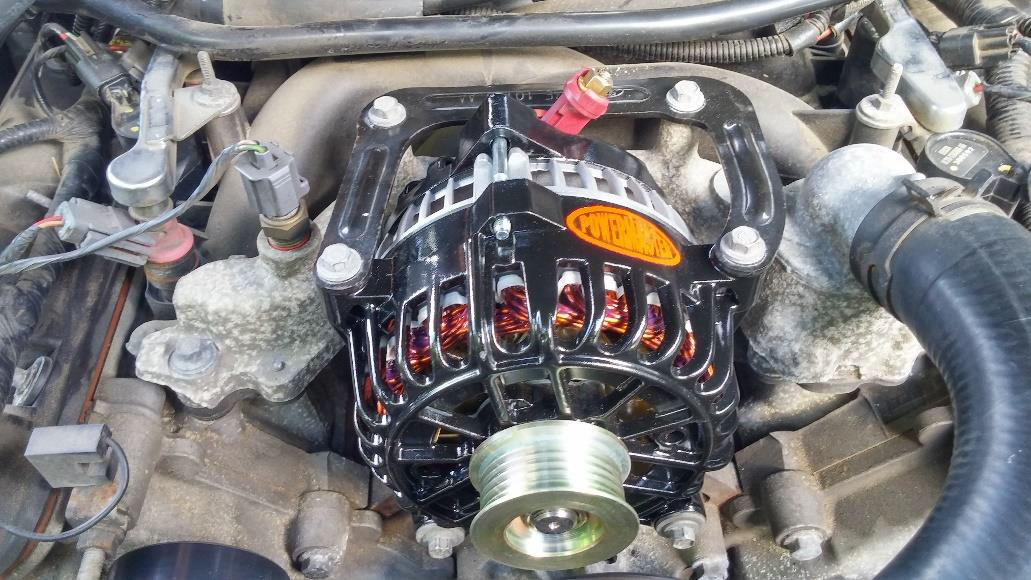
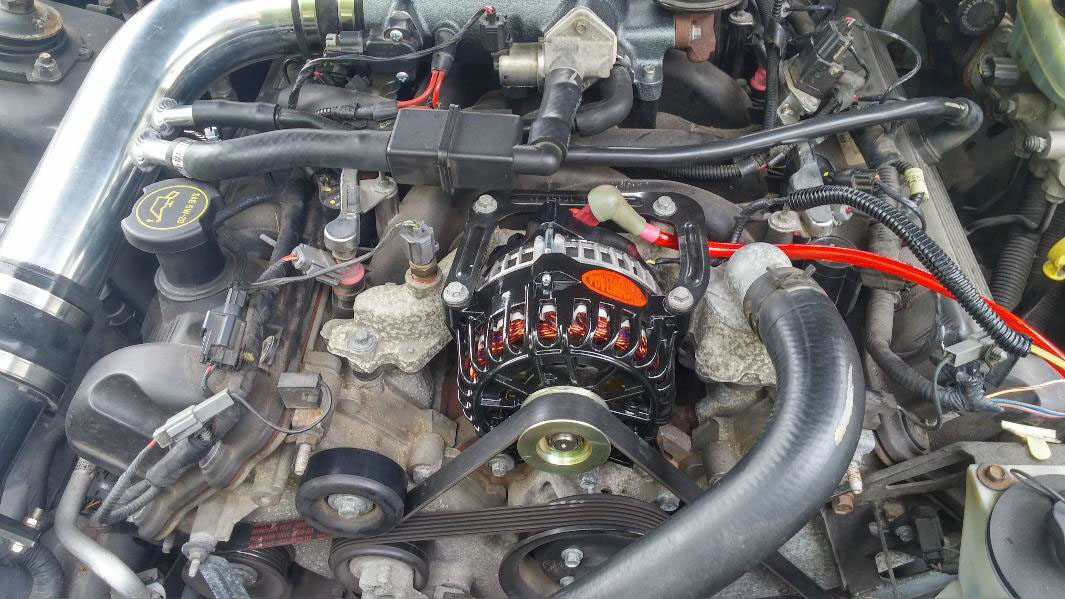
11. (GOLD) Place your new alternator into the engine compartment.
12. (GOLD) Begin installing your new alternator by threading in the two long 10mm bolts that go through the two slots in the bottom of the new alternator into the holding bracket.
After starting the threads with your fingers, use a wrench or socket and ratchet to finish tightening them. Do not completely tighten these bolts. Leave them loose enough for you to be able to slightly move the alternator.

13. (RED) Place the old alternator bracket on your new alternator and thread the four 10mm bolts through the bracket and into the new alternator.
After beginning the threads with your fingers, use a ratchet and socket or wrench to tighten the bracket down. The goal is to align the alternator so that the bracket is perfectly horizontal. Once the bracket is in this position, only gently tighten down all the bolts on the top of the alternator.
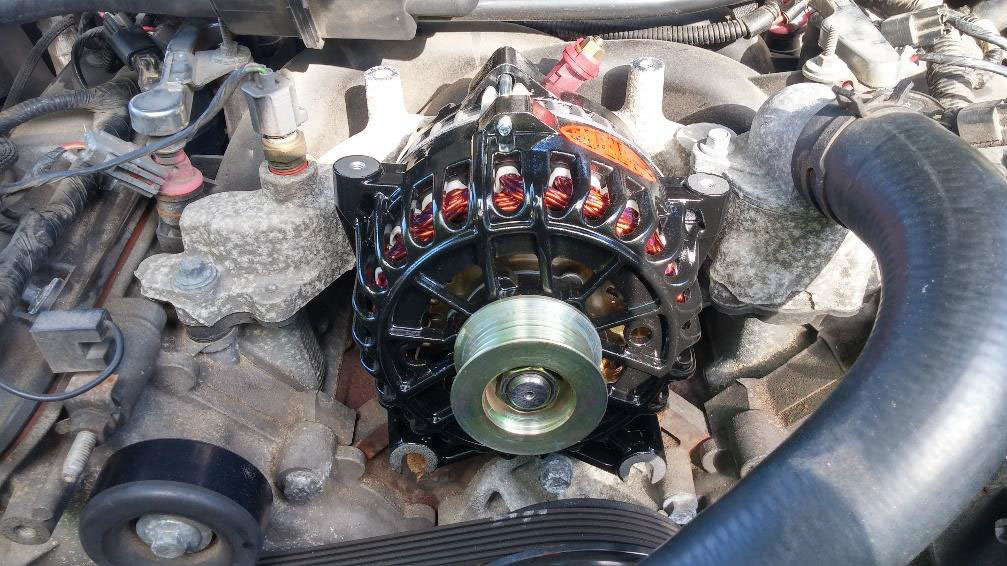
14. (GOLD) Next, gently tighten down the two 10mm bolts on the bottom of the alternator using a ratchet and socket or wrench. Now, go through and tighten each bolt, starting with the top four and moving in a star-like pattern (bottom left, top right, bottom right, top left), and then tightening both of the bottom bolts on the new alternator.
15. (PURPLE) Re-attach the rubber intake tube to the throttle body.
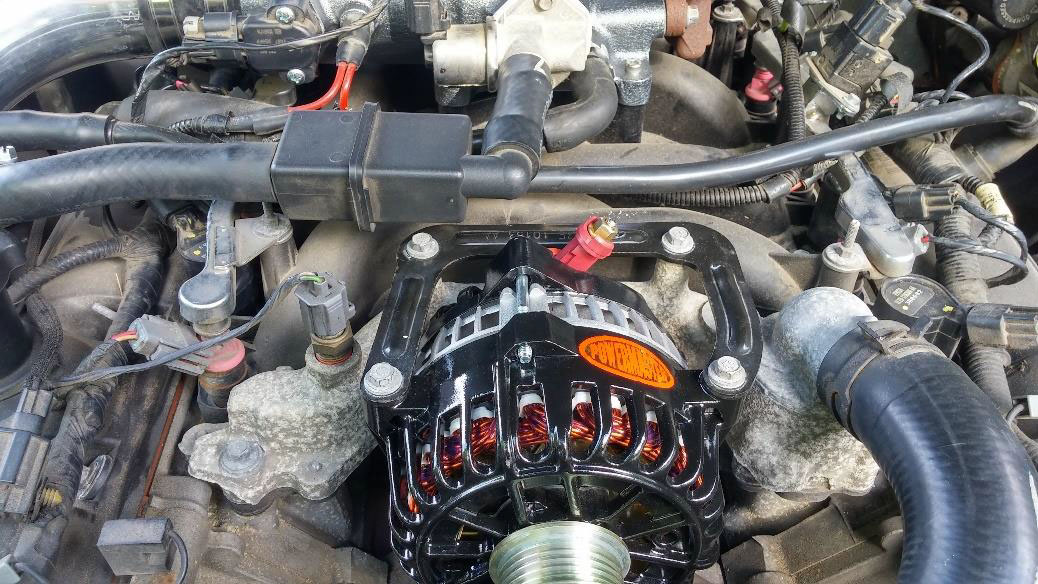
16. Re-attach the plug on the back of the alternator.
17. Using a 10mm socket and ratchet, attach the alternator charging cable to the new alternator.
18. Place the rubber boot over the 10mm bolt.
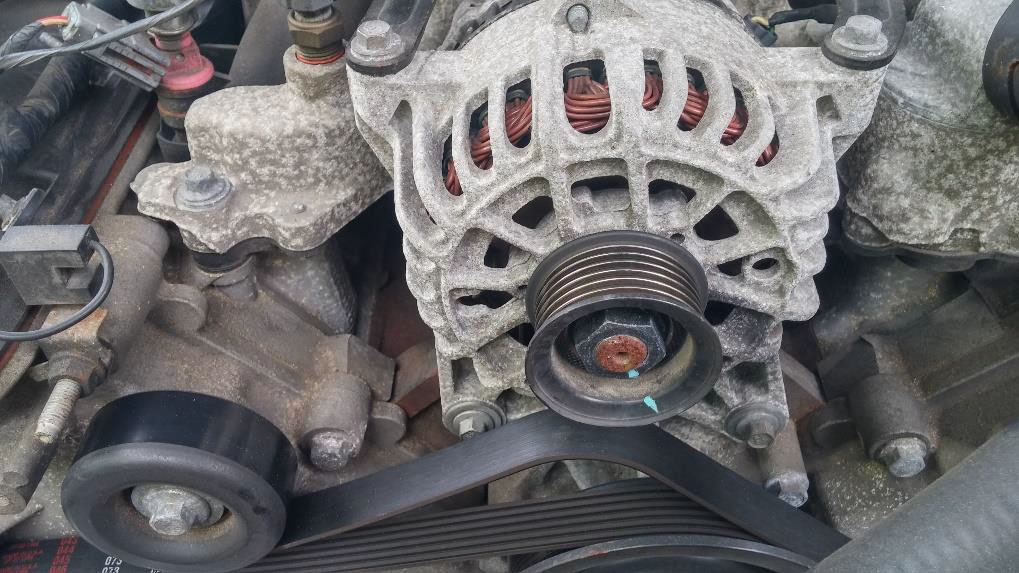
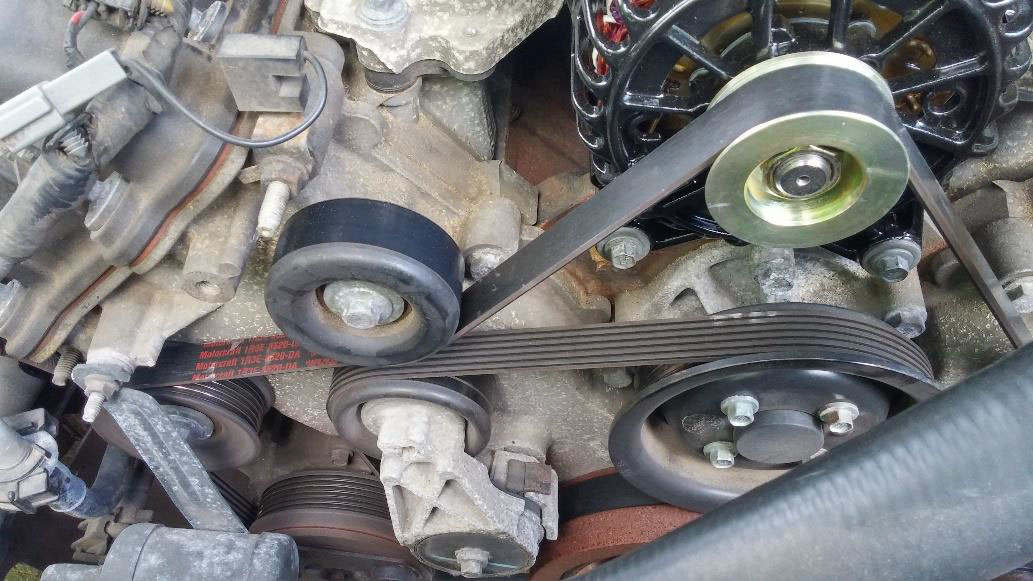
19. Using the 1/4" ratchet, loosen the tensioner and place the belt back on the alternator. Make sure the belt is run evenly across the alternator pulley and all other pulleys in the system. It is important that the belt be placed on all the pulleys and wheels properly.
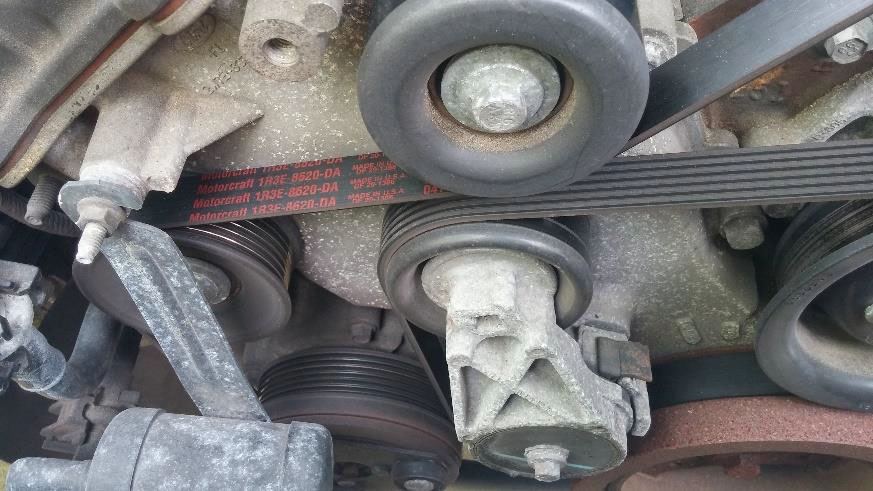
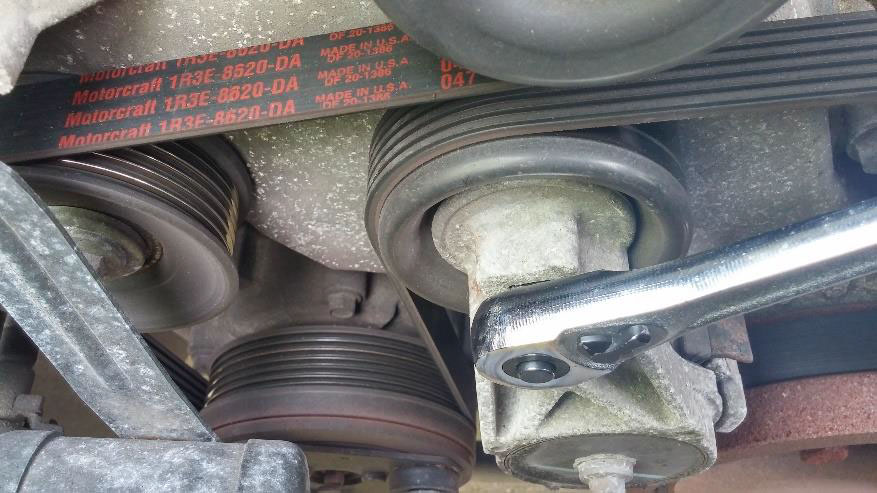
Below, is an example of an incorrect belt installation where the ribbed side of the belt engages the smooth wheel. The next picture shows the belt placed properly on the wheel. In general, it is important to make sure the smooth wheels are engaged by smooth parts of the belt, and the ribbed wheels are engaged by ribbed parts of the belt. Further, make sure that the belt is centered on each wheel and that there is no slack in the belt.

20. Finally, reconnect the battery with the 8mm socket and ratchet. Note: Make sure that the battery is fully charged before reconnecting the battery. Starting the vehicle at this stage using a non-fully charged battery will result in severe voltage spikes and likely damage to the alternator.
Make sure to keep the Powermaster box and your purchase information as you will need it if you plan to utilize Powermaster’s one year warranty. This guide in no way, shape or form guarantees any warranty. As such, you should fully read Powermaster’s literature on the warranty to ensure that you comply with all of their warranty requirements.
Assuming a fully charged battery has been connected, start the car and enjoy your new alternator!
Installation Instructions written by AmericanMuscle customer Roberto Fernandez 6.5.15
